Rye Bread, like Oma made

Rye Bread - trustinkim.com

My Oma made the best bread. Nobody that I know of in my family ever learned quite how to make her bread the way she did. I’ve tried a number of times to recreate it, including baking it in a brick oven once like she did sometimes. This is the closest I’ve ever gotten to making bread that tastes like hers, and I think the potato water is a big part of that. Also the method of baking it in a lidded dish helps to create that nice dark crust.

This is a version of the popular no-knead bread making method. I added the potato water to make it more like Oma’s bread. No-knead bread is super easy to make, and so delicious. Now that my favourite local bread bakery (Terra Breads) has closed due to the pandemic, I’m making this bread regularly.

The potato water adds some flavour and gives the bread a nice texture. To make potato water you can boil some potatoes ahead of time for another meal, then save the cooking water in the fridge until you want to make this bread. Just bring the potato water to room temperature before mixing the dough.

I used a lidded baking dish for this, my le Creuset French oven. At other times I’ve used a Romertopf baker. I imagine a casserole dish with a lid could work too. You could bake it without a lid too, which I haven’t done with this recipe yet.

What you need:

  • 3/4 cup dark rye flour
  • 2 & 1/4 cups white flour
  • 1 & 1/4 teaspoons salt
  • 1/4 teaspoon yeast
  • 1 & 1/2 cups room temperature potato water

What you do:

  1. Combine the flours, salt and yeast in a large bowl. Add the potato water and mix it up. You will end up with a shaggy, sticky dough.
  2. Cover the bowl with plastic wrap or a lid, and let sit for 12-18 hours in a warm-ish place, and out of direct sunlight. The dough should about double in size and become dotted with bubbles. If your house is a little on the cool side you will likely need the longer rising time. 
  3. Cut a large piece of parchment paper and place it on a countertop. Coat the parchment paper with a bit of oil using your hands, then turn the dough out onto the parchment paper. Sprinkle the surface of the dough with flour. Cover the dough loosely with some plastic wrap or a kitchen towel. Let the dough sit for 1-2 hours, until it has doubled in volume.
  4. About 1/2 an hour before you want to put the bread in the oven, set the temperature to 475°F  and place your baking pot on a rack in the lower third of the oven. Let the pot heat up, and when the oven has reached 475°F, remove the pot from the oven. Pick up the dough by gathering together the corners of the parchment paper. Carefully (remember the pot is smoking hot!) place the dough (still on the parchment paper) into the pot. I cut away any really long bits of parchment that are sticking out of the pot.
  5. Put the cover on the pot and bake for 30 minutes while the bread forms its nice thick crust. Remove the lid from the pot and continue to bake for 15-20 minutes more.  The bread should become a deep brown when it is done, and if you tap on it, it should sound hollow.  Remove the pot from the oven, lift the bread out of the pot, remove the parchment paper, and place it on a rack to cool. It needs to cool for about 1/2 an hour before slicing.
  6. This bread has no preservatives, so if you don’t use it up by the second day, it should be refrigerated frozen.

Bubbat – Mennonite Raisin and Farmer Sausage Bread

bubbat recipe - trust in kim

My Oma always made this bread for holiday feasts, so I’m giving it a try for Thanksgiving dinner.  While delicious, this version doesn’t seem a lot like hers, but she never used a recipe, so the secret is lost. I think she probably added a whole bunch of chicken fat.

I found several recipes in the Mennonite Treasury, that great cookbook that holds so many of the traditional recipes.  I used a combination of two recipes, choosing to use a yeast-raised version.  I mainly used the recipe for ‘Bubbat (with sausage)’ submitted by Mrs. Herman Neufeld.  Poor dear, with no first name of her own! To her recipe I added the raisins and prunes, some butter, and used much less sausage than the 1&1/2 pounds the recipe called for.  I set aside a bit of batter to make a small vegetarian loaf before mixing in the sausage.

What you need:

1 tablespoon sugar

1 package (2 & 1/4 teaspoons) yeast

1 egg

1 &1/2 cups milk

1 teaspoon salt

1/2 cup melted butter

3 & 1/2 – 4 cups flour

2 cups raisins and chopped prunes

2 cups chopped farmer sausage (if you’re in the Fraser Valley near Vancouver, the best is from Rempel Meats)

What you do:

1. Heat the milk until it just boils, then let it cool.

2. Dissolve 1 tablespoon of sugar into some lukewarm water then sprinkle the yeast on top. Let this sit for about 10 minutes, until it gets foamy.  If it doesn’t do anything that means your yeast is dead.

3. Once the milk has cooled, add the yeast, a beaten egg, melted butter and salt to it.  Stir in the flour to make “a soft dough that can barely be stirred with a spoon.” I think this means it is soft but firm… do what feels right! Add the raisins, prunes and farmer sausage.

4. Grease a large loaf pan very well with butter and pour the dough into it.  The cookbook asks for lengths of sausage to be pressed into the top, so you can do this if you want more meat in there.

5. Let the dough rise in a warm place for about an hour.  The cookbook does not specify, but I think it’s a good idea to put a clean tea towel on top of it.

6. Once the dough has risen,  preheat the oven to 375F and bake for 45 minutes.

One recipe says to serve it hot, but I don’t remember having it that way, so you can remove it from the tin to let it cool if you want, or serve it right away with some butter.

bubbat recipe - trust in kim

Oma’s Mennonite Bread

brinck oven bread - trust in Kim

brick oven - trust in kim

As I was planning a trip up to the family cabin at Mahood Lake I knew I had to make my Mennonite Oma’s Russian bread.  I love taking the opportunity to bake in that oven when I go up to the lake, because it’s the only place where I have access to one. and it is so much fun.  I usually just make pizza in there, but this time I wanted to branch out a little, so I thought of my Oma’s awesome dark-crusted bread.  My Oma was born in the Ukraine where they made this type of bread, and then she lived in Paraguay for 15 years where she also baked it in an outdoor oven.  In the early 1980’s my Opa built this great brick oven, in the style of the Paraguayan Mennonite  ovens.  My Oma always made this great bread – it was dark brown, almost black on the outside, with a thick crust, and tender inside.  Now, I’ve got the recipe, and I made a delicious loaf of bread, although I fully admit that it is nothing like my Oma’s bread.  I asked her in the past how she got that great crust on it, and she told me she just put all the ingredients together – so she had a magic touch that I can’t figure out.  Oma passed away a few weeks ago, so her secret it gone too.

You don’t need the brick oven to make this bread, it’ll work fine in a conventional oven.  I used a machine with a dough hook, but you could do it by hand if you’re feeling energetic.  This recipe makes 3-4 loaves.

If you’re using a brick oven you need to get a really good fire going so it’s smoking hot in there.  I pushed some of the coals to the back of the oven so it would retain heat for a full hour.

What you need:

1 medium-sized potato, scrubbed

2 cups buttermilk

1 tablespoon yeast

1 tablespoon salt

1 cup rye flour

1 cup bran

6 & 1/2 cups unbleached all-purpose flour (approximately)

What you do:

1. Boil the potato in about 3 cups of water until it is soft.  Place the potato, saving the liquid, in a 2 cup measuring cup.  Smash the potato up with the back of a fork, then add enough of the potato water to fill the measuring cup to 2 cups. Allow this to come to room temperature.

2. In a large mixer bowl add about 2 tablespoons of warm water and sprinkle the yeast top.  Wait until the yeast begins to bubble and is all dissolved (if it doesn’t your yeast may be dead).

3. Add the potato water and buttermilk to the yeast mixture.  With the machine running and using a dough hook, gradually add the flours, bran and salt.  Mix until you have a moist dough, using more or less flour to get this consistency.  Keep mixing until the dough begins to form a bit of a ball.

4. Remove the bowl from the mixer and cover it with a clean damp tea towel.  Let it rise to about double in volume; this will take about 1- 2 hours, depending on how warm your kitchen is.

5. Punch the dough down, then turn it out onto a floured surface.  Give it a few kneads, then cut into 3-4 equal pieces.  Form a loaf with the seam in the bottom and place in loaf pans. Cover with the damp tea towel and let it rise, again to about double, which should take slightly less time than the first.

6. Heat the oven to 400F.  When the loaves have doubled in size, and they hold an indentation when you poke the dough lightly, they are ready to go in the oven.   If you want to get more of a crust on your bread, you can spray the inside of the oven with water just before the bread goes in.  Just try not to spray the light bulb, as it might shatter. Place the bread in the oven and bake for about 1 hour. 

7. You will know the loaves are ready when you tap on the bottom of the pan and it sounds hollow, so keep an eye on it in the last 10 minutes or so of baking to see if it’s looking done, and test it using this method.

8. Remove the bread from the pans and let it cool on wire racks.  Once it is mostly cool you can slice it up and then slather on some butter, but we just broke of satisfying chunks and ate some with butter,  and on some we added apricot jam.  Not quite like Oma made it, but delicious nonetheless.

bread with jam - trust in kim

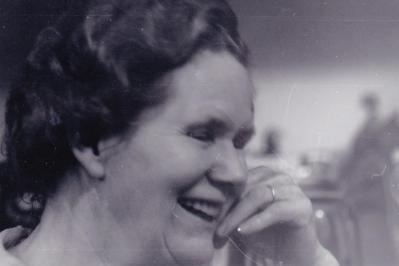
My Oma -trust in kim
My Oma