Fruit Piroschki – Mennonite Fruit-Filled Hand Pies

Mennonite piroshky - trust in kim

My childhood was filled with these beautiful little pies, made by my Mom, Oma and Aunts, filled with various fruits and sometimes even meat. So I figured it’s  about time I made them myself.  Instead of using my Tante Kantja’s recipe (see below), which is the only one I had access to at the moment, I opted for the pastry recipe from the Smitten Kitchen Cookbook. So while it’s not the traditional Ukrainian piroschki I grew up eating, it’s the same idea: a square pastry filled with fruit.  Yum! My favourite result was the apricot/nectarine combination, but the blueberries were pretty good too.

I made the whole recipe, then baked a few and put the rest in the freezer.  They were just as good when I pulled a few straight out of the freezer and baked them up for just a little longer than the pre-frozen version. I like them best when they are freshly baked, but they will keep for a few days.

This is a great picnic food!

What you need:

  • 2 & 1/2 cups all-purpose flour
  • 1 tablespoon sugar
  • 1 teaspoon salt
  • 1 cup very cold butter
  • 1/2 cup ice-cold water
  • about a pound of apricots, nectarines, peaches, plums or apples, or a combination of those
  • 1 egg

What you do:

  1. Whisk together the flour, sugar and salt in a large bowl.  Cut the cold butter into medium-sized dice and add it to the flour.  Use a pastry blender or your hands (better if they aren’t too hot) and break the butter up, combining it with the flour mixture, into pieces the size of tiny peas.
  2. If it is a very warm day put the bowl in the fridge for a while to let the butter get cold again before rolling it out.
  3. Drizzle most of the water over the mixture and stir it in, adding more as you need it.  Use floured hands to knead the dough briefly until it comes together in a ball. Wrap the dough in plastic wrap and refrigerate for 2 hours.
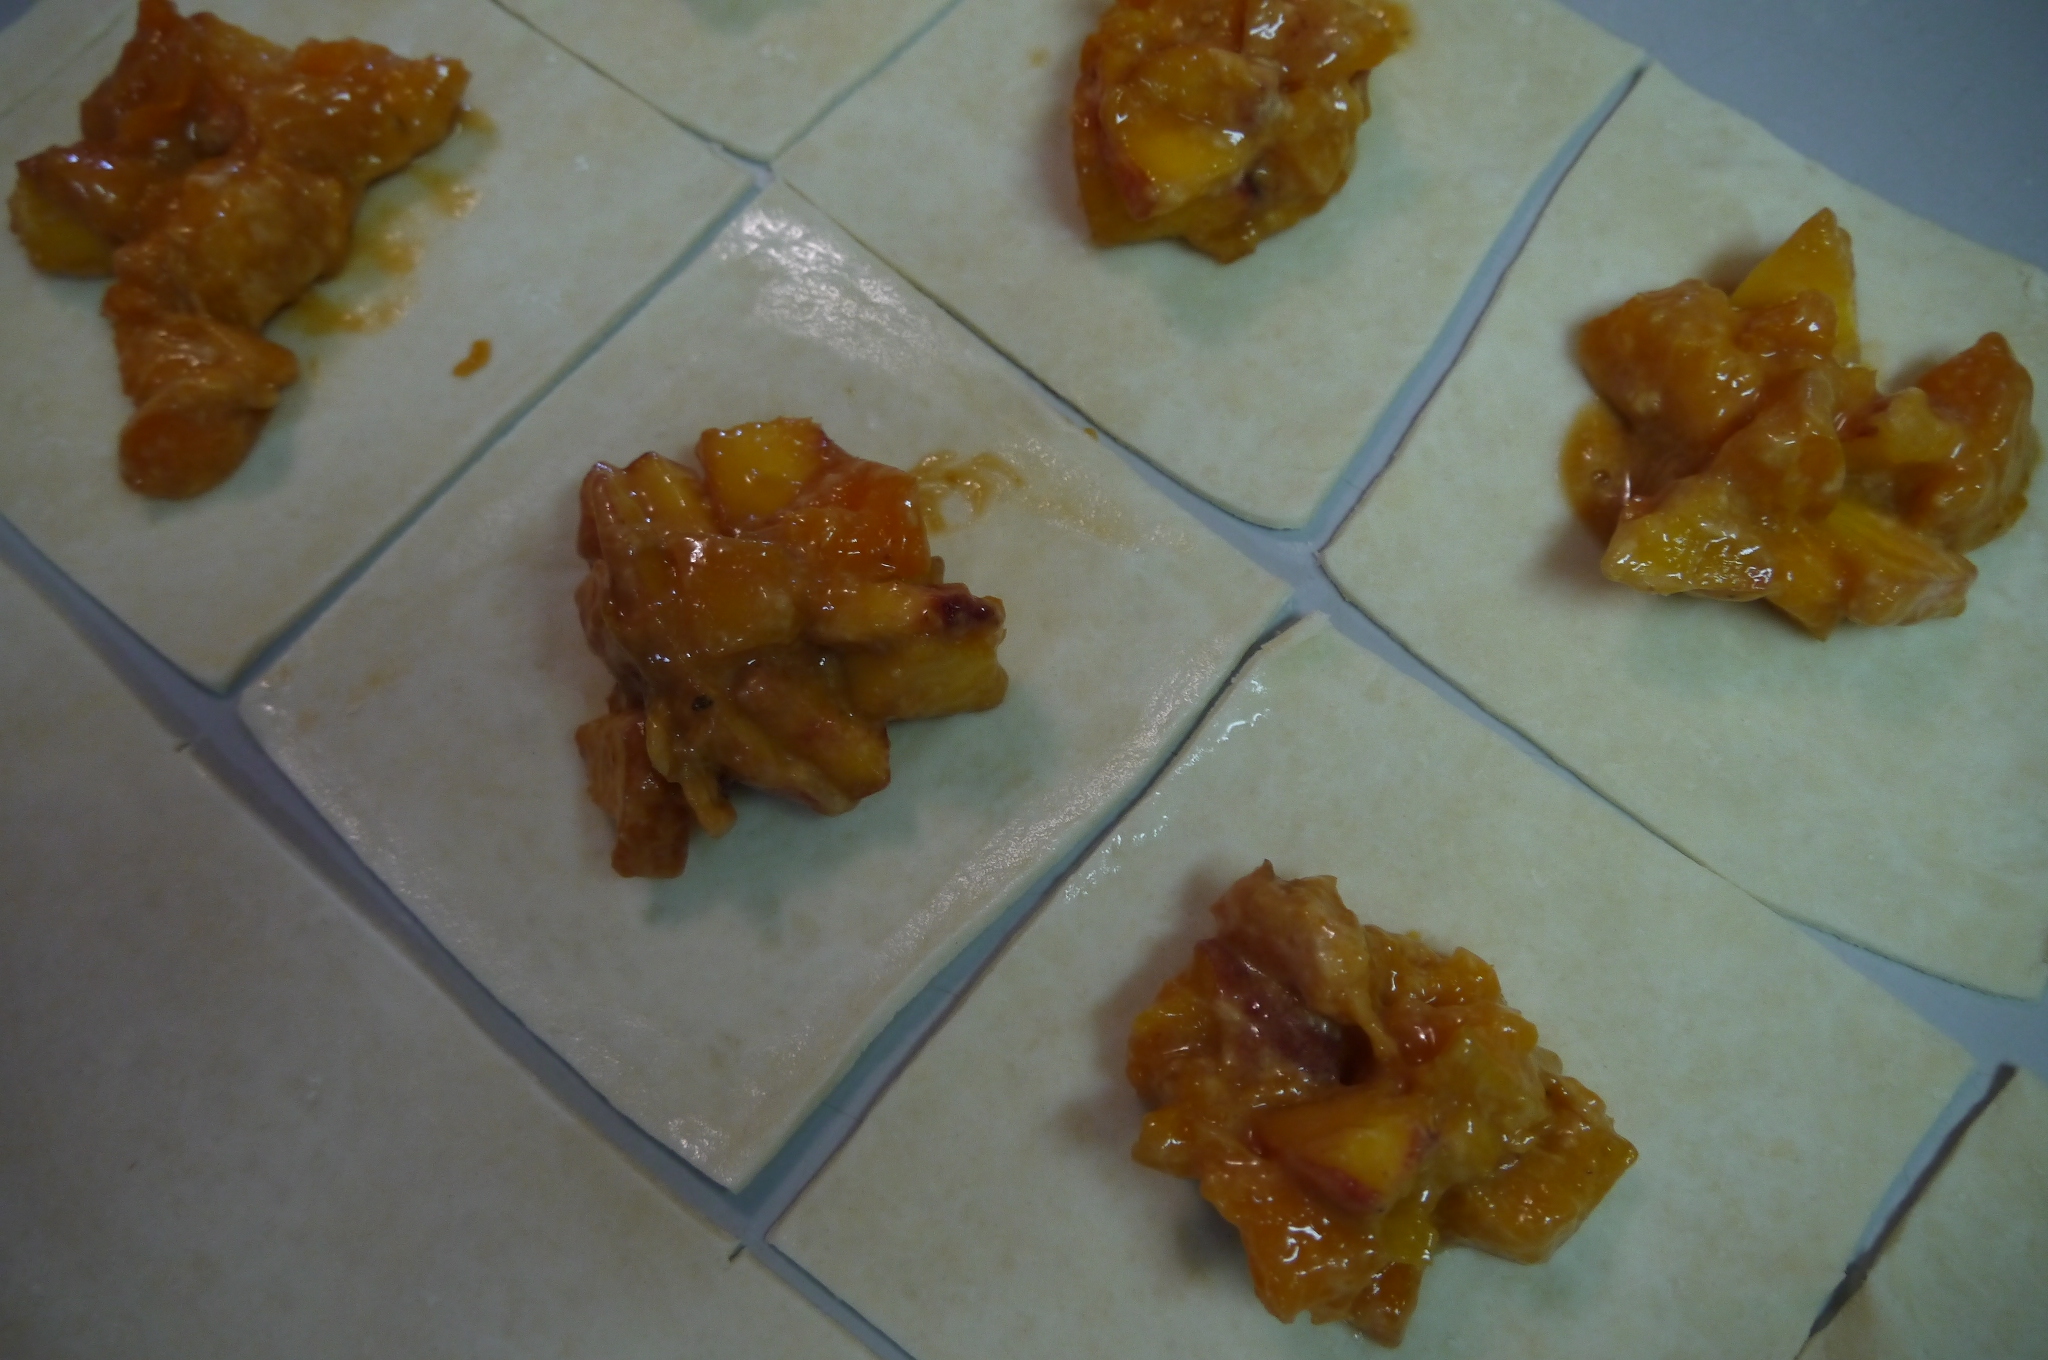
  4. Before you are going to roll out the dough, chop up the fruit and sprinkle it with a little bit of flour or cornstarch and stir that together gently.
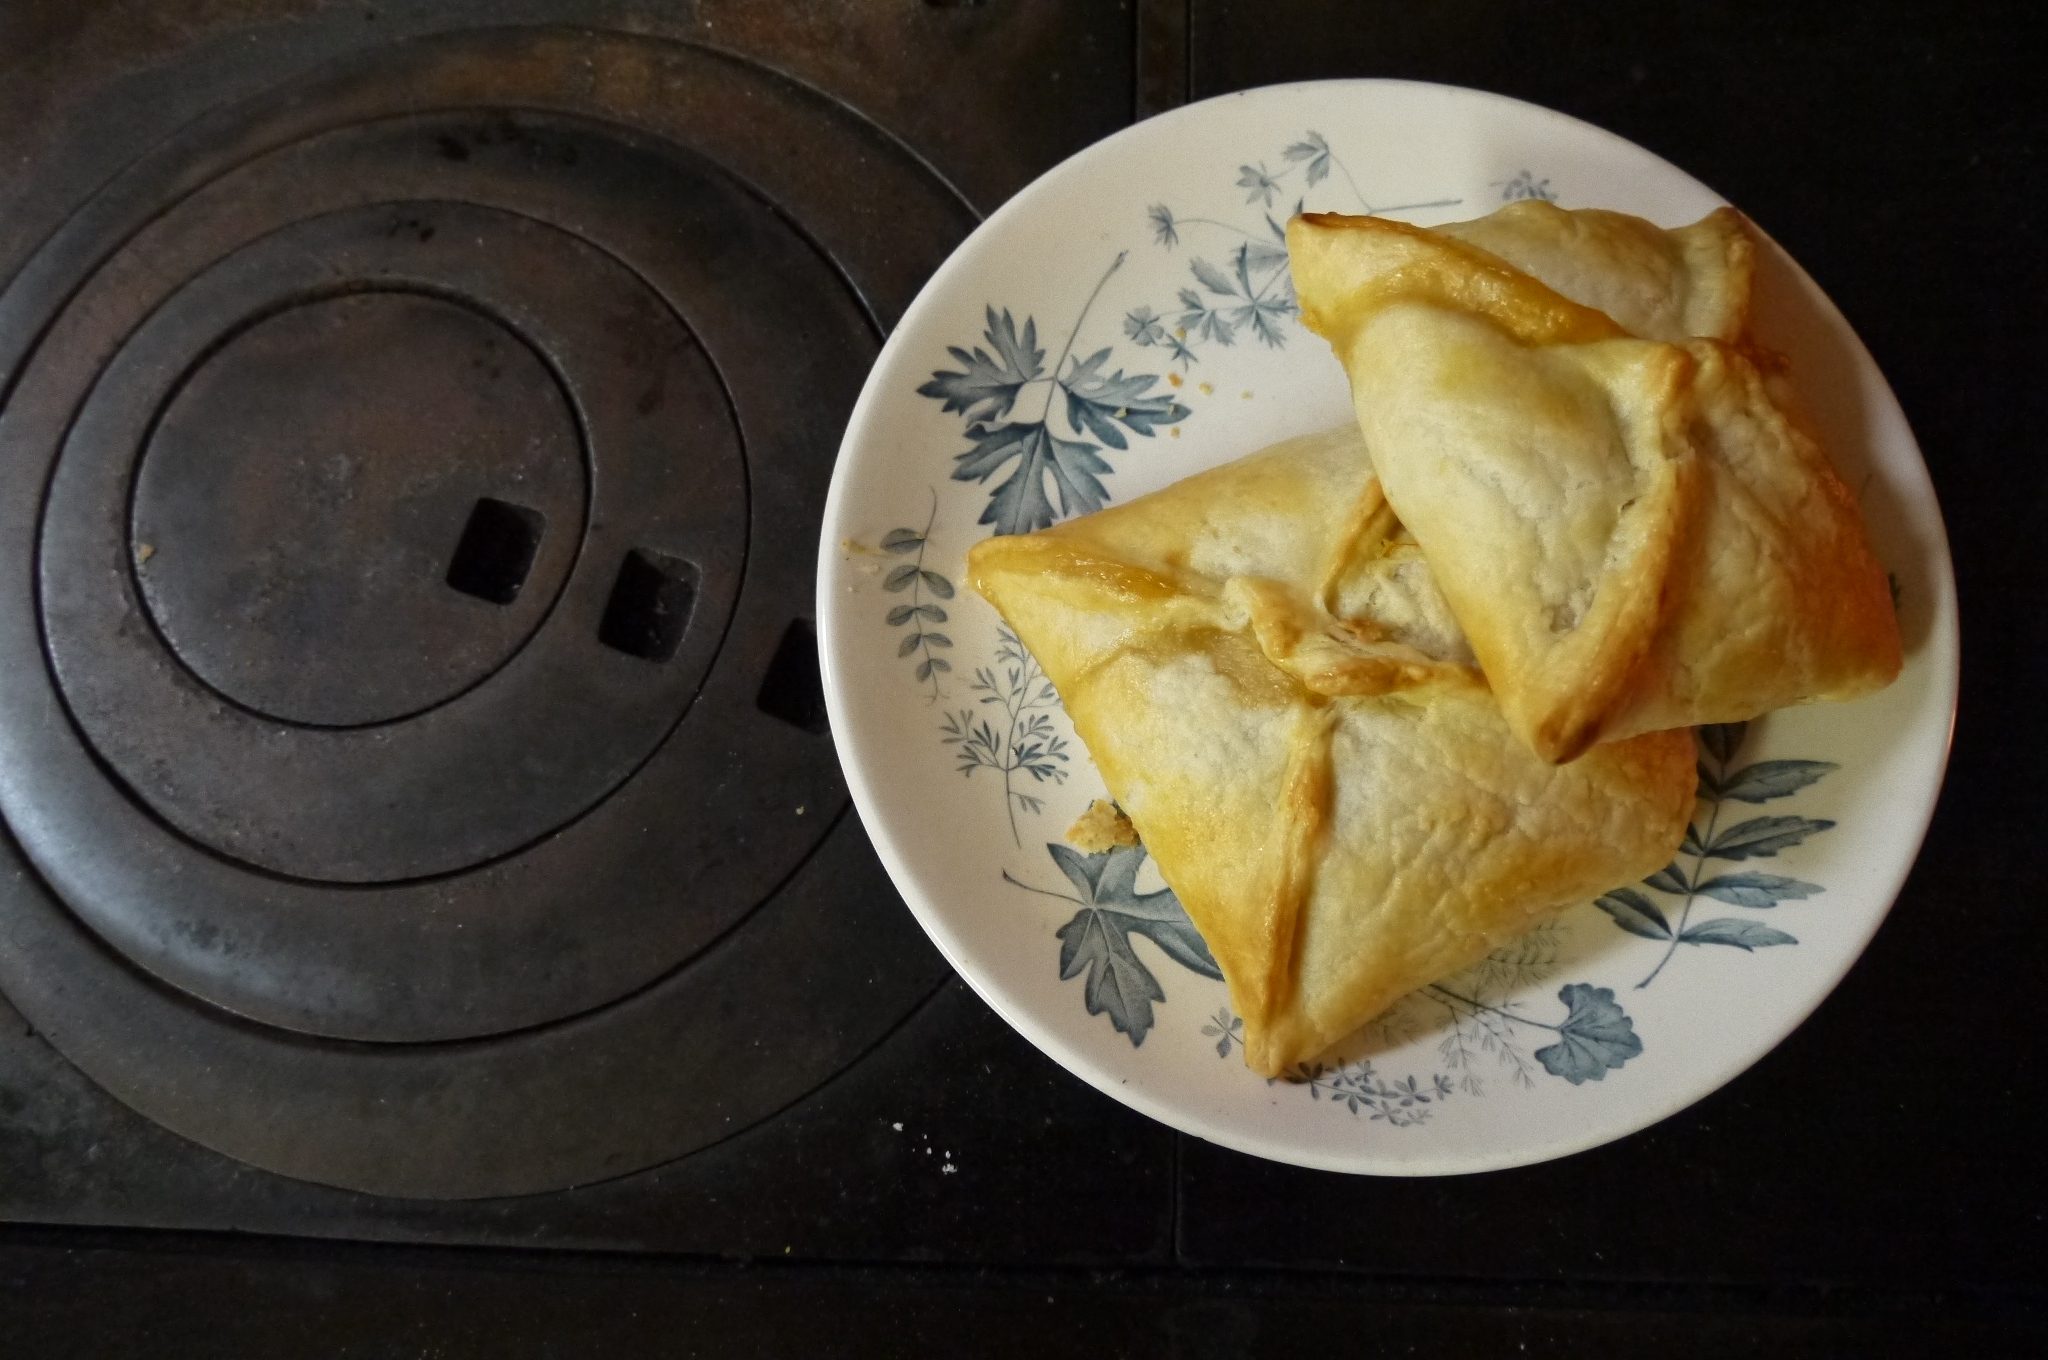
  5. Dust the countertop and rolling-pin (or wine bottle if you don’t have a rolling-pin) with a little flour. Cut the dough ball in half and roll out one half.  Cut the dough into 15cm/6 inch squares and fill each with some fruit (pictured below). Run a wet finger along each of the edges of the pastry, then bring two corners together to and press them together; do this with each corner until they all meet in the middle. (See picture at the top of the page) Do the same thing with the rest of the dough.
  6. Put the piroschki into the fridge for about 30 minutes. While they are chilling preheat the oven to 375 F and line a baking sheet with some parchment paper (optional – I didn’t have any and they didn’t stick to the pan).
  7. Crack the egg into a bowl add a teaspoon of water; mix with a fork. Use a pastry brush to glaze the pastry with the egg.
  8. Bake for 30 to 40 minutes, or until they are a beautiful golden brown.  Let cool only slightly before devouring.

If you are not baking for a large crowd I advise that you freeze part of the batch for a later date.  Just put the baking sheet into the freezer until they are solid, then but them into a freezer bag.  To bake just take a few out of the freezer and place them on a pan and into a preheated oven, 375 F for 35-45 minutes.  Just as yummy as the first batch!

making piroshky - trust in kimpiroschki recipe - trust in kim


Coconut Carrot Cake with Creamcheese White Chocolate Icing

coconut carrot cake - trust in kim

I can’t really believe I haven’t posted this one before.  I’ve been making it for years, and it is a favourite for many people.  The recipe comes from the Rebar Cookbook, which was put out by a great little vegetarian restaurant in Victoria, BC.  There is a bit of work involved in this cake, but just chopping and grating a few things, nothing too technical.  It also makes nice cupcakes or a 9 x 13 cake.

What you need:

  • 1 & 1/2 cups grated carrots
  • 3/4 cup (180 mL) crushed pineapple
  • 3/4 cup unsweetened coconut
  • 3/4 cup chopped walnuts
  • 1/2 cup chopped dates
  • 3 eggs
  • 3/4 cup brown sugar
  • 1/3 cup white sugar
  • 2 teaspoons vanilla
  • 3/4 cup vegetable oil
  • 1 & 1/2 cups unbleached flour
  • 2 teaspoons baking powder
  • 1 teaspoon baking soda
  • 1/4 teaspoon salt
  • 1 & 1/2 teaspoons cinnamon
  • 1 & 1/2 teaspoons ginger
  • 1/2 teaspoon freshly grated nutmeg
  • 1/2 teaspoon allspice

What you need for the icing:

  • 9 oz ( 270 grams) cream cheese (firm block, not spreadable) room temperature – very important
  • 1/4 cup unsalted butter, room temperature
  • 1 teaspoon vanilla
  • 3 oz (90 grams) white chocolate
  • 3 cups icing sugar, sifted (could cut back to 2 & 1/2 cups)

What you do:

  1. Butter and flour two 8″ round cake pans.  I like to  cut out circles of parchment paper to fit into the bottom of the pans for easy removal.  Preheat the oven to 350F.
  2. Combine the grated carrot, pineapple, coconut, dates and chopped walnuts in a large bowl.
  3. In a mixing bowl beat the sugars with the eggs. Add the vanilla and beat on high-speed until the volume has tripled. With the beater on low-speed, pour the oil in slowly to blend it in.
  4.  Combine the remaining dry ingredients and gently stir them into the egg mixture. Fold in the carrot mixture. Divide the batter among the cake pans and smooth the tops.
  5. Bake for 30 minutes, or until an inserted toothpick comes out clean. Let the cakes sit in the pan for about 10 minutes, then run a knife around the edge and invert onto cooling racks.
  6. After the cakes have cooled, prepare the icing.  Begin by melting the white chocolate in a double boiler over medium heat and set aside to cool a little while you do the next part.
  7. Beat the room temperature cream cheese on high-speed until smooth and fluffy, then blend in the vanilla and butter.  Add the melted chocolate to the cream cheese mixture and mix on high until smooth and fluffy (I added the chocolate when it was too warm, and I couldn’t get to the fluffy stage.  I put it in the fridge for 10 minutes and that solved the problem). Slowly add the icing sugar, stopping to scrape down the sides now and then. Beat on high until the icing  is light and fluffy; about 3 minutes.
  8. Spread the bottom layer of the cake with one-third of the icing, smoothing it evenly to the edges. Chill for 10 minutes. Place the top cake layer on and frost the top and sides. I garnished it with white chocolate curls, but my next choice was to make a border of chopped walnuts around the edge.  Toasted coconut or a decorative piped border are other options.
  9. Store refrigerated where it will keep for up to 4 days.

carrot cake - trust in kim

Peanut Butter Brownie with Chocolate Ganache

peanut butter brownie - trust in kim

For those who love chocolate and peanut butter, this will be a temptation.  There’s a peanut butter “blondie” on the bottom, filled with chocolate chips, and then a chocolate ganache on top.  It is a two-step recipe, but the second step is so easy. For the chocolate ganache I used half bittersweet chocolate and half  semi-sweet.  I thought it was a great balance of sweetness to the base layer that is slightly sweeter, and my staff at work who sampled this on goodie day agreed.  If you’ve got a real sweet tooth you may want to use only semi-sweet chocolate.

I got the recipe from Smitten Kitchen (love her site and cookbook), and she got it from Gourmet Magazine’s recipe from Butterwood Desserts.

What you need for the brownie/blondie:

  • 1 cup or 1/2 pound unsalted butter, room temperature
  • 1 & 3/4 cup sugar
  • 1 cup creamy peanut butter (I used a natural peanut butter with no sugar or salt added – if you use this you’ll want to add extra salt to the batter)
  • 2 large eggs plus one yolk, room temperature
  • 2 teaspoons pure vanilla extract
  • 2 cups all-purpose flour
  • 1 & 1/2 cups semisweet chocolate chips
  • 1/2 teaspoon salt or more if you’re using natural peanut butter

What you need for the ganache:

  • 5 ounces semisweet chocolate, chopped
  • 4 ounces bittersweet chocolate, chopped
  • 1/2 cup heavy cream
  • 1 tablespoon butter

What you do:

  1. Begin by rolling out enough parchment paper to line a 13 x 9-inch baking pan.  Spread some butter on the parchment, then line the pan with it.
  2. Preheat the oven to 350F with the rack in the middle of the oven.
  3. Beat the butter and sugar at medium-high speed until the  mixture is light and fluffy, then beat in the peanut butter. Beat in whole eggs, egg yolk, and vanilla. With the mixer sped on low, mix in the flour until just combined. Stir in the chocolate chips,  then spread thick batter into the parchment-lined baking pan, smoothing the  top.
  4. Bake the brownies for about 40-45 minutes, until deep golden and a toothpick inserted into the centre comes out clean. (I used two 9×9 pans, so mine was done early)
  5. Cool completely on a rack before topping with the ganache.
  6. To make the ganache put the chocolate chips in the top of a double boiler or in a bowl that fits on top of a small pot of water.  Add the cream and butter, then turn the heat up on the double boiler until it reaches a low simmer.  Stir with a spatula until the chocolate is melted and glossy.  Spread the ganache over top of the brownie, then let it stand until set.
  7. To cut the brownie remove it from the pan, then run a large knife under hot water, dry it off, and slice the brownie.

peanut butter chocolate brownie - trust in kim

Chocolate-Dipped Espresso Shortbread Cookies

espresso shortbread - trust in kim

This recipe comes from the Absolutely Chocolate cookbook by Fine Cooking, which I discovered from an episode of Anna and Kristina’s Grocery Bag.   I love this show – they choose a cookbook, make a bunch of recipes (often not very successfully), and then invite a chef to judge their work.  Anyways, this was one of the big hits from the episode about this cookbook.  So I took the book out of the library and made the recipe. Love It!

I made the cookies into hearts, just like the recipe suggested, but of course you can make circles or any other shape your heart desires.

What you need:

  • 1 cup cold unsalted butter
  • 1/2 cup sugar
  • 1/2 teaspoon salt
  • 2 & 1/4 cups flour
  • 2 tablespoons finely ground espresso beans (you could just go to the grocery store or coffee shop and get enough freshly ground beans for the recipe)
  • 9 oz semi-sweet chocolate, chopped
  • 1 tablespoon vegetable oil (I used coconut oil)

What you do:

  1. Combine the butter, sugar and salt in a large bowl and mix with an electric mixer for 1-2 minutes.
  2. Add the flour and espresso and mix with a wooden spoon for about 3 minutes, until the mixture just starts to come together.
  3. Roll the dough out on a lightly floured surface to about 1/4 inch thickness.  Use a cookie cutter to form the cookies, then place them on a parchment-lined pan.  Refrigerate for about 20 minutes.
  4. Meanwhile, heat the oven to 300F.  After the cookies have been refrigerated, bake them for about 35-40 minutes, or until they have become lightly golden brown.  Place the baked cookies on a wire rack to cool.
  5. Heat the chocolate and oil in the top of a double boiler; I just put a bowl on top of a pot that has a little water in it, then heat that on the stove to melt the chocolate.  When the chocolate has melted, dip each cookie in the chocolate, scraping the bottom of the cookie lightly on the edge of the chocolate bowl to get a little of the extra chocolate off.  Cool the cookies on a parchment or wax-paper lined pan.
  6. Allow the chocolate to set for at least 2 hours.  Store the cookies in an airtight container with a sheet of parchment or wax paper between each cookie so they don’t stick together.

chocolate dipped espresso shortbread - trust in kim

espresso shortbread - trust in kim

Chocolate Nut Apple Cake

chocolate nut apple cake - trust in kim

For my dad’s birthday I baked this loaf cake.  At first I thought the apple/nut/chocolate combination would be strange, but it really works well together.  I just used a little more chocolate than the recipe asked for.  I found the recipe in Tarek Malouf’s Hummingbird Bakery Cookbook.  I have read a number of blogs recently that swear these are awesome recipes, so I thought I’d give it a try.  This was a great recipe to start with!

You need to plan ahead a bit, as the batter needs to be refrigerated for a few hours or overnight. This is a great benefit it you want to make something freshly baked but don’t have time that day; just make the batter a day ahead and bake it when you need it.

What you need:

  • 3/4 cup unsalted butter at room temperature
  • 3/4 cup packed brown sugar
  • 2 tablespoons strawberry jam (I used raspberry)
  • 2 eggs
  • 1 cups plus 2 tablespoons flour
  • 1 tablespoon baking powder
  • 1 teaspoon ground cinnamon
  • 2/3 cup mixed nuts (I used almonds, walnuts and coconut)
  • 2 oz. bittersweet chocolate, finely chopped
  • 2 apples, peeled, cored and roughly chopped

What you do:

  1. Beat the butter, sugar and jam with a mixer until light and fluffy.
  2. Add the eggs one at a time and beat well.  Scrape down the sides of the bowl with a spatula to make sure everything is incorporated.
  3. Sift the flour, baking powder and cinnamon into the mixing bowl, then beat it until incorporated.
  4. Stir in the nuts, chocolate and apples until they are evenly distributed.  Cover and refrigerate for a few hours or overnight.
  5. Preheat the oven to 325F.
  6. Butter and flour a 9 x 5 inch loaf pan.
  7. Pour the batter into the pan and smooth the top down.
  8. Bake for 50-60 minutes. Test to see if is done by inserting a toothpick; if it comes out with no batter sticking to it the cake is done.
  9. Let the cake cool completely before removing it from the pan.

Enjoy!

Chocolate Birthday Cake

chocolate birthday cake - trust in kim

In searching for a chocolate cake recipe online I stumbled across a Hershey’s chocolate cake recipe several times, and everyone seemed to love it.  Since the birthday girl requested chocolate cake, “the kind I had when I was a kid, with really chocolatey icing,” this seemed like the way to go.  And the birthday girl was pleased – she said it was exactly what she had in her mind of that childhood cake. Yay! I love it when things work out that way.  

And – it’s a pretty easy recipe. I found it here, but it’s from the Hershey’s website.  Besides adding extra instructions, the only thing I changed was that I used melted butter in the cake, while the original recipe called for canola oil.  I thought the butter would add more flavour, and I think I was right, but I’ve never made it the other way to be able to compare.  But come on – it’s butter! It’s gotta taste better!

What you need for the cake:

  • 2 cups sugar
  • 1 & 3/4 cups all-purpose flour
  • 3/4 cup cocoa
  • 1 & 1/2 teaspoons baking powder
  • 1 &1/2 teaspoons baking soda
  • 1 teaspoon salt
  • 2 eggs, lightly beaten with a fork
  • 1 cup milk
  • 1/2 cup melted butter, cooled slightly
  • 2 teaspoons vanilla extract
  • 1 cup boiling water

What you do for the cake:

  1. Line two 9-inch round cake pans with parchment paper. Preheat the oven to 350F.
  2. Combine all the dry ingredients in a large bowl.
  3. Add the egg, milk, butter and vanilla.  Mix on medium speed for about 2 minutes.  Stir in the boiling water to make a runny batter.
  4. Pour into the prepared pans.  Give the pans a light tap on the counter before placing them in the oven to get rid on any large air bubbles.
  5. Bake for 30-35 minutes, testing with a toothpick to see if it is done.
  6. Run a very sharp knife around the edge of the cake pans after the cakes have sat for a few minutes, then invert the cakes onto wire racks and remove the pans.  Let the cakes cool completely before adding the frosting.

What you need for about 2 cups of icing:

  • 1/2 cup butter 
  • 2/3 cup cocoa
  • 1 teaspoon vanilla extract
  • 3 cups powdered sugar
  • 1/3 cup milk

What you do for the frosting:

  1. Melt the butter then stir in the cocoa and vanilla.
  2. Alternately add some of the sugar and milk on medium speed until it is a good consistency for spreading.  I needed to add a little extra milk to get it to the right consistency.
  3. Frost your cake, then refrigerate it for a few hours before serving.

chocolate cake -trust in kim


The website also gives these options for different kinds of cakes: 

One pan cake: Grease and flour 13x9x2-inch baking pan. Heat oven to 350° F. Pour batter into prepared pan. Bake 35 to 40 minutes.

Three layer cake: Grease and flour three 8-inch round baking pans. Heat oven to 350°F. Pour batter into prepared pans. Bake 30 to 35 minutes. Cool 10 minutes; remove from pans to wire racks. 

Bundt Cake: Grease and flour a 12-cup fluted tube pan. Heat oven to 350°F. Pour batter into prepared pan. Bake 50 to 55 minutes. Cool 15 minutes; remove from pan to wire rack. 

Cupcakes: Line muffin cups (2-1/2 inches in diameter) with paper baking cups. Heat oven to 350°F. Fill cups 2/3 full with batter. Bake 22 to 25 minutes. 

Bolzano Apple Cake

Bolzano Apple Cake - trust in kim

This delicious cake was one of my contributions for a Thanksgiving dinner.  I had wanted to bring an apple pie, but I didn’t feel like making a crust, so I was happy to discover this recipe on the Whisk and a Spoon blog.  (original recipe from The Essential New York Times Cookbook)  It is a lot easier to make than a pie, and the tartness of the Granny Smith apples balances well with the custard-like sweetness of the cake, which is highlighted by real vanilla bean.  It tasted amazing on day two when eaten at room temperature.

What you need:

8 tablespoons/1 stick unsalted butter, plus some for greasing the pan

2 large eggs

1 cup sugar

1 vanilla bean

1 & 1/4 pounds (3-4 medium Granny Smith apples)

1/2 cup all-purpose flour

2 teaspoons baking powder

1/2 cup milk, room temperature

What you do:

1. Line an 8-inch spring-form pan with parchment paper and smear it with butter. Dust with flour and remove any excess. Preheat the oven to 350F.

2. Melt the butter and set aside to cool.

3. Split the vanilla pod in half and reserve the seeds.  Put the pod into the warm butter.

4. Peel, quarter and core the apples, then slice them thinly. (I used a mandoline, but you could do it with a large knife.)

5. Beat the eggs in a large bowl with half the sugar, then gradually add the rest of the sugar while beating.  The batter should form ribbons when you lift the beaters. Add the vanilla seeds to the batter.

6. Remove the vanilla pod from the butter and stir the butter into the batter.

7. Combine the flour and baking powder, adding it alternately with the milk, ending with flour. Stir in the apples, making sure each piece of apple is coated.  Pour the batter into the spring-form pan and smooth the surface with a spatula.

8. Place the spring-form pan on a baking sheet in case there is any leaking, and bake for 25 minutes.  Then rotate the pan and bake for 25 minutes more.  The cake should pull away from the sides and become brown on top; when you insert a knife it should come out clean.  Cool on a rack for 30 minutes.

The original recipe suggests serving it with a sprinkling of icing sugar, but I’m not a big fan of that, so I served it on its own, and it was Awesome!

bolzano apple cake - trust in kim

Lemon Sables – French Sugar Cookies

lemon sables - trust in kim


Mmm, these pretty little lemony cookies have a nice crispy bite to them, almost like a shortbread.  I usually look for cookie recipes that have some chocolate in them, but this is a nice fresh change from my usual, and they go great with a cup of tea.   I made them for a dessert to bring to a friend’s place, and they were a hit.  They are small enough to have just a little sweet bite after dinner, but those who wanted more sweet bites could have a few.

I got this recipe from Clotilde Dusoulier’s fabulous Chocolate and Zucchini cookbook.

What you need:

1 lemon

1 cup plus 2 tablespoons all-purpose flour

1/3 cup sugar

1 teaspoon fleur de sel or kosher salt

7 tablespoons/ 3.5 ounces cold unsalted butter, diced

1 large egg yolk

1 cup icing sugar

What you do:

1. Zest about one tablespoon of lemon peel, making sure to only use the yellow skin, not the bitter white part underneath.

2. Rub the lemon zest into the sugar, then stir in the flour and salt.

3. Add the butter and mix it into the dry ingredients using a pastry blender or cool hands (if your hands are too hot they will melt the butter) until it looks like very coarse sand.  Add the egg yolk and stir with a fork until combined, and then knead the dough until it comes together. If you need to, you can add a little ice-cold water, one teaspoons at a time to help bring it together.

4. Divide the dough into two parts, then form it into logs about 3-4 cm in diameter.  Wrap the logs in plastic wrap and place in the freezer for 1/2 hour.

5. Preheat the oven to 350F and line a baking sheet with parchment paper. Take one of the logs out of the freezer and slice about 1cm thick using a very sharp serrated knife.

6. Place the disks on the baking sheet, leaving a few centimeters’ space between them.  Bake for about 12 minutes, or until lightly golden on the edges.  Cool the cookies on a wire rack. You can bake both logs, or save one for baking fresh another time.  While these cookies do keep for a few days, they are best on days one and two.

7. Once the cookies are completely cool you can make the glaze by squeezing the lemons to get 3 tablespoons of juice.  Add the juice to a bowl with the icing sugar and whisk it until there are no lumps.  Glaze the cookies using a pastry brush or a teaspoon.  Let the glaze dry completely before serving.  Make sure to store them in an airtight container.

Pecan Biscotti with Dark and White Chocolate

pecan biscotti with dark and white chocolate - trust in kim

These are a variation on my favourite biscotti and another crowd-pleaser. I brought them to work the other day, and a lot of my colleagues asked for the recipe, so I take that as a sign that they were delicious.

They are lovely dipped in some coffee, but these turn out with just the right bite to them, so you can easily eat them without softening them up first.

What you need:

1/2 cup butter

3/4 cup sugar

2 eggs

1 teaspoon vanilla extract

1/2 teaspoon almond extract

2 cups + 2 tablespoons white flour

1 & 1/2 teaspoons baking powder

1/4 tsp salt

1/2 cup pecans, lightly toasted

1/2 cup semi-sweet chocolate chips

1/4 cup white chocolate chips

What to do:

1. Toast the pecans in a frying pan until very lightly browned and allow to cool.  They are easy to burn, so watch carefully – I usually keep them on low while I start making the cookie dough.

2. Cream the butter, then beat in the sugar, then eggs one at a time and beat until fluffy.  Beat in vanilla and almond extracts.

3. Combine dry ingredients and mix with a wooden spoon until just incorporated.  Add chocolate and nuts and stir until just combined.

4. Divide the dough into two pieces.  With floured hands form into two logs on a baking sheet, flattening the logs out a bit.  Bake at 325F for 25-30 minutes.

5. Slice the baked rolls diagonally and place on a baking sheet.  Lower the oven to 300F and bake for 10-15 minutes, until slightly browned.  Turn over and bake for another 10-15, until that side is also slightly browned. Cool on a wire rack.

These can keep for a few weeks in an airtight container, but I like to freeze some to keep them really fresh. They don’t usually keep very long, and I find that they make a great gift.

biscotti on the pancutting th biscotti

Vegan Chocolate Mousse – not just for vegans!

silken tofu chocolate mousse - trust in kim

My friend I-Wen brought this chocolate mousse to a BBQ the other day, and people gobbled it right up, before we had even finished the meal part of the BBQ.  It is light, flavourful, and pretty much guilt-free! And did I mention easy to make?

What you need:

3/4 cup dark (70%) chocolate

12 oz silken tofu – Must be room temperature

1/2 cup unsweetened almond, soy or rice milk

1 teaspoon vanilla

What you do:

1. Melt the chocolate on top of a double boiler, or in a bowl on top of a small pot of water.

2. Warm the milk.

3. Throw all the ingredients into a blender or food processor (I used an immersion blender), and blend until it is all combined.

4. Scoop into bowls and refrigerate until cold.