Christmas Baking Highlights

This post is all about some of my favourite holiday baking treats over the 10+ years of TrustInKim, so bakers have it all in one place. There are more recipes to come this year too!

Gingerbread People with red candy hearts.

Rum Balls! Another of my mom’s amazing recipes.

My mom’s fudge recipe, super easy, loved by all.

Sour Cream Cutout Cookies, perfect for decorating.

Jam-filled Cookies, which we called “ammonia cookies.”

This Chocolate Rum cake is not for the faint of heart.

Stollen with brandy-soaked dried fruit, almonds and marzipan.

Coconut Mango Cookies

And a few Savouries:

Bubbat Mennonite raisin and Farmer Sausage bread

Stollen

stollen with Christmas ornaments

Here is an updated version of a recipe from a few years ago. I made one big change in the method: I didn’t add the fruit and nuts in the first proofing because it is easier for the dough to rise on its own. I added the fruit when I formed the loaves. Another benefit was that it was easier to work the fruit into the dough at this time.

This stollen is filled with brandy-soaked sour cherries and raisins, toasted almonds, and plenty of marzipan. It is coated with butter and powdered sugar, for flavour, but also to help from drying out.

When I was a kid we often had Stollen at relatives’ houses at Christmas, but I didn’t like the “fruit,” because the flavour and texture seemed nothing like a fruit, those red and green bits of preserved ‘something.’ This recipe uses delicious dried sour cherries and raisins soaked in Brandy or Rum – yum!

The stollen from my childhood was always a bit too “aged” for me, since it would be made ahead and left to sit for weeks, and the same for the present-day grocery store Stollen. This one is good if you “age” it, but you can also eat it when it is freshly baked. I like to eat a small portion fresh, and then freeze or share the rest.

In Vancouver, my favourite place to shop for baking supplies is Famous Foods; they have pretty much everything you need, and a lot of it is in bulk sizes. Gourmet Warehouse is awesome too, and for those who are not local, they also ship.

If you don’t love marzipan feel free to leave it out. I believe marzipan is a misunderstood food, since a lot of people have only eaten a stale version – the good stuff is basically almond and sugar! Yum!

The original recipe is found here (oops, I lost the link when I updated the recipe!). I changed the fruit, and added almonds and almond extract, and added more melted butter in the end.

This recipe makes two large loaves (or four smaller ones with a shorter baking time).

What you need:

  • 3/4 cup raisins
  • 3/4 cup dried sour cherries
  • 1/2 cup brandy or rum
  • 1/3 cup slivered almonds, toasted
  • 2 packages active dry yeast (4 & 1/2 teaspoons, or 14 grams) + 1 teaspoon sugar
  • 1/2 cup sugar
  • 1/2 cup milk
  • 1 teaspoon salt
  • 1/2 teaspoon vanilla
  • a few drops of pure almond extract
  • 2 eggs, at room temperature
  • 4 to 5 cups flour, divided
  • 1/2 cup butter, room temperature
  • 200 grams (7 ounces) marzipan (or a little more if you love marzipan)
  • melted butter (1/4 to 1/3 cup)
  • 1/4 cup powdered sugar

What you do (Updated Version Dec 2021:

  1. Combine the raisins and cherries in a bowl and cover with the brandy or rum. Let it sit for 12 – 48 hours, stirring from time to time (Shortcut: just soak for an hour). Drain the brandy or rum, keeping it to add to the dough later. Pat the fruit dry with paper towels and toss the fruit in 2 tablespoons of flour.
  2. Toast the almonds until very lightly browned.
  3. In a large bowl add 1 teaspoon of sugar into 1/4 cup warm water (110-115 degrees-any hotter will kill the yeast, colder and it won’t activate) and stir it in. Sprinkle the yeast on top and stir it in and let it sit until the yeast starts to bubble, about 5 minutes.
  4. Heat the milk, salt and 1/2 cup sugar in a small pot over medium heat, until just warm (110-115 degrees).
  5. Add the milk mixture (make sure it’s just warm, not hot, or it will kill the yeast), vanilla and almond extracts and eggs to the yeast mixture and combine by beating with a fork. Mix in the reserved brandy or rum (there should be about 1/4 cup. If not, top it up to 1/4 cup).
  6. Add two cups of flour and use a wooden spoon to combine. Cut the 1/2 cup butter into small pieces and work into the dough using a fork.
  7. When the butter has been evenly distributed, add one cup of flour and mix it in. Add about half a cup more flour, adding more until the dough forms into a workable ball (not too much flour to make it too stiff).
  8. Turn the dough out onto a floured countertop and knead for 10 minutes. The dough should become smooth and elastic.
  9. Here comes the trickiest part: adding the fruit and almonds. To do this I flattened the dough out a bit, sprinkled about 1/2 cup of fruit on, and kneaded it in. Continue this process until all the fruit is combined, then do the same with the nuts. If any pieces of fruit are sticking out of the top of the dough, pick them off and knead them in a bit more.
  10. Melt a little bit of butter and use it coat a large bowl. Place the ball-shaped dough into the buttered bowl, then turn the dough butter-side up so it is coated in butter. Loosely cover the bowl with a tea towel and let the dough rise until it has doubled in volume, about 1-3 hours depending on how warm your room is.
  11. Line a baking pan with parchment paper. Melt about 2 tablespoons of butter.
  12. Punch down the dough and divide it into two parts (or 3 or 4 for smaller loaves). Form one half into a flat oval using your hands.
  13. Cut the marzipan into quarters and roll into a rope just short of the length of the dough. (For smaller loaves I used just one rope of marzipan). Place two of the marzipan ropes on top of the dough, leaving space between them, then roll the sides of the dough over the marzipan, pressing down in the middle. Roll the ends of the dough over a little, and then gather the loaf and place it rolled-side down on the parchment paper. Repeat this process with the other half of the dough.
  14. Brush the loaves with butter, covering with a tea towel. Let the loaves rise until about doubled in size.
  15. Heat the oven to 375F. Bake for 30-40 minutes; if you tap on the loaf it should sound hollow, and it will be dark golden brown.
  16. Remove the loaves from the oven and brush with more melted butter! Dust them with sifted powdered sugar and let them cool completely before packing.
  17. Enjoy!

Orange Olive Oil Cake

For my 500th blog post I give you this simple Orange Olive Oil Cake. So easy to make, but a big flavour bomb! I have barely turned my oven on all summer, but this one called out to me, and I had to try it. And . . . rave reviews! If cake at breakfast is your thing, then this is the one for you, but it’s good anytime. It’s so easy – combine the liquids, add to the dry, bake. Eat. Yum. (You will need some kind of device to zest the orange – a microplaner, part of your grater, or an official zester; I prefer the microplaner.)

This cake is super moist, and super flavourful thanks to all the lemon zest. And the olive oil seems to pair really well with the citrus.

My oven is a gong show, and I never know when it’s going to heat up or cool down, so I do my best to guess (one of the reasons I haven’t been baking much lately). For me this was done almost 15 minutes before the suggested bake time because my oven was so hot – and it still turned out great! So if you are a newer baker, or have a really unpredictable oven like mine, this recipe seems to be a no-fail one.

I ate and gave away a lot of this cake, and then I froze a portion. It’s so nice to have something in the freezer that you can pull out when you need it!

I found the recipe on this website (thank you), based on a recipe that originates with Jim Lahey. I use his amazing pizza dough recipe, and my bread recipe also comes from him.

What you need:

  • 1 cup sugar
  • 2 large eggs
  • zest of 2 navel oranges (I used very large oranges)
  • 1/4 cup fresh orange juice
  • 2/3 cup whole or homogenized milk
  • 3/4 cup extra virgin olive oil
  • 1 & 1/3 cups all-purpose flour (about 155 grams)
  • 1 teaspoon baking powder
  • 1/2 teaspoon baking soda
  • 1/2 teaspoon table salt or 3/4 teaspoon kosher salt

What you do:

  1. Prepare an 8-inch cake pan by cutting a round piece of parchment paper to place in the bottom. Preheat the oven to 350°F (176°C). Place the rack in the bottom third of the oven.
  2. Place the flour, baking powder, baking soda and salt in a large bowl, then mix it together.
  3. In another bowl combine the sugar, zest (I use a microplaner to do this), eggs, orange juice, milk and olive oil.
  4. Pour the wet ingredients into the dry ingredients. Stir until just combined, scraping the bottom and sides to make sure all the flour is incorporated; it might seem a bit weird, but it’s okay to have some lumps.
  5. Pour the batter into the cake pan. Bake for 45-50 minutes, at which time the top should be browned and a cake tester should come out mostly clean. (Note – I put the cake pan on a baking sheet because I thought it might spill over – it didn’t though! Whew.)
  6. Let the cake cool for 5 minutes. Run a knife around the edges of the pan and then turn the cake onto a cooling rack.
  7. Enjoy!

Sour Cherry Almond Muffins

sour cherry almond muffins - trustinkim.com

Why have I never made an almond and cherry baked good before? My apartment smelled so wonderful after baking these; the almond smell is dreamy! These muffins are a bit more on the mini-cake side, meaning I don’t think they’re the healthiest muffins I’ve ever made. That’s not to say I didn’t have one for breakfast a few times   . . . and they’re really good with tea!

We ate one of these while they were warm, which is when they are at their best, but they were also great the next day. I froze the rest as soon as they were cool, and they were still really good when thawed.

I found the recipe on this site: Pretty Simple Sweet. The original recipe uses sweet cherries, but I used sour cherries, and I think they pair really well with the almond flavour. I tend to like to balance sweetness with tartness.

The recipe calls for baking the muffins for a few minutes at a higher temperature, then lowering the temperature for the rest of the baking. My oven is really finicky; I have to set it for higher than the required temperature, but then I have to lower it once it is at the right temperature or it will get too hot. So for me this was quite challenging. The good news is, by checking for a light brownness, and then using a toothpick to check if they had baked through, they baked successfully. Yay!

What you need:

  • 1 & 3/4 cups (250 grams) all-purpose flour
  •  2 teaspoons baking powder
  •  1/4 teaspoon baking soda
  •  1/4 teaspoon salt
  • 3/4 cup (150 grams) granulated sugar
  •  1 large egg, slightly beaten
  •  1 cup yogurt (I use 3.5% fat, my homemade recipe)
  •  1/3 cup (80 mL) canola oil
  •  1/2 teaspoon vanilla extract
  •  1 teaspoon pure almond extract 
  •  1 & 1/2 cups (300 grams) cherries, halved and pitted 
  •  1/2 cup sliced almonds, plus extra to sprinkle on top

What you do:

  1. Preheat oven to 425F/220C. Line 12 muffin cups with paper liners; I also sprayed them with baking spray.
  2. Toast the 1/2 cup of almonds in a frying pan or in the oven.
  3. Sift the flour, baking powder, baking soda, and salt into a large bowl. Add the sugar and stir to combine.
  4. Mix the egg with the yogurt, oil, and vanilla and almond extracts in a medium bowl.
  5. Pit and cut the cherries in half. If they are really juicy or if you’re using frozen berries, you can toss them in just a bit of flour to prevent bleeding. Prepare the cherries right before you are going to add them to the batter so that your finished product will look pretty.
  6. Pour the wet ingredients into the dry ingredients and fold the batter with a rubber spatula just until combined. Be careful to not over-mix, which would toughen the final product. We want nice light muffins. You can expect the batter to be thick and lumpy.
  7. Fold in the toasted almonds and cherries.
  8. Spoon the batter into the lined muffin cups. Sprinkle each muffin with a few un-toasted almonds.
  9. Bake for three minutes, then reduce the temperature of the oven to 375F/190C and bake for 12-17 minutes more. Test for doneness by inserting a toothpick; the muffin should be tender but not wet.
  10. Cool the muffins still in the tins for about 10 minutes, then place the muffins on a wire rack to cool.
  11. Allow the muffins to cool completely before storing in an airtight container. They can be stored on the counter for a day or two, or frozen for a few months.
  12. Enjoy!

Vanilla Cake with the best butter icing

Vanilla Birthday Cake - trustinkim


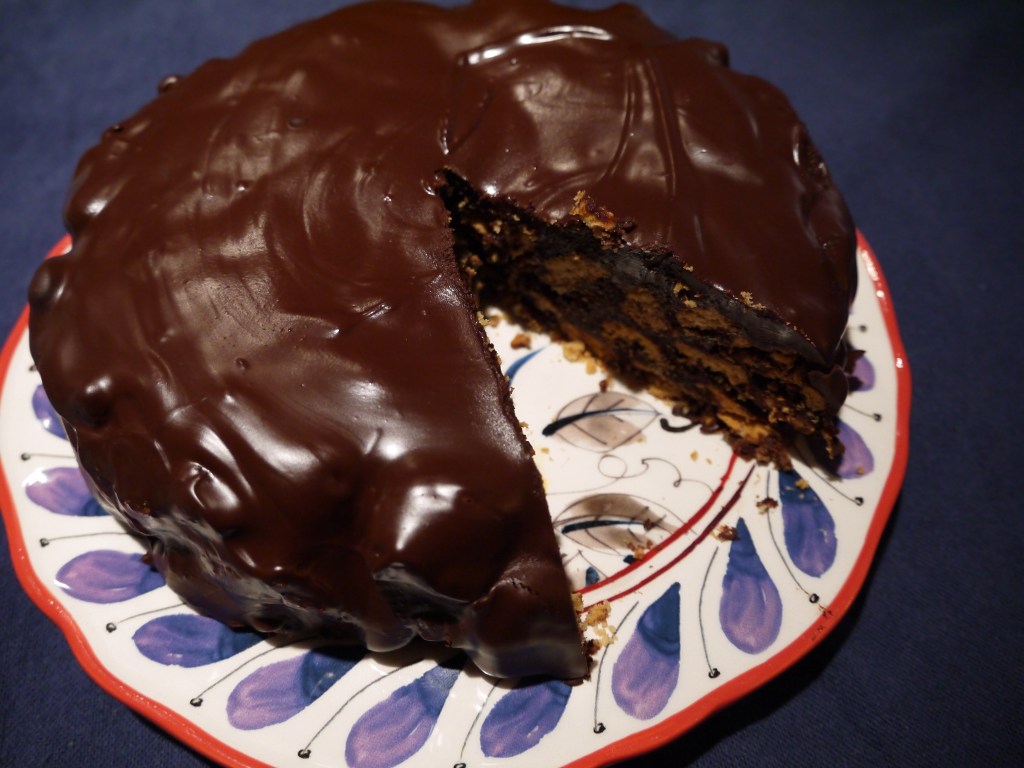
If you’re looking for the best, moistest, tastiest vanilla cake, then look no further. This is the one. The cake is so delicious, and my mom’s recipe for the buttery icing is the BEST! By request this one had coconut on it, but you can leave that off if you wish.

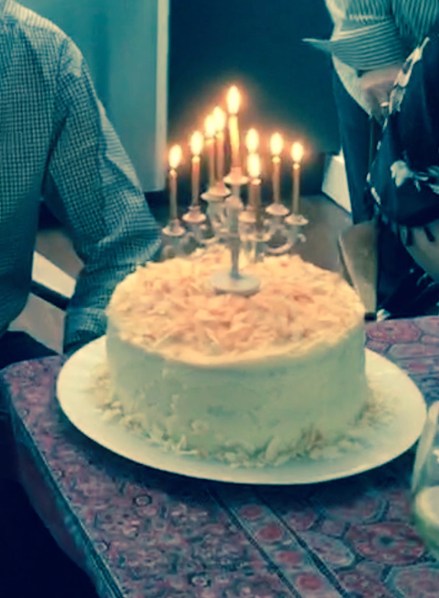
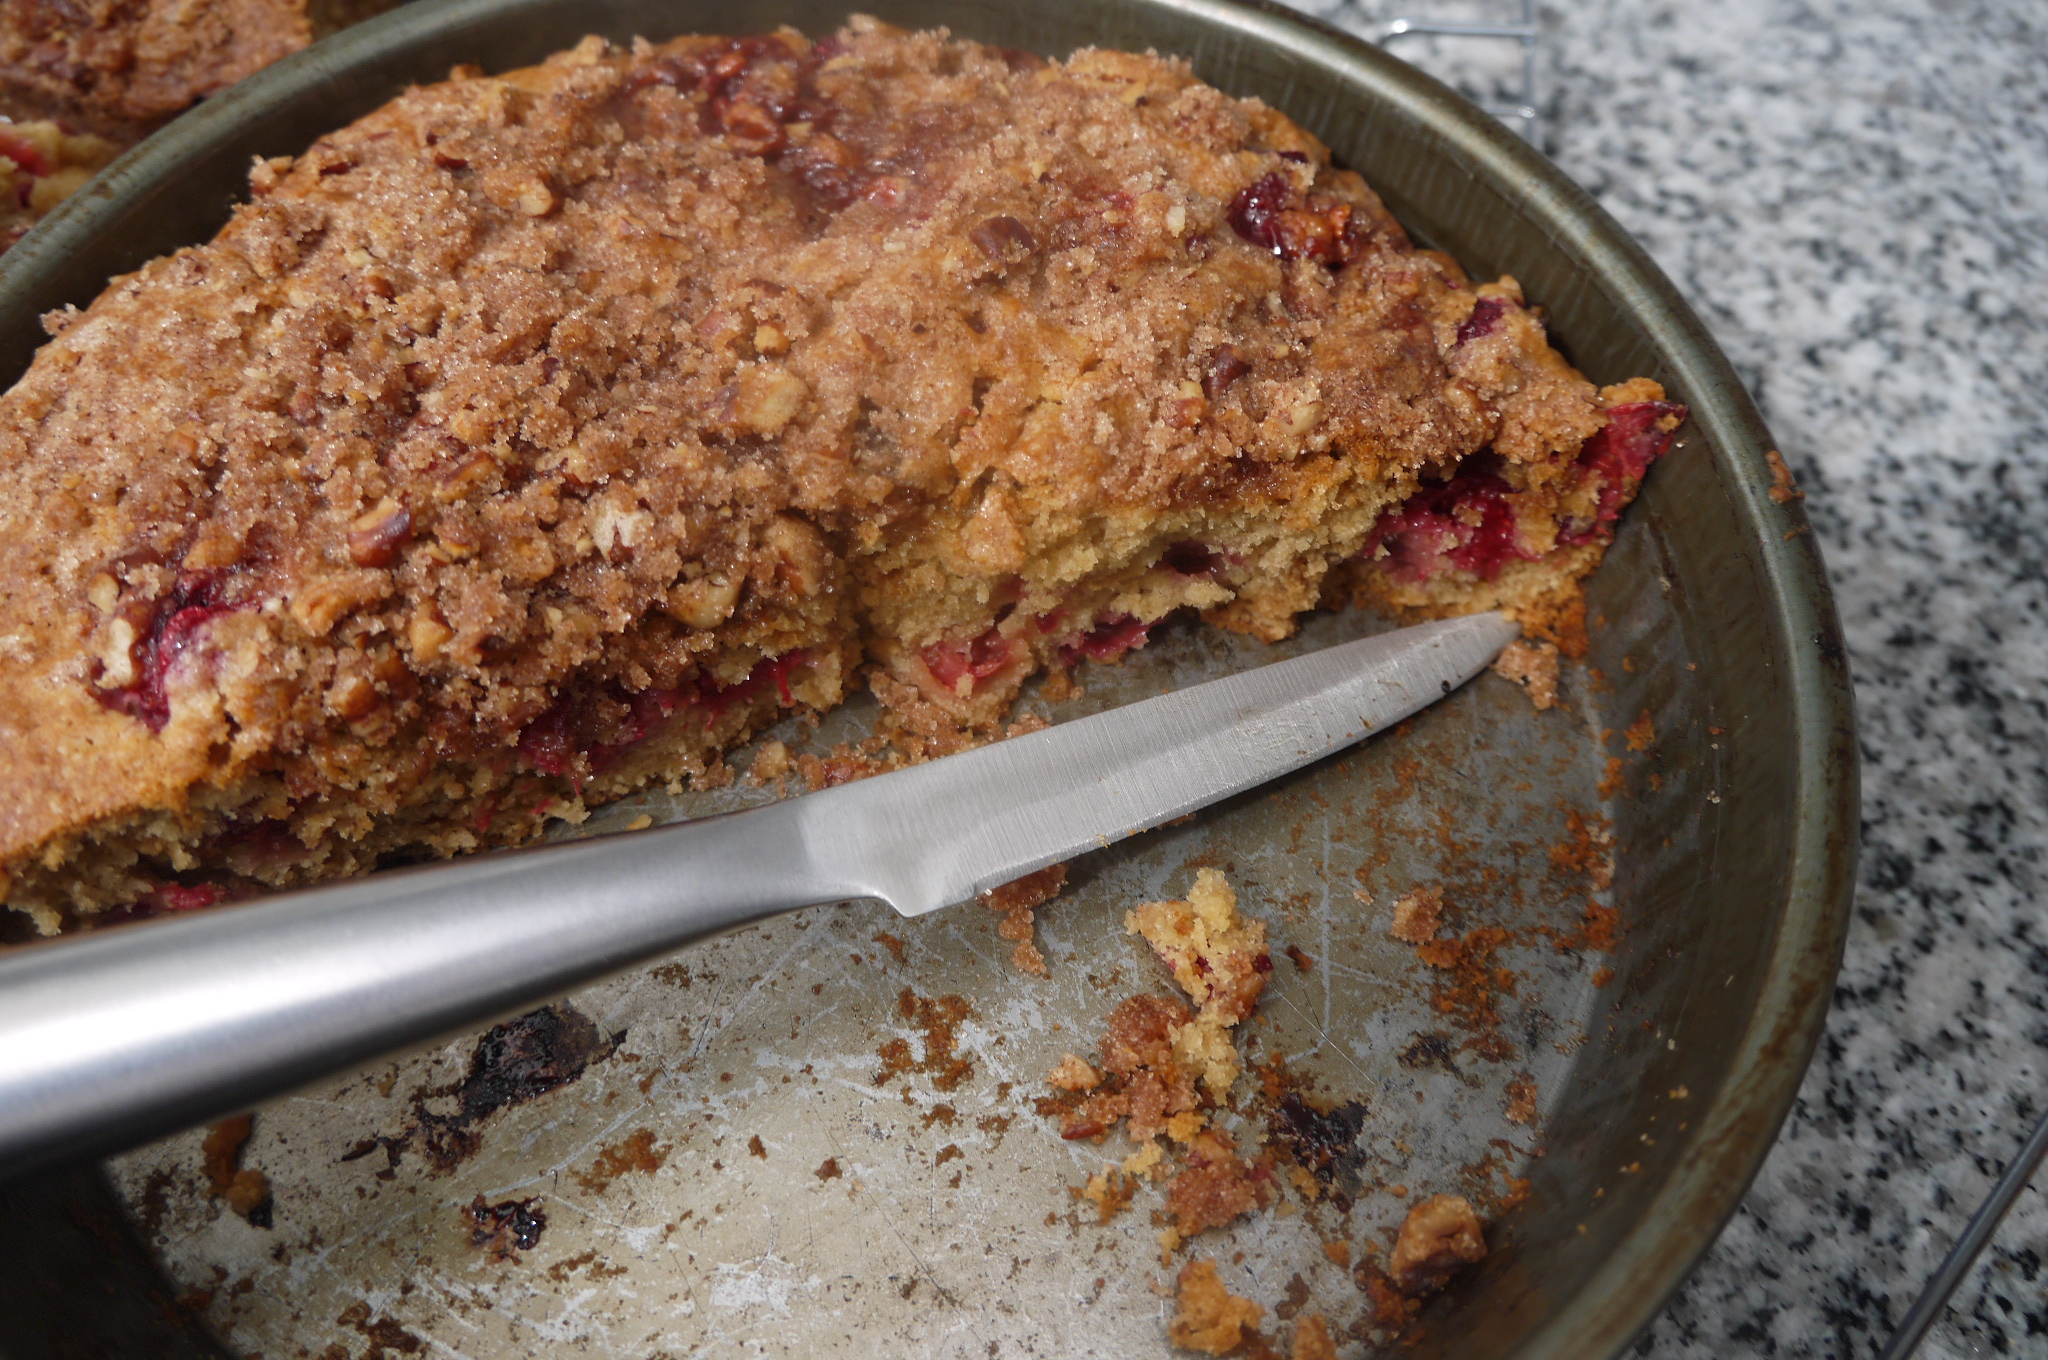
To celebrate a “really big birthday” recently I wanted to make an amazing cake that I knew the birthday boy (man) would love. I found the recipe for the vanilla cake on Sally’s Baking Addiction.  During the party I completely forgot to take a good picture of the cake – oh no! So this is the best I could do when it was already half eaten. You can’t see in the photo, but it’s a triple layer cake.

I’ve been enjoying my mom’s vanilla icing for as long as I can remember, so finally I asked her for her “boiling icing” recipe. It’s a little trickier than some, but it’s worth it. I like it best when it’s just come out of the fridge, so the icing is a bit harder, but it’s also nice when it’s sat out for a while and the icing turns creamier.

I only made a few changes to the original recipe: I used a different frosting, and  added the toasted coconut. In the method I made one change, which is what I usually do when adding dry and wet to a batter: I added half the dry, then half the wet, and then repeated the step. I find this makes it easier to mix.

Just make sure you leave time to let the cake cool completely before you put the icing on it. Alternatively, you can make the cake ahead of time and freeze it. 

The recipe makes a triple layer cake, so don’t try to fit it into two pans as it won’t bake through. If you don’t have three pans (and I don’t live near you do I can’t loan you mine), you could put 1/3 of the batter into cupcake pans or a loaf pan. Your cake won’t be as tall, but then this is a really big cake, so you could get away with it.

A note about the blending flour: this is also called instant flour, and it works better when used for thickening, like in this boiled icing recipe. My mom uses it, and I didn’t, so I ended up having to run the milk and flour through a fine sieve because I had lumps. So if you don’t have blending/instant flour, you can substitute it with a.p. flour, but just beware that you will need to whisk it really well so it doesn’t get lumpy.

What you need for the cake:

  • 420 grams (3 & 2/3 cup) cake flour
  • 1 teaspoon salt
  • 1 teaspoon baking powder
  • 3/4 teaspoon baking soda
  • 345 grams (1 & 1/2 cups) unsalted butter – room temperature
  • 400 grams (2 cups) granulated sugar
  • 3 large eggs plus two egg whites – room temperature
  • 1 tablespoon vanilla extract
  • 360 mL (1 & 1/2 cups) buttermilk
  • (optional – toasted coconut)

What you need for the icing:

  • 1 & 1/2 cup milk
  • 7 & 1/2 tablespoons blending flour 
  • 1 & 1/2 cups unsalted butter, room temperature
  • 1 & 1/2 cups granulated sugar

What you do for the cake:

  1. Prepare the cake pans by cutting parchment paper circles to fit in the bottoms of the pans. Grease the pans, then grease the parchment paper.
  2. Preheat the oven to 350°F (177°C).
  3. Whisk the flour, salt, baking powder and baking soda.
  4. Beat the butter and sugar together using an electric mixer. Beat on high speed for about three minutes, until it is smooth and creamy. You will need to scrape down the sides from time to time.
  5. Add the eggs one at a time, including the extra whites, then beat in the vanilla. The batter may look a bit curdled as you do this, but it will come together.
  6. Add half of the dry ingredients to the batter on low speed, mixing until just about combined. Add half of the buttermilk, again mixing until just about combined. Repeat the process, adding flour, then buttermilk, until they are just combined. Make sure you mix to the bottom of the bowl to avoid any lumps; you can do this with a rubber spatula.
  7. Pour the batter into the three pans, equal amounts in each. You can weigh them if you want this to be precise.
  8. Bake for 23-26 minutes, testing for doneness by inserting a toothpick in the centre of the cake to see if it comes out clean.
  9.  Allow the cakes to cool completely – leave them in their pans to do this, and place the pans on a wire rack.

What to do for the icing:

  1. In a saucepan combine the flour and cold milk, stirring until there are no lumps.
  2. Whisking constantly, bring the mixture to a simmer. Continue to whisk it until it becomes thick. Allow this to cool completely.
  3. Beat the butter and sugar until very light and fluffy, about 5 minutes. Beat in the cooled milk and flour mixture on medium speed, a little at a time. Continue to beat until it is light and fluffy.
  4. To ice the cake, place one layer of the cake on your serving dish. Using a flat metal spatula, spread a bit less than 1/4 of the icing on that layer, then do the same on the next layer. On the edges of the cake spread a thin layer of icing, then the same on the top. If you have time, refrigerate the cake for about half an hour, then add the final layer of icing to make it look finished. Here’s a video to show the process.
  5. Refrigerate the cake for at least an hour before slicing so that it will hold its shape.

    birthday cake -  trustinkim.com

No-Bake Nut Butter Cookies

no-bake nut butter cookies

A perfect treat when you don’t want to turn on your oven, these chocolate-coated nut butter cookies are simple and tasty. I needed something sweet to bring to a picnic, something that adults and kids would enjoy, and these were perfect. Plus I was happy to not heat my home up with the oven. And also perfect, because . . . well, peanut butter and chocolate are a match made in heaven!

The recipe calls for oat flour. I just whizzed some rolled oats in the food processor until they were finely ground.

This recipe makes about 3 dozen tiny cookies. They are quite rich, so I opted to make them really small rather than the two tablespoons that the original recipe calls for. I made my cookies with peanut butter, but you can use the nut butter of your choice.

If you omit the chocolate these would make a great power cookie for hiking or biking. Unless you’re hiking or biking in cool weather, when the chocolate wouldn’t melt.

You can store the cookies in the fridge for about 10 days.

What you need:

  • 3/4 cup (188 mL) nut butter
  • 1/2 cup (125 mL) honey
  • 1 teaspoon (5mL) pure vanilla extract
  • 3 cups (750mL) oat flour
  • 1/2 teaspoons salt
  • 3/4 cup (188mL) chocolate chips

What you do:

  1. Line a baking pan with parchment paper, or wax paper if that’s all you have.
  2. Heat the nut butter and honey in the microwave or in a pot on the stove. Whisk in the honey.
  3. Add the oat flour and salt, then mix until combined. 
  4. Scoop one tablespoonful of the mixture at a time and use your hands to form each into a ball. Flatten the cookie into a disk and place it on the parchment-lined baking sheet. Use a fork to make the crosshatch pattern typical of a peanut butter cookie.
  5. Refrigerate the cookies while you prepare the chocolate. I used a double boiler, but you can carefully melt it in the microwave if you prefer.
  6. Dip each cookie in chocolate, then place it on the parchment again. Let the cookies sit until the chocolate has set. I did this in the fridge because it was a hot day when I made them, and also I was running late for my picnic!
  7. Enjoy!

pb & chocolate match made in heaven - trustinkim.com
“Match Made in Heaven”


No-Bake Chocolate Date Nut Brownies


date nut brownie - trustinkim

This nutty brownie is a no-bake, vegan, gluten-free, lactose-free, raw recipe that also happens to be super tasty. It makes a great energy bar that you can pack for a big bike ride or hike. It contains nuts to give you some protein, and there’s natural sugar in the dates to make it taste good. 

You don’t need an oven, but you will need a food processor for this recipe. It keeps well in the fridge for a few weeks, or the freezer for a few months.

Just know that it is not your typical brownie that is cakey or gooey. You can find some of those recipes here here, and here.

I halved the recipe when I made it, but here is the full recipe version that comes from theminimalistbaker.com.

What you need:

  • 1 cup raw unsalted almonds (roughly chopped)
  • 1 cup raw walnuts
  • 1/2 cup raw walnuts, roughly chopped
  • 2 & 2 1/2 cups Medjool dates (pitted)
  • 3/4 cup cocoa powder or raw cacao 
  • 1-2 tsp espresso powder or finely ground coffee
  • pinch sea salt
  1. Line a cake pan with parchment paper (or loaf pan for 1/2 a recipe)
  2. Place 1 cup of the walnuts along with the almonds in the food processor and process until it is finely ground.
  3. Put the cocoa, espresso powder and sea salt in the processor, then pulse to combine. Place in a bowl and set aside.
  4. Process the dates until soft, then remove to a bowl.
  5. Put the nut and cocoa mixture back in the processor, then slowly add the dates through the spout in the top of the processor. Process until it becomes doughy; I had to add a little bit of water. The mixture should come together when you squeeze it.
  6. Place the mixture into the lined cake pan, then add the chopped walnuts. Combine the walnuts with the brownie mixture, then press it down until it is flat.
  7. Cover and refrigerate for about half an hour before cutting.
  8. Enjoy!

The Best Date Squares

date squares - trustinkim

My mom says these are the best date squares she’s ever had, even better than hers – so that’s all the recommendation I need to give for these. The recipe is from Ricardo’s website, and it is also available en français.

Another name for these is matrimonial cake, or date crumbles. Apparently this is a true Canadian treat!

Using Medjool dates might be one of the factors in the greatness of this recipe, but I also love the buttery goodness of the crumble and crust.

These will keep well if wrapped and stored in the fridge for over a week, or in the freezer for several months. 

What you need for the date filling:

  • 2 & 1/2 cups (625 ml) Medjool dates, lightly packed, pitted and chopped 
  • 1 cup (250ml) water
  • 2 tablespoons (30 ml) brown sugar
  • 2 tablespoons (30 ml) lemon juice
  • 1/2 teaspoon (2.5 ml) baking soda

What you need for the crumble and crust:

  • 3/4 cup (180 ml) salted butter, room temperature
  • 1 cup (250 ml) unbleached all-purpose flour
  • 1 & 3/4 cups (430 ml) quick-cooking rolled oats
  • 3/4 cup (180 ml) brown sugar
  • 1/4 teaspoon (1 ml) baking powder

What you do:

  1. Bring the chopped dates, water, lemon juice and brown sugar to a boil in a saucepan. Add the baking soda and allow to simmer while stirring for about 5 minutes. The dates should have fallen apart. Mine didn’t really fall apart enough, so I gave them a whizz with my immersion blender. Allow this mixture to cool.
  2. Prepare a square baking pan (20 cm/8 inch) by lining it with a strip of parchment paper; allow the edges to hang over two sides. Butter the exposed sides of the pan. (When I make this again I will also butter the parchment paper to make it easier to remove.)
  3. Preheat the oven to 180°C (350°F), positioning the rack in the middle.
  4. In a large bowl cream the butter using a wooden spoon, then add the oats, flour, brown sugar and baking powder. Stir to combine. You might need to get in there with your hands to make this a little bit easier.
  5. Spread half of the oats mixture into the pan, then add the date mixture. Sprinkle on the rest of the crumble and press it down a little.
  6. Bake for about 55 minutes, or until golden brown. Let it cool on a wire rack – this will take a number of hours.
  7. When cooled, gently pull up on the parchment paper strips to remove the date squares from the pan.
  8. Enjoy! 


Aniseed Pound Cake

anise pound cake - trustinkim.com

This aniseed pound cake is awesome with a coffee or cuppa tea. I happen to love the flavour of anise, so I was eager to make this recipe from Bijoux.com. The recipe calls for confectioners sugar (I call it icing sugar) to be sprinkled on top, but although that looks pretty, I’m not a fan of the metallic taste of the sugar.

The cake was really good even four or five days after baking! I put some of it in the freezer, and it was awesome to be able to pull it out when I had company coming for afternoon tea.

Of course, being Canadian I should have changed the name to ‘slightly less than half a kilogram’ cake, but that sounds a bit pedantic. And in this recipe no ingredient is a pound anyways, unlike the traditional pound cake that has a pound each of butter, sugar, egg and flour. So maybe I should call it pound-ish cake . . .

The only planning ahead you have to do is taking the butter and eggs out of the fridge early so that they can come to room temperature.

This recipe makes one 8-inch/20 cm loaf, or four small loaves.

What you need:

  • 1 cup (1/2 pound) unsalted butter, at room temperature
  • 1 & 2/3 cups granulated sugar
  • 5 large eggs, at room temperature
  • 1 & 3/4 cups unbleached all-purpose flour
  • 1/4 teaspoon salt
  • 3 tablespoons anise seed

What you do:

  1. Preheat the oven to 325°F/165°C. Butter the bottom of a loaf pan, then line the bottom of the pan with parchment paper. Butter and flour the parchment paper.
  2. Cream the butter and sugar using an electric mixer, beating on high for about 10 minutes until it becomes light and fluffy.
  3. Beat the eggs in one at a time on medium-low speed.
  4. Stir the flour, salt and anise seeds in by hand just until it is combined.
  5. Pour the batter into the prepared pan, smoothing the tops a little. Tapping the pans down on the counter will help to settle the batter. Bake for about 45 minutes, or until an inserted toothpick comes out clean.
  6. Place the loaf pan on a rack and let it cool before removing it from the pan. 
  7. To store, wrap the loaf tightly in plastic wrap. You may freeze it if you wish.

Cranberry Coffee Cake

cranberry coffee cake - trustinkim

This coffee cake is a classic that everyone seems to appreciate eating, and one of the recipes I make more than any other. It makes a large cake or two smaller ones, so it’s great to make when baking for a crowd. I like to bring it to the staffroom for goodie day, or to a picnic. 

The sweetness of the nutty topping is a nice balance for the tartness of the cranberries, and the cake is moist and delicious. It is still great a few days after baking, but of course is the very best the day it’s made . . . especially when it’s still a little warm. 

Store in an airtight counter for a few days. Serve at room temperature.

What you need for the cake:

  • 1/2 cup butter, room temperature
  • 1 & 1/2 cups brown sugar
  • 1 egg
  • 2 cups all-purpose flour
  • 1 teaspoon baking soda
  • 1/2 teaspoon salt
  • 1 cup plain yogurt (not non-fat)
  • 1 & 1/2 cups cranberries, frozen or fresh

What you need for the topping:

  • 1/2 cup chopped walnuts (pecans are good for this too)
  • 1/2 cup white sugar
  • 2 tablespoons butter
  • 1 teaspoon cinnamon
  • 1/2 teaspoon cardamom

What you do:

  1. Preheat the oven to 350F, then spray or butter and flour a 9 x 13 inch pan (or two round or square 9-inch pans – springform would be great).
  2. To make the topping, melt the butter, then stir in the rest of the ingredients. Set this aside.
  3. Cream the butter along with the brown sugar, then blend in the egg.
  4. Sift together the flour, baking soda and salt.
  5. Mix one-third of the flour mixture into the batter with a wooden spoon. Add half the yogurt and mix it until just it is incorporated. Mix in one-third more of the flour, then the rest of the yogurt, finishing with the rest of the flour.  Mix until just combined.
  6. Gently fold in the cranberries, then pour into the baking pan. It is quite a thick batter, so you’ll have to smooth it a bit. Don’t worry too much about getting into all the corners, as it will fill in as it bakes.
  7. Sprinkle on the nut-sugar topping.
  8. Bake for about 40 minutes, or until a toothpick inserted in the cake comes out clean.