This blog is my way of sharing recipes I love. I don't make a penny from the blog, it's just for fun! I do pay to keep it Ad-Free so it's a better experience for you. Please write a comment if you use a recipe! I'd love to hear your thoughts.
This post is all about some of my favourite holiday baking treats over the 10+ years of TrustInKim, so bakers have it all in one place. There are more recipes to come this year too!
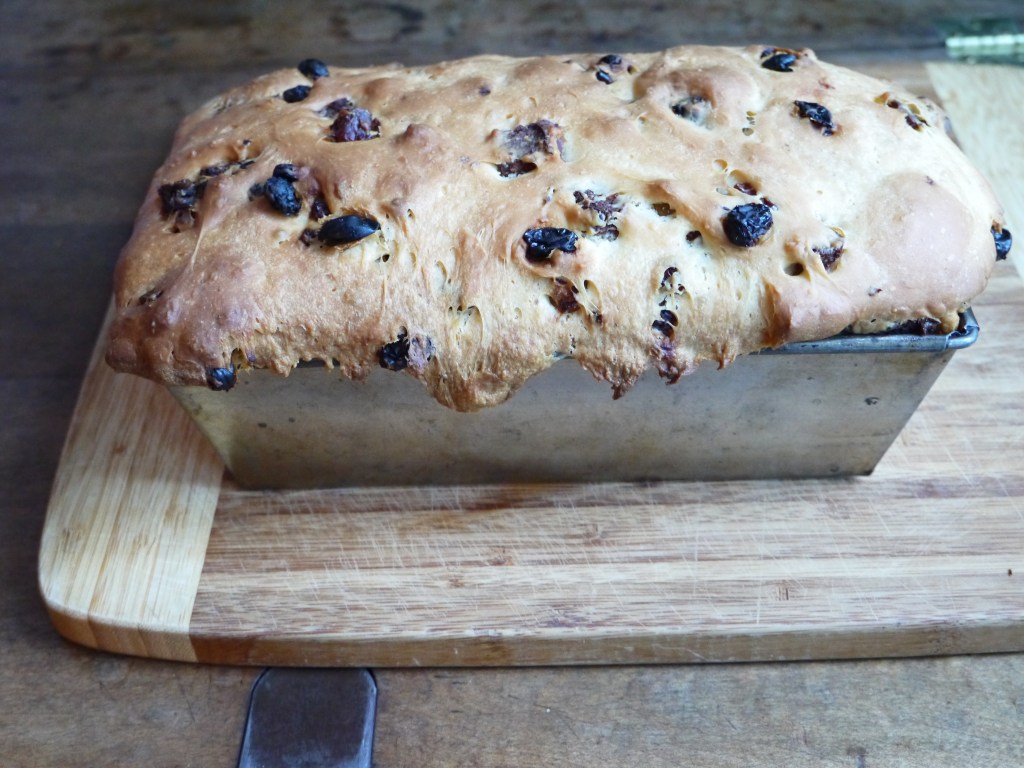
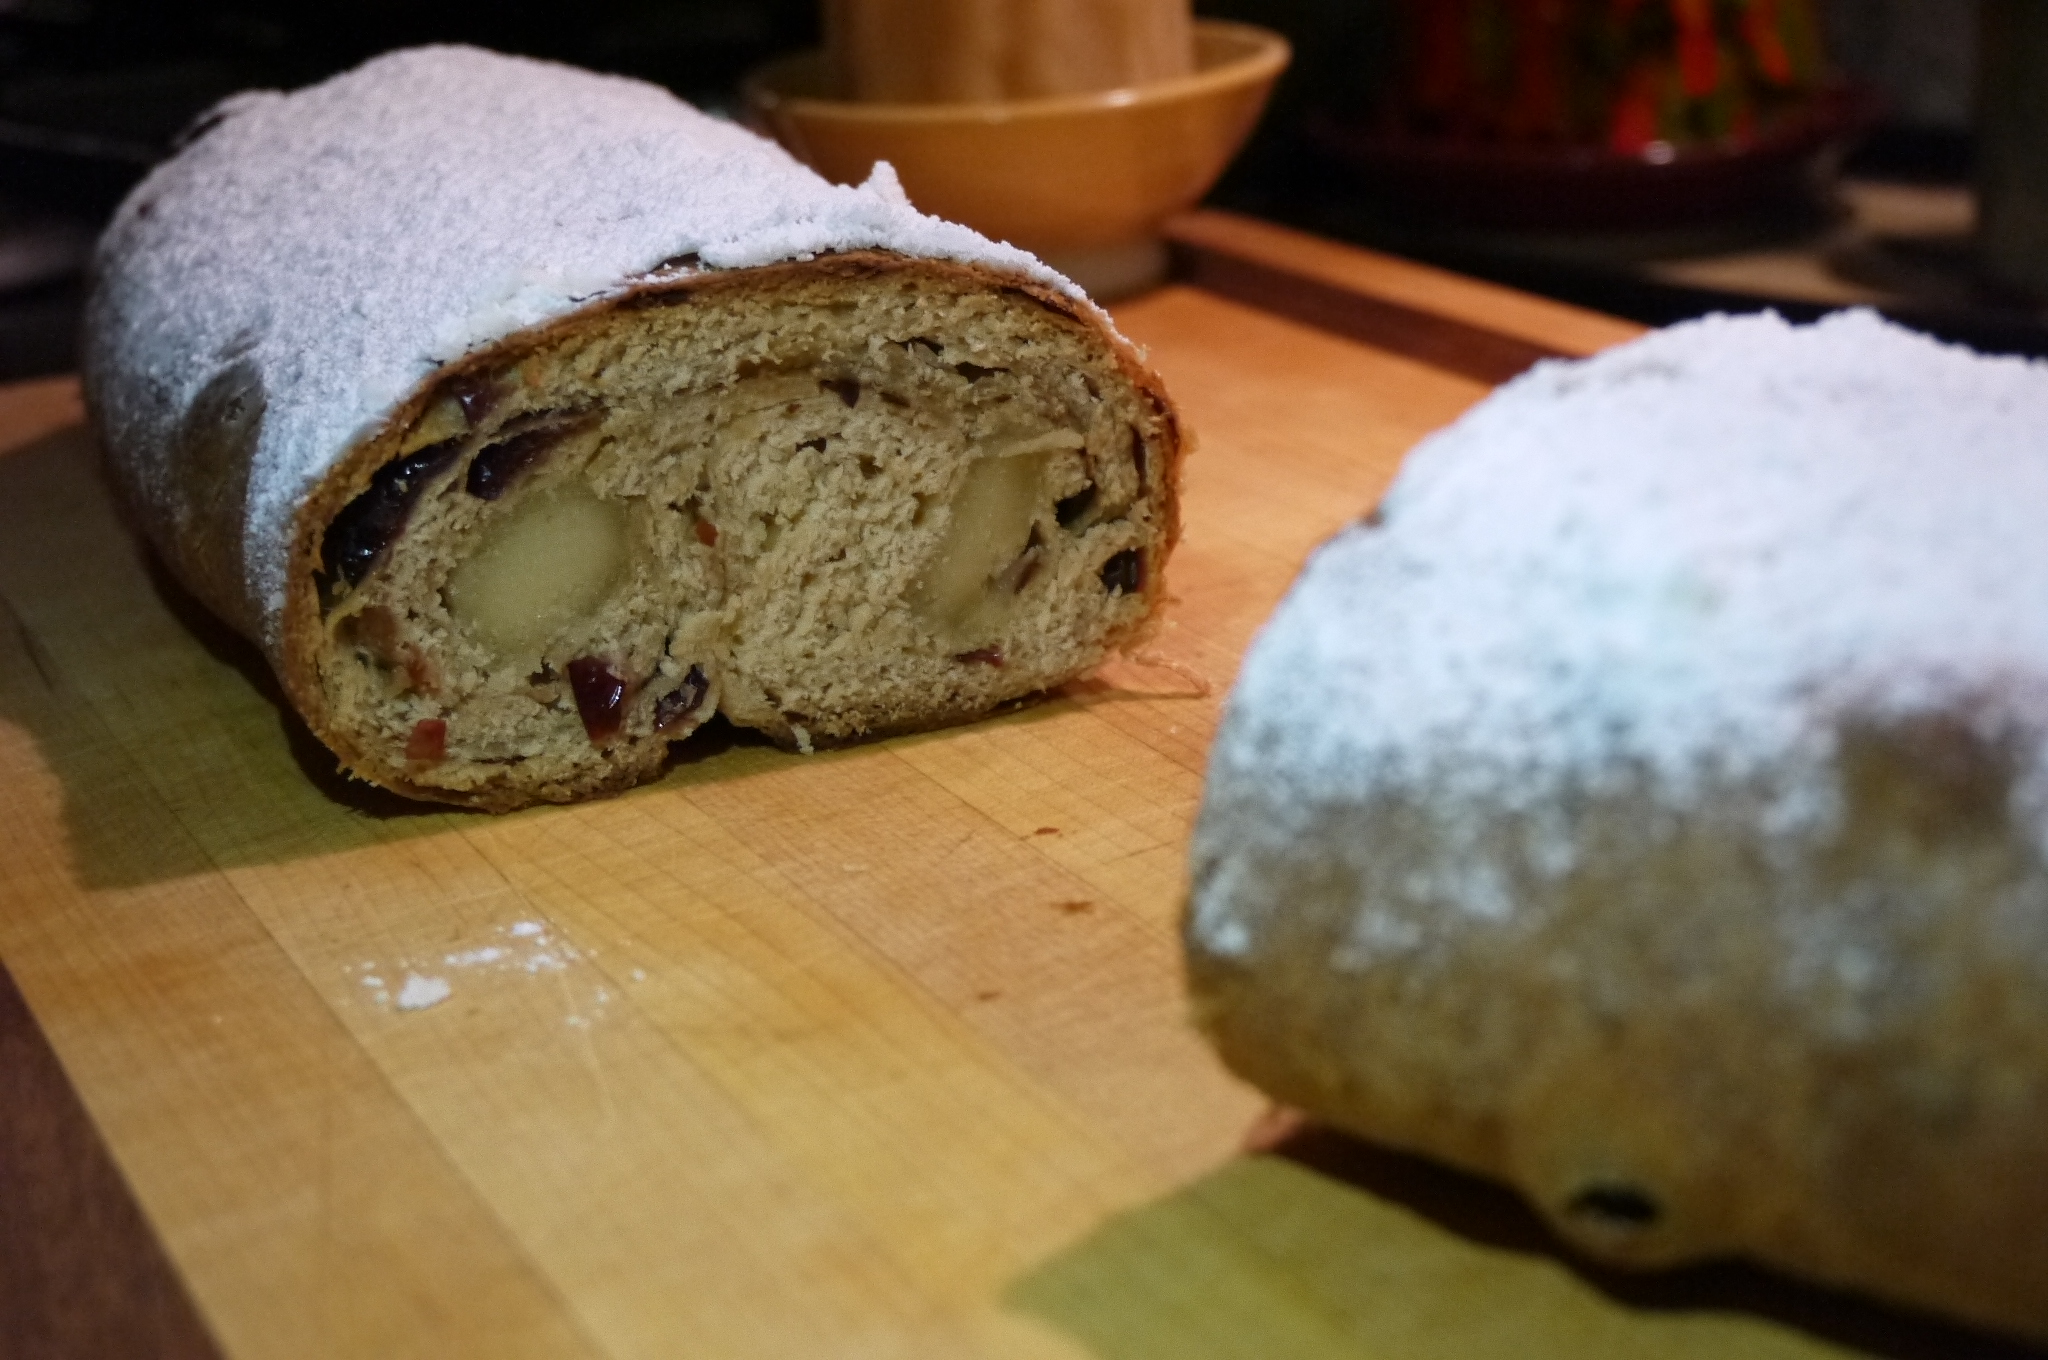
Here is an updated version of a recipe from a few years ago. There were issues with the previous version because the use of alcohol in the dough inhibited the yeast growth. This version made the best stollen I’ve ever made!
This stollen is filled with brandy-soaked sour cherries and raisins, toasted almonds, and plenty of marzipan. It is coated with butter and powdered sugar, for flavour, but also to help from drying out.
If you don’t love marzipan feel free to leave it out. I love it, but I understand that not everyone does.
This recipe makes two large loaves (or four smaller ones with a shorter baking time).
What you need:
1/2 cup raisins
1/2 cup dried sour cherries
1/2 cup brandy or rum for soaking the fruit
3/4 cup slivered almonds, toasted
2 packages active dry yeast (4 & 1/2 teaspoons, or 14 grams) + 1 teaspoon sugar
1/2 cup sugar
1/2 cup milk
1 teaspoon salt
1/2 teaspoon vanilla
a few drops of pure almond extract
2 eggs, at room temperature
4 to 5 cups flour, divided
1/2 cup butter, room temperature
200 grams (7 ounces) marzipan (or a little more if you love marzipan)
melted butter (1/4 to 1/3 cup)
1/4 cup powdered sugar
What you do (Updated Version Dec 2021:
Combine the raisins and cherries in a bowl and cover with the brandy or rum. Let it sit for 12 – 48 hours, stirring from time to time (Shortcut: just soak for an hour). Drain the brandy or rum. Pat the fruit dry with paper towels and toss the fruit in 2 tablespoons of flour.
Toast the almonds until very lightly browned.
Heat the milk, salt and 1/2 cup sugar in a small pot over medium heat, until just warm (110-115 degrees). Let it cool.
In a large bowl add 1 teaspoon of sugar into 1/4 cup warm water (110-115 degrees celcius). Any hotter will kill the yeast, and colder and it won’t activate. Sprinkle the yeast on top and stir it in. Let it sit until the yeast starts to bubble, about 5 minutes.
Add the milk mixture (make sure it’s just warm, not hot, or it will kill the yeast), vanilla and almond extracts and eggs to the yeast mixture. Combine by beating with a fork. Add 1/4 cup water.
Add two cups of flour to the bowl, and use a wooden spoon to combine. Cut the 1/2 cup butter into small pieces and work into the dough using a fork.
When the butter has been evenly distributed, add one cup of flour and mix it in. Add about half a cup more flour, adding more until the dough forms into a workable ball (not too much flour to make it too stiff).
Turn the dough out onto a floured countertop and knead for 10 minutes. The dough should become smooth and elastic.
Add the fruit and almonds tot eh dough. I start with the almonds. To do this I flattened the dough out a bit, sprinkle on about 1/4 cup of almonds, and kneaded them in. Continue this process until all the nuts are combined, then do the same with the fruit. If any pieces of fruit are sticking out of the top of the dough, pick them off and knead them in a bit more.
Melt a little bit of butter and use it coat a large bowl. Place the ball-shaped dough into the buttered bowl, then turn the dough butter-side up so it is coated in butter. Loosely cover the bowl with a tea towel and let the dough rise until it has doubled in volume, about 1-3 hours depending on how warm your room is.
Line a baking pan with parchment paper. Melt about 2 tablespoons of butter.
Punch down the dough and divide it into two parts (or 3 or 4 for smaller loaves). Form one half into a flat oval using your hands.
Divide the marzipan into equal parts to go in each loaf. Roll it into a rope just short of the length of the dough. Place one of the marzipan ropes on top of the dough, then pull the sides of the dough over the marzipan, pressing down in the middle. Roll the ends of the dough over a little. Gather the loaf and place it rolled-side down on the parchment paper. Repeat this process with the other half of the dough.
Brush the loaves with butter, and cover with a tea towel. Let the loaves rise until about doubled in size.
Heat the oven to 375F. Bake for 30-40 minutes; if you tap on the loaf it should sound hollow, and it will be dark golden brown.
Remove the loaves from the oven and brush with more melted butter! Dust them with sifted powdered sugar and let them cool completely before packing.
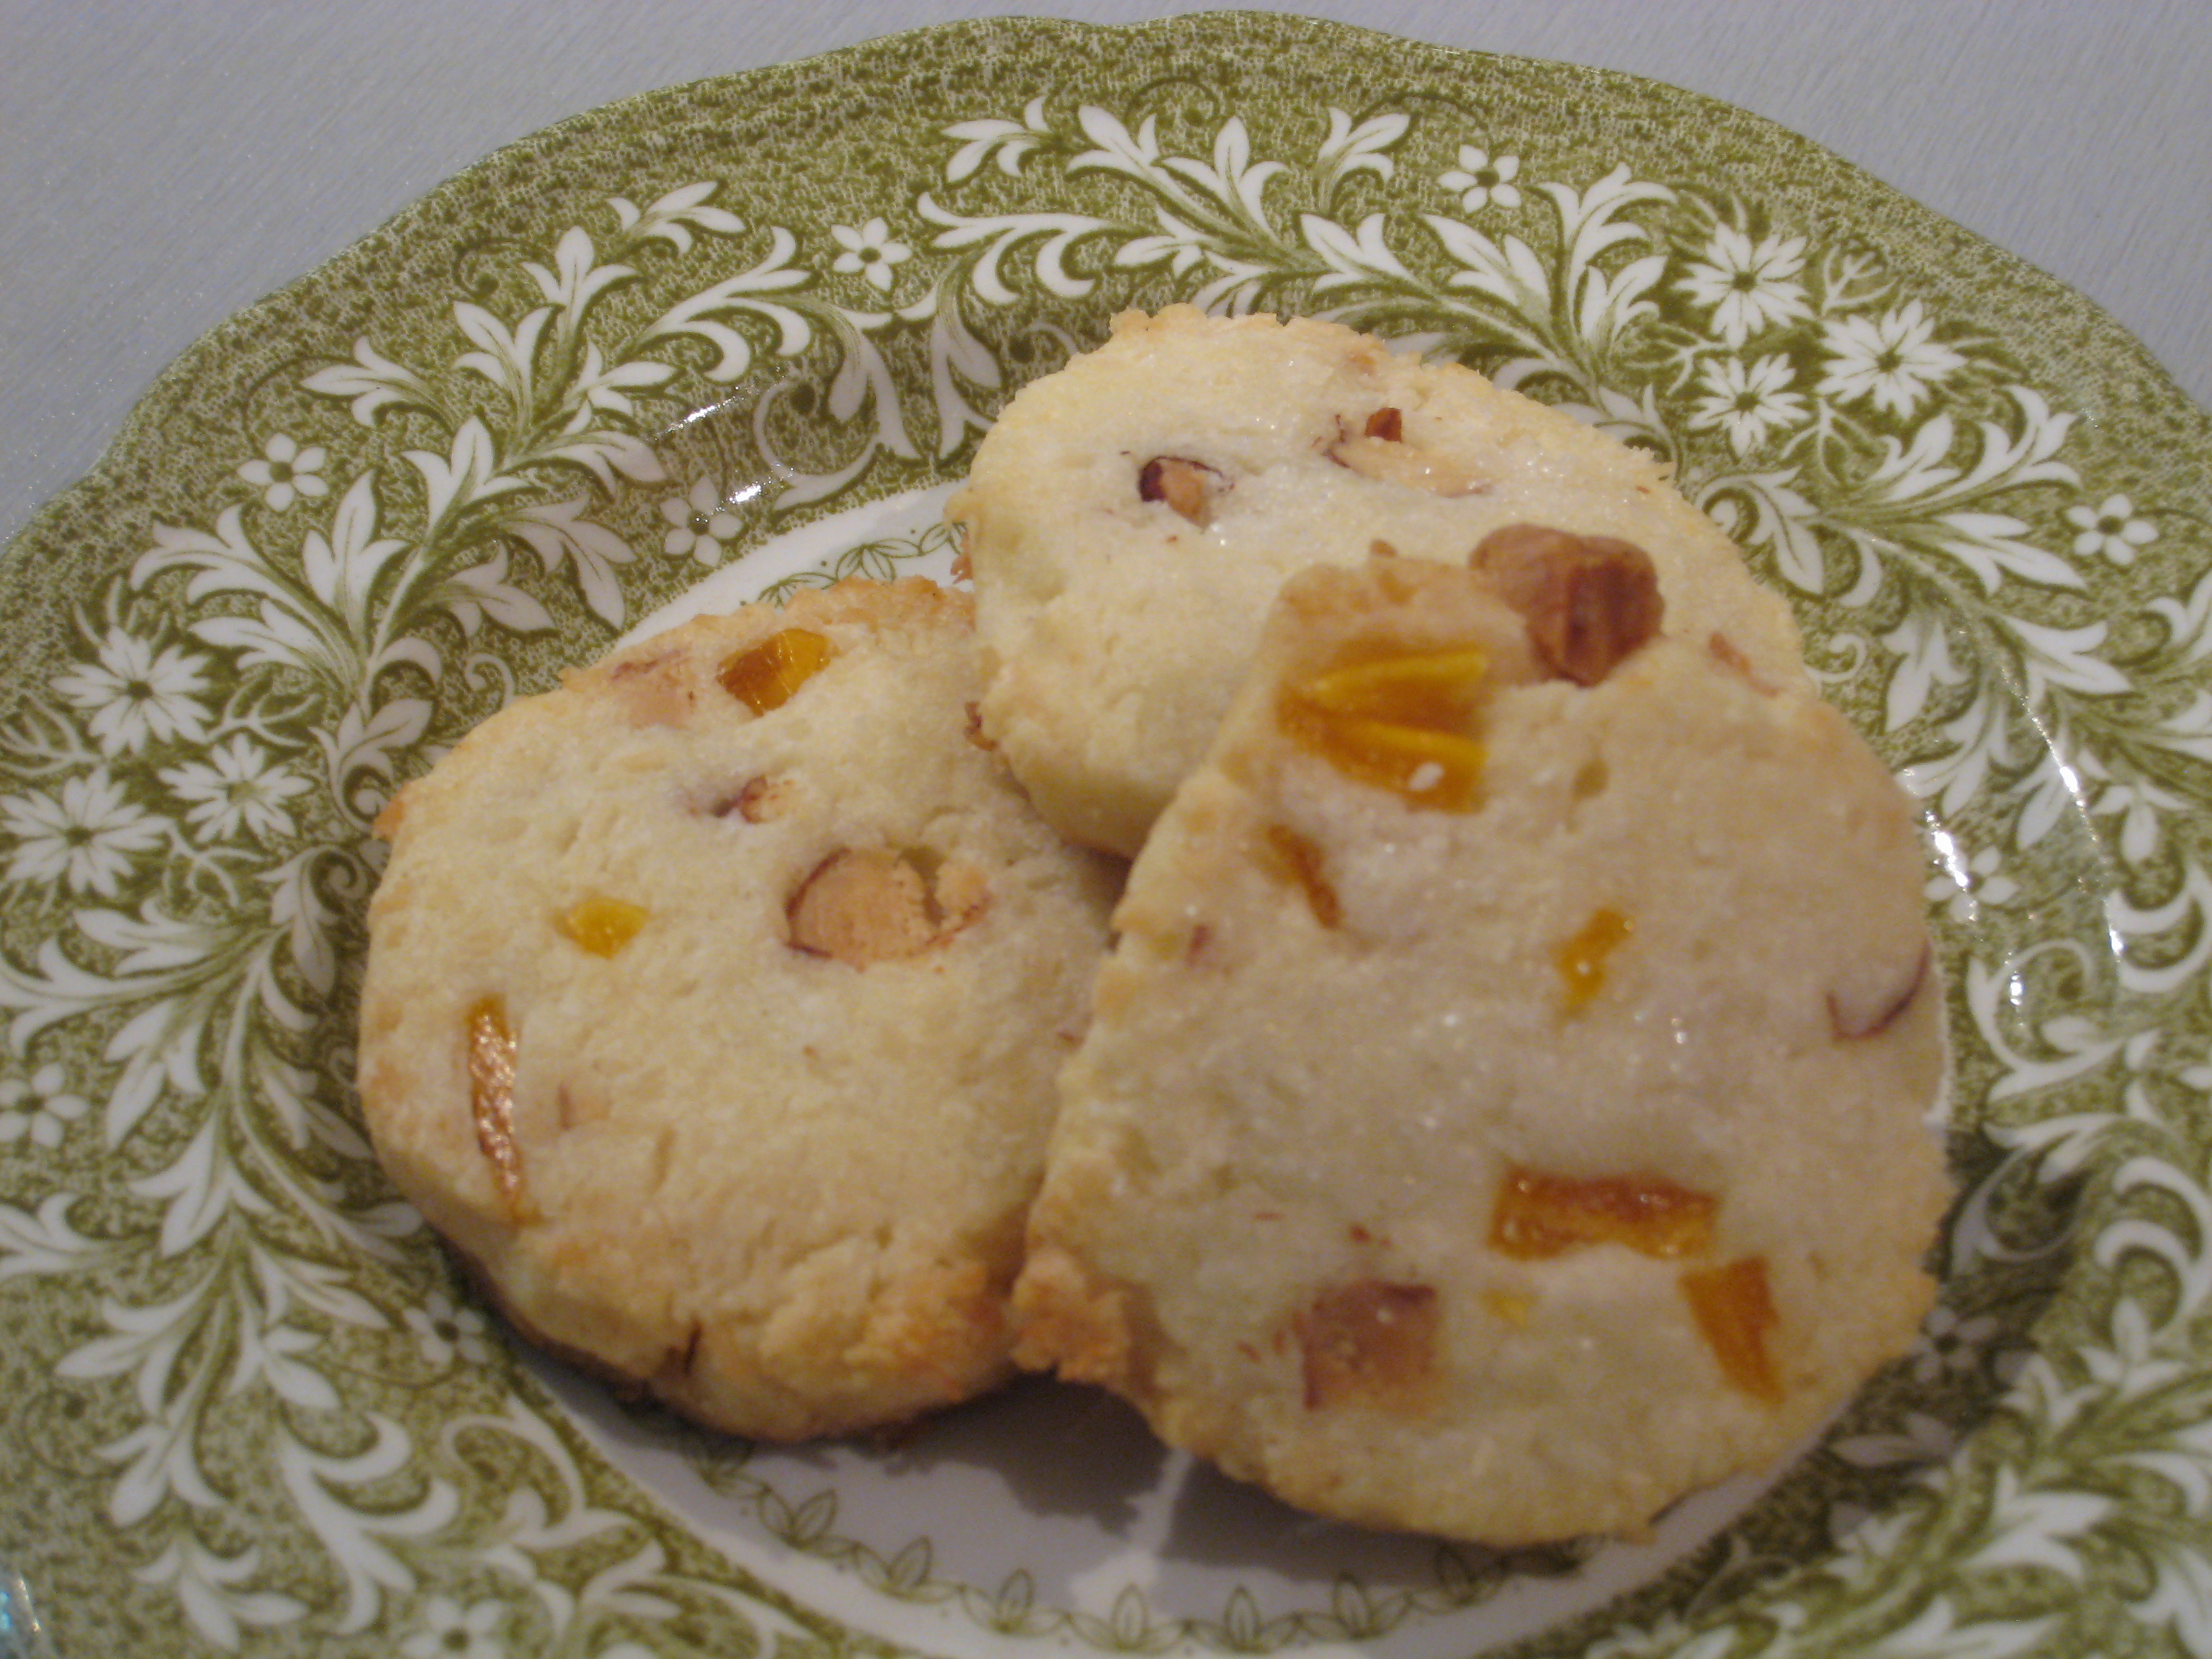
Thank you Tante Betty for sharing your amazing shortbread recipe with me!
I have made a few shortbread recipes over the years, but none were ever good enough to post on my blog. I finally asked my Tante Betty if she would share her recipe with me, and she was kind enough to send it.
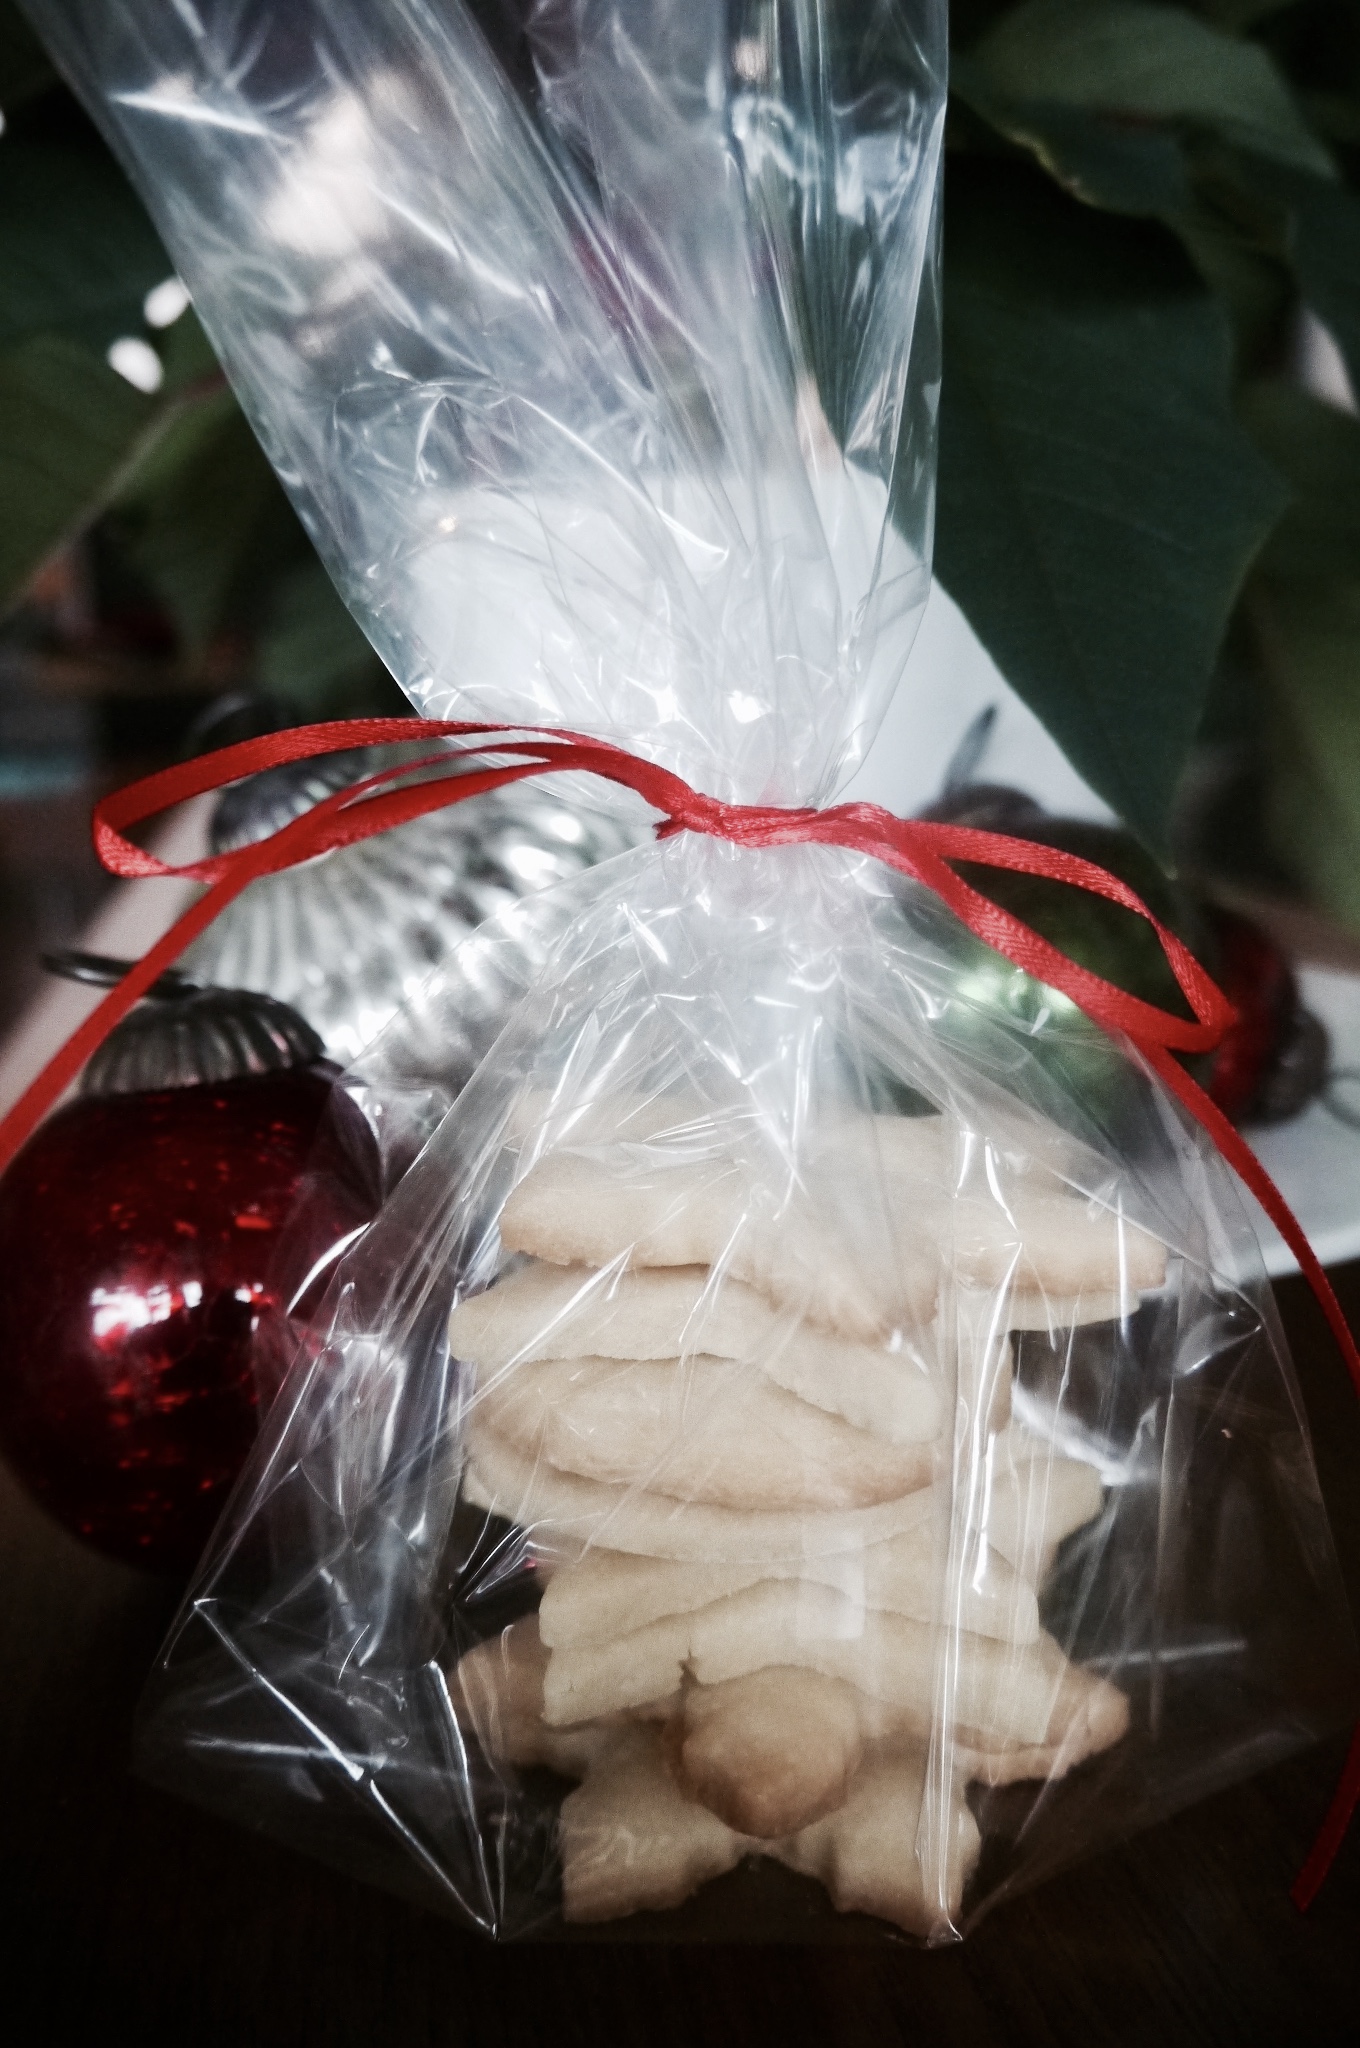
Apparently there are two camps in the shortbread game. Some people feel strongly that just three ingredients make the best shortbread: butter, sugar and flour. The others prefer to also include cornstarch. I’m sure they’re all great, but to me this recipe with three ingredients (well, two types of sugar) makes the best traditional shortbread.
The only change I made to Tante Betty’s recipe was to cut the recipe in half. I want to make a few different kinds of cookies in smaller batches, so I decided to halve a lot of the recipes. Feel free to double the recipe to make the full four dozen.
One caveat with this recipe: when cutting the cookies into your desired shapes, stick to a cookie cutter that is not too intricate. I tried making some awesome reindeer cookies, but they broke apart when I tried to put them on the cookie sheet.
So, here’s the recipe:
What you need:
1 cup butter (room temperature)
1/2 cup minus 1 tablespoon icing sugar, sifted
1 tablespoon light brown sugar
2 cups all-purpose flour, sifted
What you do:
Prepare baking pans by lining with parchment paper.
Cream the butter and sugars with an electric beater. This will take 4-5 minutes to get it nice and fluffy. The sugar should become a lighter colour when you are done.
Add the flour to the butter mixture and beat until combined.
Wrap the dough in plastic wrap and refrigerate for a few hours. You can do this the before if you want. Just take it out of the fridge about half an hour before you want to roll it out.
Preheat the oven to 300F.
Roll out the dough on a floured surface to less than one centimetre thick. Use floured cookie cutters to cut into your desired shapes. Place the cookies onto the cookie sheets.
Bake two pans at a time, rotating the pans halfway through the baking, for about 20 minutes (or less – check at around 15 minutes – they should not become brown). The back of the oven tends to be hotter, so if you flip the pans around they will bake more evenly.
Place the cookies on a wire rack to cool. They should be stored in an airtight container, and can be frozen for a few weeks.
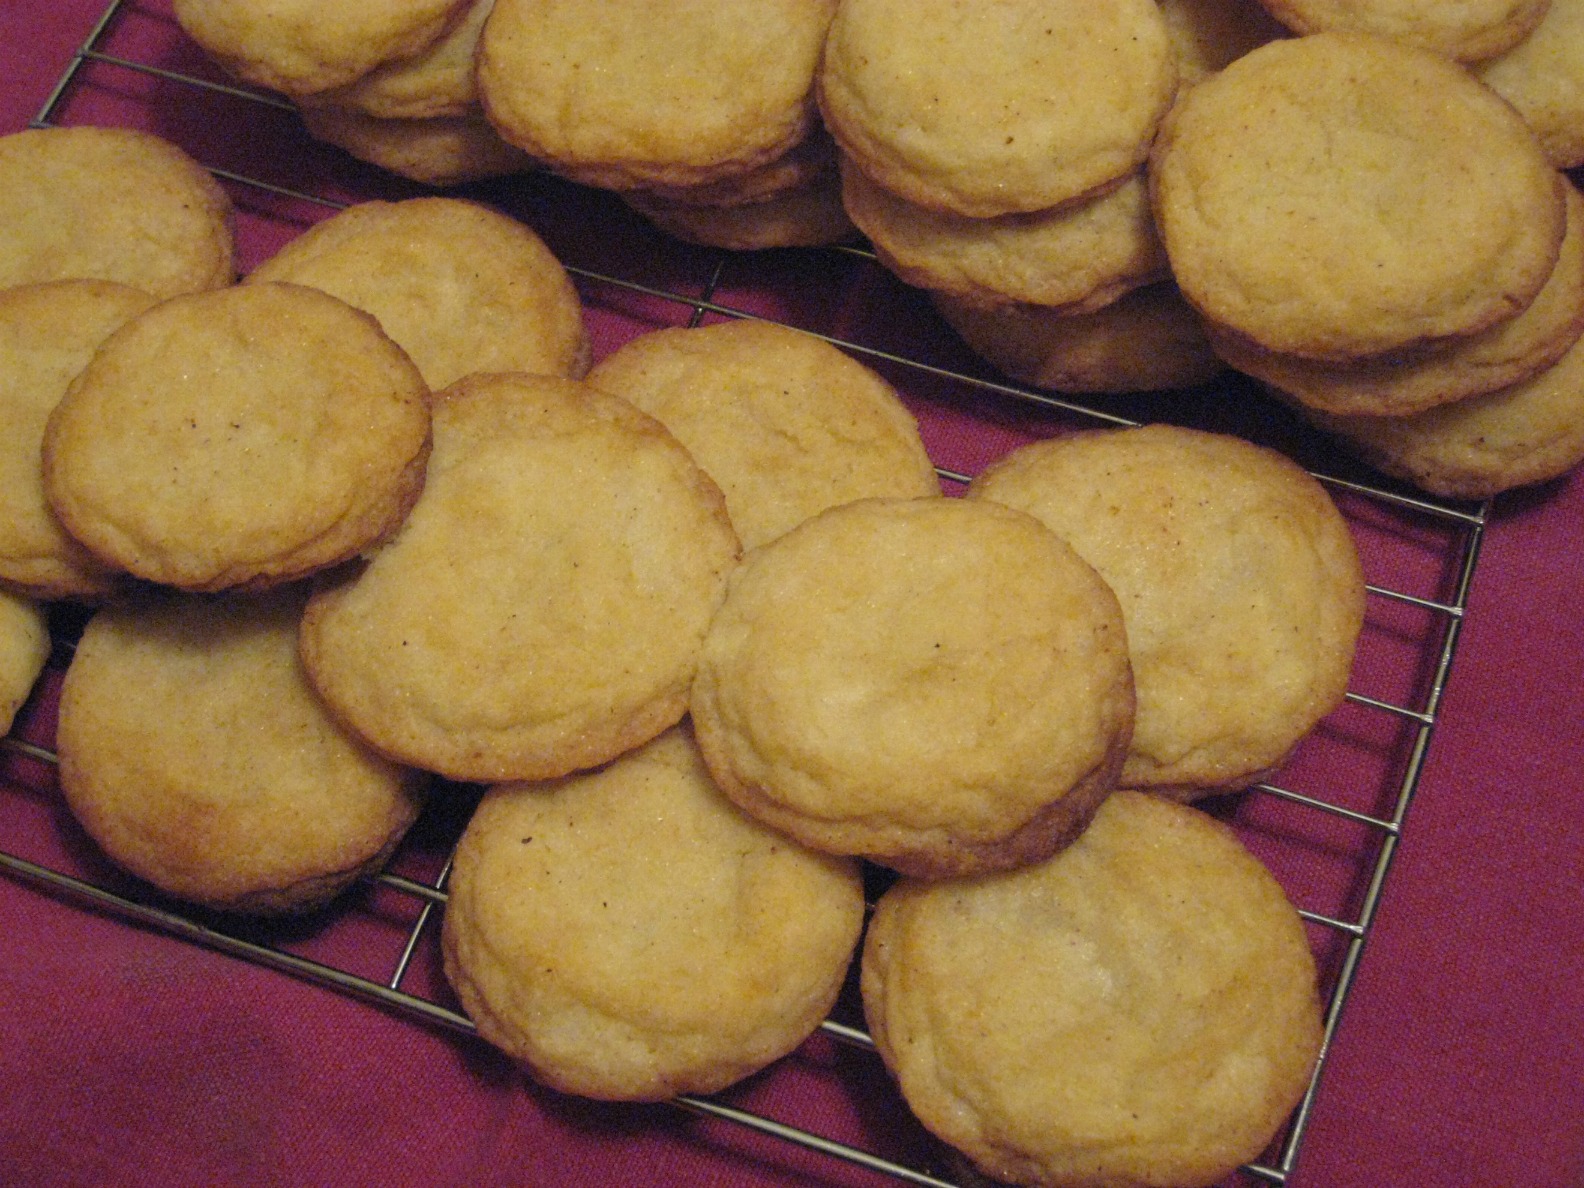
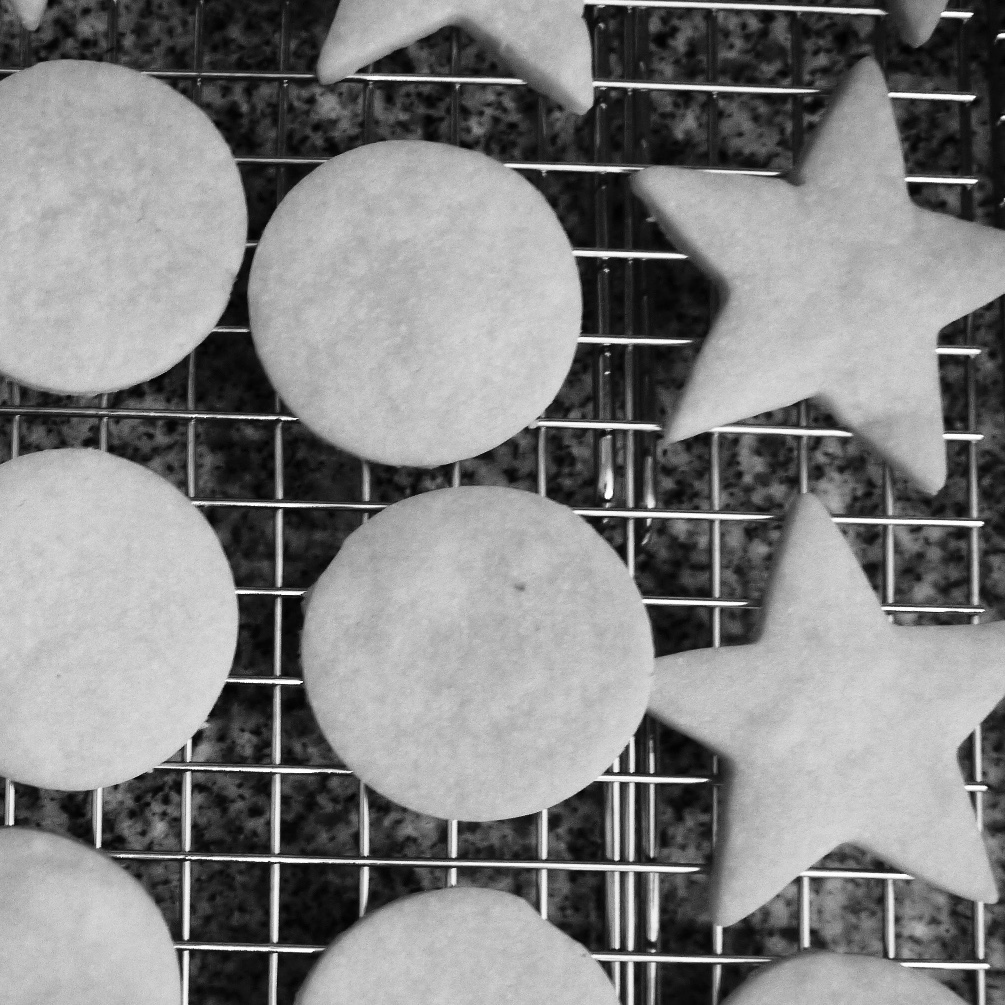
At first I wasn’t going to post this recipe because it gave me such trouble, so all I have is this iphone photo. After I tasted a cookie, however, I decided I needed to share. These are tasty and softer than many others cookies of this type.
The recipe comes from Fine Cooking Magazine from Dec 2016, and it makes a huge batch, about 5 dozen cookies depending on how big you make them.
So the problems . . . at first I didn’t read that I had to make the dough ahead of time and refrigerate, so I had to bake them a day later than I wanted to. Then I made the dough, let it rest in the fridge, and started rolling them out . . . and they were too soft to get off the counter! Argh! So back in the fridge with the dough, and I rolled them out right onto the parchment paper, cut the shapes, and got rid of the excess dough. This method worked better. Eventually I found that I could roll them out on the counter if I used more flour than I thought I would need.
Oh yeah, then the first batch I put in the oven got too brown in some places – so watch for that, and don’t roll them as thinly if that happens to you.
And the recipe says to refrigerate the cookies for 30 minutes before baking, but I only did this once before realizing it would take the rest of my life to bake all these cookies if I had to wait half an hour for each little pan (I have a small oven, and a small fridge, so it really could have taken forever.)
Oh, and I wasn’t very patient with the decorating . . .
But the successes outweigh the problems, believe it or not! I now have lots of delicious, pretty cookies that I’m happy to share.
What you need:
3 cups unbleached all-purpose flour, and more for rolling out
Sift the flour, baking soda, and salt into a bowl.
In a large bowl, beat the butter and sugar for about 2 minutes; it should become light and fluffy.
Add the eggs and vanilla and beat until combined.
Alternately add one third of the dry ingredients then one third of the sour cream until it is all mixed in. The dough will be quite sticky; make sure you don’t over mix it.
Divide the dough into three pieces, forming a disc, and wrap each in plastic wrap. Refrigerate 8-24 hours (I actually kept one of mine for a few days). You could freeze the dough for up to a month, and let it thaw in the fridge overnight.
Preheat the oven to 400F and line baking sheets with parchment paper.
Work quickly with the dough so it stays cold – if it gets too soft put it in the fridge again. Heavily flour the rolling surface with flour. Roll half of one ball of dough (putting the other half in the fridge) to a thickness of about half a centimetre. Dip the cookie cutter in flour and cut out your shapes, then transfer the cookies to the baking sheet, giving them some space to spread as they bake.
If you can, refrigerate the cookies for 30 minutes. Otherwise, just bake them for 6-8 minutes, two pans at a time, flipping the pans around half way through.
Place the baked cookies on cooling racks, and allow to cool completely before icing and decorating.
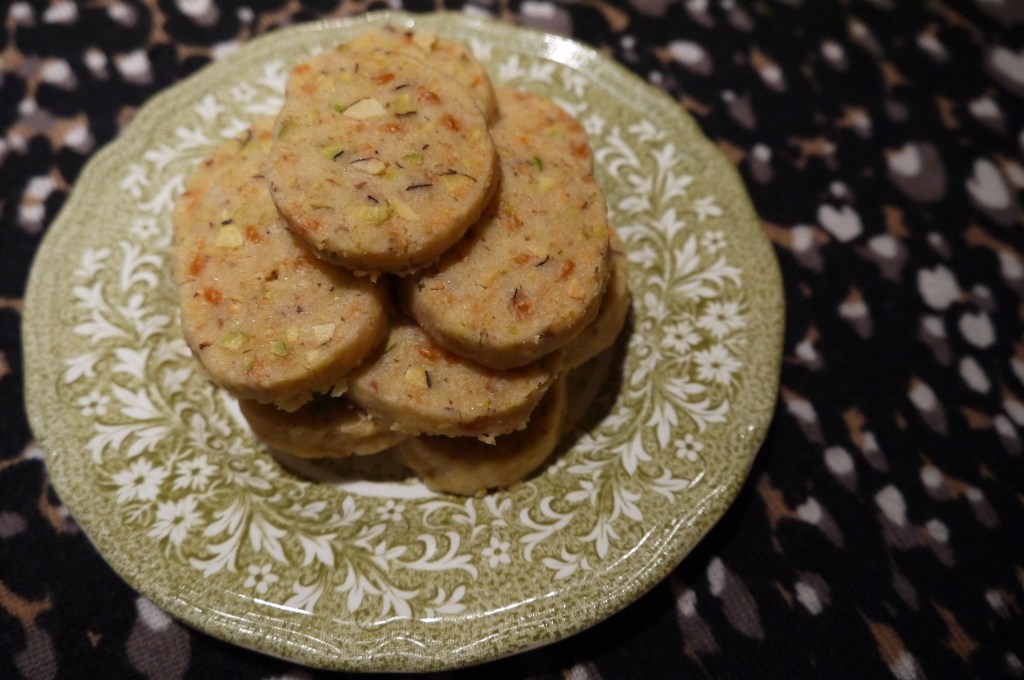
This year I thought I’d pull out all the stops for the holidays – make fudge, stollen, licorice caramels, and four kinds of cookies, one of which would be hand decorated with icing and sprinkles. But then I experienced fail after baking fail. Still edible, but a little embarrassing to give away – they are supposed to look pretty!
But these chocolate caramel cookies . . . they are awesome, and pretty much a success!
No, the photo doesn’t show them oozing caramel – because they just wouldn’t ooze when i broke them open and needed them to ooze. But they are decadent – a dark chocolate cookie, dark chocolate chips, soft caramel inside, a little fleur de sel on top.
This recipe was created by Sally who has created an amazing blog called Sally’s Baking Addiction. She has so many awesome recipes that I wish I had the time to try out. I hope you will have time to explore them. The only change I made to the recipe was to use fleur de sel rather than coarse sea salt, because I prefer the finer grain on baked goods.
You do need to plan ahead for this one – part of my problem with all these holiday recipes, for me, has been not planning ahead for doughs that need to be refrigerated – like this one. So you can make the dough a few hours ahead, or the night before and store in the fridge.
The beautiful plate in the photo is handmade by my talented friend, Gary Leung. I guess he’s gonna need some of these cookies . . .
What you need:
1 cup all-purpose flour
2/3 cup cocoa
1 teaspoon baking soda
1/2 cup unsalted butter, room temperature
1/2 cup sugar
1/2 cup brown sugar
1 large egg, room temperature
1 teaspoon vanilla extract
1/8 teaspoon salt
2 tablespoons milk
1 & 1/2 cups dark chocolate chips (I like Ghirardelli bittersweet, 60% cacao)
3 packages of Rolos
fleur de sel for sprinkling
What you do:
Sift the flour, cocoa, baking soda and salt into a bowl.
Cream the butter for half a minute, then add the sugars and cream until light and fluffy. Beat in the vanilla, scraping the batter down the sides of the bowl.
Slowly add the dry ingredients to the butter mixture.
Stir in the milk to make a sticky dough, then fold in the chocolate chips.
Chill for at least 2 hours. I let mine sit overnight in the fridge.
Take the Rolos out of their packaging. Preheat the oven the 350F and line baking sheets with parchment paper.
Scoop two pieces of dough, about a tablespoon each, and flatten them a little. Then form them around one Rolo, pushing the edges together so the caramels are sealed inside. Place on the baking sheet far enough apart so they won’t melt into each other when they spread-and they spread a fair bit.
Before popping in the oven, sprinkle each cookie with a little fleur de sel. Bake for 11-13 minutes. The cookies will seem very soft; allow them to cool on the cookie sheet for at least 5 minutes before removing to a wire rack to cool.
When completely cooled, store in an airtight container for a few days. I did not experiment with freezing these, but I don’t see why that wouldn’t work. I did keep a portion of the dough in the fridge to make a few days after I baked the first day, which I thought was a pretty good idea!
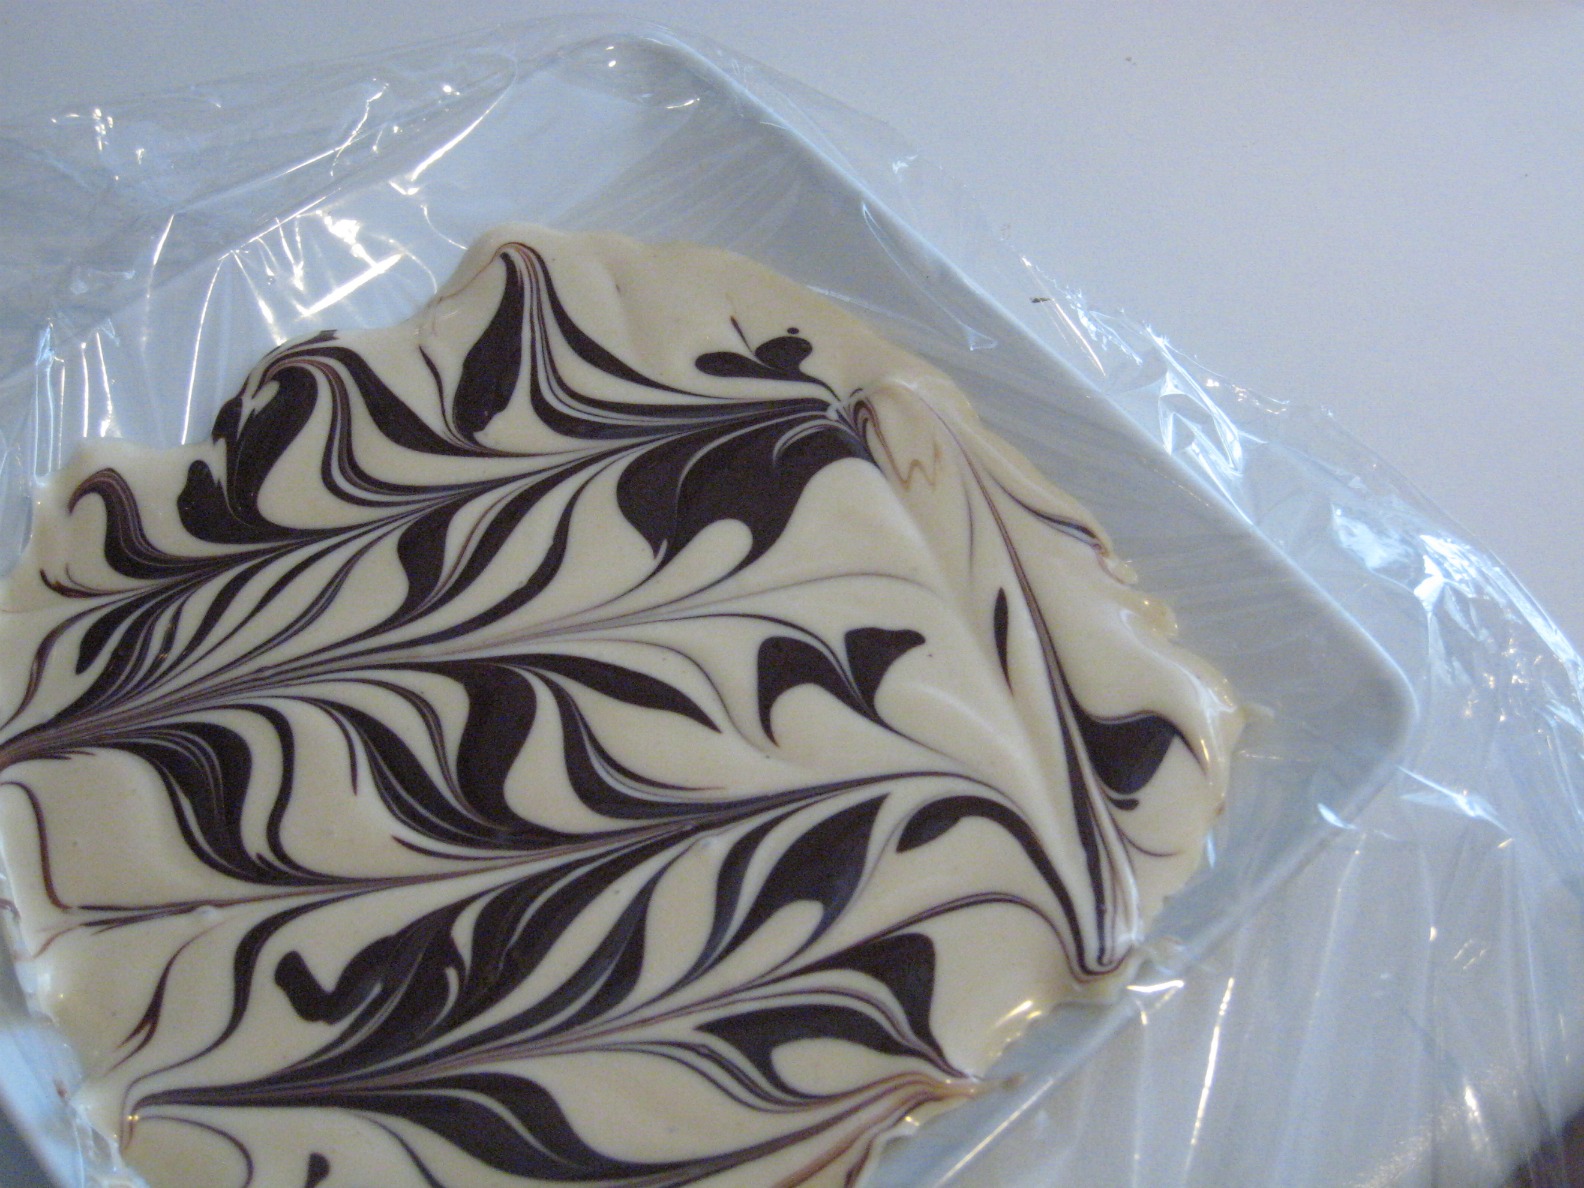
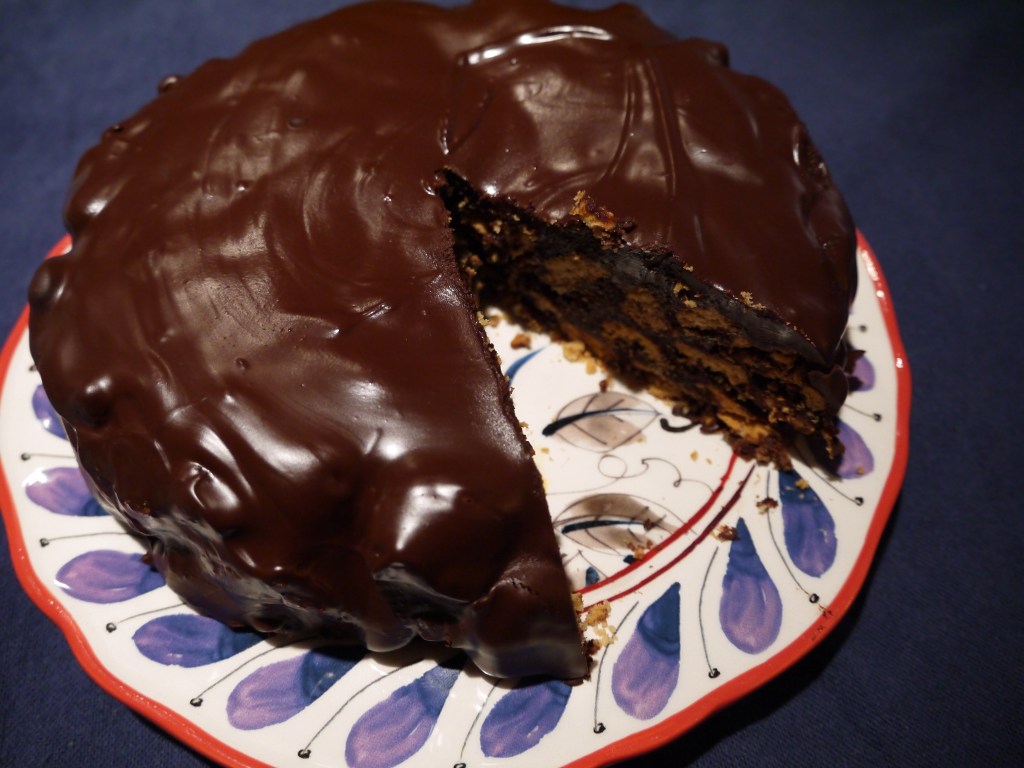
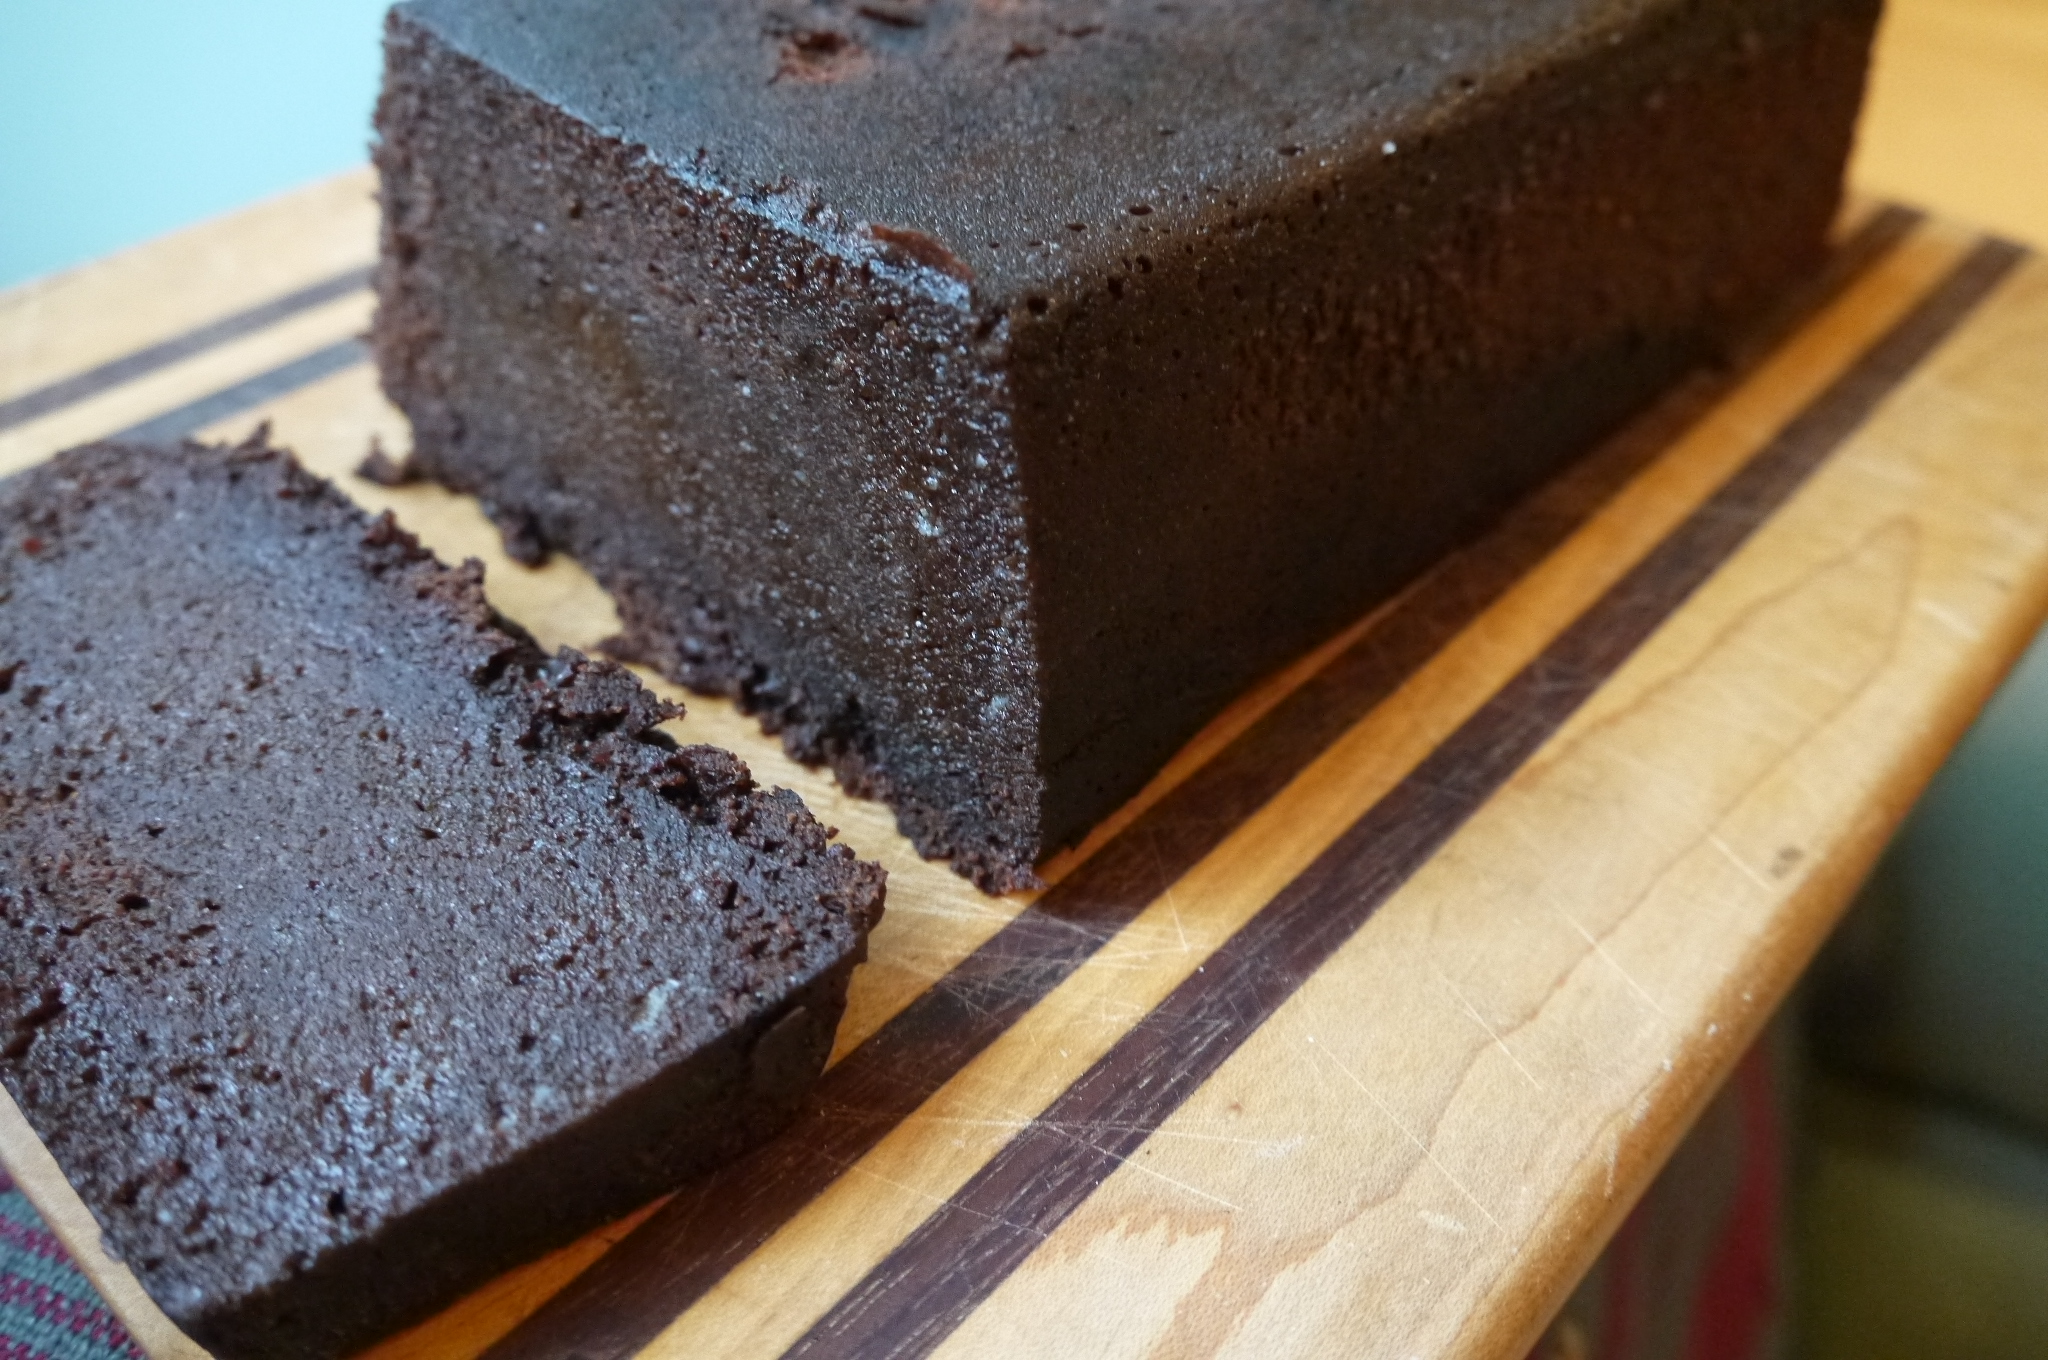
Brownie-like, this chocolate rum cake is dense and rich without being too sweet, and it is packed with rum! I served it with vanilla ice cream and hot fudge sauce, but it’s delicious on its own too.
The cake is easy to make, and you get this perfect rectangle shape by putting another loaf pan on top and putting something heavy in it.
My recipe has, believe it or not, less rum than the original recipe. It was the dessert for our family Christmas dinner, and I thought some people might not appreciate quite so much booze in their dessert (no, the kids didn’t eat any!) Most of the rum cooks off, but the last 1/4 cup (1/2 cup in the original) it still potent.
Feel free to use different proportions of chocolate. The original recipe didn’t specify which type of chocolate to use. I settled on some semi-sweet and some bittersweet, but depending on how sweet you like your desserts, you could use all of one, or half and half.
Enjoy!
What you need for the cake:
4 ounces semi-sweet chocolate (110 grams)
2 ounces bittersweet chocolate (55 grams)
125 mL butter (1/2 cup)
250 mL black rum (1 cup)
4 eggs
125 mL granulated sugar (1/2 cup)
125 mL brown sugar (1/2 cup)
250mL flour (1 cup)
1 teaspoon baking soda (5mL)
1/2teaspoon baking powder (2.5 mL)
125mL cocoa (1/2 cup)
1/2 teaspoonSalt (2.5 mL)
What you need for the rum sauce:
125mL butter (1/2 cup)
60mL black rum (1/4 cup)
60mL granulated sugar (1/4 cup)
60mL more black rum (1/4 cup)
What you do:
Butter and flour a large loaf pan (5&1/2 by 10 inches). Preheat the oven to 350F.
Place the chocolate, butter and 1 cup of rum in the top of a double boiler, or in a large bowl that you can microwave. Heat in the double boiler on low, or microwave for 30 seconds, whisk, then repeat until melted.
Whisk the sugars into the butter mixture, then whisk in the eggs one at a time.
Sift the flour, salt, baking soda, baking powder, and cocoa into another bowl.
Add half the dry ingredients to the wet, mixing completely. Now add the other half and mix again.
Pour the batter into the prepared pan and bake for about 45 minutes (original recipe says 1 hour), or until an inserted toothpick comes out cleanish (just not wet).
While the cake is baking, place the remaining butter, 1/4 cup rum, and sugar in a small pot. Boil for a few minutes. Remove from the heat and add the remaining 1/4 cup of rum.
When the cake comes out of the oven, keep it in the pan and poke it all over with a skewer or toothpick. Pour the rum sauce over top – it will all get absorbed into the cake. Place another loaf pan on top of the cake, and weigh it down with something heavy like a rum bottle.
When the cake has cooled completely, flip it onto a serving dish. Serve on its own, with a little whipping cream, or ice cream and hot fudge sauce!
2025 edit: This isn’t the best stollen ever! I have improved this recipe and you can find the new one here. There are issues in this recipe with the alcohol inhibiting the yeast. The new version deals with that issue, making a much lighter stollen!
I had some of my cousins over the other evening, and I wanted to make something seasonal, since it is the Christmas season, and most of us were brought up in Mennonite homes in which we ate stollen at Christmas. Everyone who tried it said it was the best stollen they had ever had.
The most ringing endorsement, though, came from my parents. It was my dad’s birthday, so I made one stollen for the cousins, and one for my dad. Both of my parents said it was the best they’d ever had – and they’ve had a lot more stollen-eating years than all of the cousins have.
My memory of stollen involves what I consider to be nasty tasting preserved fruits, the bright red and green cherries, or whatever those things were.
The soaking of the fruit in the booze needs to be begun at least the day before, if not another day or two, so plan ahead accordingly.
I looked at several recipes, thought about my own preferences, and then mainly followed this recipe. I made a few changes: I forgot to add the orange zest -oops, but still awsome. I added a little bit of almond extract and slivered almonds, used dried cherries instead of currants, soaked the fruit for longer, added rum, and used a little more marzipan. Plus a whole lotta love (you have to do that if you don’t have a kneading machine – hand kneading is a labour of love). I also added one last brushing of butter after baking – who doesn’t love just a little more butter! And that way there’s something for the sugar to stick to!
You can keep the stollen, wrapped tight in the fridge for a few weeks, or in the freezer for a few months. I think one of the reasons why people enjoyed this so much was that it was served the day it was made. So if you can plan to have company the day you bake it, all the better.
What you need:
1/2 cup raisins
1/2 cup dried cranberries
1/2 cup dried sour cherries
1/4 cup brandy
1/4 cup dark rum
4 to 5 cups flour, divided
2 packages active dry yeast (4 & 1/2 teaspoons, or 14 grams)
1/2 cup sugar
1/2 cup milk
1 teaspoon salt
1/2 teaspoon vanilla
a few drops of pure almond extract
2 eggs, at room temperature
1/2 cup butter, softened
1/3 cup slivered almonds, toasted
200 grams (7 ounces) marzipan (or a little more if you love marzipan)
Melted butter (1/4 t0 1/3 cup)
1/4 cup powdered sugar
What you do:
Combine the raisins, cranberries and cherries in a bowl and cover with the brandy and rum. Stir every few hours, and let sit for 12 – 48 hours. Drain the brandy and rum, keeping it for later use. Pat the fruit dry with paper towels and toss the fruit in 2 tablespoons of flour.
Toast the almonds until very lightly browned.
Stir 1 teaspoon of sugar into 1/4 cup warm water (110-115 degrees-any hotter will kill the yeast, colder and it won’t activate). Sprinkle the yeast on top and let it sit until the yeast starts to bubble, about 5 minutes.
Heat the milk, salt and 1/2 cup sugar in a small pot over medium heat, until warm (110-115 degrees).
Add the milk mixture, vanilla and almond extracts, and eggs to the yeast mixture and combine by beating with a fork. Beat in the reserved brandy and rum.
Add two cups of flour and use a dough hook in your machine, or a wooden spoon by hand, to combine. Cut the 1/2 cup butter into small pieces and beat in. Add enough flour, little by little, until the dough forms into a ball.
Continue working the dough with the dough hook, or if working by hand begin to knead for 10 minutes. The dough should become smooth and elastic.
(Update Dec 2021: move to step 9, allowing the dough to rise. Then add the fruit and nuts. The dough rises better this way). Either add the fruit and nuts to the dough in the machine, or flatten the dough out and work it in by hand, adding more flour to your kneading surface.
Shape the dough into a ball, then place it into a buttered bowl. Turn the dough butter-side up and loosely cover. Let the dough rise until it has doubled in volume, about 2 hours. I put mine on top of the fridge, where it was a little warmer , to make this happen.
Line a baking pan with parchment paper. Melt the remaining butter.
(Update, knead in the fruit and nuts now) Divide the dough into two parts. Roll one half into an oval and brush with melted butter.
Cut the marzipan into quarters and roll each one into a rope, the length of the dough. Place two of the marzipan ropes on top of the dough, leaving space between them, then roll the edges of the dough over the marzipan, pressing down in the middle. roll the ends of the dough over a little, and then gather the loaf and place it rolled-side down on the parchment paper. Repeat this process with the other half of the dough.
Brush the loaves with butter. Let the loaves rise until doubled in size. Heat the oven to 375F. Bake for 30-40 minutes; if you tap on the loaf it should sound hollow, and it will be dark golden brown.
Remove the loaves from the oven and brush with more butter! Dust them with powdered sugar and let them cool completely before packing.
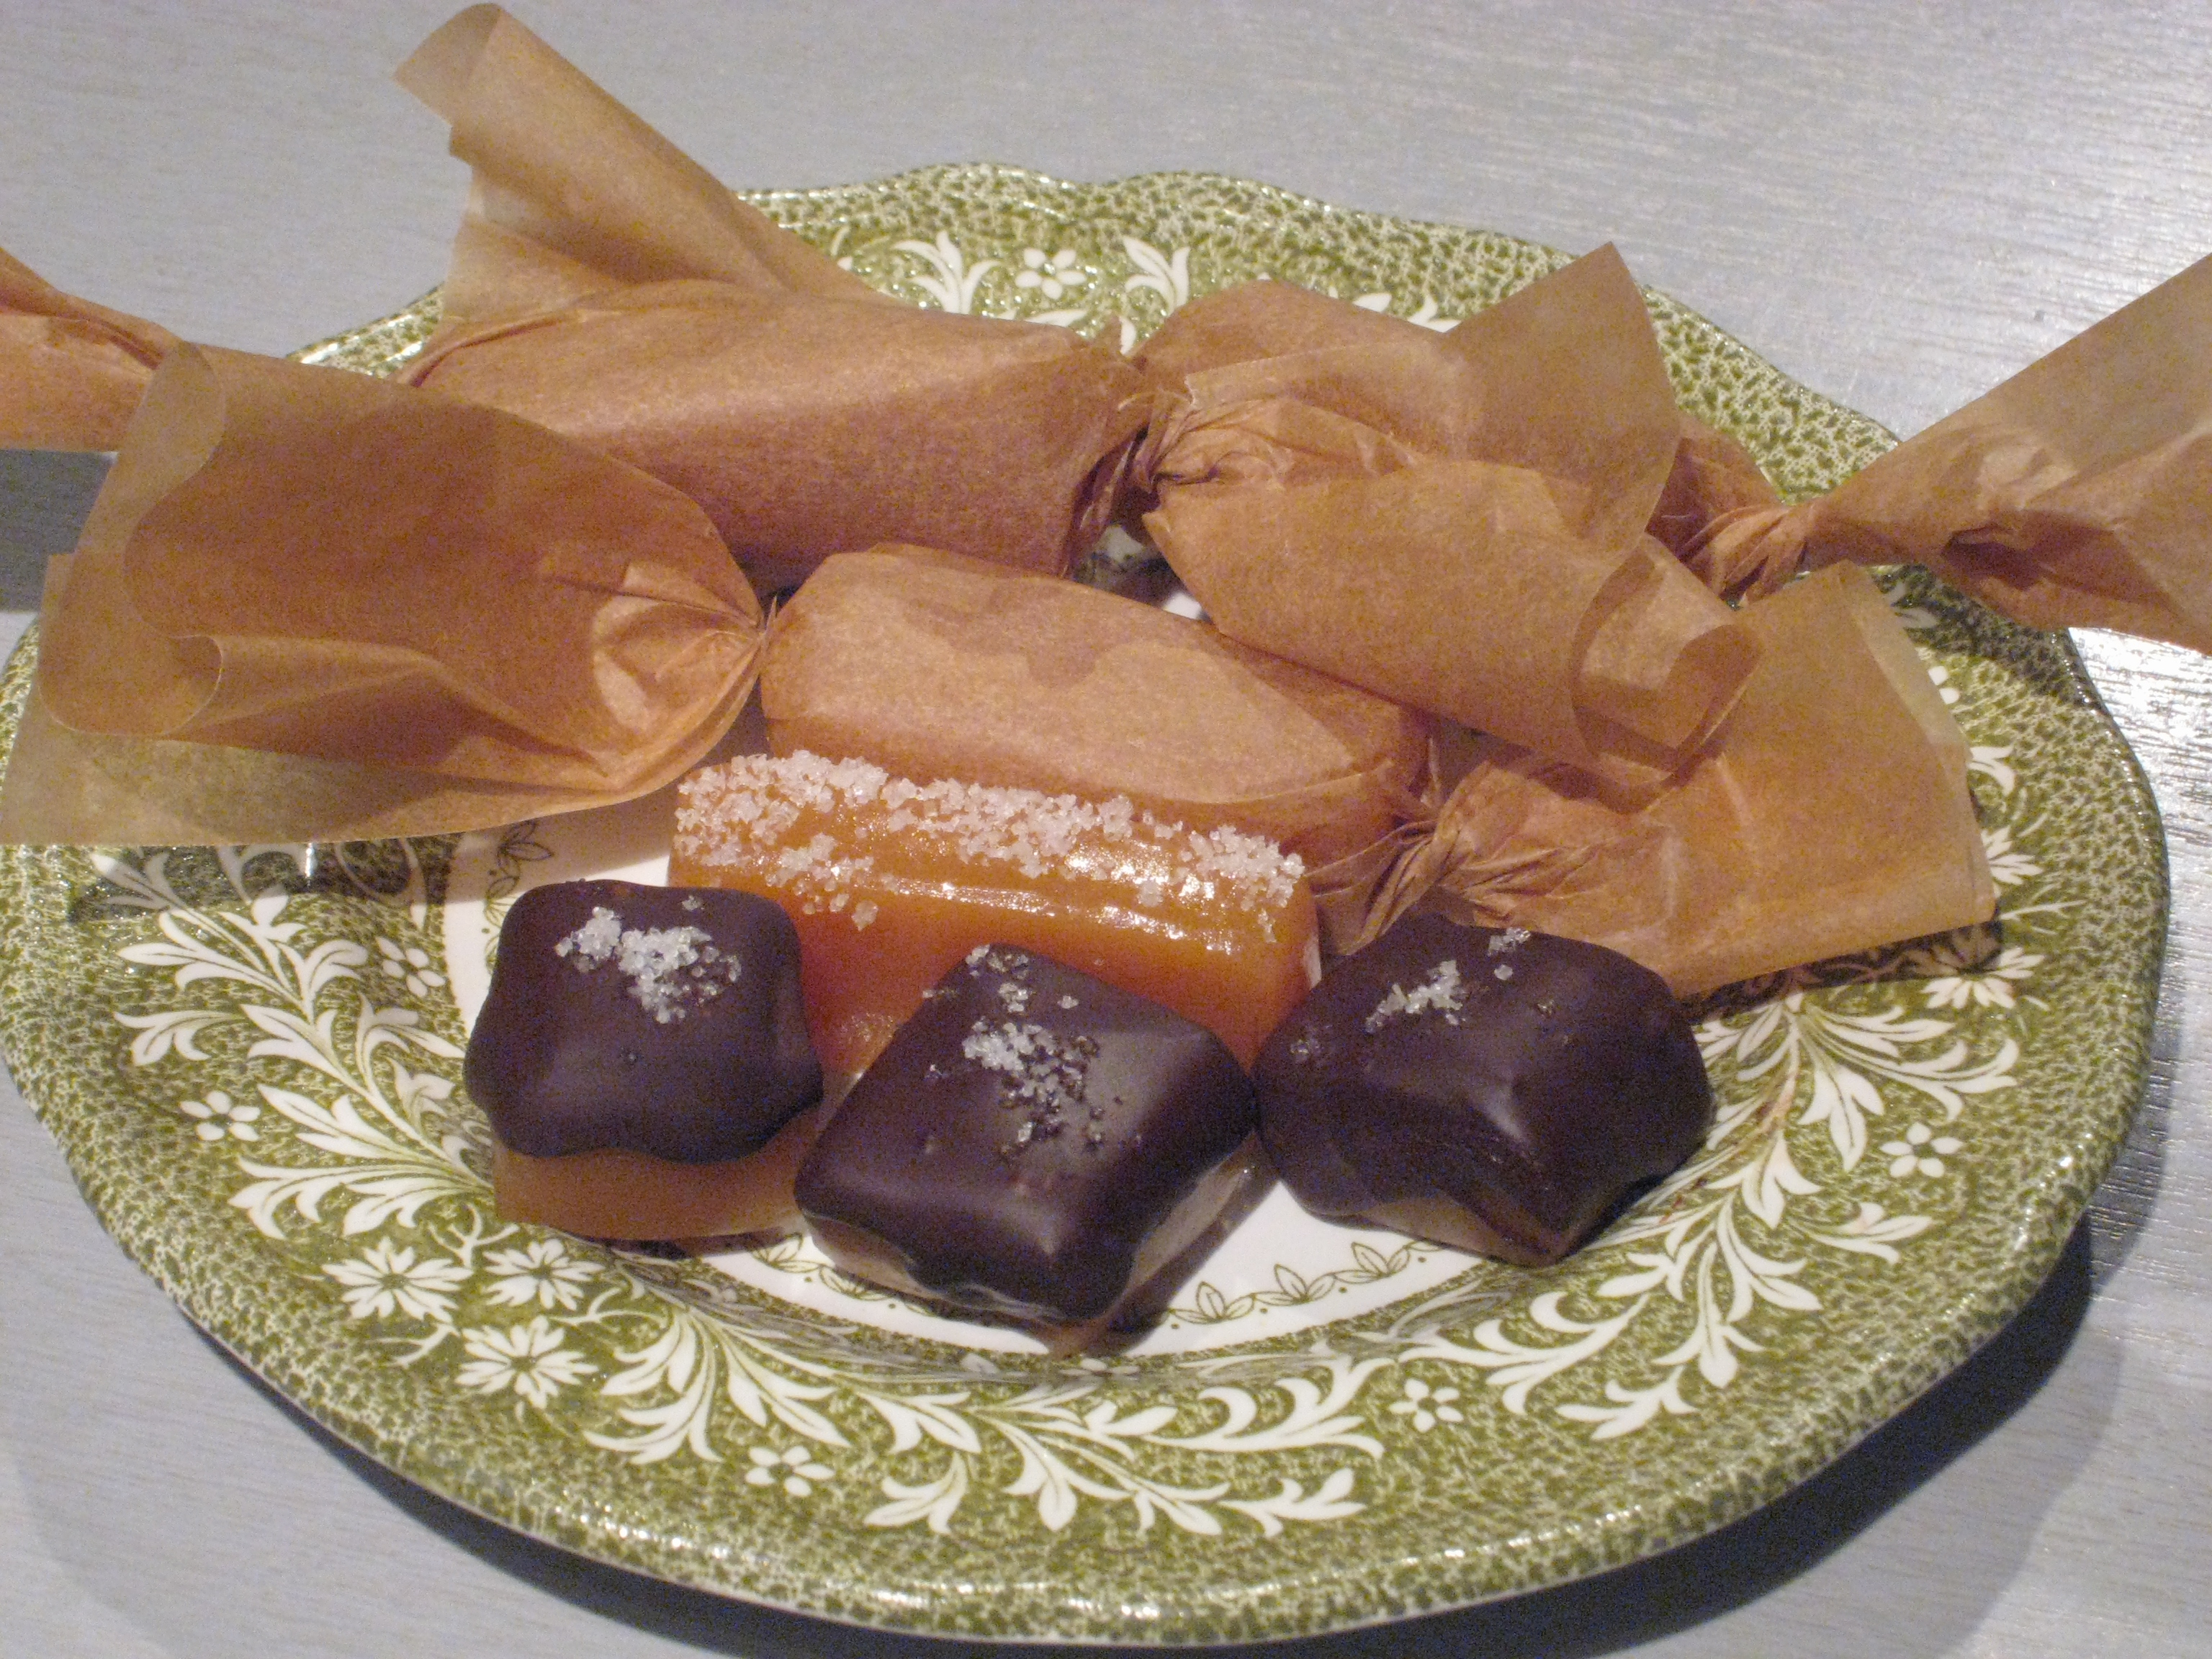
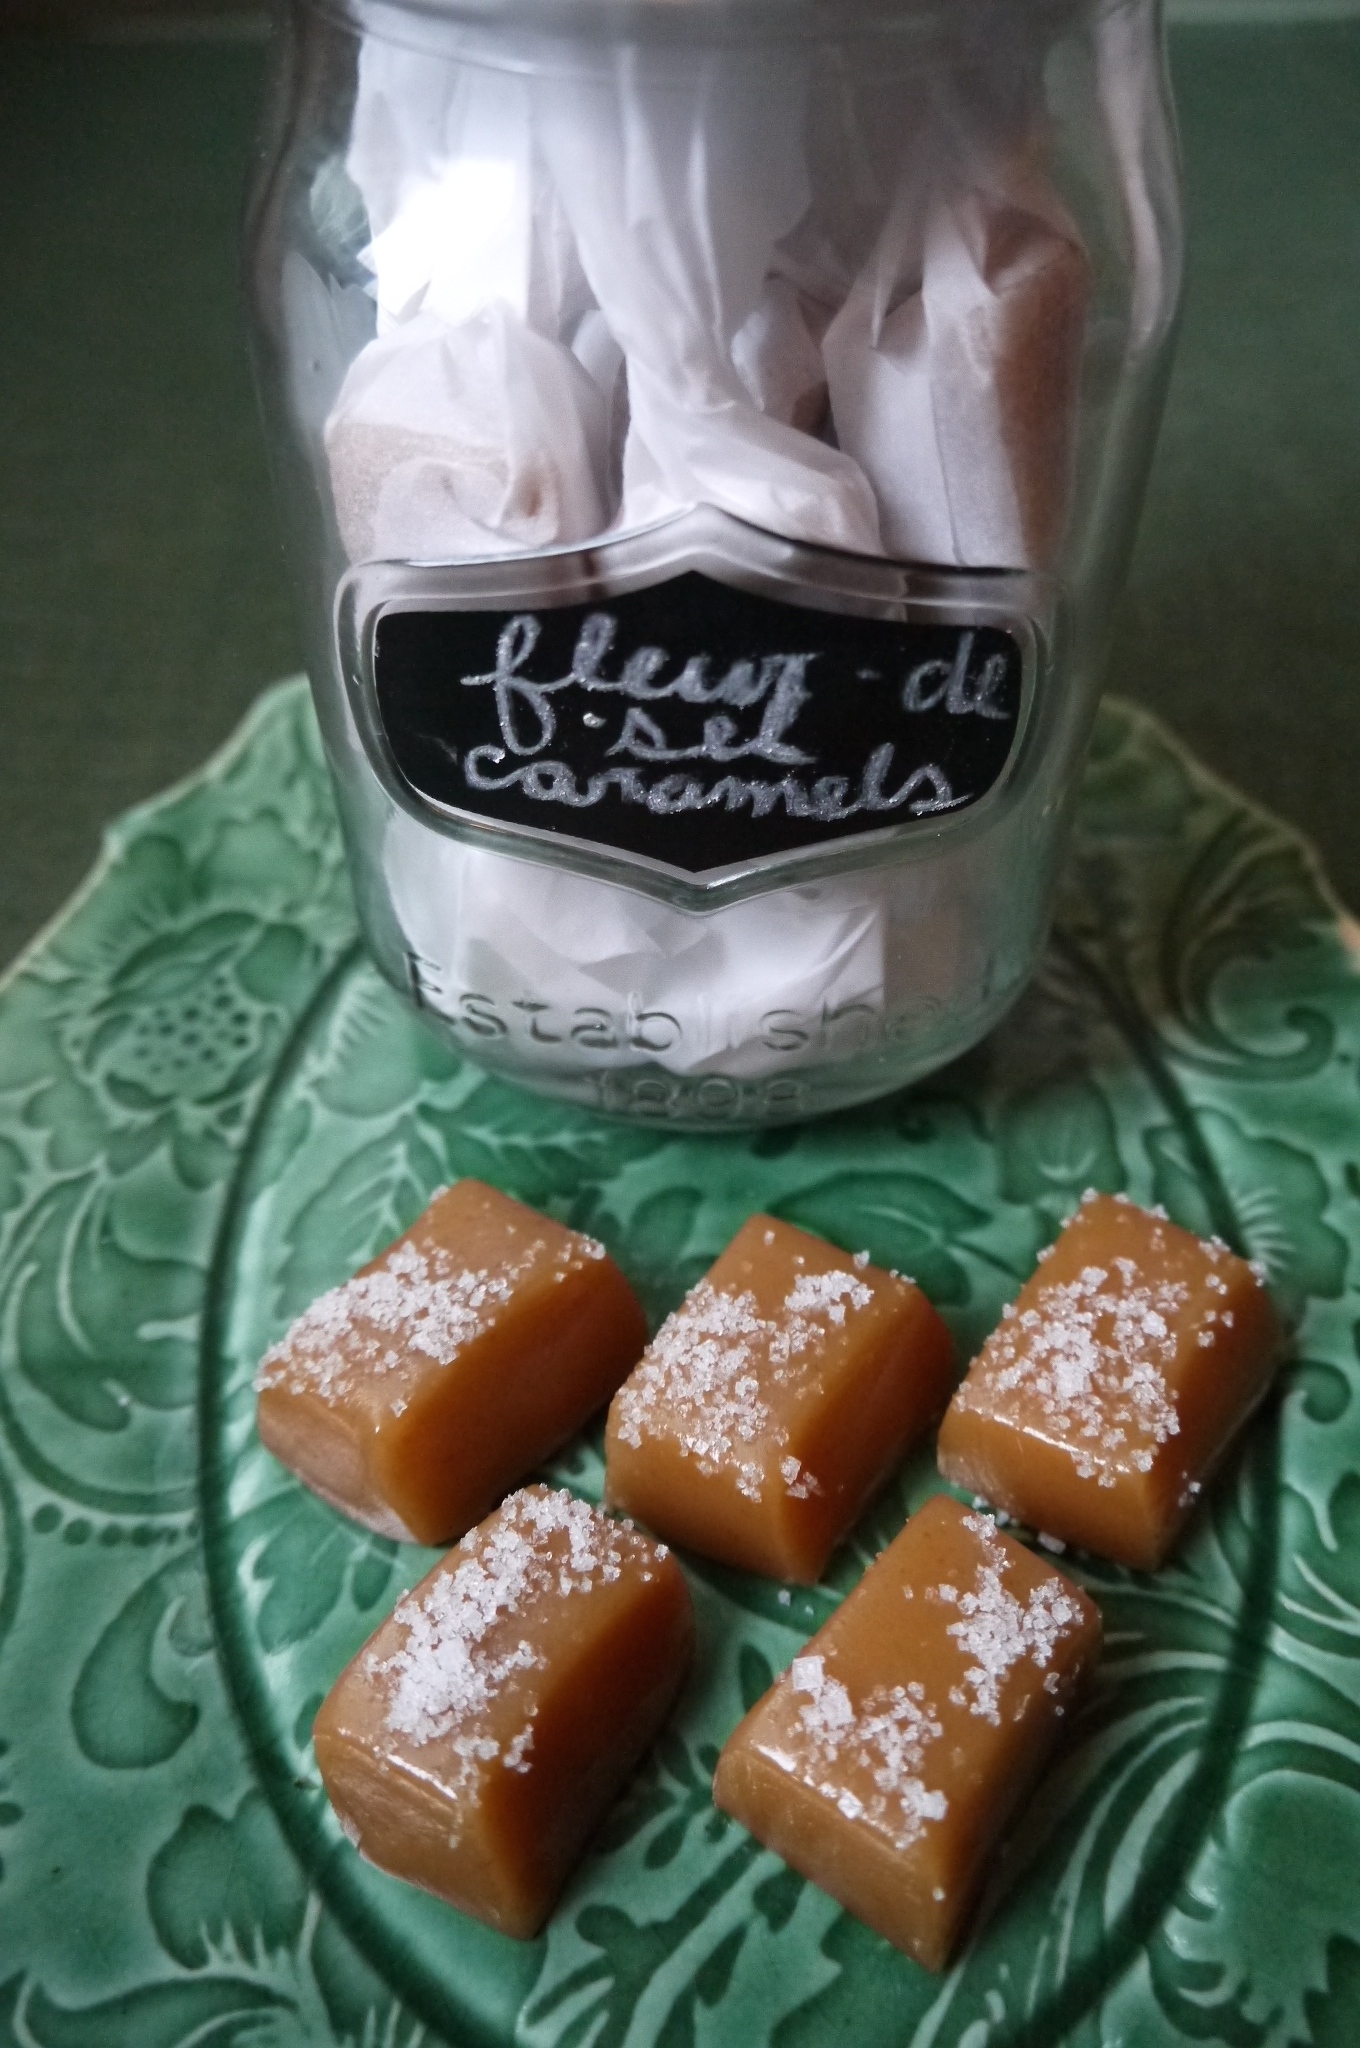
My mom likes to buy salted caramels, so I thought this year at Christmas I would surprise her and make her some of these fleur-de-sel caramels. These are so addictive! And they look pretty wrapped up in parchment paper, like little Christmas crackers.
This recipe isn’t difficult, but it does take a bit of patience to allow it to cook slowly. If you have some good music playing the time will fly by.
A candy thermometer is helpful but not essential in making these. I’ve had problems in the past with a candy thermometer that is not accurate, so I recommend testing the accuracy of your thermometer by placing it in boiling water – it should read 212F.
What you need:
2 cups granulated sugar
2 cups heavy cream (I used Avalon organic cream)
1 cup light corn syrup
1/2 teaspoon salt
5 tablespoons butter
1 teaspoon vanilla
fleur se sel
parchment paper
optional: 3 oz chocolate (I used 2 oz semi-sweet and 1 oz bitter-sweet)
What you do:
Line a 9×9-inch pan with lightly buttered parchment paper.
Combine the sugar, syrup,salt and one cup of the cream in a large pot. Place on medium heat, stirring constantly with a wooden spoon or silicone spatula until it boils. This may take a while, but make sure you don’t raise the heat to hurry it up – it needs to stay on medium
As the sugar mixture continues to boil, slowly drizzle in the cream, continuing to stir. Reduce heat to medium-low and continue to boil for 5-6 minutes, stirring little.
Add the butter, 1 tablespoon at a time so the mixture keeps boiling, and stir until melted.
For the next steps you need to have patience, as you will need to stir from time to time for about 30-40 minutes. Continue boiling over medium-low heat, stirring occasionally. You will begin to see the mixture turn a more caramel-brown colour. If you’ve got a candy thermometer, you want it to read 250F. If you don’t have one, you can get a bowl of ice water and place a drop of the mixture into it. When it forms a “firm ball” in the ice water, take it off the heat right away. After about 40 minutes I finally turned the heat up a little higher because it still hadn’t reached the right temperature and I was running out of time, but they turned out perfectly.
After removing from the heat, immediately stir in the vanilla.
Pour immediately into the parchment-lined pan. Just pour it in and don’t scrape the caramel from the bottom of the pot, to avoid crystallization. Of course you can scrape the remaining bit out into another container and eat it – it tastes great too!
Allow the caramel to cool completely, then remove it from the pan by pulling up the parchment paper.
With a lightly buttered knife, cut into desired shapes. (At this point if you are going to dip the caramels in chocolate you will do that.) Press the caramels into the fleur de sel so they have a little bit on one side.
Parchment paper is great for wrapping the individual caramels. Just cut it into rectangles and twist the ends up. I like to use a piece of parchment to pick up the caramels when I am working with them to avoid getting fingerprints on them.
Enjoy! And share!
While making these I listened to and sang along to Whitehorse’s album, The Fate of the World Depends on this Kiss.
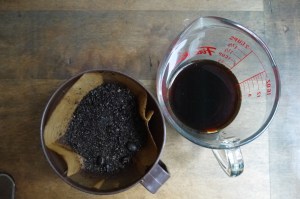
Many years ago I made some homemade Irish Cream, and used a chocolate mould to make Irish Cream chocolates. They were delicious and messy. This winter I decided to try it again, minus the chocolates; so I’d have something different to bring to Christmas parties. The recipe I used before, as most of the ones I was able to find this time around, contain canned condensed milk, chocolate syrup and instant coffee powder. This time I wanted to try a recipe that used fresh cream, home-made chocolate extract, and cold-pressed coffee. And it’s really yummy!
You need to plan a day or two in advance to make the chocolate extract and cold-pressed coffee. I have only included enough ingredients to make enough extract and coffee for this recipe. If you double the recipe for the chocolate extract you will have some left over to add to other recipes, like cakes and brownies.
The Homemade Irish Cream should keep in the fridge for about a month. I know that Bailey’s has no artificial preservatives in it, and it keeps for up to two years because the alcohol and sugar work as preservatives. Let me know how long yours lasts! I’ll be giving mine away, so it won’t last long enough to test the shelf-life.
A few things you’ll need are some bottles for storing the Irish Cream, coffee filters, and a funnel for pouring.
Some of the ingredients settle when it’s in the fridge, so you have to give it a shake before serving.
What you need:
2 tablespoons vodka or whiskey (for chocolate extract)
1 tablespoon dark chocolate cocoa (for chocolate extract)
1/2 cup coarsely ground coffee beans (for cold-press coffee concentrate)
1 cup cold water (for cold-press coffee concentrate)
Two days in advance prepare the chocolate extract: In a small container stir the cocoa, vodka or whiskey, and 1 tablespoon of water. Let this sit at room temperature for the two days, stirring once or twice a day. After the two days, moisten a coffee filter with water, then strain the chocolate mixture. It will take time to strain all the liquid out, but you will be left with a gorgeous chocolate extract.
The night before making the Irish Cream you can make the cold-press coffee concentrate: Coarsely grind the coffee beans, then pour them along with 1/2 cup cold water into a jar, making sure all the beans get moistened. Add the other 1/2 cup of the water, then seal the jar and store in the fridge overnight. In the morning you can strain the liquid using a coffee filter.
Using a double boiler over medium-low heat, or a bowl over a pot that has some water in it, place the chocolate chips along with about 2 teaspoons of cream. Stir the chocolate chips until they have melted.
In a bowl whisk the remaining cream and the sugar together. Little by little add the sugar and cream mixture to the melted chocolate, until it has all been incorporated and the sugar has dissolved.
Pour the mixture into a large bowl that has a pouring spout, or into a large jar. Use an immersion blender to pulse a few times to combine, or whisk for a minute. Add the chocolate and vanilla extracts, cold-pressed coffee concentrate, and whiskey. Pulse the blender a few more times to combine.
Use a funnel to pour the Irish Cream into clean jars.
Refrigerate, and enjoy over ice, in coffee, or on top of ice cream. Don’t forget to shake it up first!
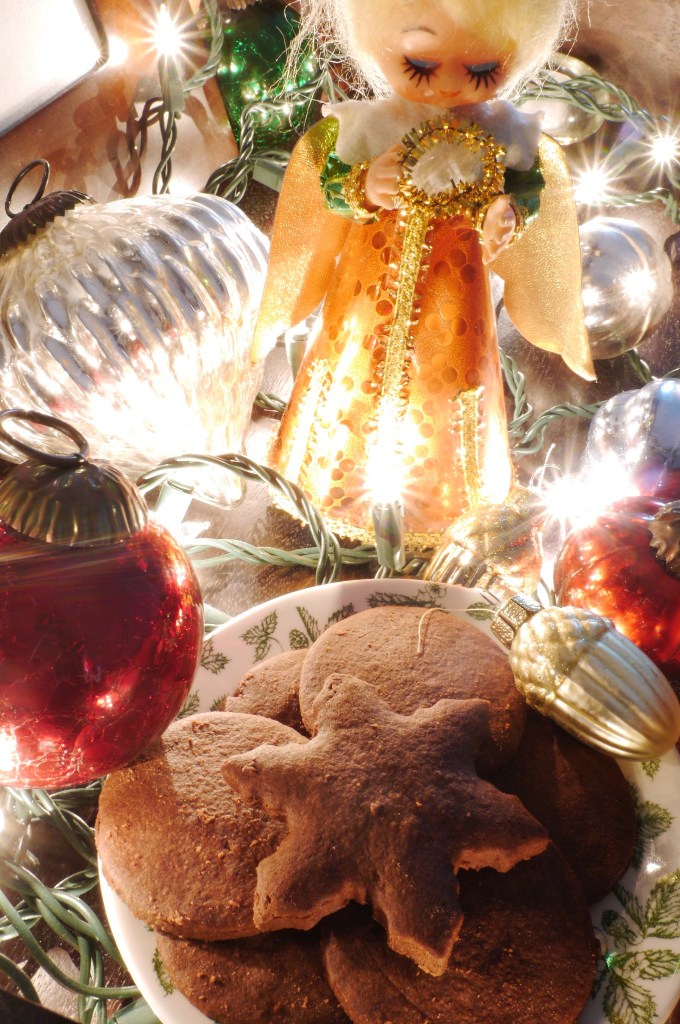
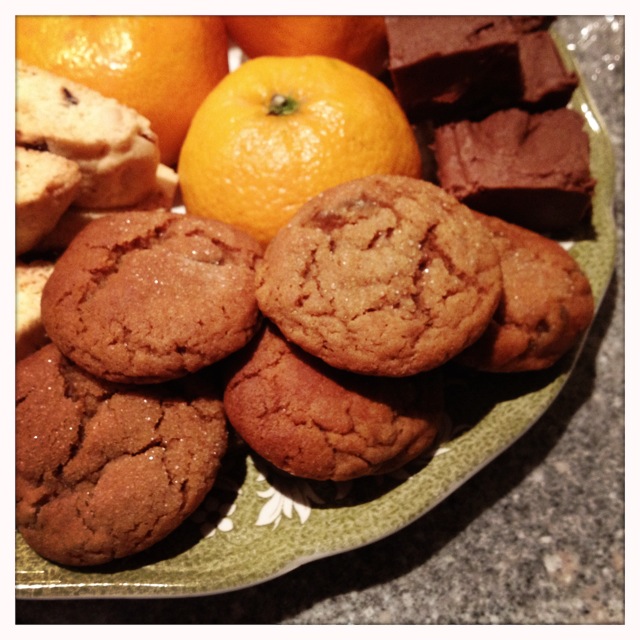
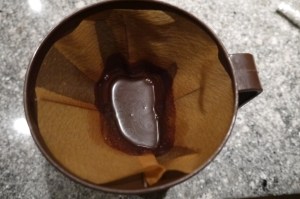
These cookies are a great combination of ginger and chocolate, and they are perfect for serving or giving away at Christmas time. Because the chocolate it bittersweet it really balances out the sugar, and the large-grain sugar coating makes them look really pretty. Perfect with sparkling lights!
The only difficulty I had was getting the sugar to stick to the outside. My hands tend to be quite cold, so I have to warm the dough up a bit in my hands before rolling in the sugar, which made things a little easier.
What you need:
1/2 cup turbinado sugar (large-grain)
6 ounces bittersweet chocolate
2 cups whole wheat pastry flour (or all-purpose)
1 teaspoon baking soda
4 & 1/2 teaspoons ground ginger
1/2 teaspoon salt
1/2 cup unsalted butter
1/4 cup unsulphured molasses
2/3 cup fine grain natural cane sugar (or white sugar)
1 & 1/2 tablespoons grated fresh ginger
1 large egg, well beaten
What you do:
Preheat the oven to 350F with the racks in the top and bottom third of the oven. Line two of baking sheets with parchment paper.
Place the large-grain sugar in a small bowl and set it aside.
Finely chop the chocolate into 1/8-inch pieces, so that it is basically shavings.
In a large bowl whisk together the flour, baking soda, ground ginger, and salt.
Heat the butter in a saucepan until it has just barely melted. Remove it from heat and stir in the molasses, (cane or white) sugar, and the fresh ginger. The mixture should be warm, so if it is hot let it cool a bit. Whisk in the egg.
Pour the butter mixture over the flour mixture and stir until it is just combined. Fold in the shaved chocolate.
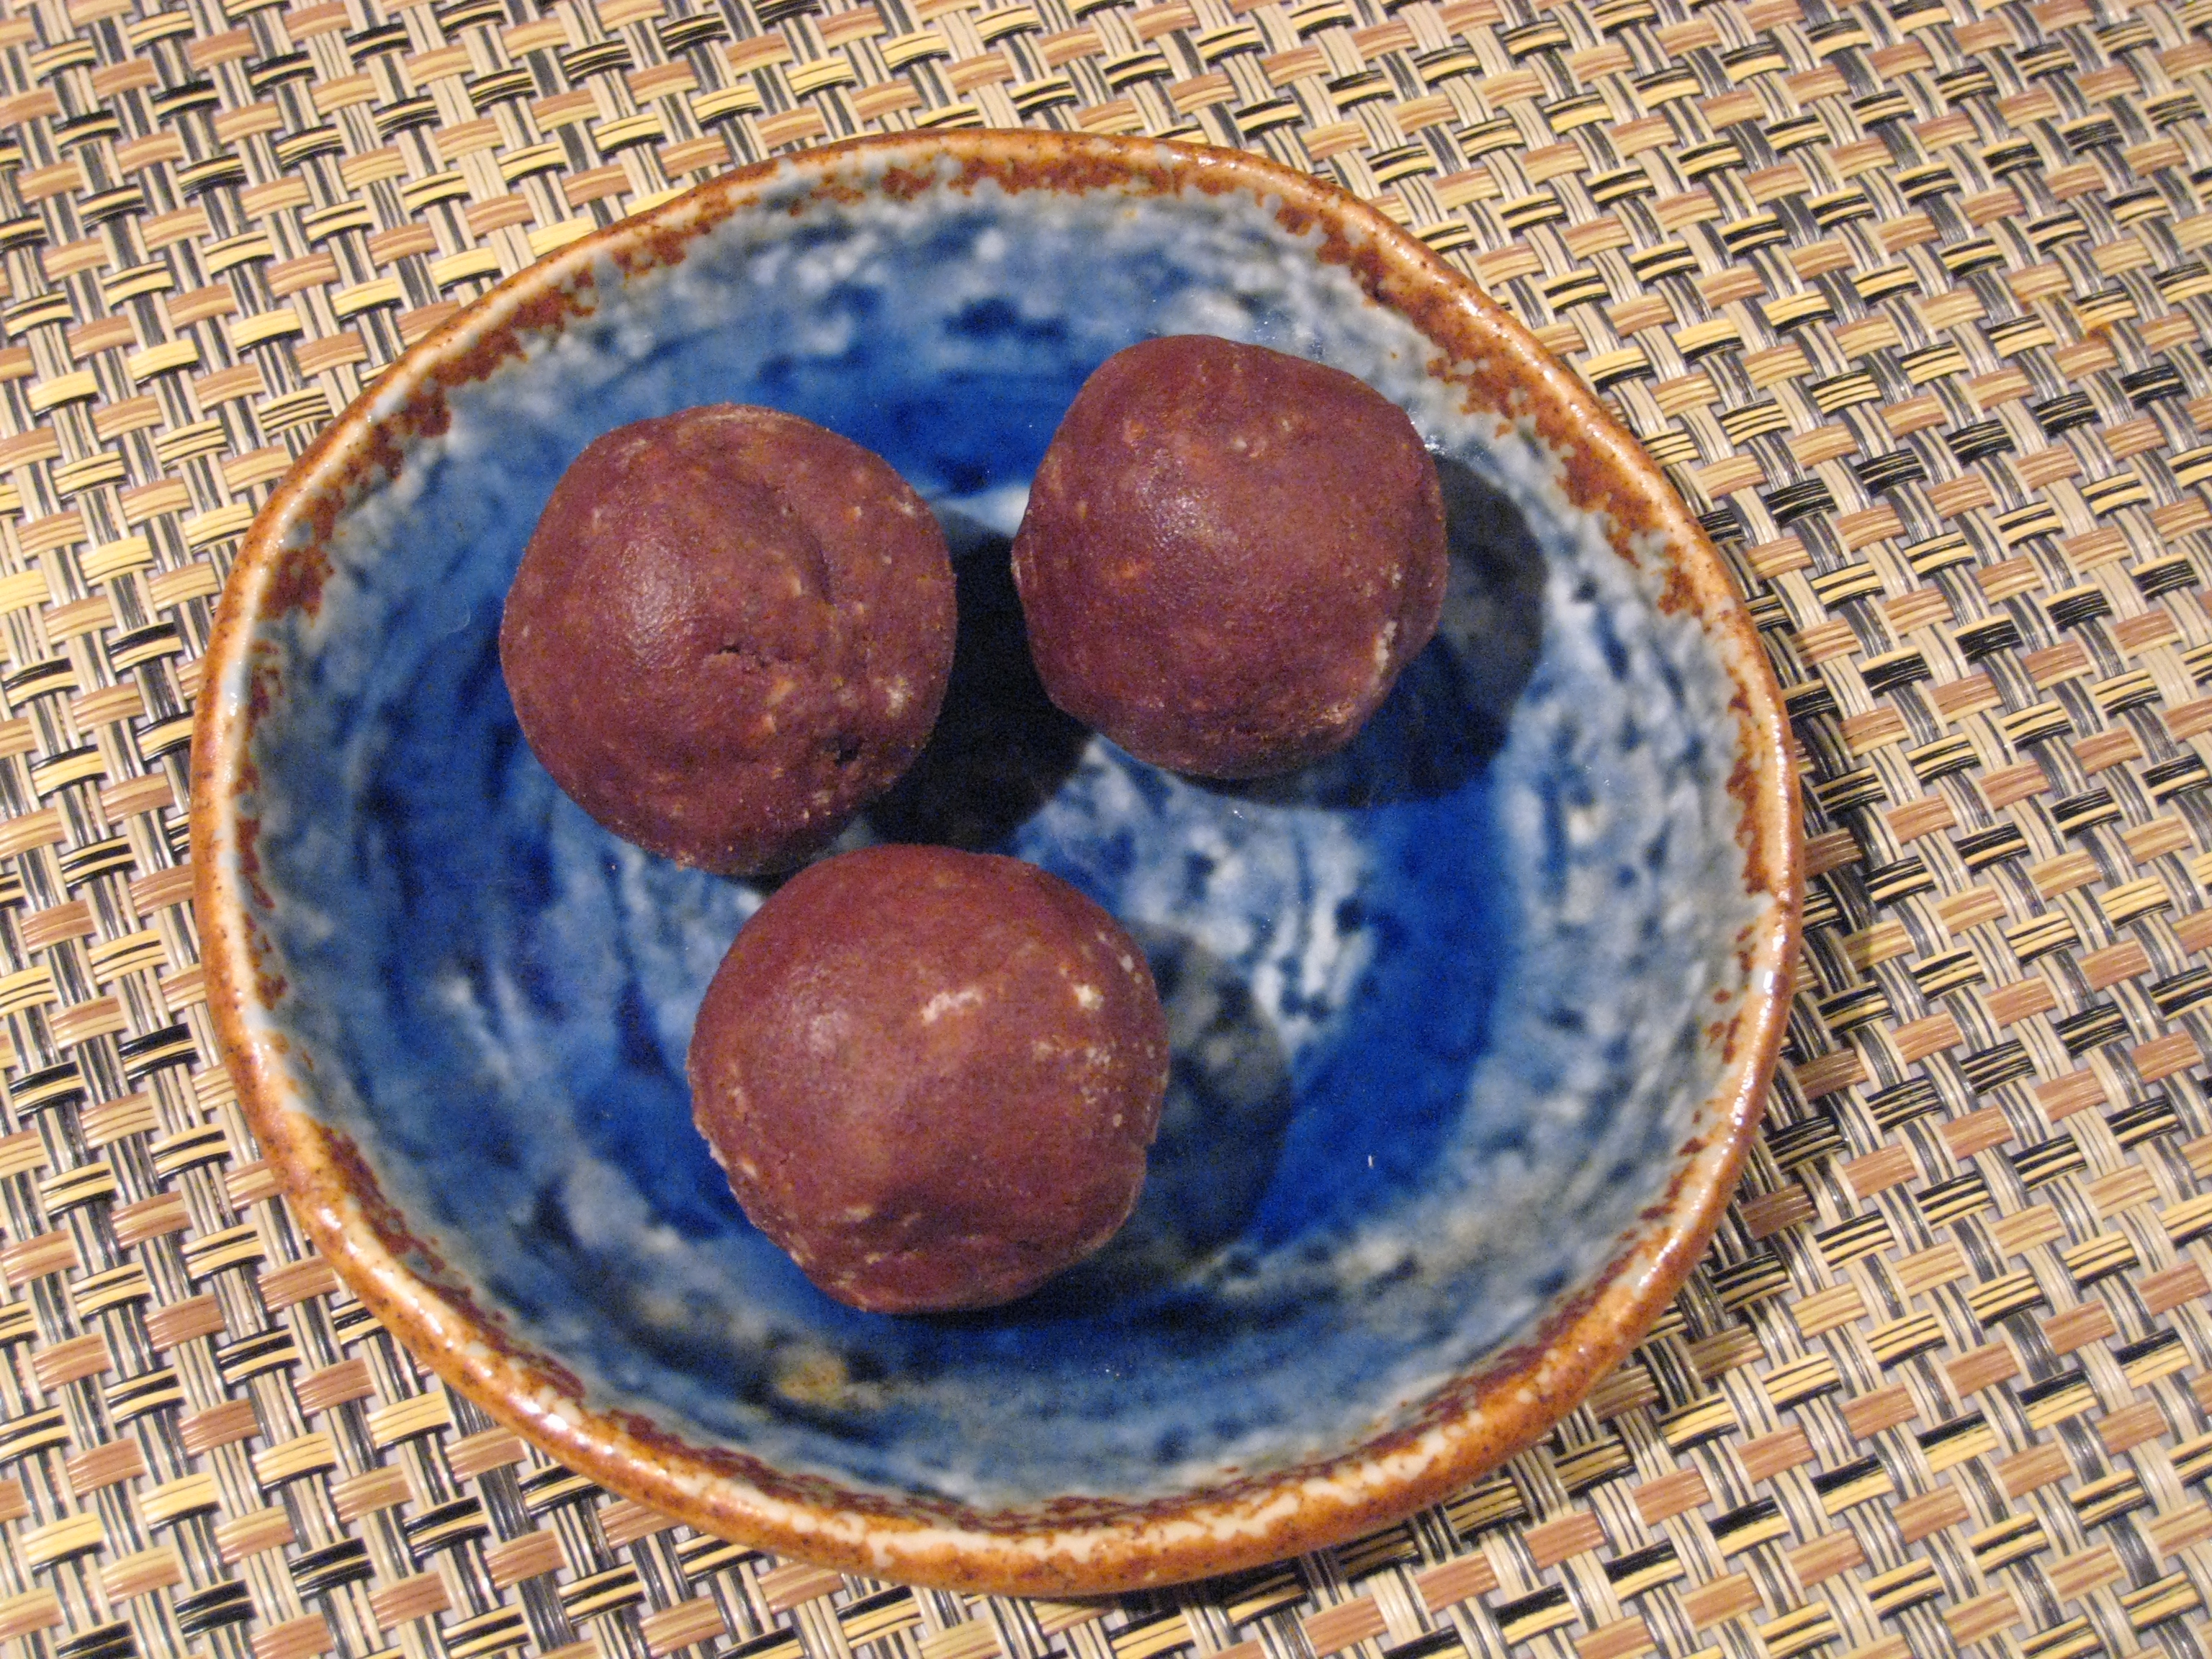
Make balls out of 2 teaspoons of the dough and roll them between your hands. Roll in the turbinado sugar, then roll in your hands so the sugar sticks to them.
Place them a few centimetres apart on the baking sheets. Bake for 7-10 minutes or until cookies puff up, darken a bit, and become fragrant.
Allow them to cool for a few minutes, then remove to a wire rack to cool.