This blog is my way of sharing recipes I love. I don't make a penny from the blog, it's just for fun! I do pay to keep it Ad-Free so it's a better experience for you. Please write a comment if you use a recipe! I'd love to hear your thoughts.
This post is all about some of my favourite holiday baking treats over the 10+ years of TrustInKim, so bakers have it all in one place. There are more recipes to come this year too!
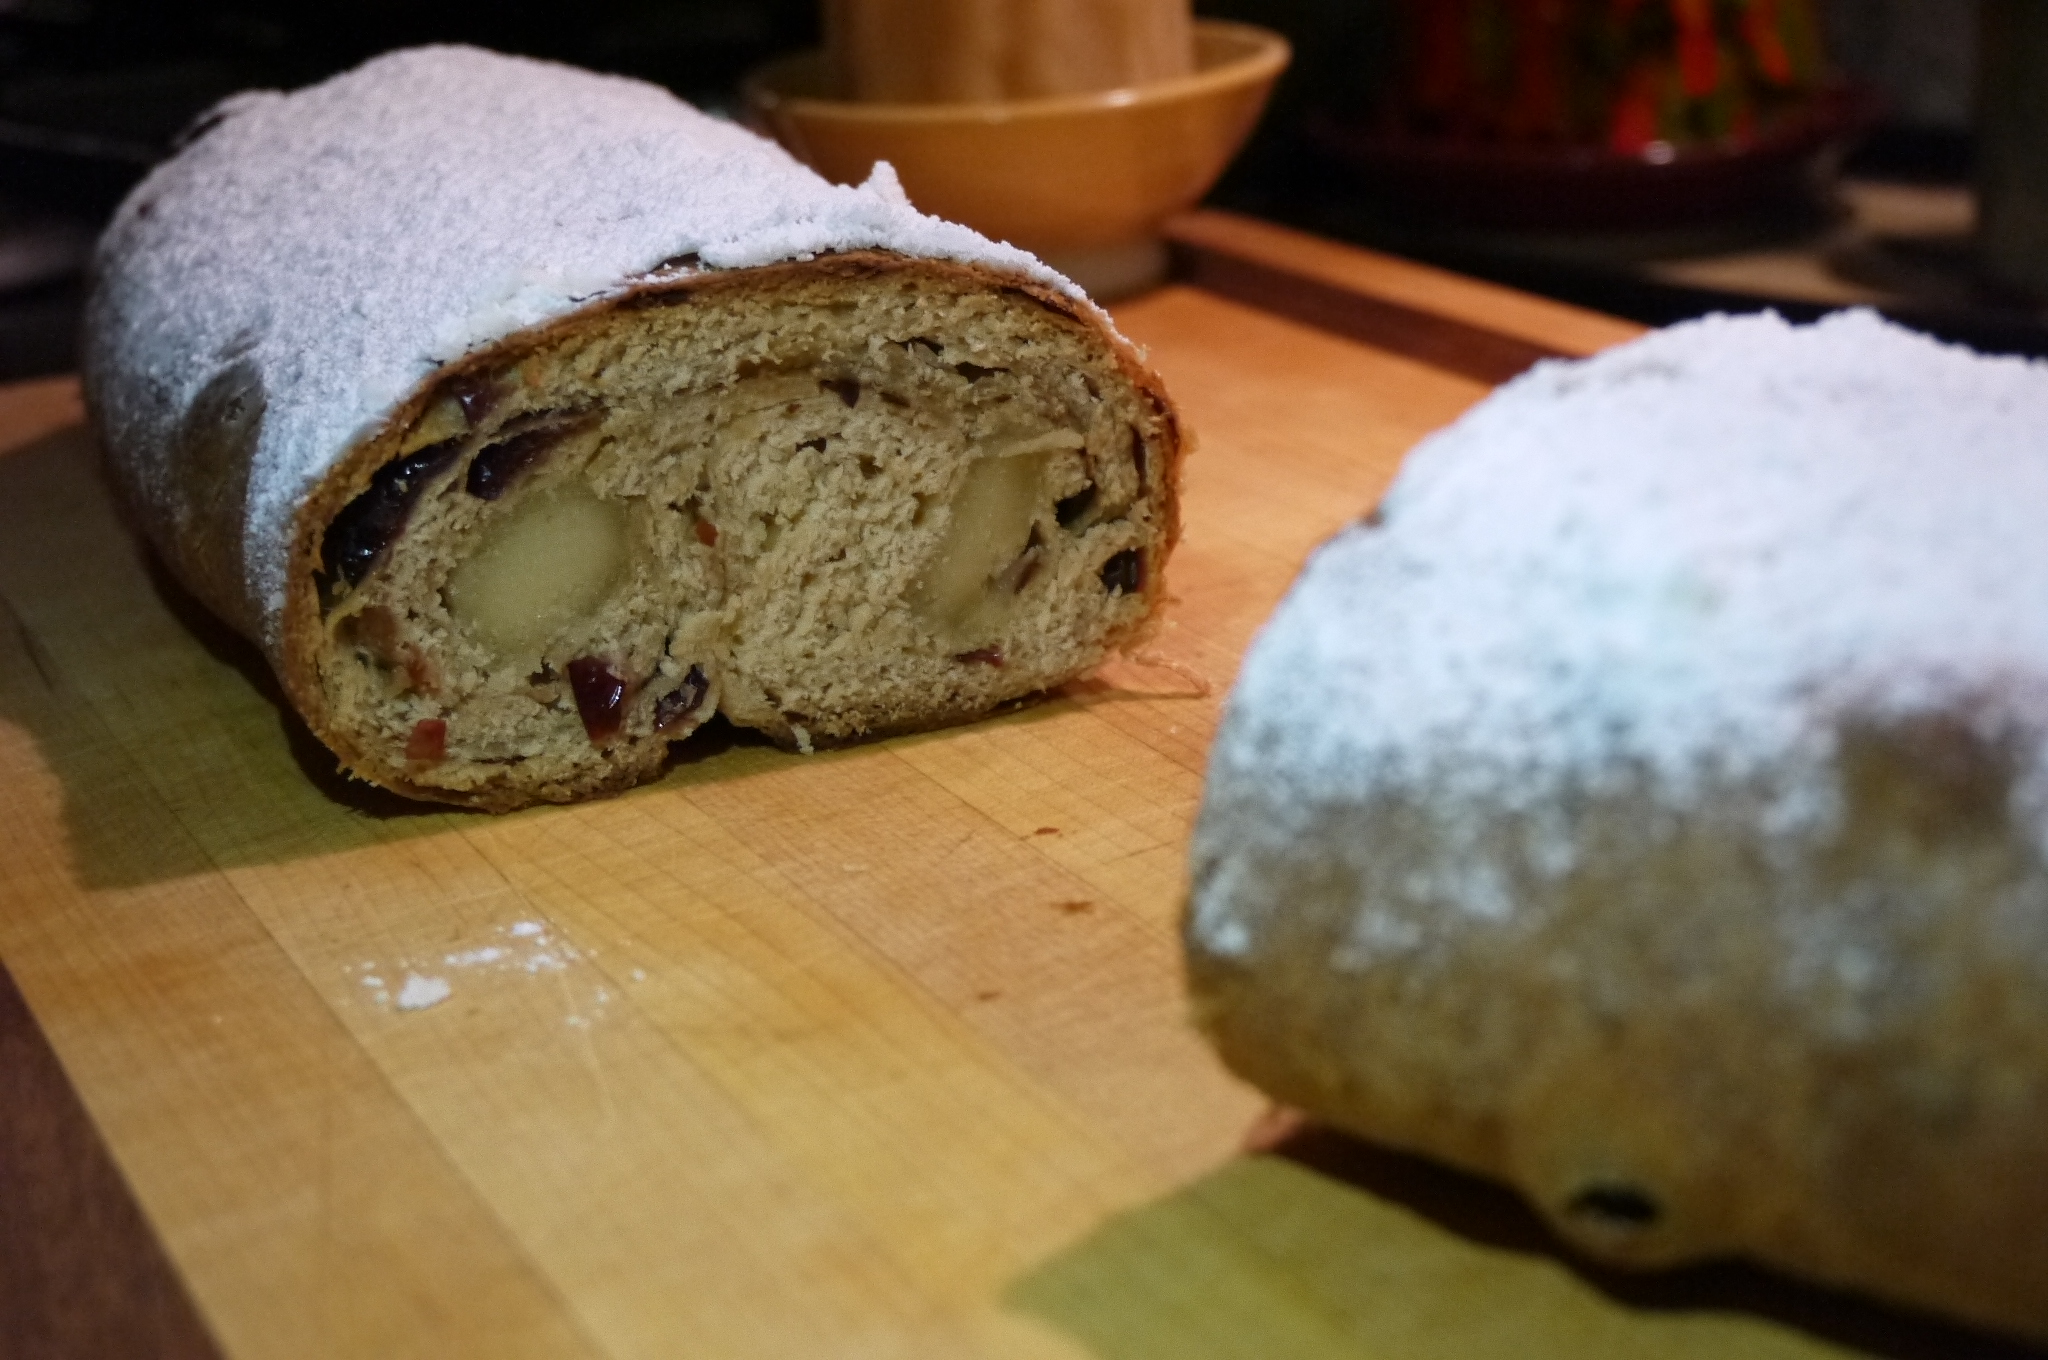
Here is an updated version of a recipe from a few years ago. There were issues with the previous version because the use of alcohol in the dough inhibited the yeast growth. This version made the best stollen I’ve ever made!
This stollen is filled with brandy-soaked sour cherries and raisins, toasted almonds, and plenty of marzipan. It is coated with butter and powdered sugar, for flavour, but also to help from drying out.
If you don’t love marzipan feel free to leave it out. I love it, but I understand that not everyone does.
This recipe makes two large loaves (or four smaller ones with a shorter baking time).
What you need:
1/2 cup raisins
1/2 cup dried sour cherries
1/2 cup brandy or rum for soaking the fruit
3/4 cup slivered almonds, toasted
2 packages active dry yeast (4 & 1/2 teaspoons, or 14 grams) + 1 teaspoon sugar
1/2 cup sugar
1/2 cup milk
1 teaspoon salt
1/2 teaspoon vanilla
a few drops of pure almond extract
2 eggs, at room temperature
4 to 5 cups flour, divided
1/2 cup butter, room temperature
200 grams (7 ounces) marzipan (or a little more if you love marzipan)
melted butter (1/4 to 1/3 cup)
1/4 cup powdered sugar
What you do (Updated Version Dec 2021:
Combine the raisins and cherries in a bowl and cover with the brandy or rum. Let it sit for 12 – 48 hours, stirring from time to time (Shortcut: just soak for an hour). Drain the brandy or rum. Pat the fruit dry with paper towels and toss the fruit in 2 tablespoons of flour.
Toast the almonds until very lightly browned.
Heat the milk, salt and 1/2 cup sugar in a small pot over medium heat, until just warm (110-115 degrees). Let it cool.
In a large bowl add 1 teaspoon of sugar into 1/4 cup warm water (110-115 degrees celcius). Any hotter will kill the yeast, and colder and it won’t activate. Sprinkle the yeast on top and stir it in. Let it sit until the yeast starts to bubble, about 5 minutes.
Add the milk mixture (make sure it’s just warm, not hot, or it will kill the yeast), vanilla and almond extracts and eggs to the yeast mixture. Combine by beating with a fork. Add 1/4 cup water.
Add two cups of flour to the bowl, and use a wooden spoon to combine. Cut the 1/2 cup butter into small pieces and work into the dough using a fork.
When the butter has been evenly distributed, add one cup of flour and mix it in. Add about half a cup more flour, adding more until the dough forms into a workable ball (not too much flour to make it too stiff).
Turn the dough out onto a floured countertop and knead for 10 minutes. The dough should become smooth and elastic.
Add the fruit and almonds tot eh dough. I start with the almonds. To do this I flattened the dough out a bit, sprinkle on about 1/4 cup of almonds, and kneaded them in. Continue this process until all the nuts are combined, then do the same with the fruit. If any pieces of fruit are sticking out of the top of the dough, pick them off and knead them in a bit more.
Melt a little bit of butter and use it coat a large bowl. Place the ball-shaped dough into the buttered bowl, then turn the dough butter-side up so it is coated in butter. Loosely cover the bowl with a tea towel and let the dough rise until it has doubled in volume, about 1-3 hours depending on how warm your room is.
Line a baking pan with parchment paper. Melt about 2 tablespoons of butter.
Punch down the dough and divide it into two parts (or 3 or 4 for smaller loaves). Form one half into a flat oval using your hands.
Divide the marzipan into equal parts to go in each loaf. Roll it into a rope just short of the length of the dough. Place one of the marzipan ropes on top of the dough, then pull the sides of the dough over the marzipan, pressing down in the middle. Roll the ends of the dough over a little. Gather the loaf and place it rolled-side down on the parchment paper. Repeat this process with the other half of the dough.
Brush the loaves with butter, and cover with a tea towel. Let the loaves rise until about doubled in size.
Heat the oven to 375F. Bake for 30-40 minutes; if you tap on the loaf it should sound hollow, and it will be dark golden brown.
Remove the loaves from the oven and brush with more melted butter! Dust them with sifted powdered sugar and let them cool completely before packing.
My Oma made the best bread. Nobody that I know of in my family ever learned quite how to make her bread the way she did. I’ve tried a number of times to recreate it, including baking it in a brick oven once like she did sometimes. This is the closest I’ve ever gotten to making bread that tastes like hers, and I think the potato water is a big part of that. Also the method of baking it in a lidded dish helps to create that nice dark crust.
This is a version of the popular no-knead bread making method. I added the potato water to make it more like Oma’s bread. No-knead bread is super easy to make, and so delicious. Now that my favourite local bread bakery (Terra Breads) has closed due to the pandemic, I’m making this bread regularly.
The potato water adds some flavour and gives the bread a nice texture. To make potato water you can boil some potatoes ahead of time for another meal, then save the cooking water in the fridge until you want to make this bread. Just bring the potato water to room temperature before mixing the dough.
I used a lidded baking dish for this, my le Creuset French oven. At other times I’ve used a Romertopf baker. I imagine a casserole dish with a lid could work too. You could bake it without a lid too, which I haven’t done with this recipe yet.
What you need:
3/4 cup dark rye flour
2 & 1/4 cups white flour
1 & 1/4 teaspoons salt
1/4 teaspoon yeast
1 & 1/2 cups room temperature potato water
What you do:
Combine the flours, salt and yeast in a large bowl. Add the potato water and mix it up. You will end up with a shaggy, sticky dough.
Cover the bowl with plastic wrap or a lid, and let sit for 12-18 hours in a warm-ish place, and out of direct sunlight. The dough should about double in size and become dotted with bubbles. If your house is a little on the cool side you will likely need the longer rising time.
Cut a large piece of parchment paper and place it on a countertop. Coat the parchment paper with a bit of oil using your hands, then turn the dough out onto the parchment paper. Sprinkle the surface of the dough with flour. Cover the dough loosely with some plastic wrap or a kitchen towel. Let the dough sit for 1-2 hours, until it has doubled in volume.
About 1/2 an hour before you want to put the bread in the oven, set the temperature to 475°F and place your baking pot on a rack in the lower third of the oven. Let the pot heat up, and when the oven has reached 475°F, remove the pot from the oven. Pick up the dough by gathering together the corners of the parchment paper. Carefully (remember the pot is smoking hot!) place the dough (still on the parchment paper) into the pot. I cut away any really long bits of parchment that are sticking out of the pot.
Put the cover on the pot and bake for 30 minutes while the bread forms its nice thick crust. Remove the lid from the pot and continue to bake for 15-20 minutes more. The bread should become a deep brown when it is done, and if you tap on it, it should sound hollow. Remove the pot from the oven, lift the bread out of the pot, remove the parchment paper, and place it on a rack to cool. It needs to cool for about 1/2 an hour before slicing.
This bread has no preservatives, so if you don’t use it up by the second day, it should be refrigerated frozen.
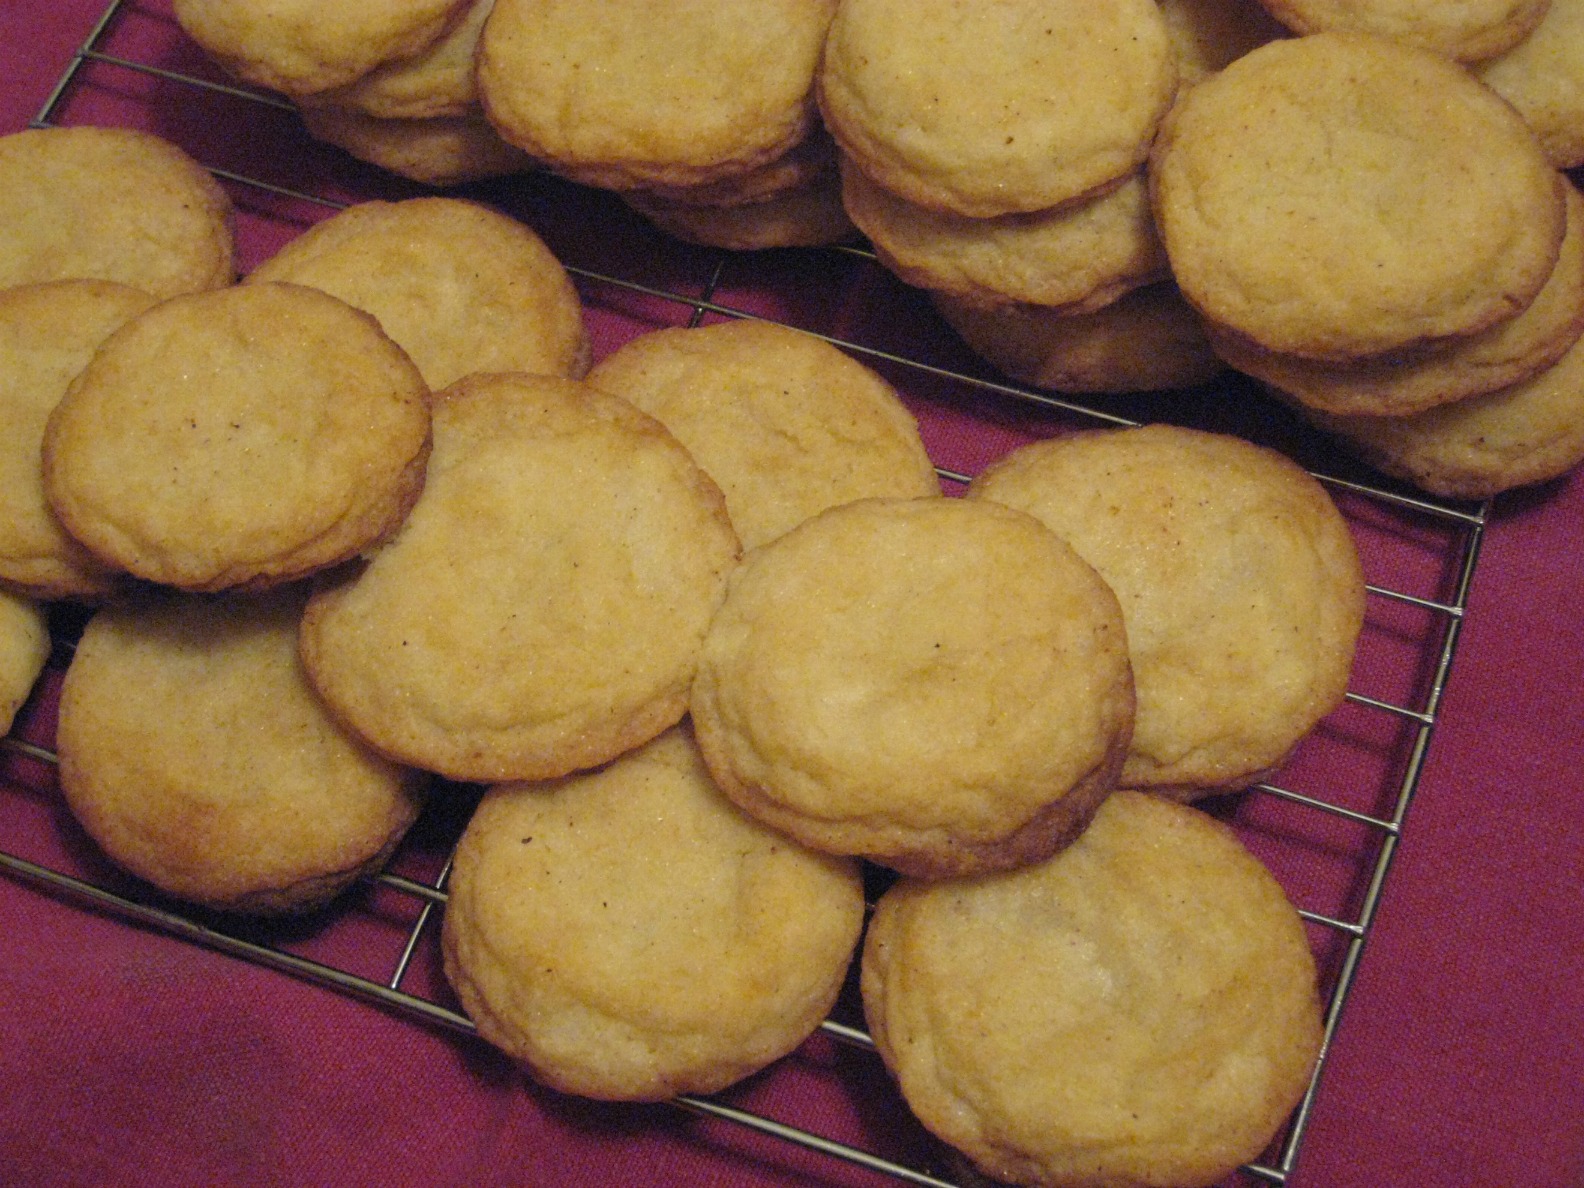
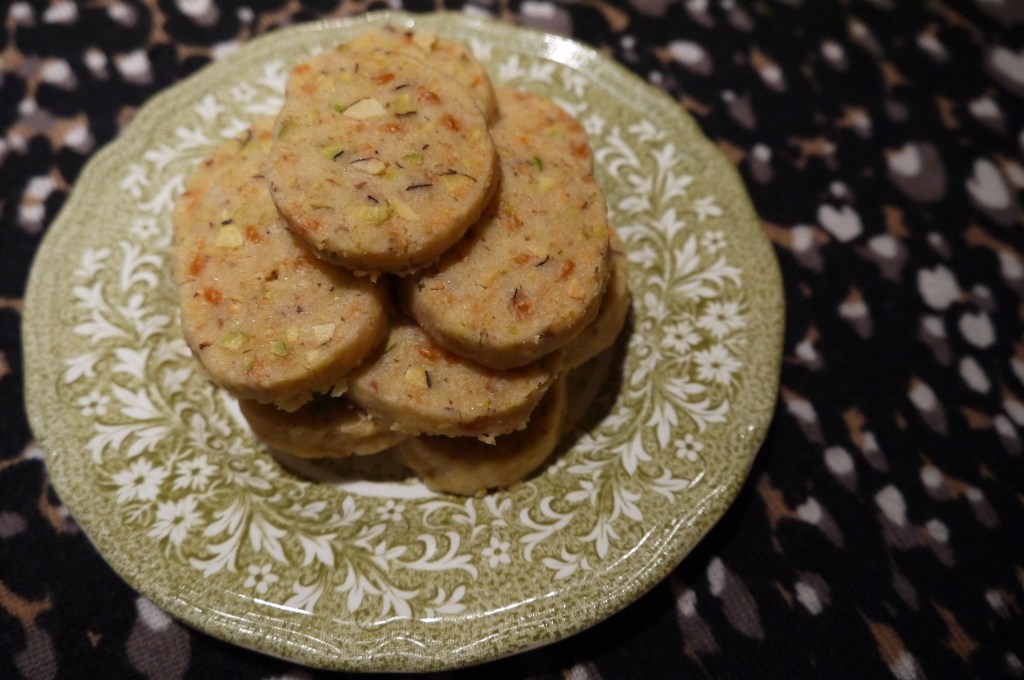
Thank you Tante Betty for sharing your amazing shortbread recipe with me!
I have made a few shortbread recipes over the years, but none were ever good enough to post on my blog. I finally asked my Tante Betty if she would share her recipe with me, and she was kind enough to send it.
Apparently there are two camps in the shortbread game. Some people feel strongly that just three ingredients make the best shortbread: butter, sugar and flour. The others prefer to also include cornstarch. I’m sure they’re all great, but to me this recipe with three ingredients (well, two types of sugar) makes the best traditional shortbread.
The only change I made to Tante Betty’s recipe was to cut the recipe in half. I want to make a few different kinds of cookies in smaller batches, so I decided to halve a lot of the recipes. Feel free to double the recipe to make the full four dozen.
One caveat with this recipe: when cutting the cookies into your desired shapes, stick to a cookie cutter that is not too intricate. I tried making some awesome reindeer cookies, but they broke apart when I tried to put them on the cookie sheet.
So, here’s the recipe:
What you need:
1 cup butter (room temperature)
1/2 cup minus 1 tablespoon icing sugar, sifted
1 tablespoon light brown sugar
2 cups all-purpose flour, sifted
What you do:
Prepare baking pans by lining with parchment paper.
Cream the butter and sugars with an electric beater. This will take 4-5 minutes to get it nice and fluffy. The sugar should become a lighter colour when you are done.
Add the flour to the butter mixture and beat until combined.
Wrap the dough in plastic wrap and refrigerate for a few hours. You can do this the before if you want. Just take it out of the fridge about half an hour before you want to roll it out.
Preheat the oven to 300F.
Roll out the dough on a floured surface to less than one centimetre thick. Use floured cookie cutters to cut into your desired shapes. Place the cookies onto the cookie sheets.
Bake two pans at a time, rotating the pans halfway through the baking, for about 20 minutes (or less – check at around 15 minutes – they should not become brown). The back of the oven tends to be hotter, so if you flip the pans around they will bake more evenly.
Place the cookies on a wire rack to cool. They should be stored in an airtight container, and can be frozen for a few weeks.
2025 edit: This isn’t the best stollen ever! I have improved this recipe and you can find the new one here. There are issues in this recipe with the alcohol inhibiting the yeast. The new version deals with that issue, making a much lighter stollen!
I had some of my cousins over the other evening, and I wanted to make something seasonal, since it is the Christmas season, and most of us were brought up in Mennonite homes in which we ate stollen at Christmas. Everyone who tried it said it was the best stollen they had ever had.
The most ringing endorsement, though, came from my parents. It was my dad’s birthday, so I made one stollen for the cousins, and one for my dad. Both of my parents said it was the best they’d ever had – and they’ve had a lot more stollen-eating years than all of the cousins have.
My memory of stollen involves what I consider to be nasty tasting preserved fruits, the bright red and green cherries, or whatever those things were.
The soaking of the fruit in the booze needs to be begun at least the day before, if not another day or two, so plan ahead accordingly.
I looked at several recipes, thought about my own preferences, and then mainly followed this recipe. I made a few changes: I forgot to add the orange zest -oops, but still awsome. I added a little bit of almond extract and slivered almonds, used dried cherries instead of currants, soaked the fruit for longer, added rum, and used a little more marzipan. Plus a whole lotta love (you have to do that if you don’t have a kneading machine – hand kneading is a labour of love). I also added one last brushing of butter after baking – who doesn’t love just a little more butter! And that way there’s something for the sugar to stick to!
You can keep the stollen, wrapped tight in the fridge for a few weeks, or in the freezer for a few months. I think one of the reasons why people enjoyed this so much was that it was served the day it was made. So if you can plan to have company the day you bake it, all the better.
What you need:
1/2 cup raisins
1/2 cup dried cranberries
1/2 cup dried sour cherries
1/4 cup brandy
1/4 cup dark rum
4 to 5 cups flour, divided
2 packages active dry yeast (4 & 1/2 teaspoons, or 14 grams)
1/2 cup sugar
1/2 cup milk
1 teaspoon salt
1/2 teaspoon vanilla
a few drops of pure almond extract
2 eggs, at room temperature
1/2 cup butter, softened
1/3 cup slivered almonds, toasted
200 grams (7 ounces) marzipan (or a little more if you love marzipan)
Melted butter (1/4 t0 1/3 cup)
1/4 cup powdered sugar
What you do:
Combine the raisins, cranberries and cherries in a bowl and cover with the brandy and rum. Stir every few hours, and let sit for 12 – 48 hours. Drain the brandy and rum, keeping it for later use. Pat the fruit dry with paper towels and toss the fruit in 2 tablespoons of flour.
Toast the almonds until very lightly browned.
Stir 1 teaspoon of sugar into 1/4 cup warm water (110-115 degrees-any hotter will kill the yeast, colder and it won’t activate). Sprinkle the yeast on top and let it sit until the yeast starts to bubble, about 5 minutes.
Heat the milk, salt and 1/2 cup sugar in a small pot over medium heat, until warm (110-115 degrees).
Add the milk mixture, vanilla and almond extracts, and eggs to the yeast mixture and combine by beating with a fork. Beat in the reserved brandy and rum.
Add two cups of flour and use a dough hook in your machine, or a wooden spoon by hand, to combine. Cut the 1/2 cup butter into small pieces and beat in. Add enough flour, little by little, until the dough forms into a ball.
Continue working the dough with the dough hook, or if working by hand begin to knead for 10 minutes. The dough should become smooth and elastic.
(Update Dec 2021: move to step 9, allowing the dough to rise. Then add the fruit and nuts. The dough rises better this way). Either add the fruit and nuts to the dough in the machine, or flatten the dough out and work it in by hand, adding more flour to your kneading surface.
Shape the dough into a ball, then place it into a buttered bowl. Turn the dough butter-side up and loosely cover. Let the dough rise until it has doubled in volume, about 2 hours. I put mine on top of the fridge, where it was a little warmer , to make this happen.
Line a baking pan with parchment paper. Melt the remaining butter.
(Update, knead in the fruit and nuts now) Divide the dough into two parts. Roll one half into an oval and brush with melted butter.
Cut the marzipan into quarters and roll each one into a rope, the length of the dough. Place two of the marzipan ropes on top of the dough, leaving space between them, then roll the edges of the dough over the marzipan, pressing down in the middle. roll the ends of the dough over a little, and then gather the loaf and place it rolled-side down on the parchment paper. Repeat this process with the other half of the dough.
Brush the loaves with butter. Let the loaves rise until doubled in size. Heat the oven to 375F. Bake for 30-40 minutes; if you tap on the loaf it should sound hollow, and it will be dark golden brown.
Remove the loaves from the oven and brush with more butter! Dust them with powdered sugar and let them cool completely before packing.
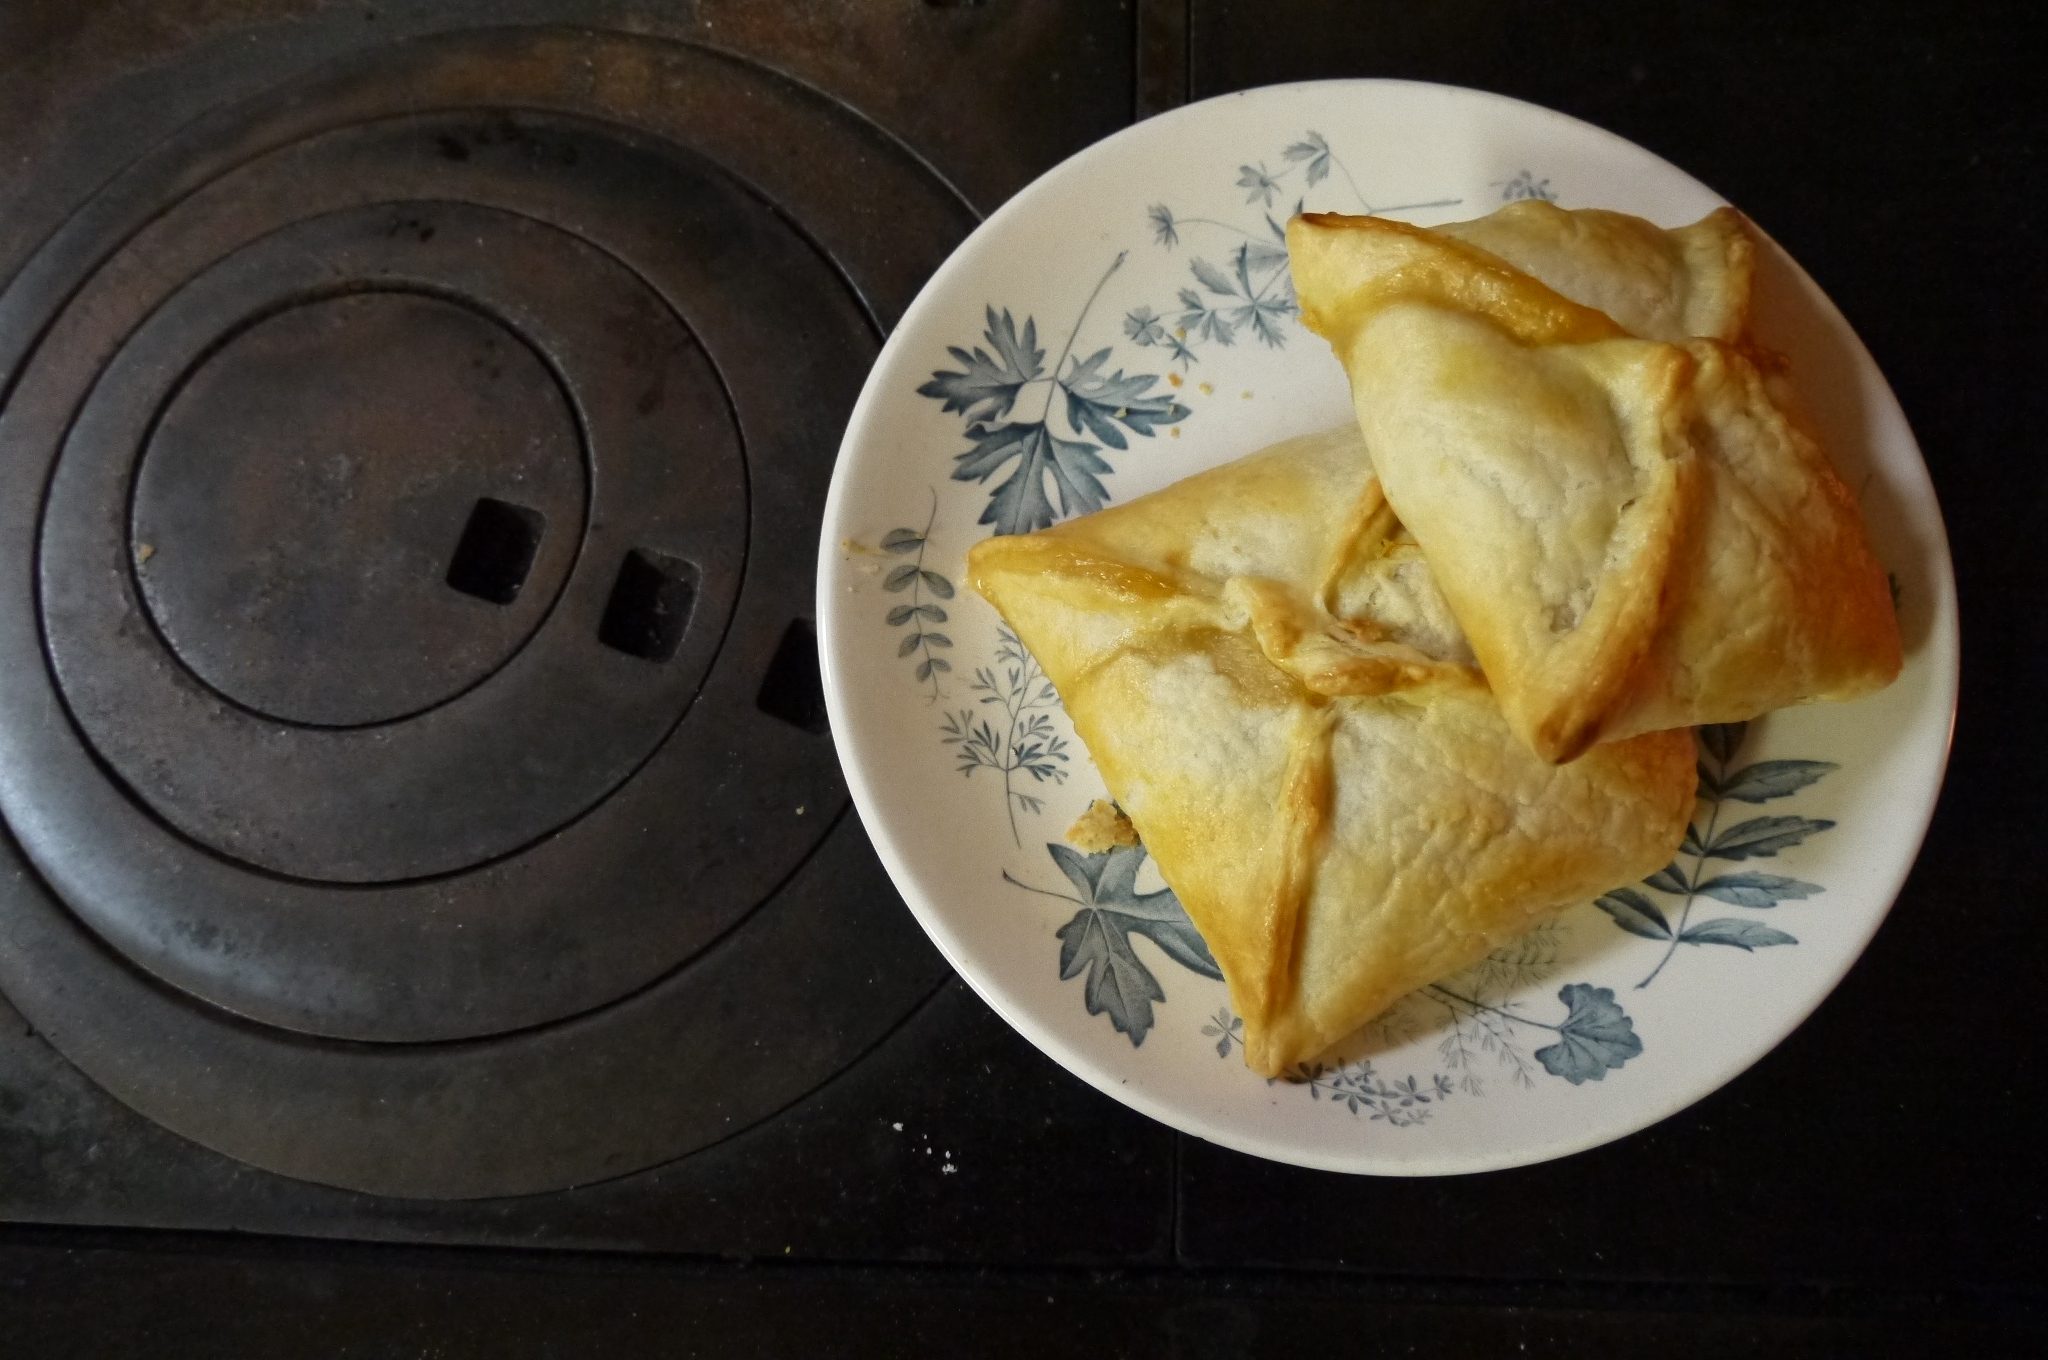
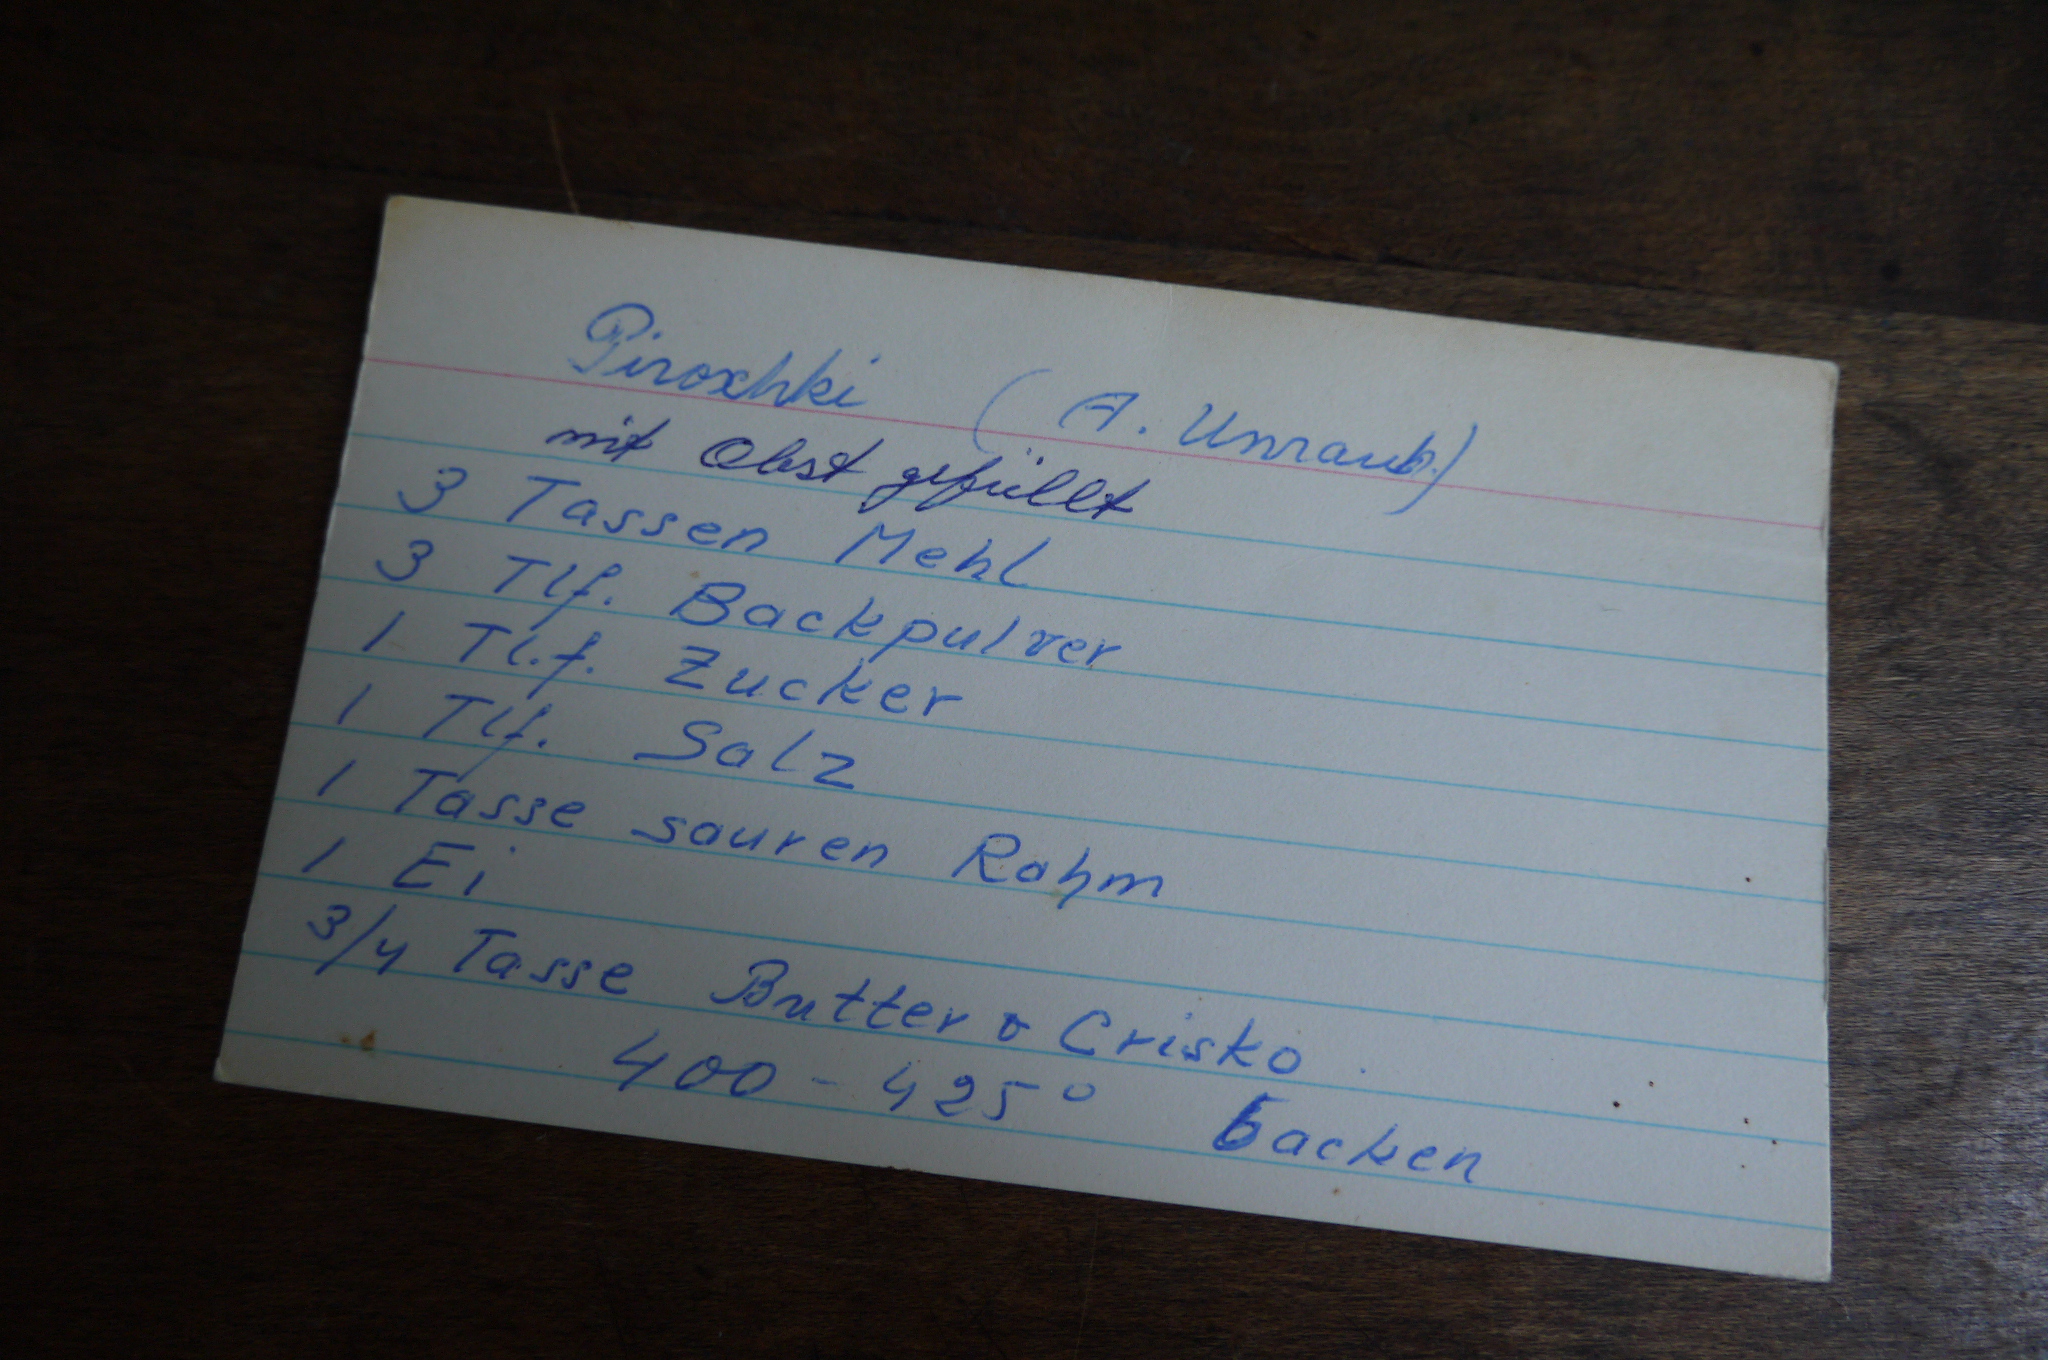
My childhood was filled with these beautiful little pies, made by my Mom, Oma and Aunts, filled with various fruits and sometimes even meat. So I figured it’s about time I made them myself. Instead of using my Tante Kantja’s recipe (see below), which is the only one I had access to at the moment, I opted for the pastry recipe from the Smitten Kitchen Cookbook. So while it’s not the traditional Ukrainian piroschki I grew up eating, it’s the same idea: a square pastry filled with fruit. Yum! My favourite result was the apricot/nectarine combination, but the blueberries were pretty good too.
I made the whole recipe, then baked a few and put the rest in the freezer. They were just as good when I pulled a few straight out of the freezer and baked them up for just a little longer than the pre-frozen version. I like them best when they are freshly baked, but they will keep for a few days.
This is a great picnic food!
What you need:
2 & 1/2 cups all-purpose flour
1 tablespoon sugar
1 teaspoon salt
1 cup very cold butter
1/2 cup ice-cold water
about a pound of apricots, nectarines, peaches, plums or apples, or a combination of those
1 egg
What you do:
Whisk together the flour, sugar and salt in a large bowl. Cut the cold butter into medium-sized dice and add it to the flour. Use a pastry blender or your hands (better if they aren’t too hot) and break the butter up, combining it with the flour mixture, into pieces the size of tiny peas.
If it is a very warm day put the bowl in the fridge for a while to let the butter get cold again before rolling it out.
Drizzle most of the water over the mixture and stir it in, adding more as you need it. Use floured hands to knead the dough briefly until it comes together in a ball. Wrap the dough in plastic wrap and refrigerate for 2 hours.
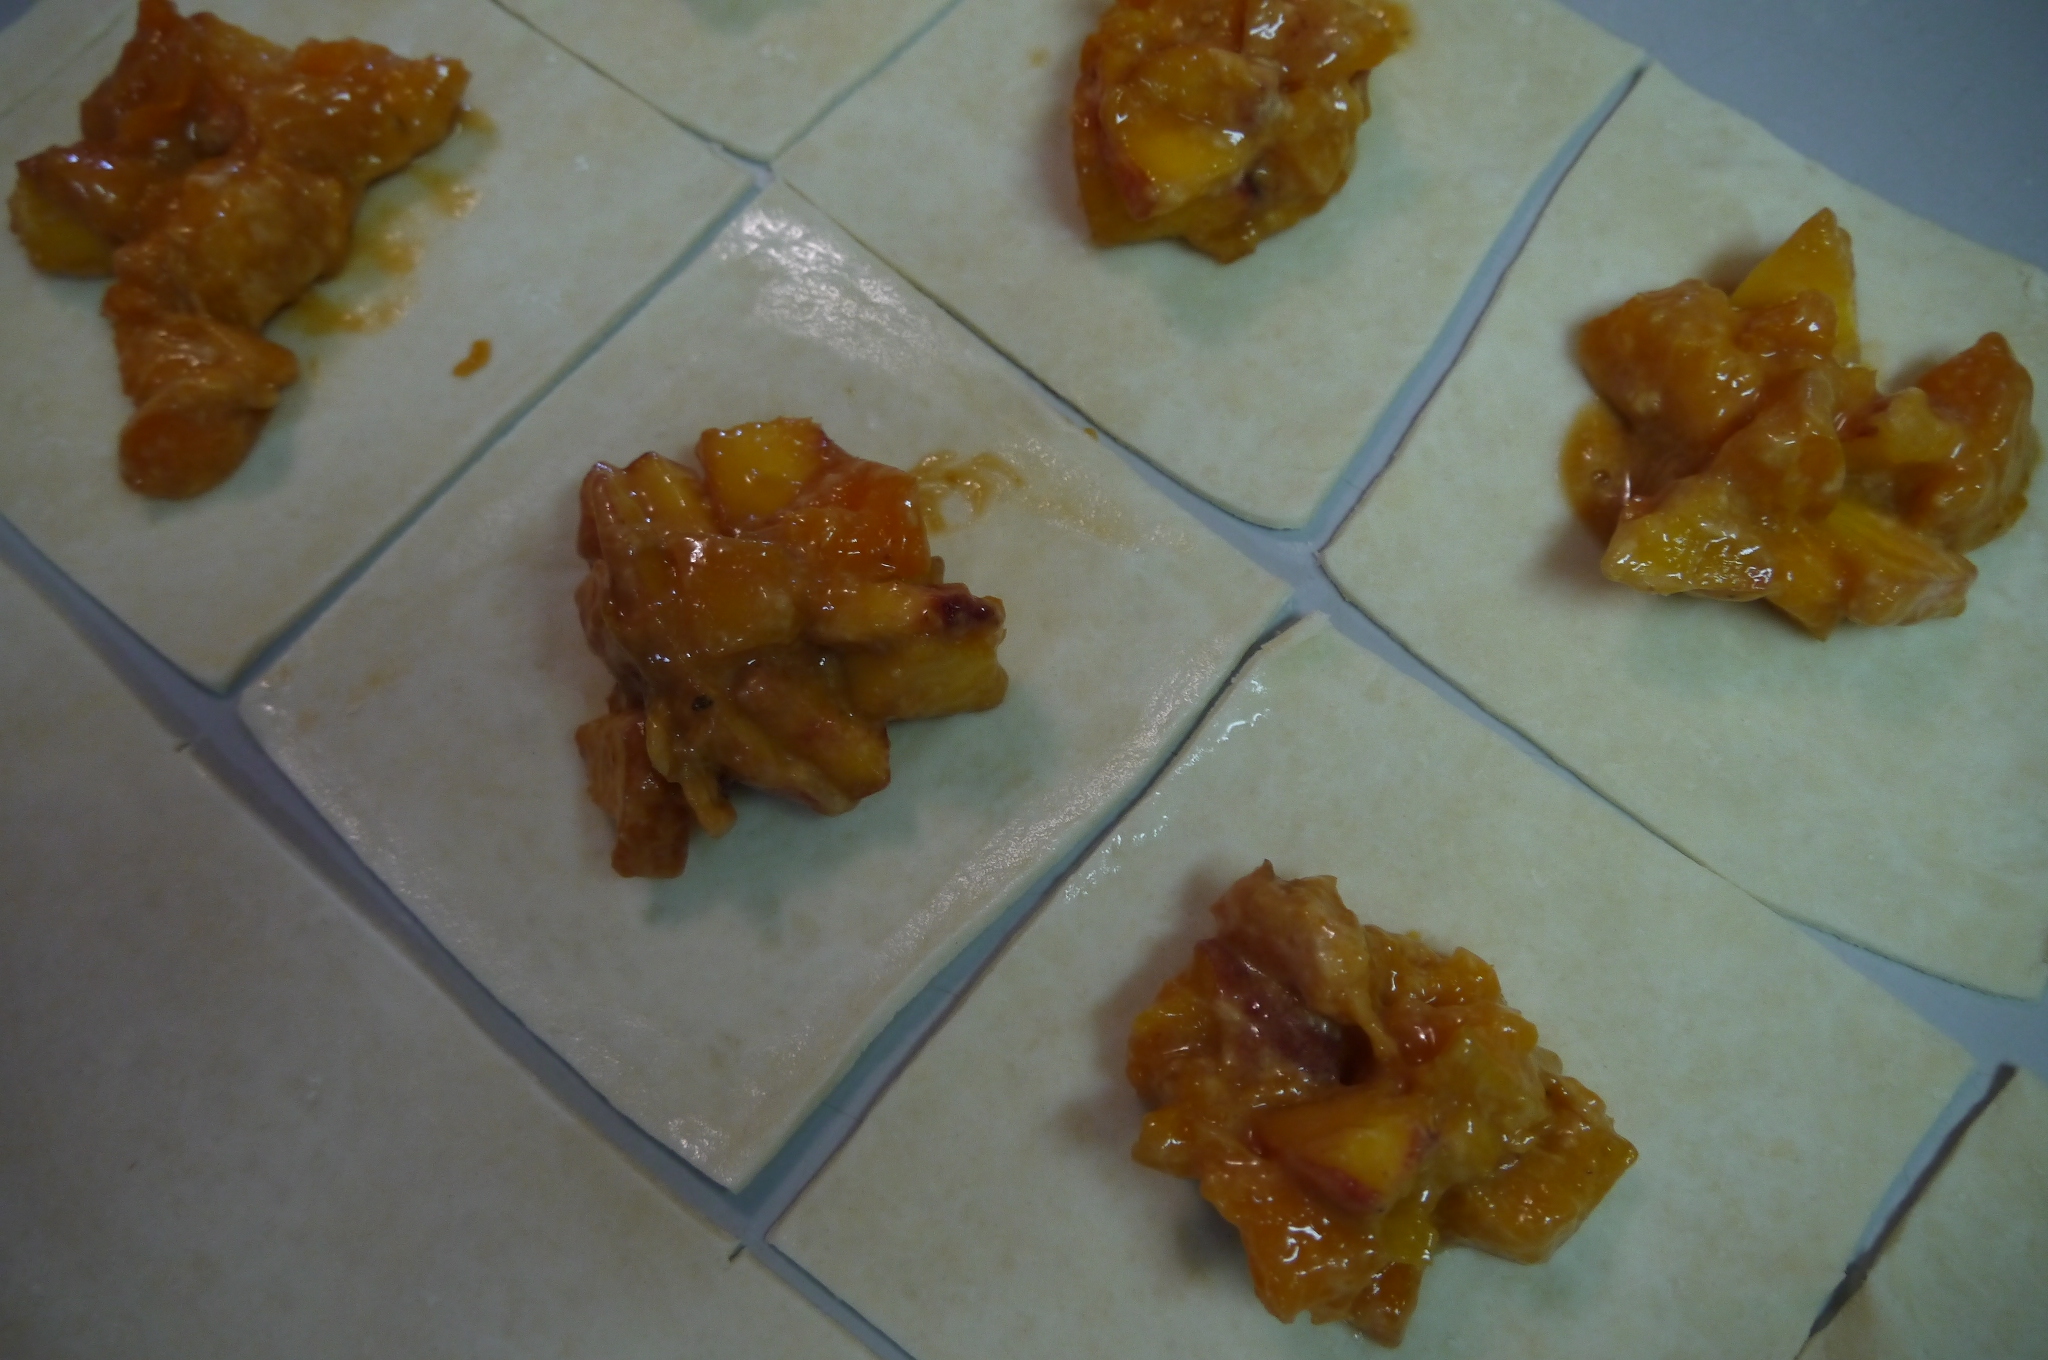
Before you are going to roll out the dough, chop up the fruit and sprinkle it with a little bit of flour or cornstarch and stir that together gently.
Dust the countertop and rolling-pin (or wine bottle if you don’t have a rolling-pin) with a little flour. Cut the dough ball in half and roll out one half. Cut the dough into 15cm/6 inch squares and fill each with some fruit (pictured below). Run a wet finger along each of the edges of the pastry, then bring two corners together to and press them together; do this with each corner until they all meet in the middle. (See picture at the top of the page) Do the same thing with the rest of the dough.
Put the piroschki into the fridge for about 30 minutes. While they are chilling preheat the oven to 375 F and line a baking sheet with some parchment paper (optional – I didn’t have any and they didn’t stick to the pan).
Crack the egg into a bowl add a teaspoon of water; mix with a fork. Use a pastry brush to glaze the pastry with the egg.
Bake for 30 to 40 minutes, or until they are a beautiful golden brown. Let cool only slightly before devouring.
If you are not baking for a large crowd I advise that you freeze part of the batch for a later date. Just put the baking sheet into the freezer until they are solid, then but them into a freezer bag. To bake just take a few out of the freezer and place them on a pan and into a preheated oven, 375 F for 35-45 minutes. Just as yummy as the first batch!
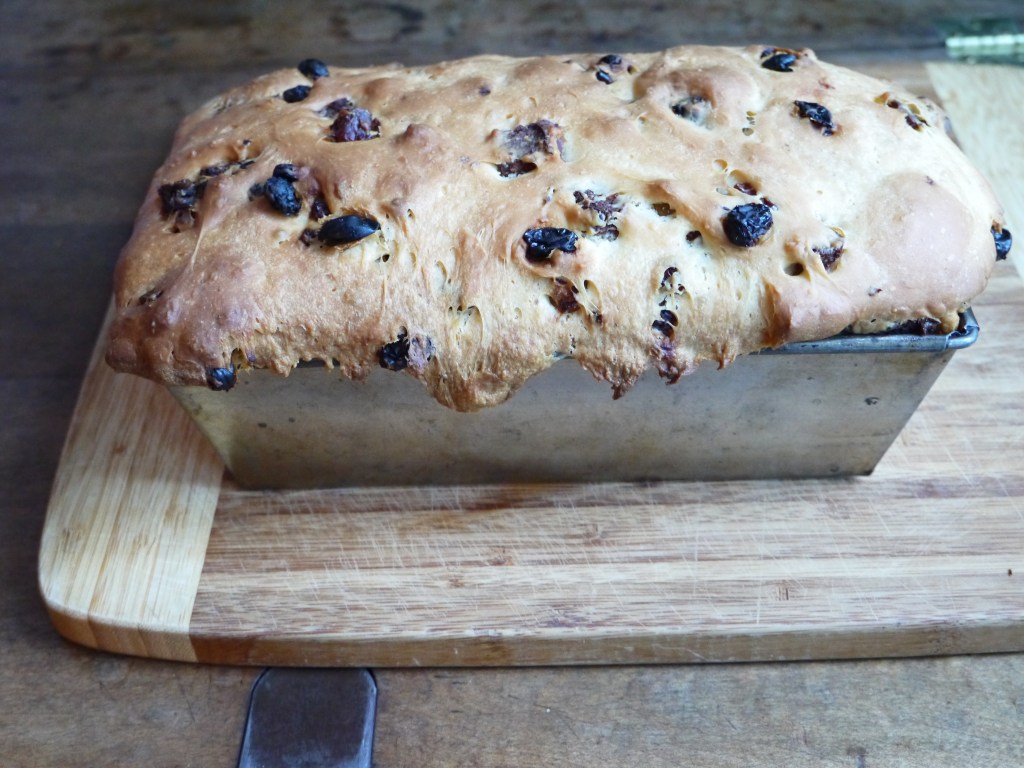
My Oma always made this bread for holiday feasts, so I’m giving it a try for Thanksgiving dinner. While delicious, this version doesn’t seem a lot like hers, but she never used a recipe, so the secret is lost. I think she probably added a whole bunch of chicken fat.
I found several recipes in the Mennonite Treasury, that great cookbook that holds so many of the traditional recipes. I used a combination of two recipes, choosing to use a yeast-raised version. I mainly used the recipe for ‘Bubbat (with sausage)’ submitted by Mrs. Herman Neufeld. Poor dear, with no first name of her own! To her recipe I added the raisins and prunes, some butter, and used much less sausage than the 1&1/2 pounds the recipe called for. I set aside a bit of batter to make a small vegetarian loaf before mixing in the sausage.
What you need:
1 tablespoon sugar
1 package (2 & 1/4 teaspoons) yeast
1 egg
1 &1/2 cups milk
1 teaspoon salt
1/2 cup melted butter
3 & 1/2 – 4 cups flour
2 cups raisins and chopped prunes
2 cups chopped farmer sausage (if you’re in the Fraser Valley near Vancouver, the best is from Rempel Meats)
What you do:
1. Heat the milk until it just boils, then let it cool.
2. Dissolve 1 tablespoon of sugar into some lukewarm water then sprinkle the yeast on top. Let this sit for about 10 minutes, until it gets foamy. If it doesn’t do anything that means your yeast is dead.
3. Once the milk has cooled, add the yeast, a beaten egg, melted butter and salt to it. Stir in the flour to make “a soft dough that can barely be stirred with a spoon.” I think this means it is soft but firm… do what feels right! Add the raisins, prunes and farmer sausage.
4. Grease a large loaf pan very well with butter and pour the dough into it. The cookbook asks for lengths of sausage to be pressed into the top, so you can do this if you want more meat in there.
5. Let the dough rise in a warm place for about an hour. The cookbook does not specify, but I think it’s a good idea to put a clean tea towel on top of it.
6. Once the dough has risen, preheat the oven to 375F and bake for 45 minutes.
One recipe says to serve it hot, but I don’t remember having it that way, so you can remove it from the tin to let it cool if you want, or serve it right away with some butter.
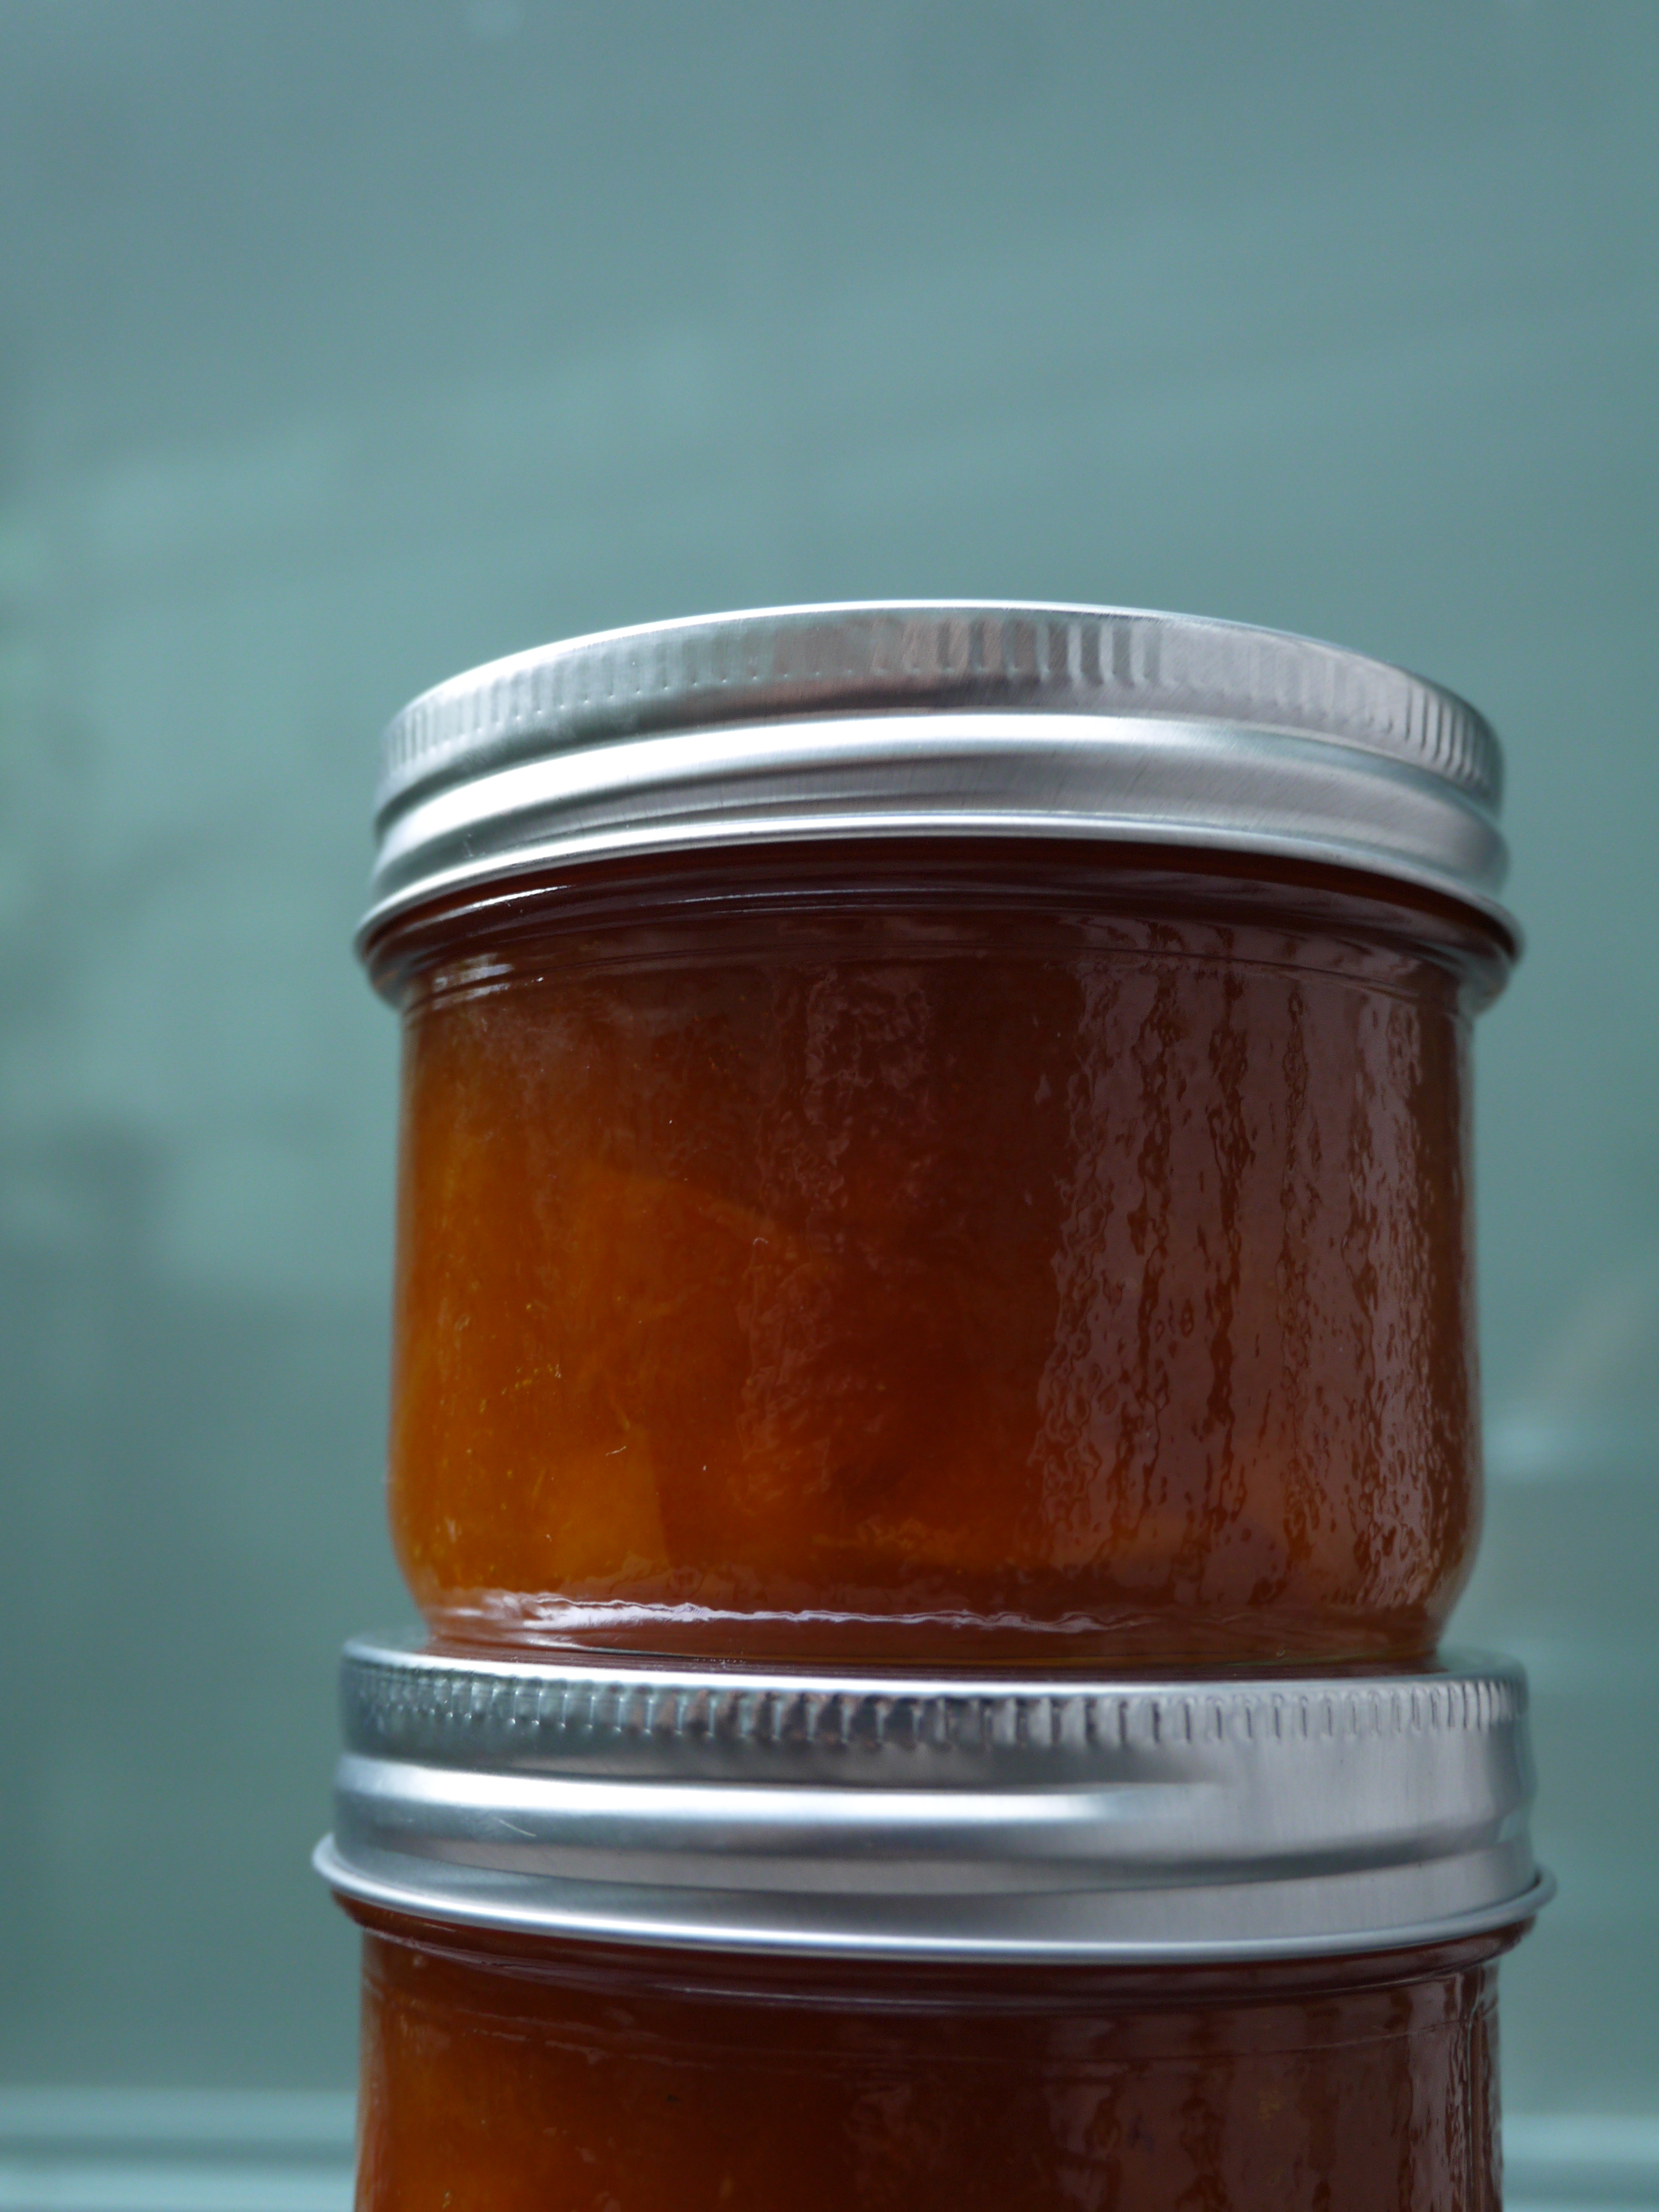
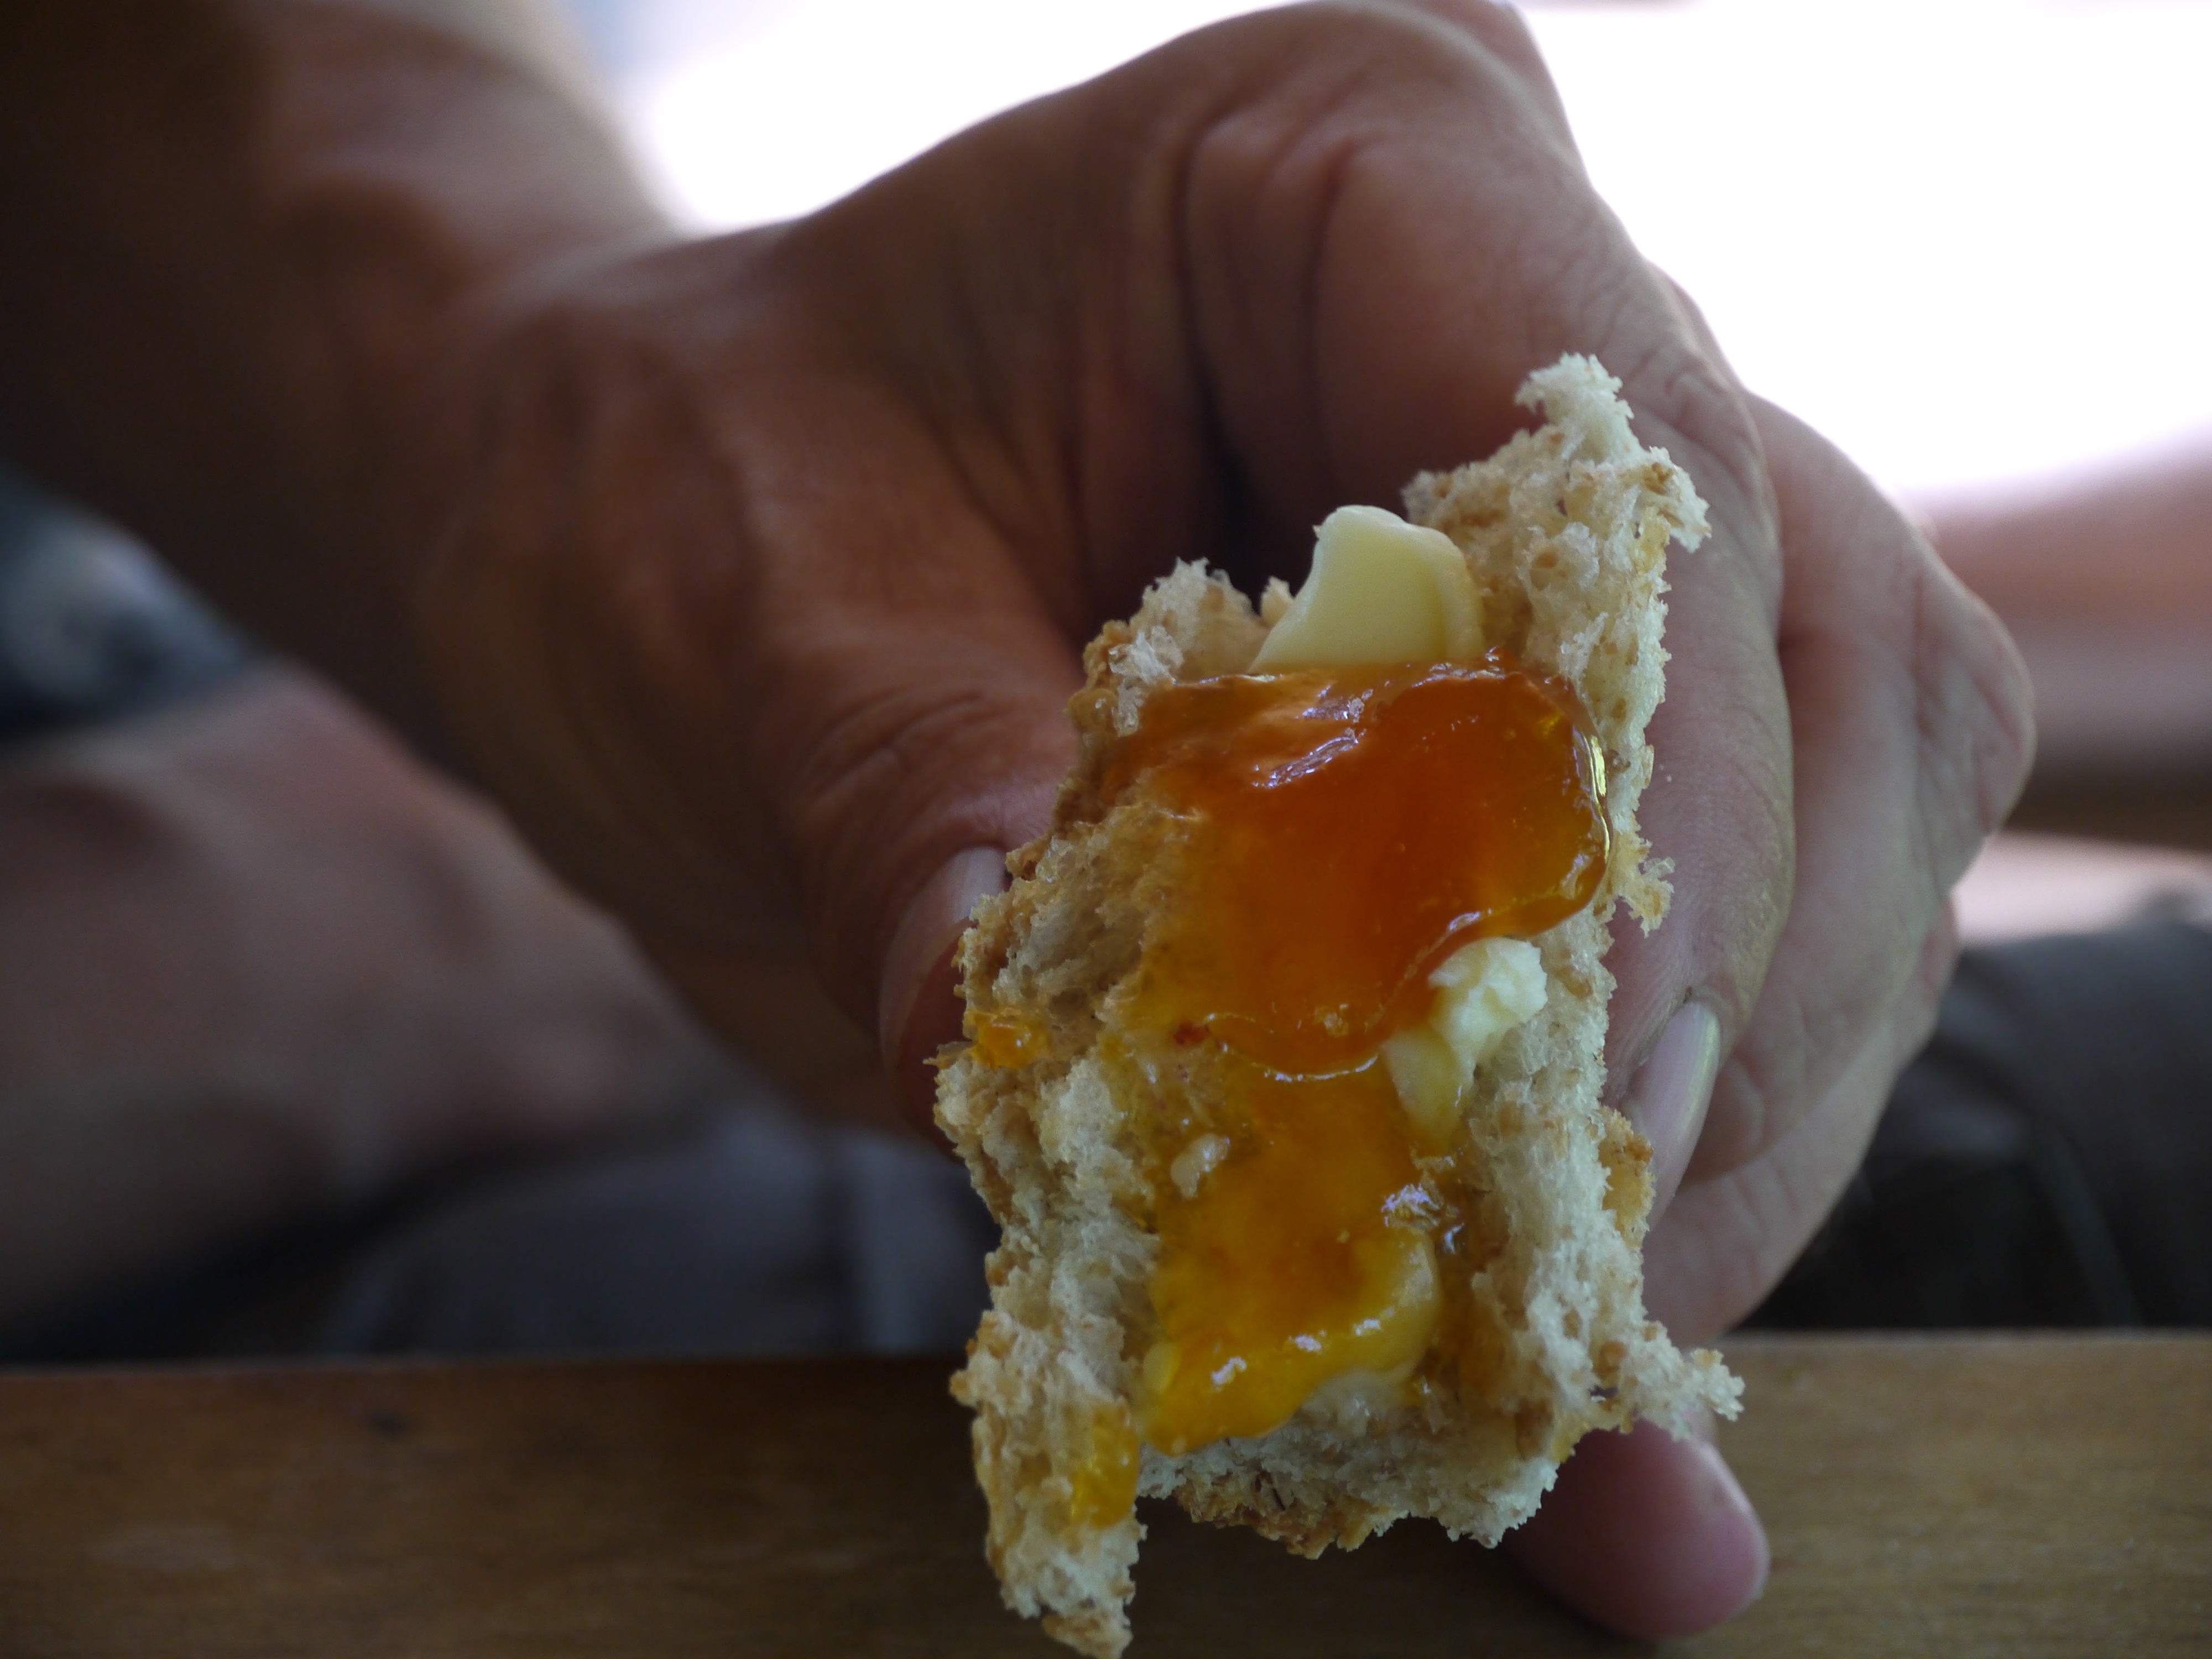
This summer my friend Connie visited from Ontario and brought a delicious jar of homemade apricot jam. It was so delicious on toast, and amazing as a glaze for the apricots in this Apricot Almond Cake. I can easily say that apricot jam is my favourite of all the jams, and yet I’ve never made it before. Since my sweetheart loves it as much as I do, I searched many produce stores to find apricots this late in the summer, (actually a few weeks ago now), and managed to find a few pounds. Connie sent me her recipe, and I cooked up a batch. Love the colour, love the smell, and I’m looking forward to tasting it all winter long!
The recipe is proportional, about 3 parts fruit to 1 part sugar. I’m writing the amounts I used, but you can experiment depending on the amount you are using, as well as the flavour in your fruit. Sometimes they need a little extra (or start with less) sugar or citrus.
What you need:
12 cups pitted and chopped apricots
4 cups white sugar
1/4 cup freshly squeezed lemon juice
1/3 cup freshly squeezed orange juice
canning jars, rings and new lids
What you do:
1. Chop the apricots up into small pieces and put them into a large pot with the sugar and citrus juices. Bring to a low boil and skim off any foam. Let it cook, stirring often, on a low simmer until the mixture has thickened. To test how thick your jam will be when it has cooled you can put a plate in the freezer. Just drop a little jam onto the icy plate and let it cool, then give it a push with your finger to see if it is thick enough. If not, just keep cooking it for longer.
2. Preheat the oven to 225F. After washing your canning jars, put them in the oven for at least 20 minutes to sterilize them. Heat a small pot of water for your lids to sterilize them and soften the rubber ring. Just a note: it’s not a good idea to re-use the lids (the rings are fine to re-use though) because they may not seal properly.
3. Once your jam is ready pour it into the sterilized jars, keeping the edges of the jar clean so you will get a good seal. Put a lid and ring on each and tighten it. My mom and Oma always put a tea towel over the jars until they seal, so that’s what I did. You’ll hear the lids ‘ping’ as they seal. I try to keep track of how many pings I hear so I know they’ve all sealed.
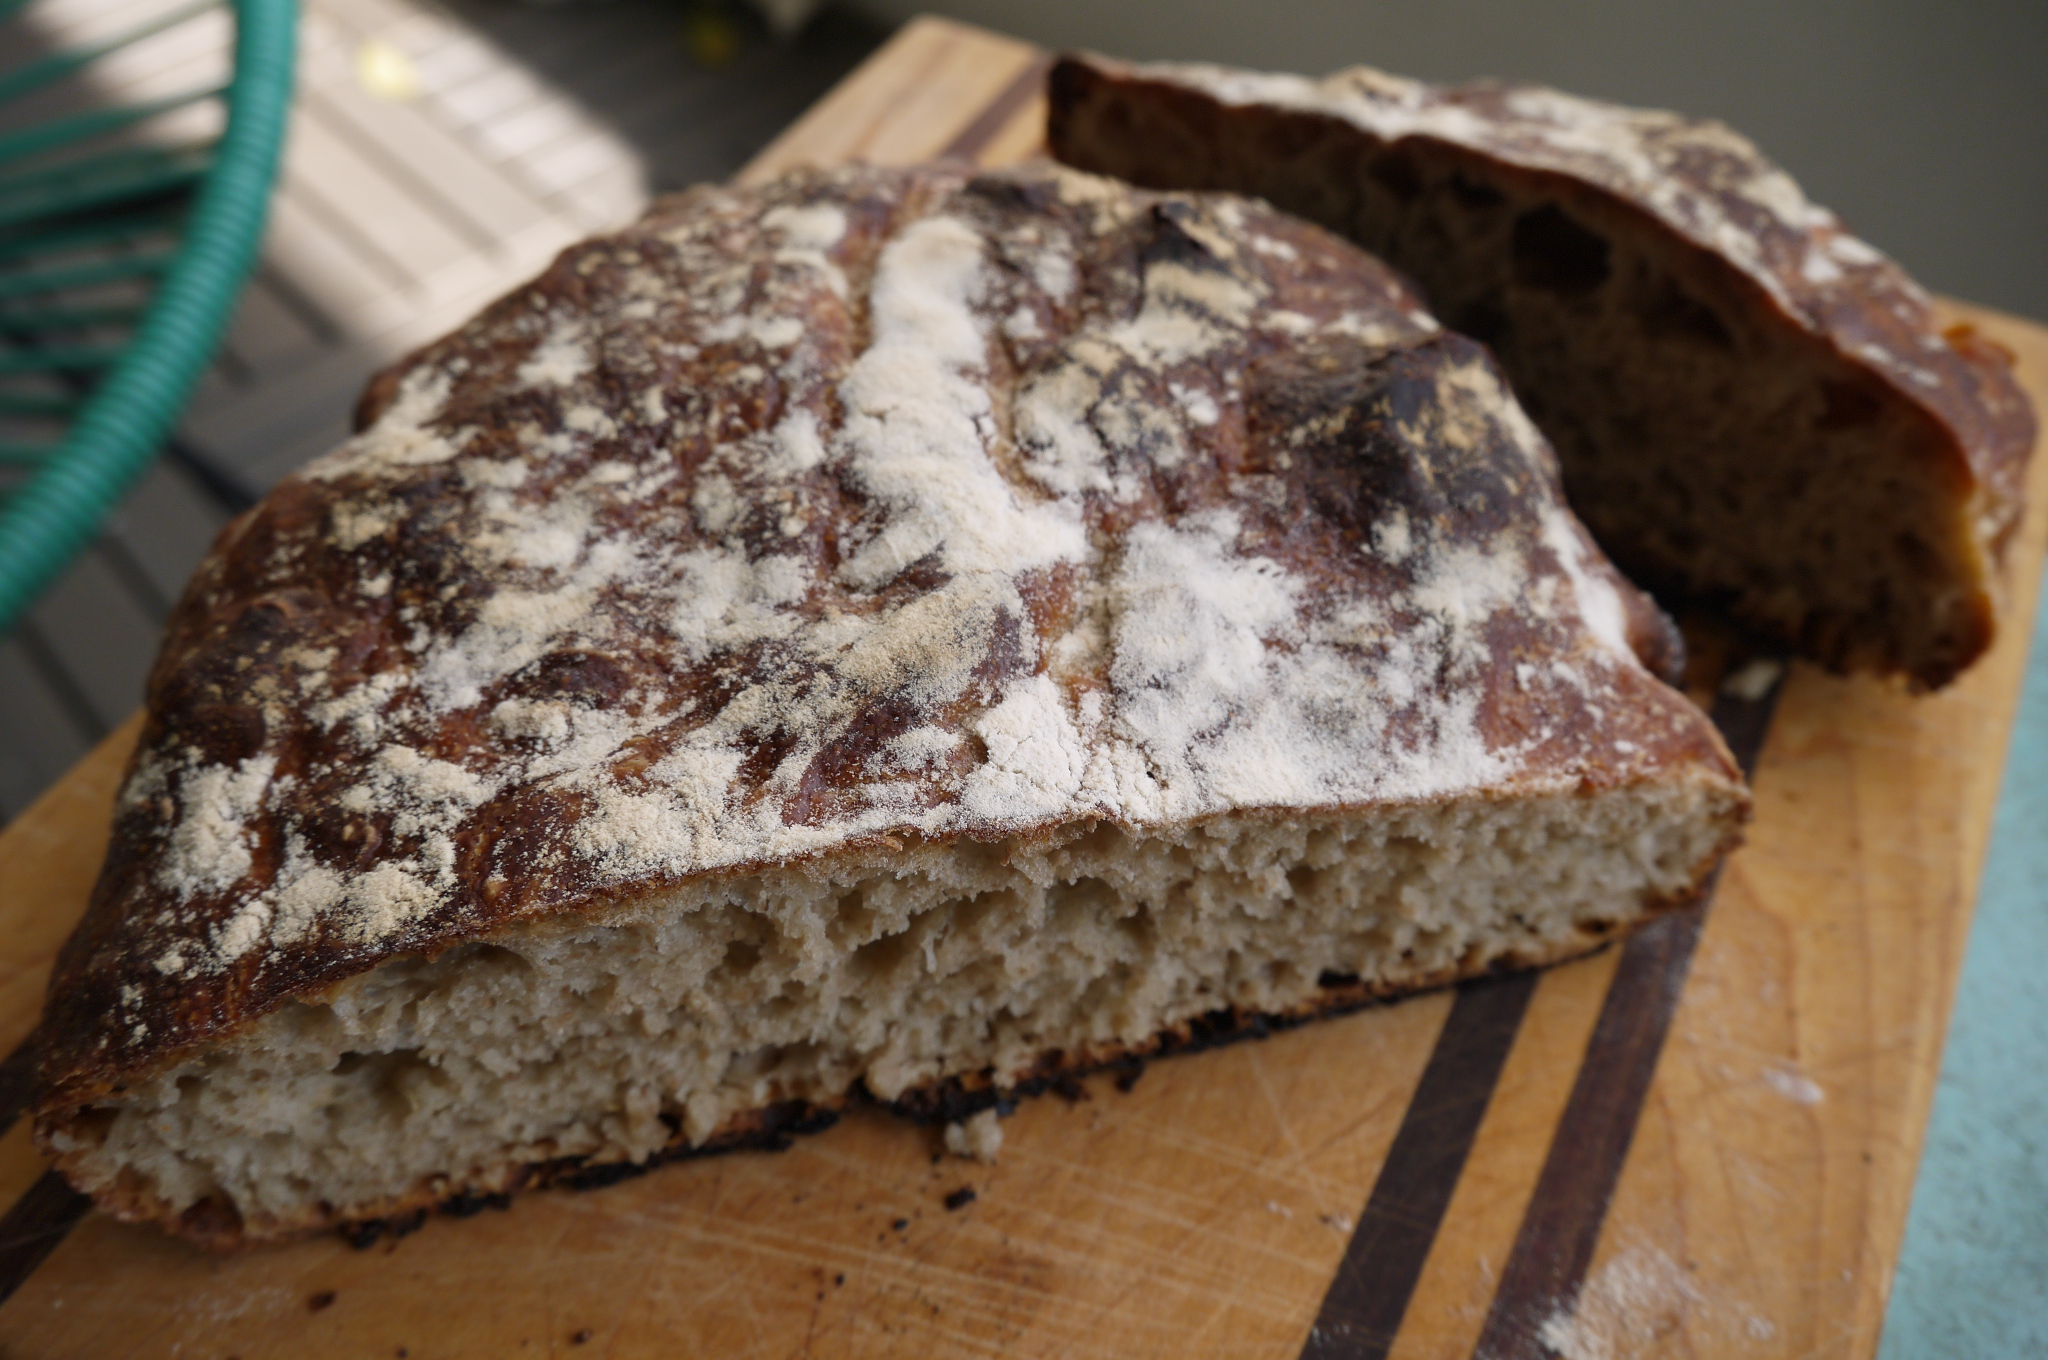
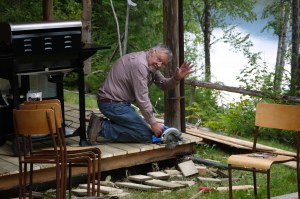
As I was planning a trip up to the family cabin at Mahood Lake I knew I had to make my Mennonite Oma’s Russian bread. I love taking the opportunity to bake in that oven when I go up to the lake, because it’s the only place where I have access to one. and it is so much fun. I usually just make pizza in there, but this time I wanted to branch out a little, so I thought of my Oma’s awesome dark-crusted bread. My Oma was born in the Ukraine where they made this type of bread, and then she lived in Paraguay for 15 years where she also baked it in an outdoor oven. In the early 1980’s my Opa built this great brick oven, in the style of the Paraguayan Mennonite ovens. My Oma always made this great bread – it was dark brown, almost black on the outside, with a thick crust, and tender inside. Now, I’ve got the recipe, and I made a delicious loaf of bread, although I fully admit that it is nothing like my Oma’s bread. I asked her in the past how she got that great crust on it, and she told me she just put all the ingredients together – so she had a magic touch that I can’t figure out. Oma passed away a few weeks ago, so her secret it gone too.
You don’t need the brick oven to make this bread, it’ll work fine in a conventional oven. I used a machine with a dough hook, but you could do it by hand if you’re feeling energetic. This recipe makes 3-4 loaves.
If you’re using a brick oven you need to get a really good fire going so it’s smoking hot in there. I pushed some of the coals to the back of the oven so it would retain heat for a full hour.
1. Boil the potato in about 3 cups of water until it is soft. Place the potato, saving the liquid, in a 2 cup measuring cup. Smash the potato up with the back of a fork, then add enough of the potato water to fill the measuring cup to 2 cups. Allow this to come to room temperature.
2. In a large mixer bowl add about 2 tablespoons of warm water and sprinkle the yeast top. Wait until the yeast begins to bubble and is all dissolved (if it doesn’t your yeast may be dead).
3. Add the potato water and buttermilk to the yeast mixture. With the machine running and using a dough hook, gradually add the flours, bran and salt. Mix until you have a moist dough, using more or less flour to get this consistency. Keep mixing until the dough begins to form a bit of a ball.
4. Remove the bowl from the mixer and cover it with a clean damp tea towel. Let it rise to about double in volume; this will take about 1- 2 hours, depending on how warm your kitchen is.
5. Punch the dough down, then turn it out onto a floured surface. Give it a few kneads, then cut into 3-4 equal pieces. Form a loaf with the seam in the bottom and place in loaf pans. Cover with the damp tea towel and let it rise, again to about double, which should take slightly less time than the first.
6. Heat the oven to 400F. When the loaves have doubled in size, and they hold an indentation when you poke the dough lightly, they are ready to go in the oven. If you want to get more of a crust on your bread, you can spray the inside of the oven with water just before the bread goes in. Just try not to spray the light bulb, as it might shatter. Place the bread in the oven and bake for about 1 hour.
7. You will know the loaves are ready when you tap on the bottom of the pan and it sounds hollow, so keep an eye on it in the last 10 minutes or so of baking to see if it’s looking done, and test it using this method.
8. Remove the bread from the pans and let it cool on wire racks. Once it is mostly cool you can slice it up and then slather on some butter, but we just broke of satisfying chunks and ate some with butter, and on some we added apricot jam. Not quite like Oma made it, but delicious nonetheless.
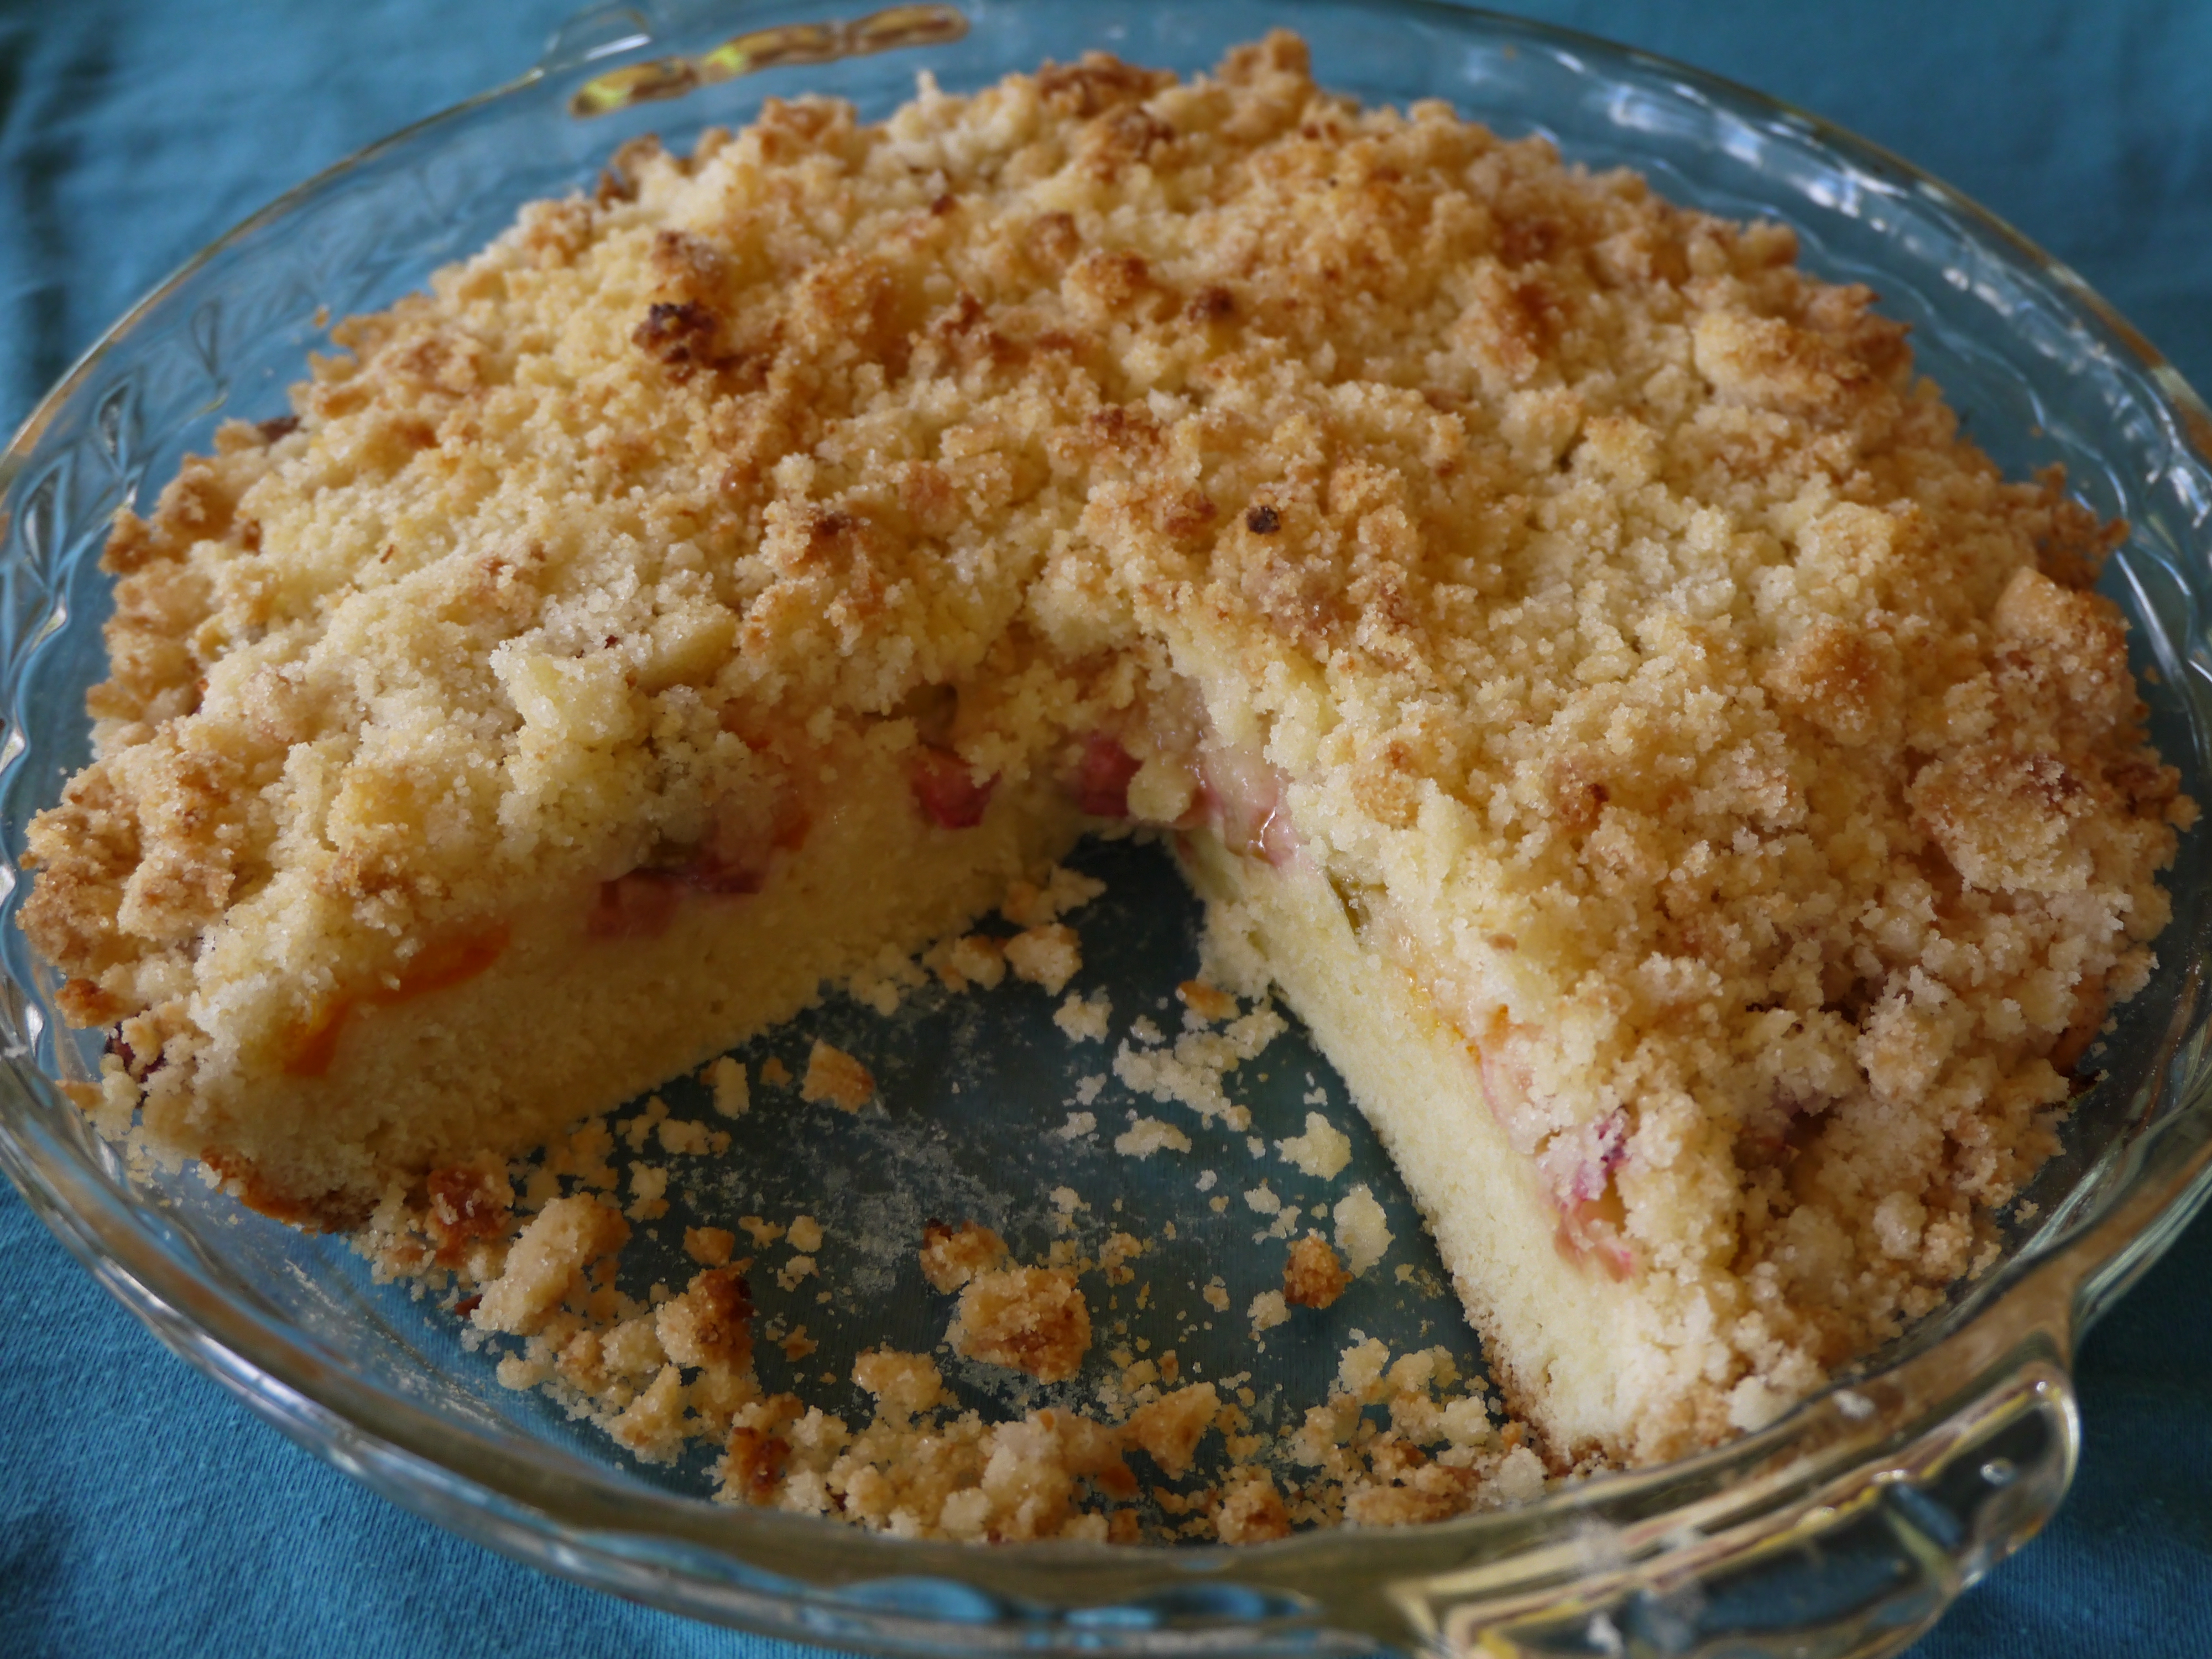
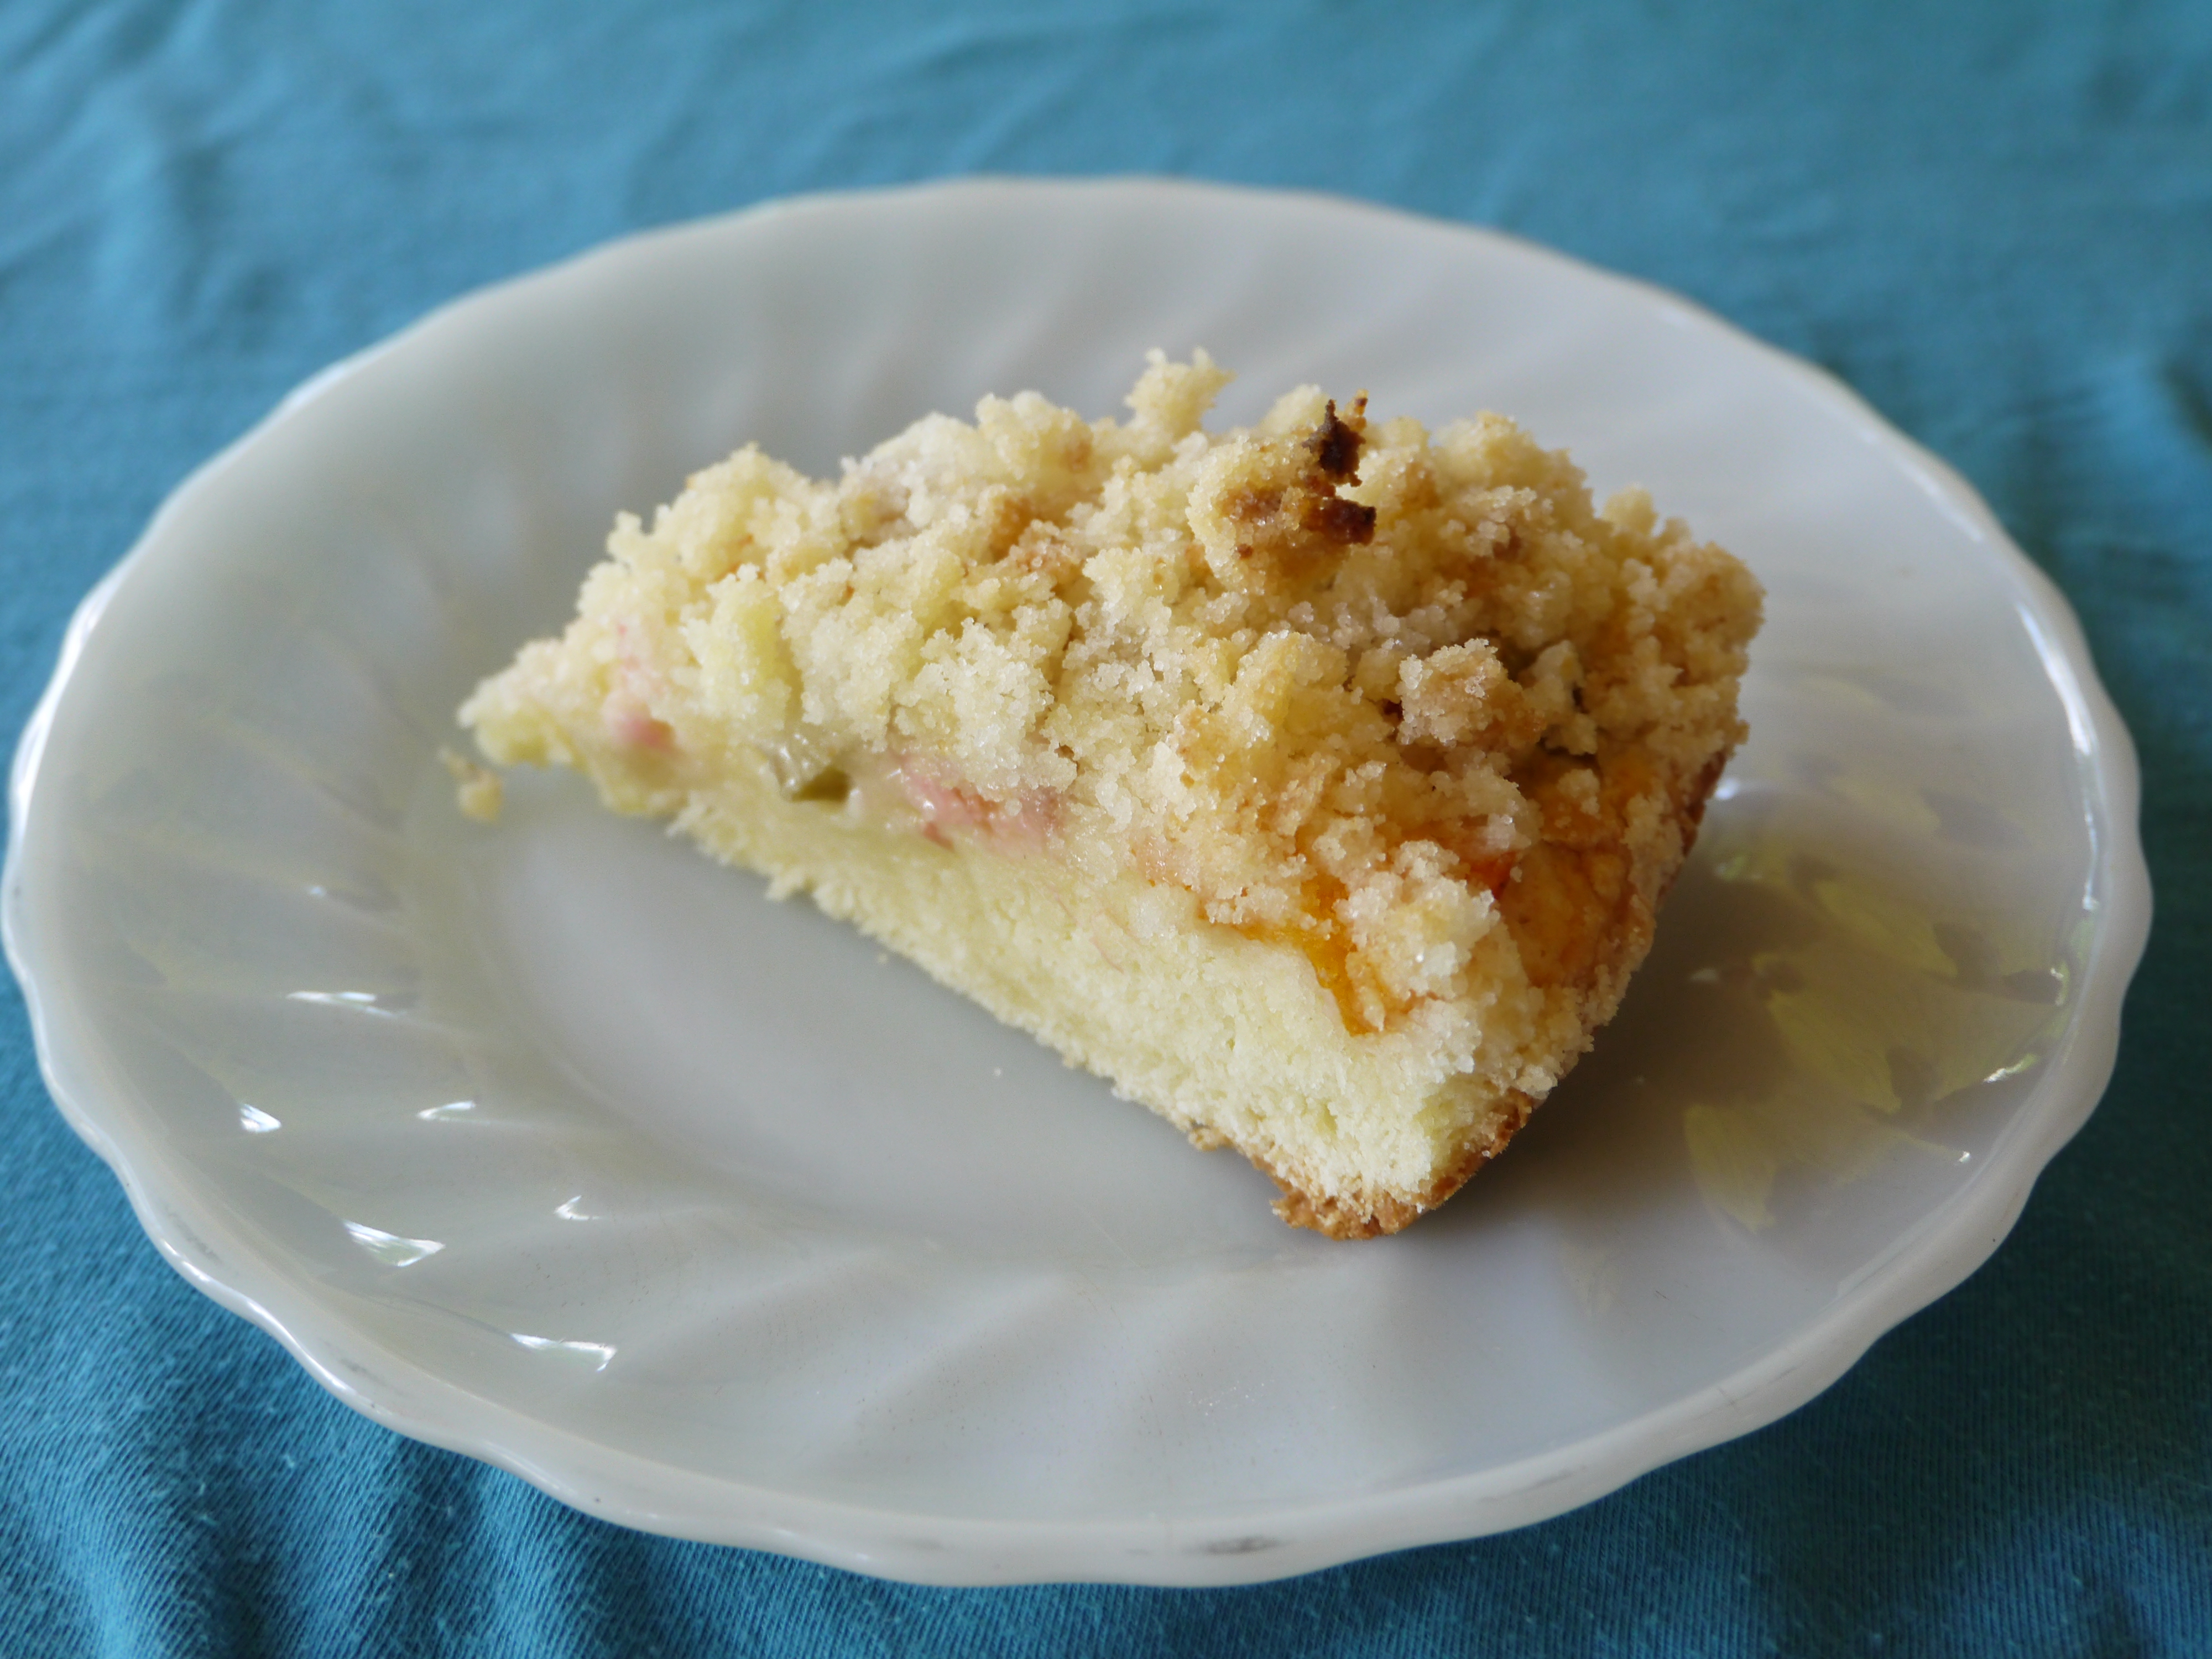
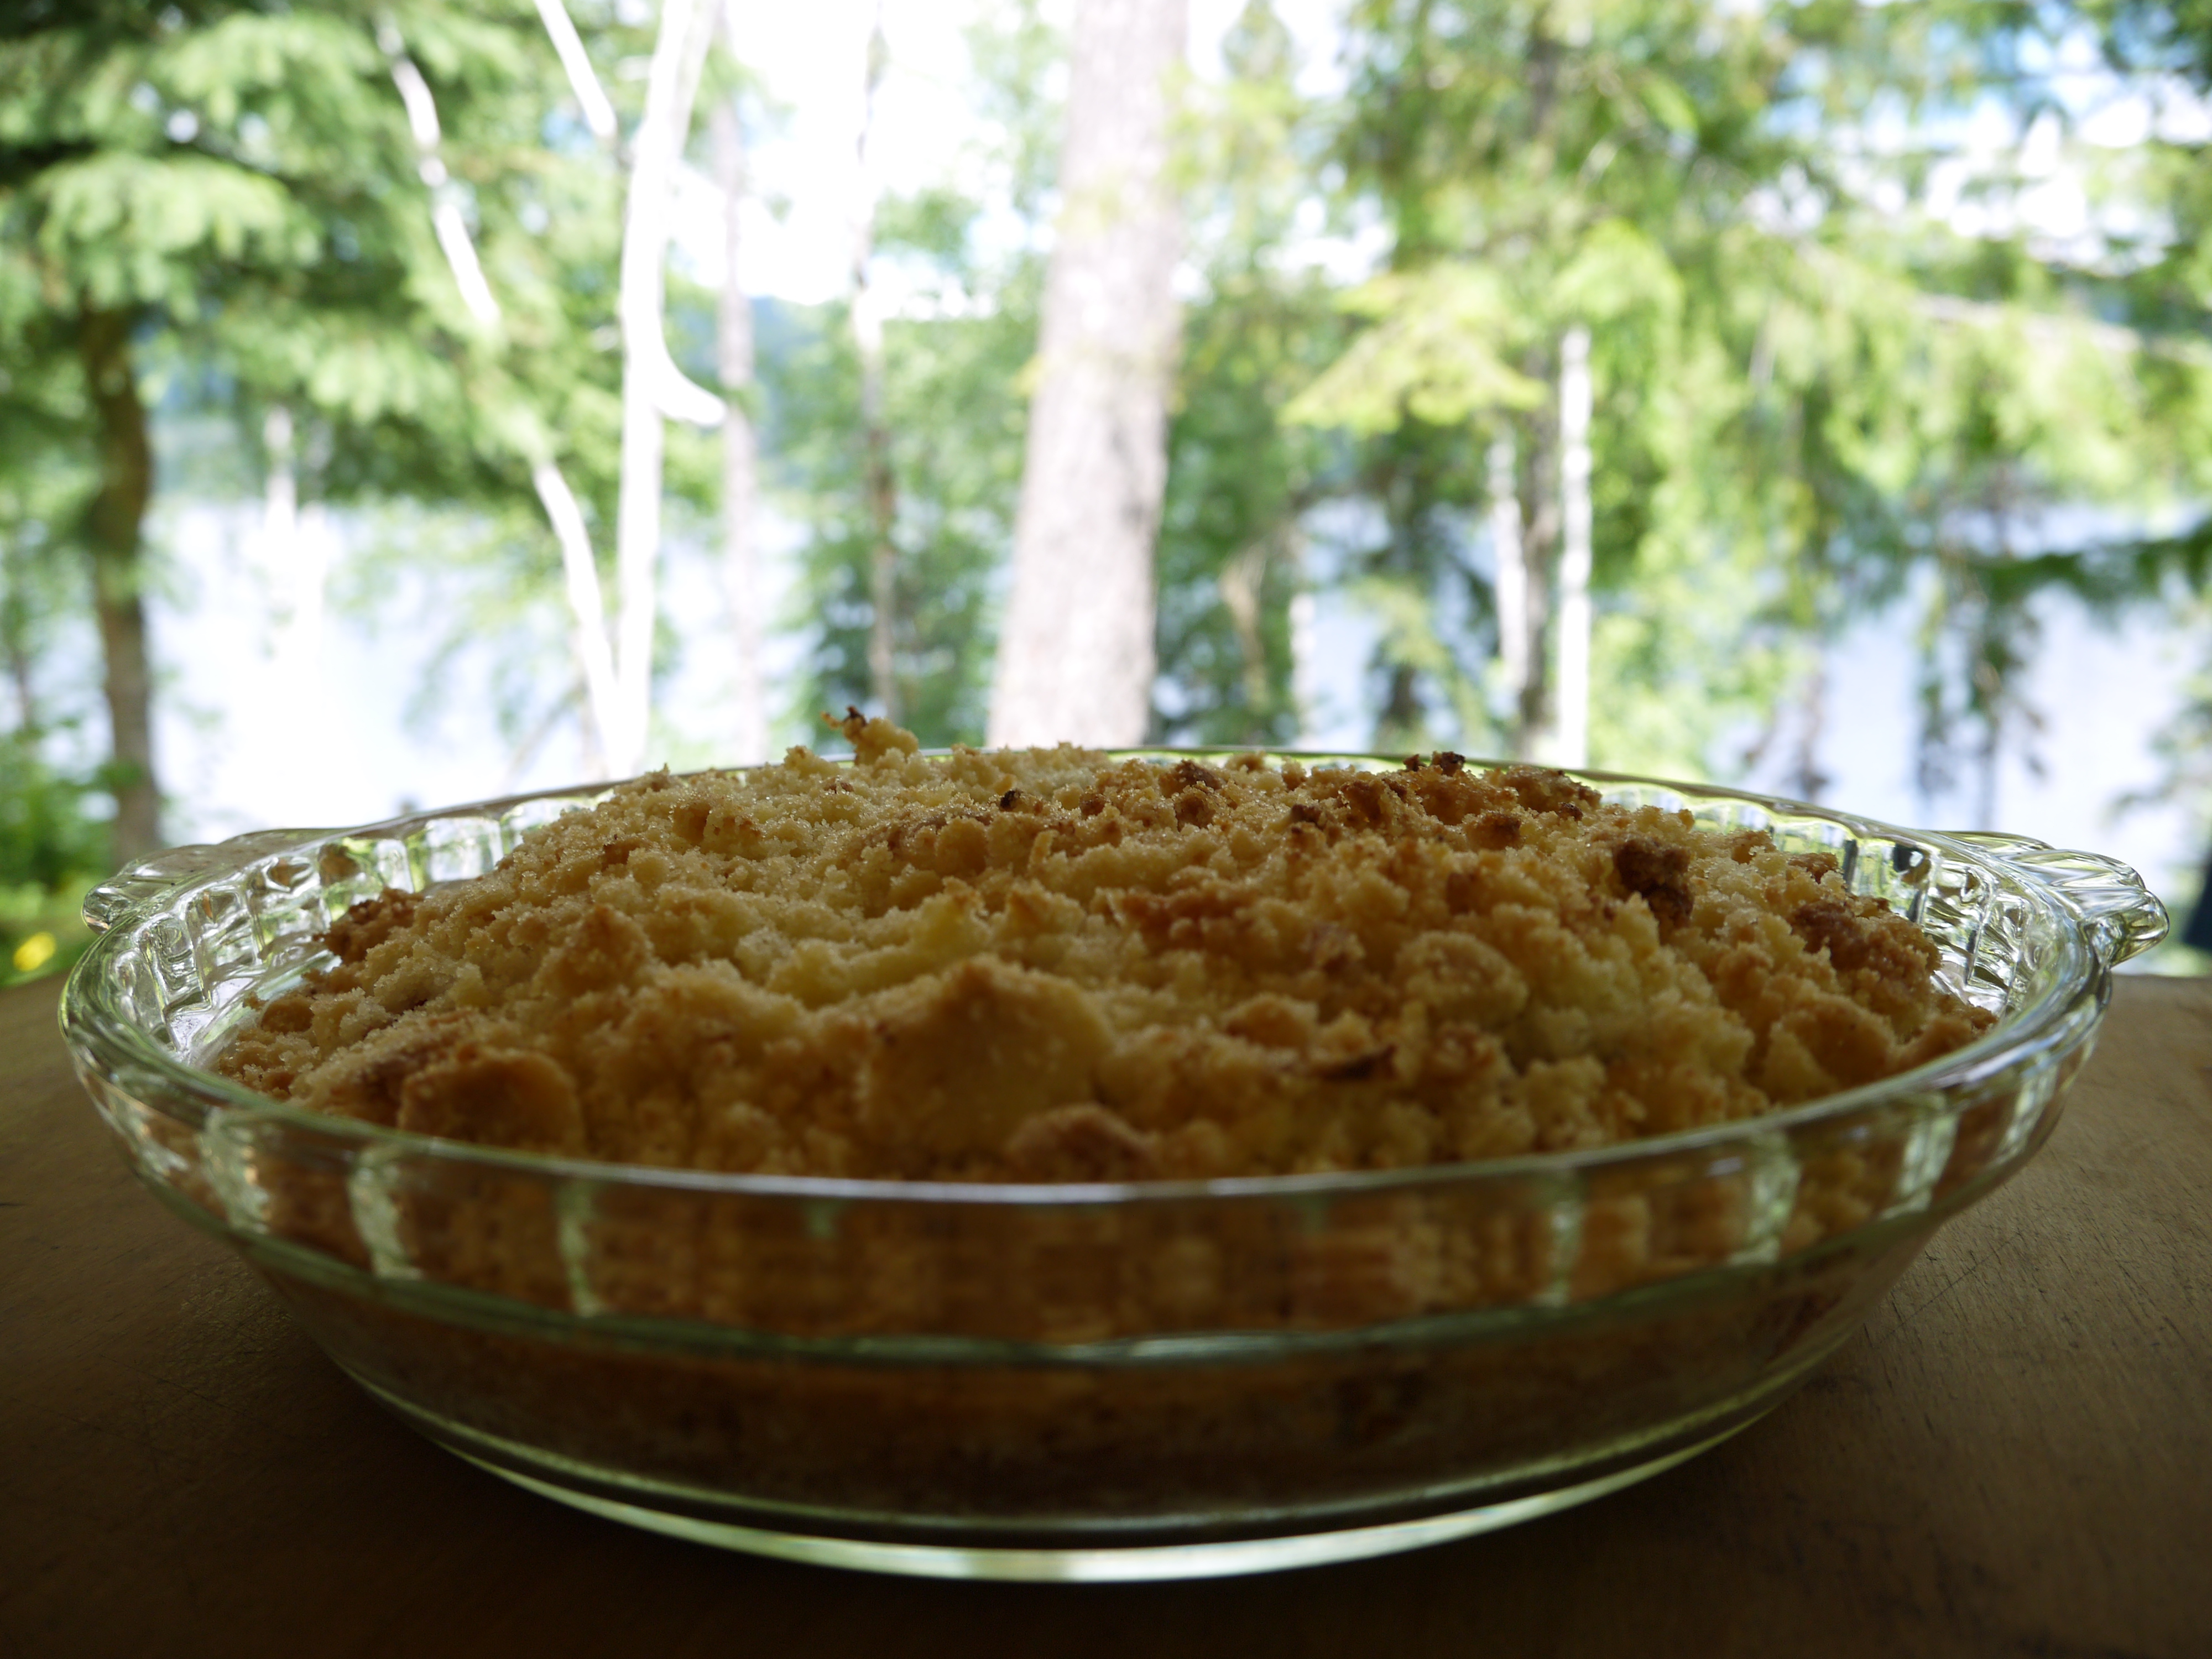
This is a recipe I grew up eating: my Mennonite Mom’s platz. It is a thin coffee cake with fruit and streusel on top. Sometimes on the second day the cake layer would get a bit dried out, but I didn’t mind too much because the fruit and streusel were so yummy. For this recipe I used a combination of rhubarb and apricots, but plums are another favourite.
Even though the photos show a thick round cake, I grew up with it baked thinly in rectangular form, which was cut into squares.
What you need for the cake:
1/2 cup butter (the original recipe called for crisco or margarine)
1/2 cup sugar
2 cups all-purpose flour
3 teaspoons baking powder
1/2 teaspoon salt
1 egg
about 1/2 cup milk
2-3 cups chopped fruit of your choice
What you need for the streusel:
1/4 cup melted butter
1 cup sugar
3/4 cup flour
pinch salt
splash of vanilla
What you do:
1. Preheat the oven to 35oF.
2. To make the cake, cream the 1/2 cup butter and 1/2 cup sugar well.
3. Combine the flour, baking powder and salt.
4. Crack the egg into a measuring cup and mix it up a little with a fork. Add enough milk to the measuring cup so it reaches the 2/3 cup mark.
5. Mix in some of the liquid and alternate with the dry ingredients. Spread this mixture in the bottom of a buttered 9 x 13 inch pan.
6. Spread the fruit on top of the batter.
7. To make the streusel topping just combine all the ingredients; my mom says to do it with a whisk, but I just used a fork and then mixed it with my hands, and then sprinkled it on the cake with my hands.