No-Bake Nut Butter Cookies

no-bake nut butter cookies

A perfect treat when you don’t want to turn on your oven, these chocolate-coated nut butter cookies are simple and tasty. I needed something sweet to bring to a picnic, something that adults and kids would enjoy, and these were perfect. Plus I was happy to not heat my home up with the oven. And also perfect, because . . . well, peanut butter and chocolate are a match made in heaven!

The recipe calls for oat flour. I just whizzed some rolled oats in the food processor until they were finely ground.

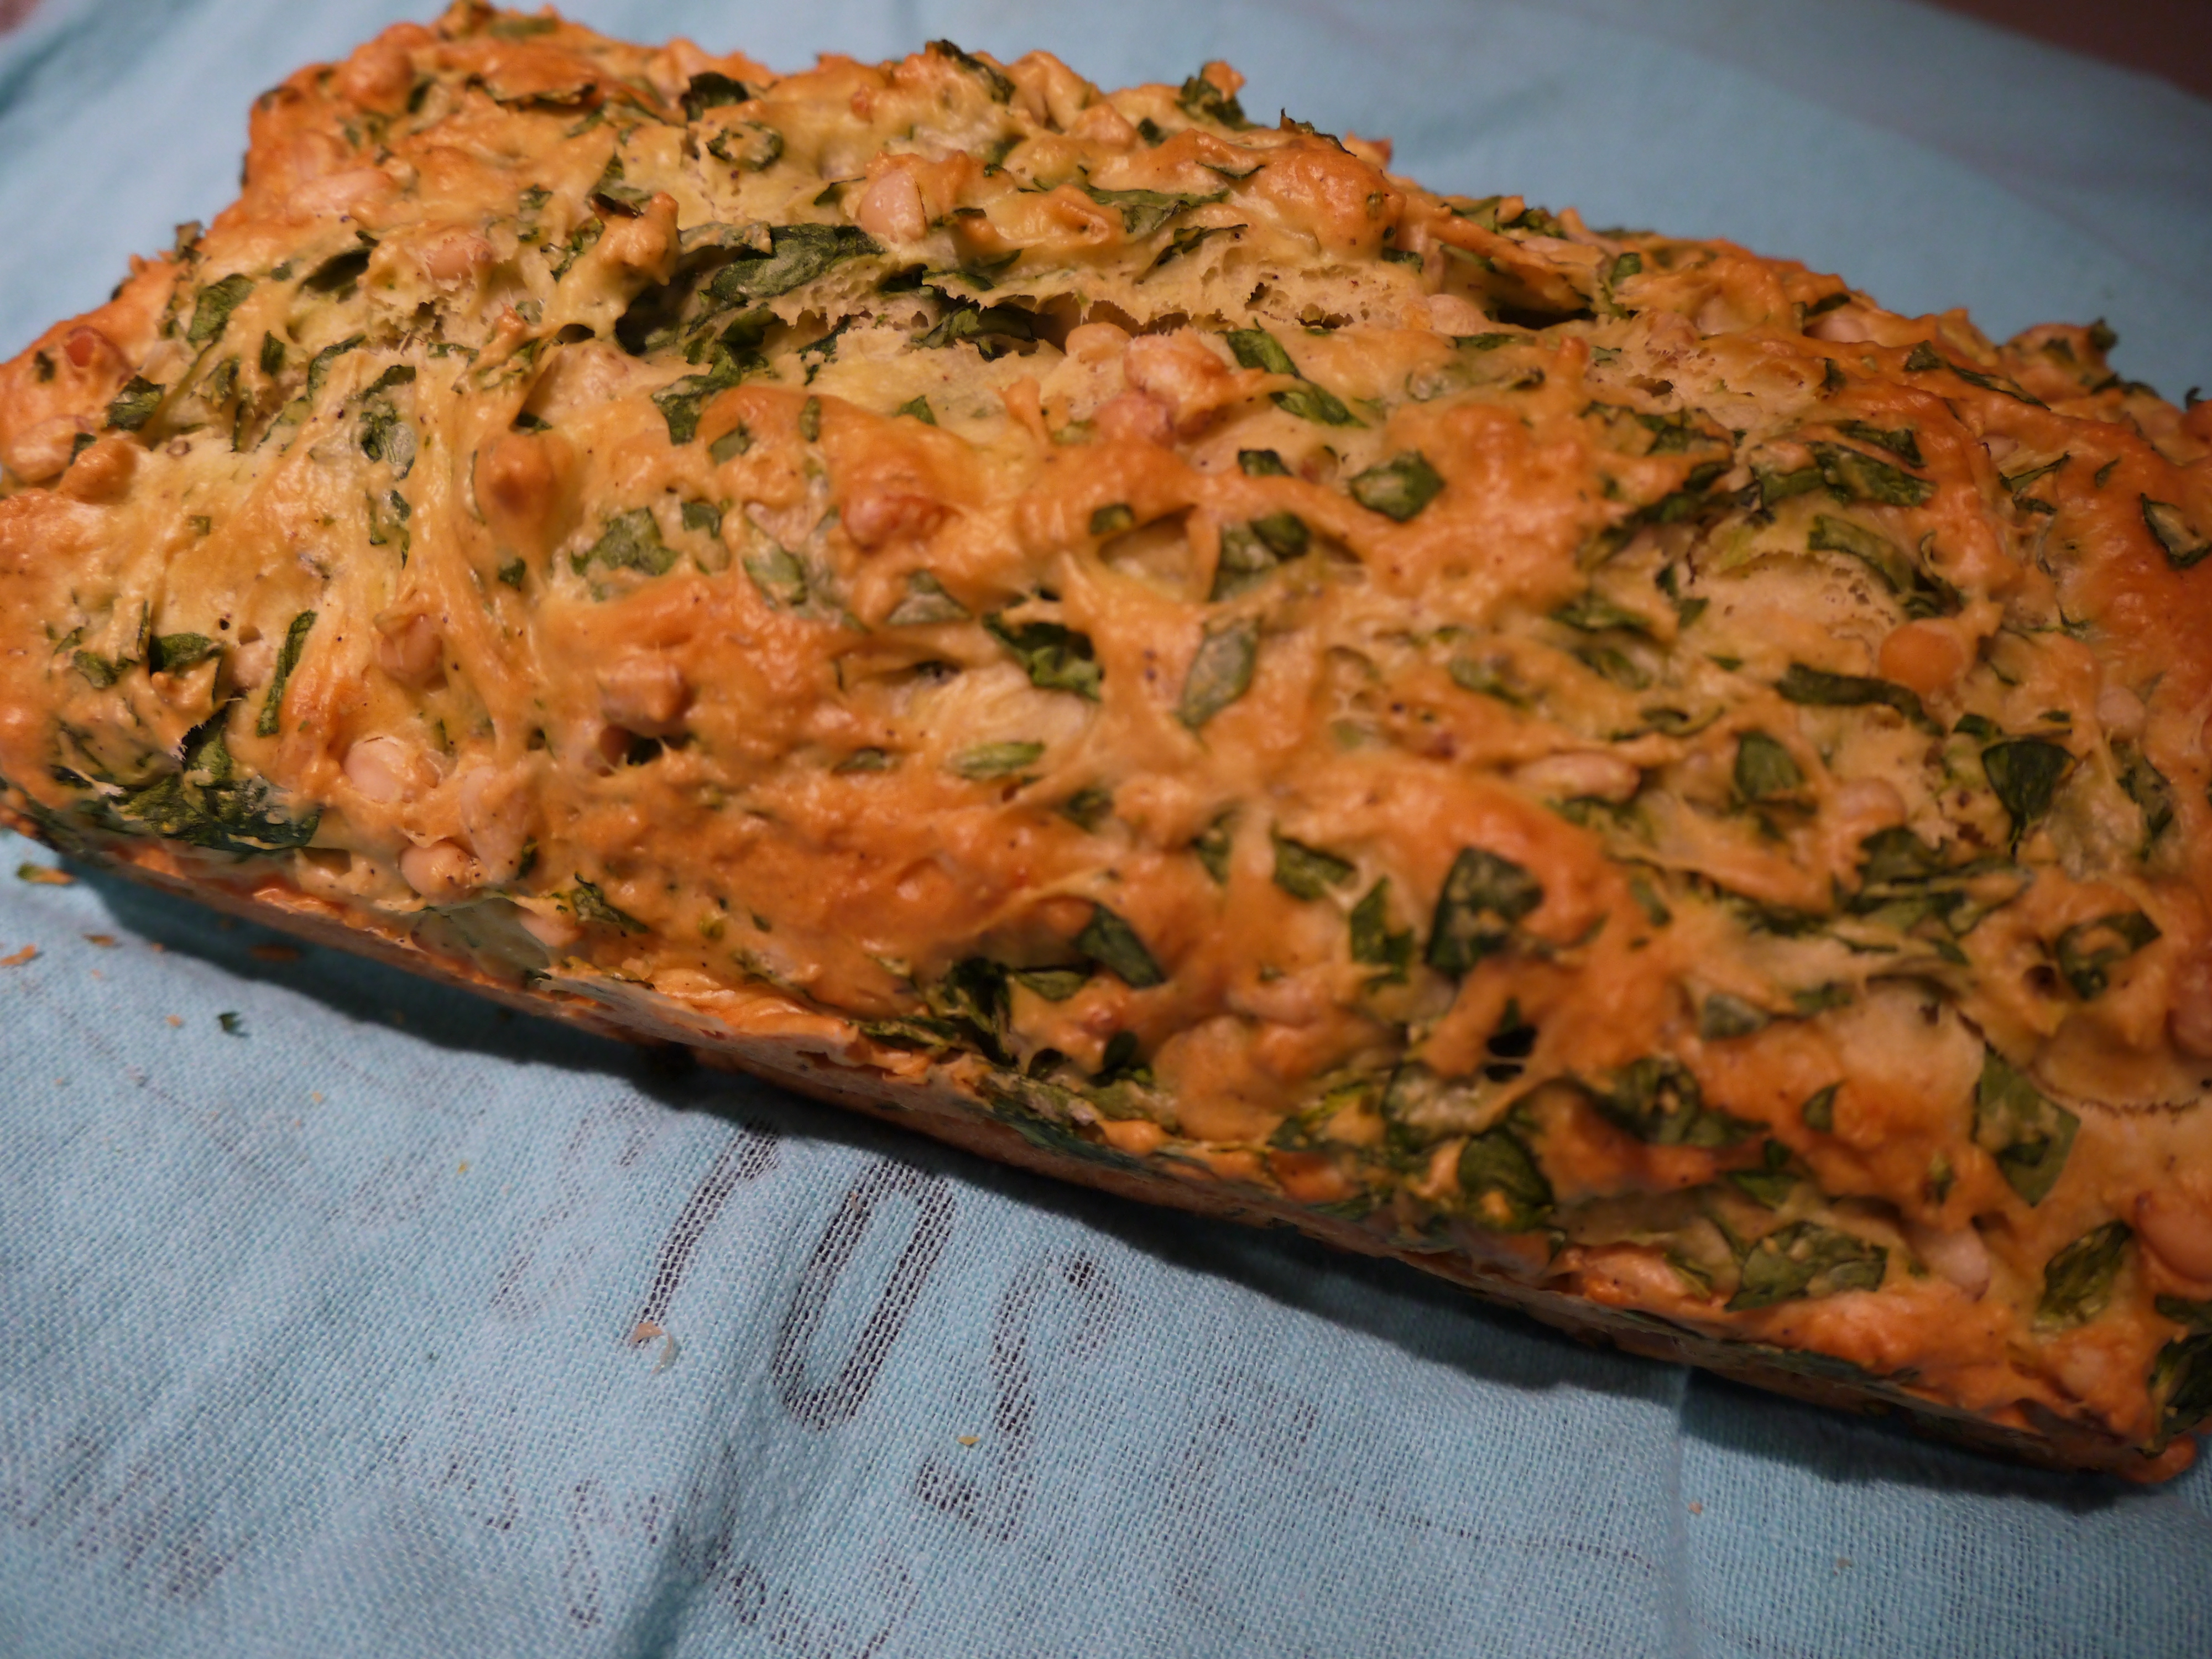
This recipe makes about 3 dozen tiny cookies. They are quite rich, so I opted to make them really small rather than the two tablespoons that the original recipe calls for. I made my cookies with peanut butter, but you can use the nut butter of your choice.

If you omit the chocolate these would make a great power cookie for hiking or biking. Unless you’re hiking or biking in cool weather, when the chocolate wouldn’t melt.

You can store the cookies in the fridge for about 10 days.

What you need:

  • 3/4 cup (188 mL) nut butter
  • 1/2 cup (125 mL) honey
  • 1 teaspoon (5mL) pure vanilla extract
  • 3 cups (750mL) oat flour
  • 1/2 teaspoons salt
  • 3/4 cup (188mL) chocolate chips

What you do:

  1. Line a baking pan with parchment paper, or wax paper if that’s all you have.
  2. Heat the nut butter and honey in the microwave or in a pot on the stove. Whisk in the honey.
  3. Add the oat flour and salt, then mix until combined. 
  4. Scoop one tablespoonful of the mixture at a time and use your hands to form each into a ball. Flatten the cookie into a disk and place it on the parchment-lined baking sheet. Use a fork to make the crosshatch pattern typical of a peanut butter cookie.
  5. Refrigerate the cookies while you prepare the chocolate. I used a double boiler, but you can carefully melt it in the microwave if you prefer.
  6. Dip each cookie in chocolate, then place it on the parchment again. Let the cookies sit until the chocolate has set. I did this in the fridge because it was a hot day when I made them, and also I was running late for my picnic!
  7. Enjoy!
pb & chocolate match made in heaven - trustinkim.com
“Match Made in Heaven”


Arugula & Pine Nut Savoury Bread

arugula and pine nut bread - trust in kim

Here’s a really easy and delicious bread you can make as an appetizer or to pair up with a meal.  It uses eggs and baking powder for leavening, so no need to wait for it to rise. I brought a loaf to a party where we slathered our slices with a bit of butter, and the whole loaf went really quickly. With picnic season coming up I can see myself making this one a few times to eat al fresco.

I substituted spinach for the arugula, which was delicious, but I imagine the arugula would give it even more flavour. She uses self-raising flour, but I changed the recipe a little so I could use all-purpose flour.  This bread is light enough that you could use some whole wheat flour.

This recipe is from Yvette Van Boven’s book Home Made Summer.

What you need:

  • 100 grams washed and dried arugula or spinach
  • 1 & 1/2 cups all-purpose flour
  • 2 & 1/4 teaspoons baking powder
  • 1 teaspoon salt
  • 1/2 teaspoon freshly ground pepper
  • 3 large eggs
  • 2 tablespoons sour cream (I used 2% yogurt)
  • 1 tablespoon Dijon mustard
  • 4 tablespoons olive oil
  • 1/2 cup pine nuts

What you do:

  1. Preheat the oven to 325F and grease a 5-by-9 loaf pan with butter.
  2. Chop the arugula and set it aside.
  3. In a bowl whisk the baking powder, salt and pepper into the flour, then add the eggs, sour cream or yogurt, olive oil and mustard.  Mix on high for about a minute – this makes a very thick batter, but don’t worry, it will make a nice light loaf.
  4. Fold in the arugula and pine nuts, then pour the batter into the pan and press it into the corners.
  5. Bake for 40 minutes, or until an inserted toothpick comes out clean. Let the loaf cool for about 5 minutes, then remove it from the pan.
  6. Serve it either hot or at room temperature with a bit of butter.

spinach and pine nut bread - trust in kim


Kamut and Veggie Salad

kamut salad - trust in kim

During summertime I like to have food in the fridge that I can grab as a quick healthy snack, or take out on a picnic.  I love the taste of Kamut (which is a trademarked name for khorasan wheat) because it tastes buttery and nutty, and I like that it’s a sturdy grain that has a good chewy bite to it. It is high in protein, so it makes a good meal-in-a-bowl salad.  It is also high in a number of nutrients, including zinc, manganese and magnesium. I’m particularly interested in the magnesium because it helps absorb calcium.

I love this dressing, from the Whitewater Cooks book.  I use it often on a green salad, but it works great on this heartier salad as well.

So yes, it’s nutritious, but it also tastes great.

What you need: 

about 3/4 cup Kamut (I used farro because I couldn’t find any Kamut at the stores near my place)

1/2 cup sugar snap peas, chopped into 2cm pieces

1/2 large sweet onion, chopped

1 sweet orange or red pepper

a few medium-sized tomatoes chopped, or a whole bunch of cherry tomatoes, sliced in half

optional: herbs of your choice, or salad greens

optional: freshly ground black pepper

What you need to make the Whitewater Glory Salad Dressing:

1/4 cup nutritional yeast

3 tablespoons tamari or soy sauce

3 tablespoons apple cider vinegar

3 tablespoons water

1 tablespoon tahini

1 clove garlic, crushed

1/2 cup vegetable oil

What you do:

1. Cook the Kamut in lots of water for at least an hour, or until the grains are tender.  Drain any excess water and let the grains cool. This step can be done ahead of time.

2. Put all the dressing ingredients except the oil into a blender, or use an immersion blender, and give it a good mix. In a steady slow stream, add the oil until it is all blended in.

3. Put all the chopped veggies into a bowl along with the cooled Kamut and mix with the dressing.  Add some dressing and taste to see if it needs a little more dressing, or some pepper.

4. Serve cold or room temperature, either on its own or on a bed of salad greens.

Chorizo Pistachio Savoury Cake

savoury pistachio chorizo cake - trust in kim

This is a repeat recipe from a few summers ago. I’ve never repeated a recipe posting before, but I chose to share this again because:

A) It’s a great picnic food that you and your friends will adore

B) It’s super easy to make

C) I just made it and looked so delicious that I was inspired to share it

D) I have a new camera and would like to have a better image that fits the amazing quality of this recipe

What you need:

room temperature butter for greasing the pan

2 tablespoons sesame seeds, for the bottom of the pan

1 & 1/4 cups flour

1 tablespoon baking powder

1/2 teaspoon salt

1/4 teaspoon chile powder

3 eggs at room temperature

1/2 cup plain yogurt

85 grams or so of cured chorizo sausage, preferably one with a bit of spice to it

8 sun-dried tomato halves, finely diced

3/4 cup unsalted pistachios

1/4 cup parsley, chopped (optional)-you could substitute some onion or basil

What you do:

1.  Spread the butter into the bottom and sides of a 9-inch loaf pan.  Toss the sesame seeds around in the pan until there is a layer of them over the bottom and sides.  Preheat your oven to 350F.

2.  Mix the egg and yogurt together in a bowl.  Add flour, baking powder, salt and chili powder and stir it in, being careful to mix only until just incorporated.

3.  Fold in the chorizo, tomatoes, nuts and parsley.  Spread the batter into the loaf pan.

4.  Bake for 40-50 minutes and test with a toothpick to see if it is done.  Let the loaf sit in the pan for about 15 minutes after you’ve taken it out of the oven before removing it to cool on a rack.

When it’s cool you can cut it into thin slices to serve.  Apparently it keeps for a few days on the counter, but if I have leftovers I prefer to wrap them in plastic wrap and either store in the fridge, or freeze for later use.  It tastes best at room temperature, so take it out of the fridge with enough time in advance of eating to allow it to some to room temperature.

I got this recipe from David Lebovitz’s website, and he adapted it from Clotilde Dusoulier’s Chocolate and Zucchini cookbook.

Mango Quinoa Salad

Here’s a salad with a taste of summer.  Easy, yummy, and great picnic food!

What you need:

1/2 cup uncooked quinoa, cooked in 1 cup water

1 teaspoon olive oil

1 mango, cut into chunks

1 jalapeno, deseeded and chopped finely (leave the seeds in if you love spicy food)

1/3 cup raisins

1 tomato, chopped

juice of 1 lime

a little chopped cilantro and/or parsley

What you do:

1.  To cook the quinoa, put it in a pot with 1 cup of water.  Bring to a boil, then put a lid on it and lower the heat, cooking for 15 minutes.  Then remove the pot from the heat and let it sit for 10 minutes.  Let the quinoa cool to use in the salad.

2.  Toss all the other ingredients together in a large bowl to let the flavours mingle, for at least half an hour.  By this time the quinoa may be cooled, and you can either serve the mango mixture on a bed of quinoa, or you can mix it all together.  Serve with a garnish of something green, like cilantro.


Wild and Brown Rice, Pepper and Pecan Salad

If you like pecans, whole grains and vitamin C-rich peppers, then you’ll love this hearty salad.  It’s great for a lunch or picnic.

What you need:

3/4 cup brown rice

1/4 cup wild rice

1 each of red, orange and yellow peppers

1/2 cup pecans

1/2 bunch parsley

1- 2 green onions

1/3 cup dried currants

For the dressing:

1/4 cup olive oil

1/4 cup apple cider vinegar

2 Tablespoons honey or maple syrup

1 teaspoon tamari

What you do:

1.  Put the rices in a pot with 1 & 1/2 cups of water.  Bring to a boil, then cover and turn heat to low.  Cook for 45 minutes, then take off the heat, leaving the lid on, for 10 minutes.

2.  Toast pecans by heating in a frying pan for 5-8 minutes on medium-low heat.  Be careful!  It’s easy to burn them.

3.  Chop peppers into approximately 2 cm chunks.

4.  Chop parsley and green onion.

5.  Mix oil, vinegar, honey and tamari together, then stir in a large bowl with all the veggies and the currants.

6.  Let the veggies and sauce do their thing while you are waiting for the rice to cook and cool.  Mix the rice in, and you’re good to go!  It’s really nice served with a few slices of avocado.

Great for leftovers!