Gochujang Chicken Strips – Air Fryer Version

photo of breaded chicken strips on a plate with red chili sauce  in a bowl

These chicken strips are really easy to whip up in an Air Fryer. With a bit of spice and a crunchy exterior, they’re pretty addictive!

The majority of the recipes I post are recipes that someone else has created; most of the time I make some changes to the recipe, and sometimes I follow the recipe to the T. This one I made up myself, and I have to tell you it’s a good one!!

It’s been far too long since I last posted a recipe on here, but I’m starting to see the light at the end of the tunnel in my Master’s program. I haven’t been taking any photos of my food makes for a long time, so when I made up this recipe last night I again didn’t take a photos. I did remember what I put in the recipe, and it was so good that I had to make it again tonight, and this time I took a few photos.

What’s so great about this recipe, you ask? Well . . . these chicken strips are really tender thanks to the air fryer cooking method, and the chili coating brings a ton of flavour to them. Plus there’s no added oil, other than a little bit that you spray on the cooking surface.

Gochujang is a Korean chili paste that has a little heat, a little sweetness, and is slightly fermented. You can find Gochujang paste at any Korean grocery store; I get mine at Kim’s on Broadway in Vancouver.

I was a holdout on the Air Fryer purchase, but the more I read peoples’ opinions on it and heard from friends what they liked about it, I figured I should look into it. I do not like to have a ton of machines, and the Air Fryer machine is quite large, so I bought the Air Fryer lid for the Instant Pot that I already own. Since then I’ve done a lot of roasted veggies, Agadashi Tofu, and a few different chicken strip recipes. All have been excellent, and all have taken so little time that I am motivated to try more recipes. I made this recipe, start to finish, in less time than it would take me to preheat my oven.

I served these with Air Fryer roasted cauliflower last night, and tonight I made breaded zucchini in the Air Fryer. Air Fryer fries are also awesome! I dipped the chicken in a sweet chili sauce, but feel free to use your sauce of choice or no sauce at all.

What you need:

  • 1 chicken breast
  • 2 tablespoons Gochujang paste
  • 2 teaspoons soy sauce
  • 2 teaspoons Mirin
  • 1 clove garlic, crushed
  • 1/3 to 1/2 cup Panko crumbs

What you do:

  1. Combine the Gochujang, soy, mirin, and garlic in a bowl.
  2. Put the Panko crumbs in another bowl.
  3. Cut the chicken breast into strips.
  4. Place the chicken in the Gochujang mixture and coat all sides.
  5. Using a fork, place a piece of chicken in the Panko crumbs and coat all sides.
  6. Spray the Air Fryer with oil spray, then place the chicken on the Air Fryer rack in a single layer, with a little space between each piece.
  7. All Air Fryers will work differently, so get to know the cooking times on your machine. For my Instant Pot Air Fryer lid, I cooked the chicken at 400F with no preheating. First I cooked it for 4 minutes, then flipped the chicken and cooked it two minutes more. If you are testing your machine out, you could try cooking for a shorter amount of time so you don’t overcook, then add a minute at a time. Make notes about your cooking times.
  8. Enjoy them while they are hot!
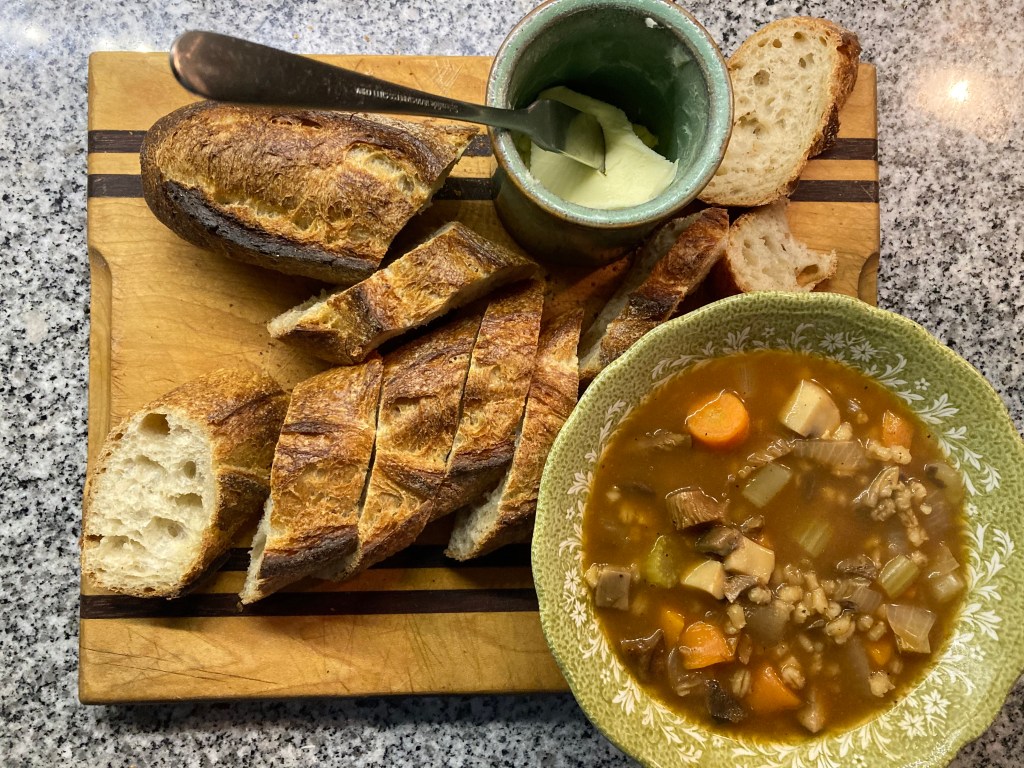
photo of Trader Joe's soy sauce, Mitkusan mirin, Korean Gochujang paste, and a clove of garlic
photo of two bowls, one with chicken coated in a red paste, the other with chicken coated in panko breadcrumbs
photo of chicken strips in an instant pot air fryer

Oven-Baked Falafel

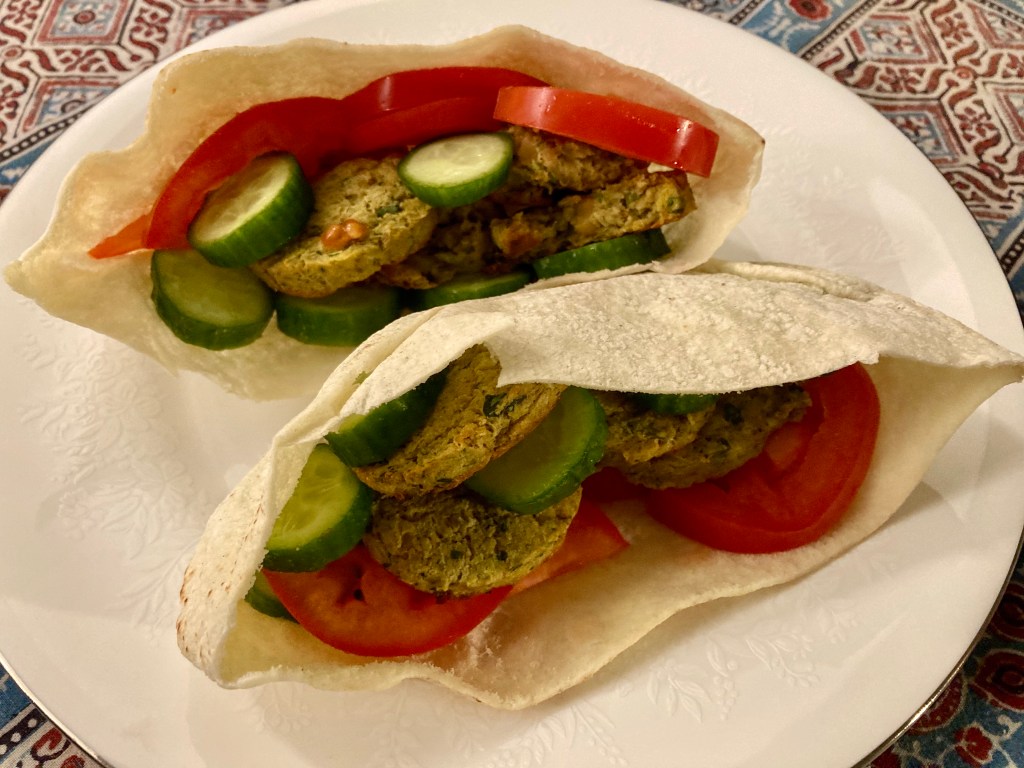
These oven-baked falafel are super tasty, and my official taster is looking forward to eating them again! Deep-fried falafel are delicious, I don’t enjoy cooking with boiling oil, and I think baking is healthier.

This photo was taken before the tahini sauce, hot sauce and pickled turnips went on – oops! Somebody was eager for the photos to be done so the eating could begin. I’ve also served these with some hummus and a cucumber, tomato and herb salad.

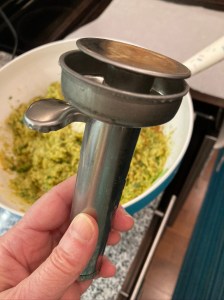
I found an aleb falafel, a falafel shaping device, for under $10 at a local Middle Eastern store. You can use a spoon or your hands to form them if you don’t have an aleb falafel.

falafel shaping device

This recipe is especially easy to make if you have a food processor, but you could also give it a try with a potato masher. It’s quite simple: all the ingredients go into the food processor bowl, you whiz it up, form the balls, and bake them. While they are baking you can prepare sauce and veggies.

These falafel freeze quite nicely!

What you need for the falafel:

  • 2 cans chickpeas, rinsed and drained, or equivalent home-cooked
  • 3 large eggs
  • 1/ 2 cup bread crumbs
  • 1 large white onion, chopped
  • 1 cup flat leaf parsley
  • 1 cup cilantro (I like to use the stems too)
  • 1 tablespoon crushed garlic
  • 1/4 cup olive oil
  • 1 teaspoon baking powder
  • 1 & 1/2 teaspoons cumin
  • 1 teaspoon paprika or Aleppo pepper
  • 1 teaspoon salt
  • olive oil for brushing on top of falafel before baking

What you need for the tarator sauce:

  • 1/2 cup tahini
  • 1 teaspoon crushed garlic
  • 1/4 to 1/2 cup lemon juice
  • 1/4 to 1/3 cup water
  • salt to taste

What you do for the falafel:

  1. Heat the oven to 375F. Line a baking pan with parchment paper.
  2. Add the chickpeas, eggs, bread crumbs, onions, parsley, cilantro and garlic to the bowl of the food processor and process until the mixture becomes doughy.
  3. Add the baking powder, seasonings and olive oil and process again until all the ingredients are combined.
  4. Form falafels with an aleb falafel (I lightly oiled mine before use), or scoop with a tablespoon and form into flattened balls with your hands.
  5. Use a pastry brush to brush a little bit of olive oil on the tops of the falafel, to help them brown nicely. Browning = flavour!
  6. Bake for about 25 minutes, then check to see if it is done; mine needed more time. You will know when it is done if a knife inserted in the centre comes out pretty much clean.
  7. While the falafel are baking you can make the sauce.

What you do for the taratour sauce:

  1. Mix the garlic in with the tahini.
  2. Add a little bit of lemon juice and mix well. Add lemon juice and water a little at at time until the sauce is creamy but not too runny.
  3. Add salt to taste.
  4. Enjoy!!

Potato and Black Bean Tacos

I have to say, I was against the idea of a potato taco in the beginning – kind of like I was against the idea of a potato pizza – but in both instances I was proven wrong. The creamy potato and black bean filling in these tacos, paired with this fire-roasted salsa, makes them a pretty awesome treat!

It’s pretty simple really, just cook some potatoes (I used a purple one because I had fresh ones from the garden), open a can of black beans (or make your own from dried beans). Smash them together with some spices, add a little cheese, throw it into a frying pan in a tortilla, and you’re done.

Here’s a breakdown of what you need to feed two people, and the process:

  • 1 medium sized potato
  • cumin
  • chili powder (I used Ancho)
  • salt and pepper to taste
  • about 2 tablespoons milk or non-dairy alternative
  • 1/2 can black beans (or less)
  • canola oil or butter for cooking
  • soft tortillas
  • cheddar or cheese of choice
  • yogurt or sour cream (optional side sauce)
  • your favourite salsa (this one!!!)

What you do:

  1. Boil the potato until soft, then drain and sprinkle in a little cumin, chili powder, salt, and pepper. Add the milk or substitute and give it a few squishes with a potato masher.
  2. Add the beans to the potatoes and give it all a few more squishes, until it is pretty much combined. Taste and add more seasonings if it needs it.
  3. Grate the cheese.
  4. Now you can heat a large frying pan and add a drizzle of oil or a bit of butter, just enough to coat the pan so the tortilla doesn’t stick.
  5. Place a tortilla in the pan, lifting half of it up so you can fit another tortilla in the other half, both of them open.
  6. Spoon some potato/bean mixture into each tortilla half and spread it out so it reaches the sides.
  7. Add some cheese, then fold the top down.
  8. Cook on the first side until it has lightly browned, then turn it over and do the same thing on the other side.
  9. Serve with your favourite salsa, and a side of yogurt or sour cream.
  10. Enjoy!

Mushroom and Barley Soup

Perfect for a Fall day, this soup is warming and hearty, but not heavy. Served with a beautiful baguette from Beyond Bread, this made a delicious dinner for two with plenty of leftovers.

You can make this as a vegan soup, or use chicken or beef broth. The soup consists of some veggies, both dried and fresh mushrooms, a splash of sherry, tomato paste, and broth. A good quality broth is important here, so homemade or a better quality like Pacific would make a tasty soup.

The recipe comes from the Yvette van Boven’s ‘Home Made Winter’ cookbook. Her recipe calls for spelt, but gives the option of barley, which I used because that was what I had in my cupboard. I added a few extra carrots, less oil, and a dab of butter at the end. I used chicken broth because I had it on hand, but look forward to trying it with mushroom broth. I changed the order of when to add the salt and pepper, adding it at the end so it doesn’t get over-salted, and so the salt doesn’t make the veggies mushy. As well, adding pepper too soon can make it the soup taste bitter. My scale is broken right now, so I guessed that 25 grams of dried mushrooms is about 1/2 cup, and that tasted great. For the fresh mushrooms I used a combination of Button and Cremini, the white and brown ones you find easily in the grocery store. If you substitute for more interesting mushrooms, please let me know in the comments below what you used and how you enjoyed it!

What you need:

  • 25 grams dried mushrooms
  • 1 tablespoon olive oil
  • 1 onion, diced
  • 2 stalks celery, sliced
  • 3 carrots, diced
  • 2 cloves garlic, minced
  • 500 grams (about 1 lb) fresh mushrooms, cleaned and chopped
  • 100 grams (about 1/2 cup) barley or spelt
  • 2 tablespoons tomato paste
  • a splash or two of dry sherry
  • 1 litre (4 cups) mushroom, vegetable or chicken stock
  • salt and freshly ground pepper to taste
  • 1 teaspoon butter (optional)

What you do:

  1. Place the dried mushrooms in a bowl and pour hot or boiling water over them, just enough to cover. Let that sit for about 20 minutes while you get started with chopping.
  2. Once the onions, carrots and celery have been chopped, heat the olive oil on medium heat, in a large pot. Sauté the vegetables until the onions begin to soften.
  3. Stir in the garlic, then add the fresh mushrooms. Sauté the mushrooms until they begin to release their juices, about 10 minutes.
  4. Raise the heat and stir in the barley or spelt, allowing it to absorb the mushroom juices.
  5. Add the mushroom soaking water and the tomato paste, cooking until you smell a sweet aroma, and then add the splash of sherry.
  6. Add the broth and the soaked mushrooms (I chopped mine first), then bring it to a simmer. Leave it simmering on low heat until the barley/spelt is cooked to an al dente texture. I checked mine after 30 minutes and it was almost done.
  7. Season with salt and pepper, and add a dab of butter if you wish.
  8. Serve with some gorgeous bread and enjoy!

Rosemary Dijon Grilled Lamb Chops

B7F61DD4-8D10-48BF-8BC0-D5F72C3E1C21

Yum yum! These tender lamb chops are so delicious, plus super quick! They can be grilled or pan-fried, depending on what you have available. I love the combination of garlic, rosemary, dijon, and a bit of vinegar to bring a ton of flavour to these. For this dinner I made some grilled zucchini, and grilled new carrots with a maple glaze. This recipe is one of my own and changes a bit each time I make it; feel free to adapt.

This dish requires little prep, with big results. You just need to prep the mustard sauce before grilling. Plus figure out what else to serve with it. Another nice side dish idea is barbecued skewered baby potatoes, which cook really quickly.

For the lamb I bought a whole rack of lamb and cut it up. This was more cost efficient where I was shopping. You can often by lamb chops pre-cut, so I would plan on two per person, or more if you are feeding big meat eaters.

This recipe is based on 4-6 chops, and the amount of each ingredient can vary depending on your preference. One thing that I think is really important is to use fresh rosemary; the flavour is much brighter than the dried version. If you don’t have fresh rosemary, you probably have a neighbour who does, so you may not have to go buy it.

I like a bit more browning on my meat, therefore I add the mustard sauce after I’ve grilled one side. And alternative is to add a little more vinegar and maybe some olive oil to the mustard sauce, and marinate the lamb in that before grilling. If you try that, please let me know how you liked it!

What you need:

  • lamb chops, salted
  • 2 teaspoons dijon mustard
  • 1 clove of garlic, minced
  • 1-2 teaspoons fresh rosemary, minced
  • 1-2 teaspoons balsamic vinegar
  • freshly ground pepper
  • salt to taste
  • if you are not grilling you can use 1-2 teaspoons olive oil in a frying pan

What you do:

  1. Prepare the dijon sauce by combining all the ingredients listed, minus the lamb and cooking oil. I like to do this with a mortar and pestle.
  2. Prepare your side dishes. The cooking of the lamb will only take a few moments. Heat your bbq or frying pan to medium-high.
  3. When the bbq or your frying pan is hot, place the chops on the grill/oiled pan. I like mine on the rarer side, so I do about 2 minutes on the first side, making sure I get a good sizzle on them before turning. 
  4. Flip the chops, then top them each with some of the mustard sauce. Cook 2-3 minutes on this side, depending on how well you like them done, and how hot your bbq is.
  5. Flip them over one more time so that the sauced side gets some heat, then remove to a plate and let them rest a few minutes before serving.
  6. If I’m frying I like to deglaze the pan with a bit of wine or water, and pour this thick sauce over the chops.
  7. Enjoy!


Potato Pizza

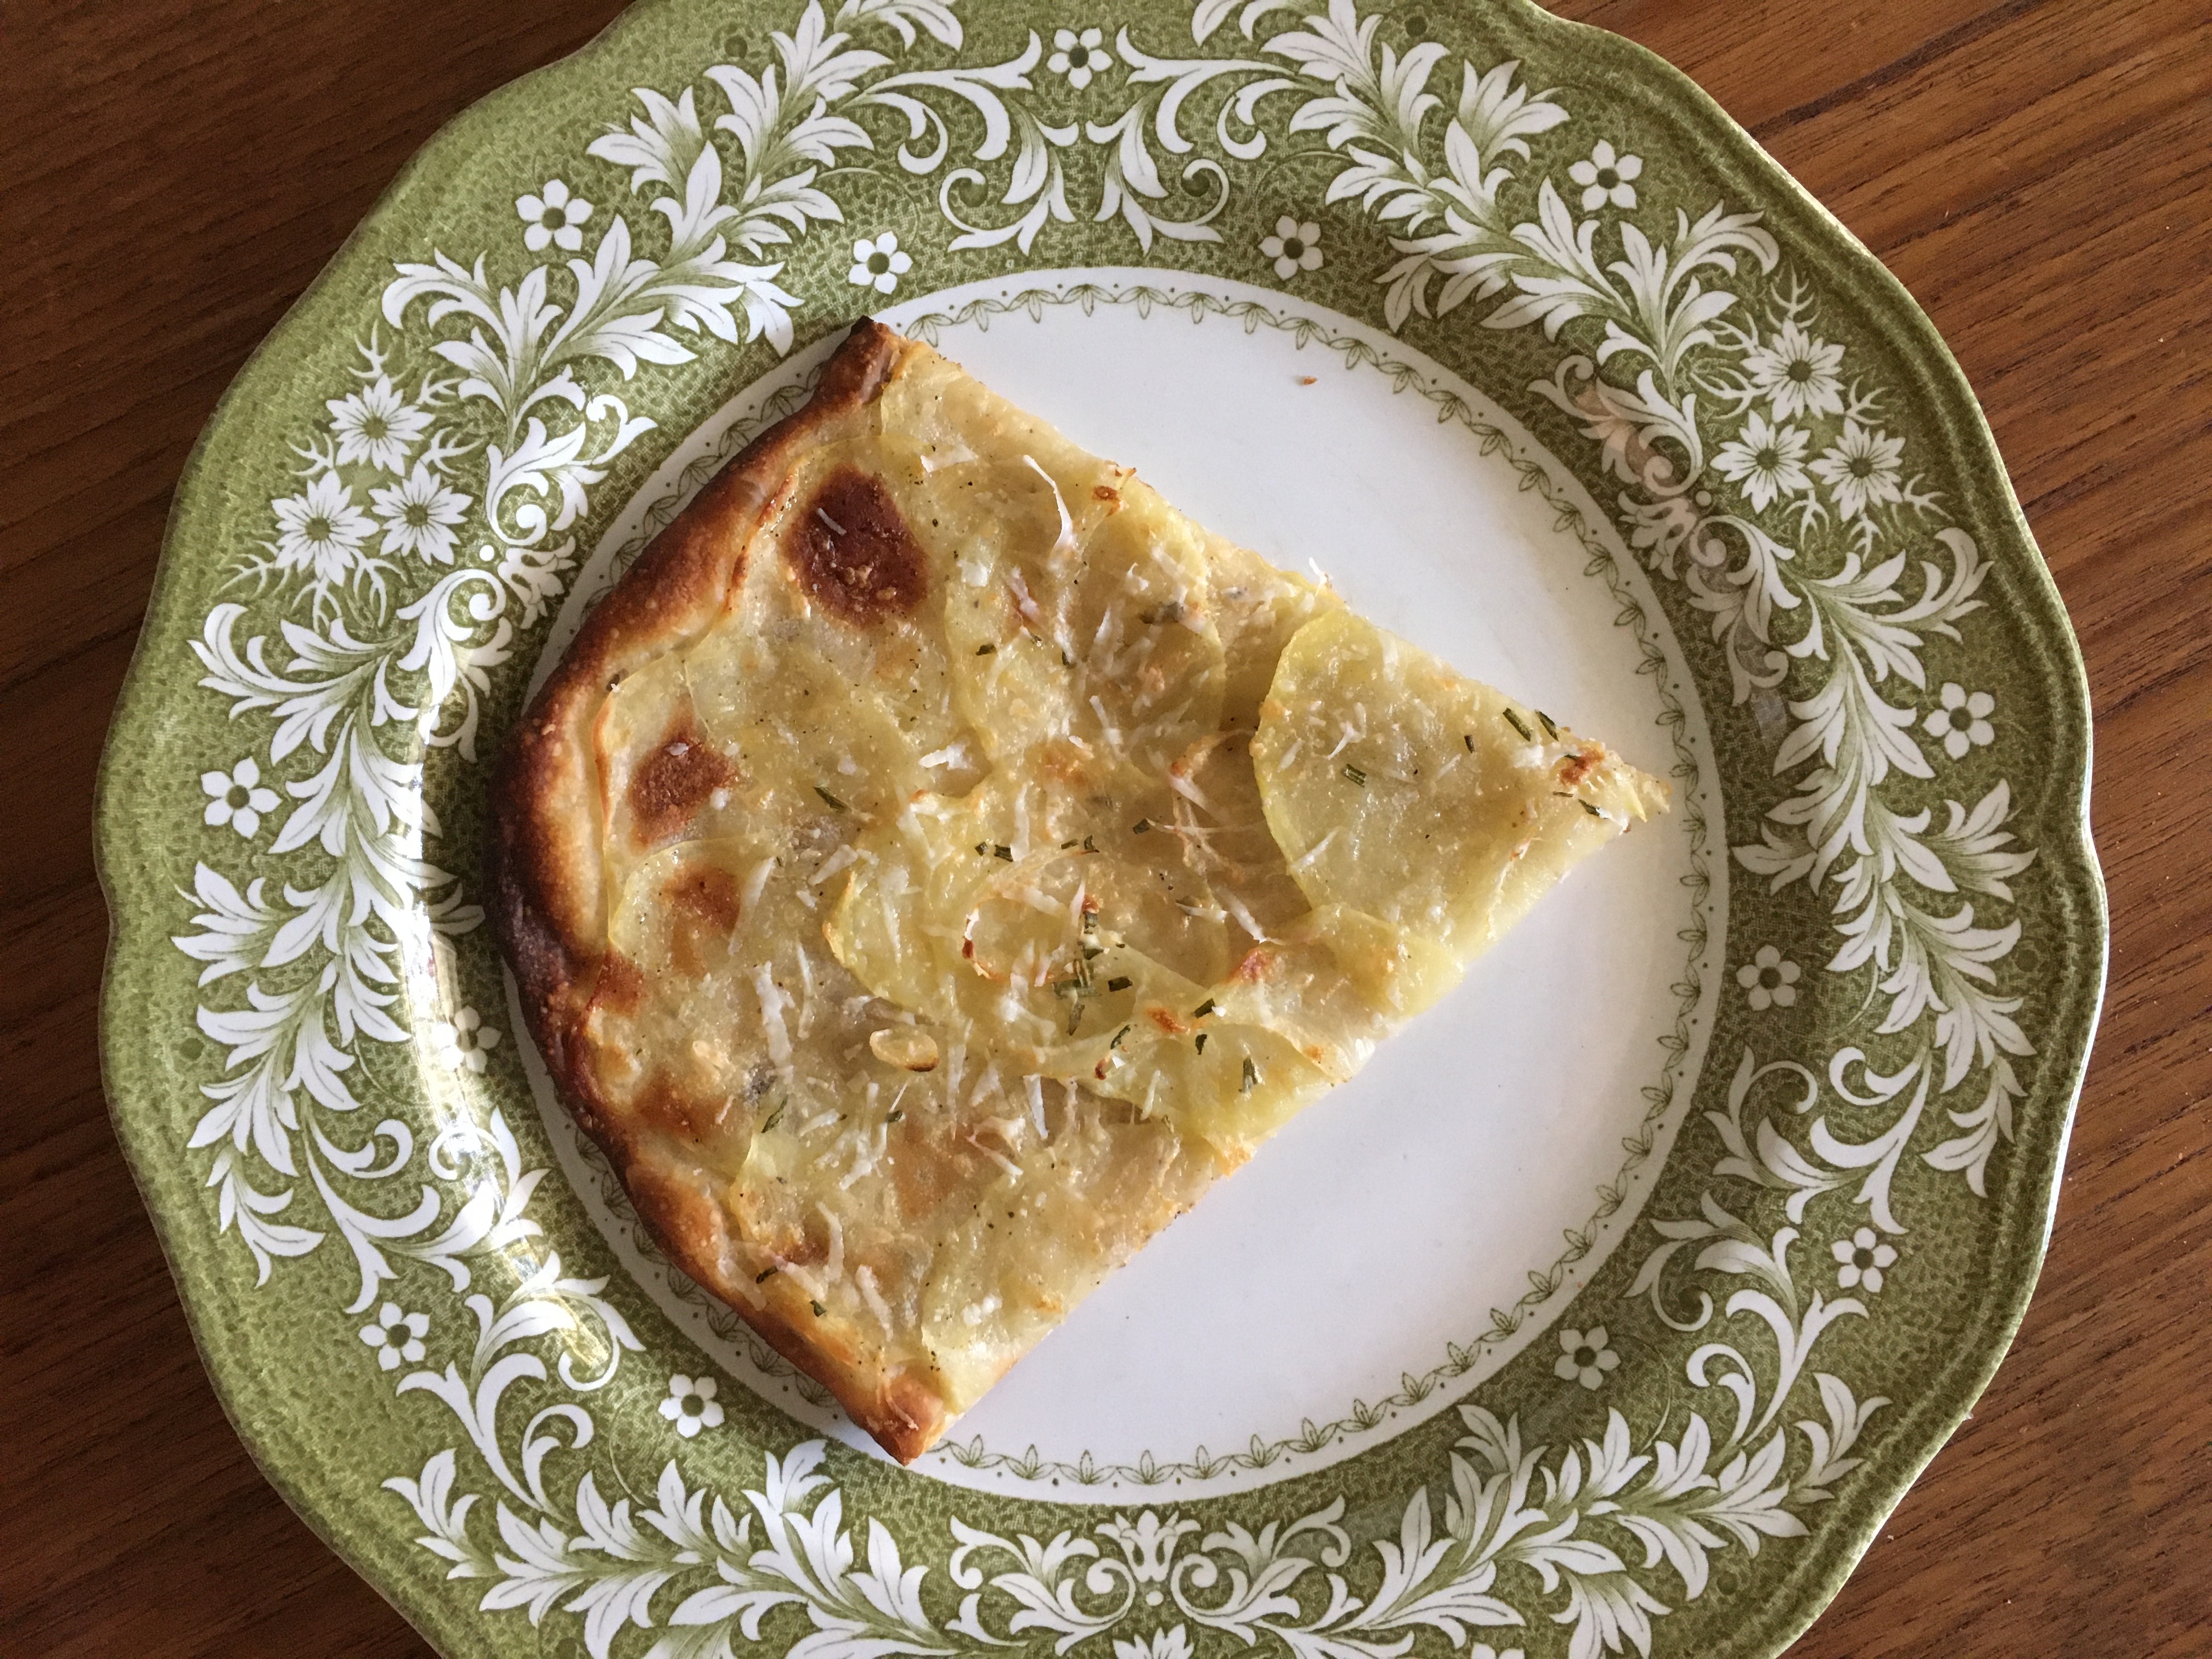
potato pizza - trustinkim.com

This pizza is surprisingly good!

I’ve been hearing about potato pizza from my guy for a long time, and to be honest, I wasn’t really interested. For a long time. But I gave it a try recently, and it was actually really good! And then he asked if we could have it a week later for his birthday dinner, so I knew it was a winner. 

This is not the type of pizza that I am used to: no sauce, just salted potato slices and onion tossed in olive oil, and some rosemary and Pecorino cheese. But really good! I love the thin crust and the crispy edges on the potato!

I looked at a lot of recipes to figure out what to do here, and went to a local Roman pizzeria in Vancouver to try theirs. I mainly followed the instructions in Smitten Kitchen’s recipe, but the Pecorino was my addition. The grocery-store-bought Pecorino wasn’t the best, so I’d say to splash out  on a cheese from a fromagerie/cheese shop if you can. A good substitution would be a nice Parmesan, or you could leave it without any cheese.

I’m leaving some of the amounts kind of vague here. You know how much pepper or rosemary you want on your potato pizza, right? If not, just play with it and see what works best for you!

If you don’t want to make your own pizza dough (although once you’ve tried this one you might find you love that it is easy and tasty) the Whole Foods dough is quite good.

What you need:

  • pizza dough (try this no-knead method) 
  • 4 teaspoons sea salt
  • a few Yukon gold potatoes (I used 2 smallish ones for one pizza)
  • 1 small onion, sliced
  • freshly cracked black pepper
  • olive oil
  • fresh rosemary, chopped
  • Pecorino cheese

What you do:

  1. At least half an hour before assembling the pizza, and up to a few hours before, peel and slice the potatoes. They should be sliced as thinly as possible; if you have a mandoline, this is the perfect time to use it. If not, try to cut the slices thinly and uniformly. Place them in a bowl of water with the salt, and let it sit until you are getting the pizza ready for the oven.
  2. Preheat the oven to 260C/500F.
  3. Drain the potatoes and use a clean kitchen towel to dry them. Toss the dried potatoes with some olive oil, pepper and rosemary.
  4. Pour a bit of olive oil onto a baking pan and spread it around with your fingers.
  5. Use your olive oil covered hands to form the crust into the pan, pushing it around until it is a somewhat uniform thickness.
  6. Spread the potatoes around the top of the dough, overlapping slightly. If you’re a cheese lover you can sprinkle a bit on now, or wait until it is baked.
  7. Bake for 15-25 minutes, depending on the thickness of your crust. The pizza will become crispy and somewhat browned. 
  8. Add a sprinkling of cheese before serving. My pizza cutting tool of choice is my clean kitchen scissors, so use those if you have them.
  9. Enjoy!

Delicious and Easy Pizza Dough

no knead pizza dough - trustinkim.com

The title says it all – this pizza dough really is delicious and easy. All you need is some time, but most of it is the planning ahead kind of time. You just need to mix up the ingredients and wait. We ate pizza twice this week – once when the dough sat in the fridge for two days, one after four – and the second round was even better! So if you can plan that far in advance, I recommend the three to four day ferment.

The most difficult part about making pizza dough at this time in history (Covid 19 times) is sourcing flour and yeast!  I happen to have half a jar of yeast in my fridge from “before,” and managed to find some flour recently – lucky me!

I’m not going to suggest toppings at this time, but I will say that it seems best when the toppings are minimal, as things get a bit mushy on pizza if there’s too much moisture on top. So a few well-chosen ingredients will be amazing on here. The one in the photo is just a simple tomato sauce with Mozzarella, but we also had a potato pizza, which was surprisingly good.

This is a Jim Lahey recipe, the guy who made this no-knead method so well known.

The recipe makes enough for four medium-sized hand-stretched pizzas. If you want a thin crust pizza it makes four large pizzas.

What you need:

  • 500 grams (3 & ¾ cups) all-purpose flour, plus more for shaping the dough
  • 1 gram (1/4 teaspoon) active dry yeast
  • 16 grams (2 teaspoons) fine sea salt
  • 350 grams (1 & ½ cups) water

What you do:

  1. Combine the flour, yeast and salt in a bowl.
  2. Add the water (room temperature) and mix it in until it is fully combined.
  3. Cover the bowl with a lid or plastic wrap. Let the dough sit on a counter for about 18 hours. It could take longer if it is in a very cold room, but less if it is very warm. When it has about doubled in size you will know it is ready.
  4. At this point the dough is ready to use, but I think the tastiest pizza crusts are made with dough that has sat in the fridge for a few days. So go ahead and skip to step #7 if you want to make pizza today.
  5. Cut the dough into four equal pieces and wrap each in plastic wrap. Refrigerate for a few days. You could even freeze a ball or two for a few weeks.
  6. Take the pizza out of the fridge a few hours (minimum 3 hours, but longer is okay too) before you want to begin making it. Unwrap the plastic wrap, put the dough on a plate. Place the plastic wrap on top of the dough, tucking it in lightly so the dough can expand. I like to put a tea towel on top of the dough while it sits.
  7. Heat the oven as high as it will go. Get your toppings ready.
  8. I like to drizzle a bit of olive oil on the pan, but only where the dough will be or it will burn.
  9. Take a ball of dough and press it into the centre, then hold it in your fingers and let the weight of the dough stretch it, turning it as it stretches. Here is a video with some dough-stretching tips, since it’s a bit difficult to describe. 
  10. Place the dough on the baking tray, put your toppings on it, and stick it in the oven. Depending on the thickness of the dough and the toppings you’ve put on it, it could be ready in 5-10 minutes.
  11. Eat it while it’s hot! 

Italian Wedding Soup with Turkey Meatballs

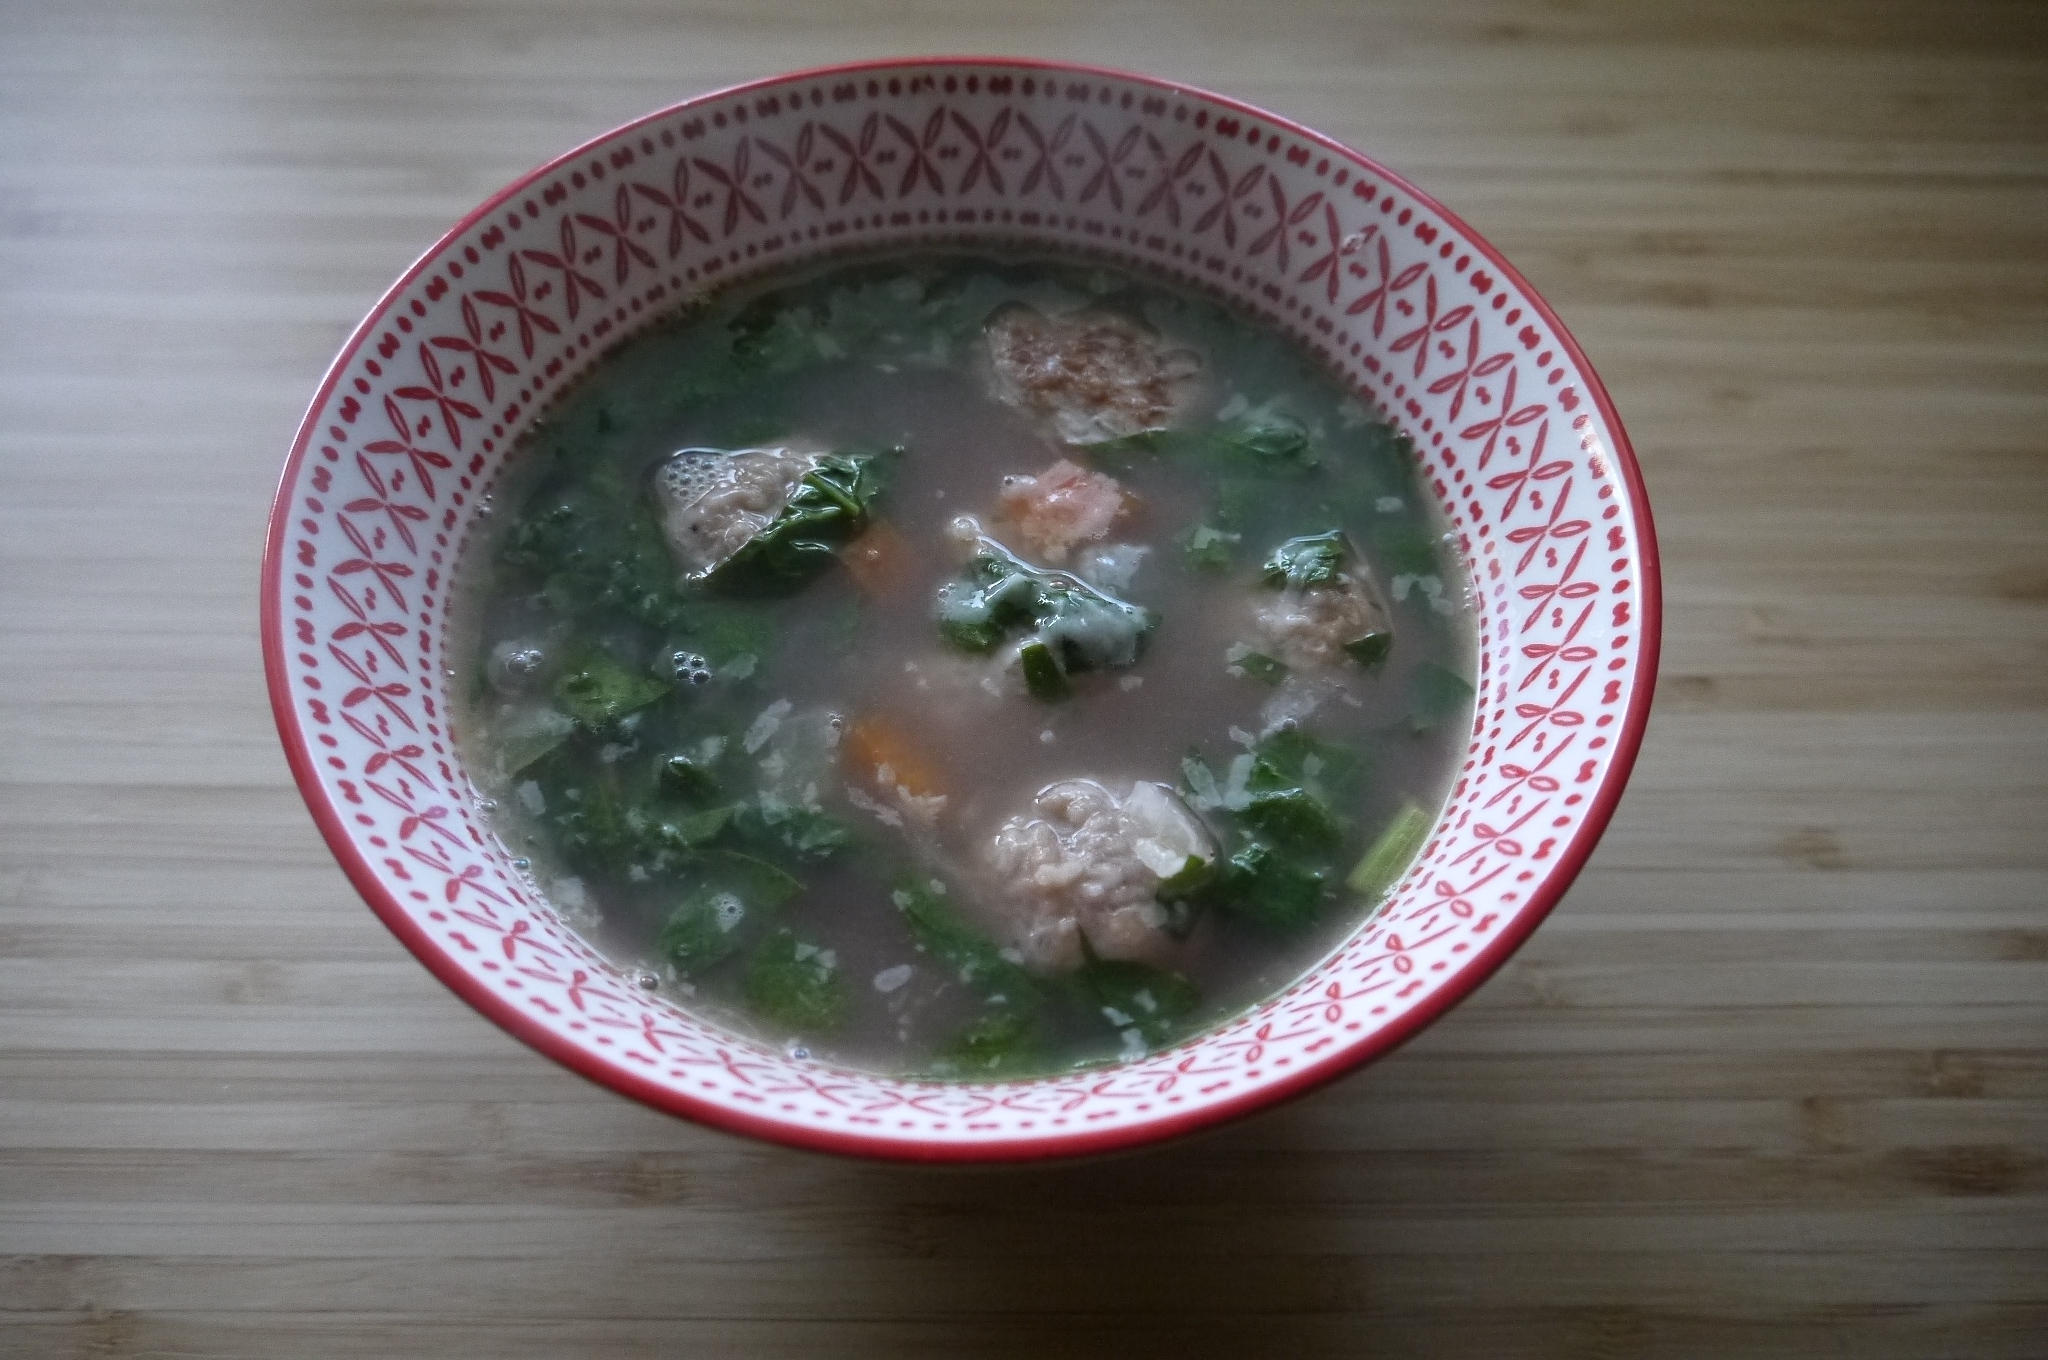
Italian Wedding Soup - trustinkim.com

My friend Maureen has been making this soup on a regular basis for years. I’ve made it a few times too, and am happy to finally be sharing it. This soup is super delicious, healthy, and . . . there’s wine in it! It also makes some beautiful leftovers.

I highly recommend using a great chicken stock, preferably a homemade one.

It comes from the Whitewater Cooks Cookbook. The main change I made was to use turkey rather than beef for the meatballs. Turkey it s bit lighter, more heart healthy, and my main eater doesn’t eat beef. The only other change I made was to substitute the type of pasta, from Acini de Pepe to orzo (because that’s what I had in my cupboard), and to cook it separately. There are two reasons for cooking the pasta separately: everybody can add as much as they want to their soup (I prefer it light on the pasta), and I don’t like the leftovers as much when there is pasta in it because I think it gets too gludgy. Oh, one more change: I used fresh basil because I think dried basil tastes nothing like fresh. I keep fresh basil in my freezer for occasions like this.

Hope you love it too!

What you need for the meatballs:

  •  450 grams (1 pound) ground turkey
  • 1/2 cup onion, minced
  • 1 clove garlic, crushed and chopped
  • 1 teaspoon salt
  • 1/2 cup panko crumbs
  • 1 tablespoon fresh basil, finely chopped
  • 1 egg

What you need for the soup:

  • 2 tablespoons butter (or less if you prefer, as I do)
  • 1 medium onion, diced
  • 2 medium carrots, diced (I will add more next time)
  • 1 clove garlic, crushed and chopped
  • 3 litres (12 cups) homemade  chicken stock
  • salt and pepper to taste
  • 1 cup orzo (or small pasta of your choice)
  • juice of 1 lemon
  • 1/2 cup red wine
  • 1 pound fresh spinach, chopped
  • Parmesan cheese for garnish

What you do:

  1. Preheat the oven to 350F before making the meatballs. Prepare a baking pan lined with parchment paper.
  2. Place all the meatball ingredients in a bowl and mix with your hands. Form bite-sized meatballs with your hands and place them on the baking pan. Bake for about 15 minutes and set aside.
  3. Melt the butter in a large pot, then add the onions, carrots and garlic. Sauté the vegetables for about 5 minutes, until they are tender. Add the chicken stock and bring to a boil, then turn to medium heat and cook for about 5 minutes.
  4. In another pot cook the orzo.
  5. Add some salt and pepper to the soup, then add the meatballs. Allow the soup to cook for a few minutes, until the carrots are just cooked through. 
  6. Add the lemon juice, red wine and the chopped spinach and let it cook for a few minutes.
  7. Ladle the soup into bowls with some orzo. Grate some Parmesan cheese on top before serving.
  8. Enjoy!


Baked Falafel Loaf with Tarator Sauce

falafel loaf - trustinkim.com

Love falafel, but hate to deep fry? Then this one’s for you!

It’s got all the yummy and protein-y goodness of a falafel, minus the deep frying. It’s super easy to whip up if you’ve got a food processor. It is delicious. (this photo doesn’t do it justice; I’ve made this a number of times, and we end up eating it before I remember to take a photo. So finally I got this shot, not the best, but not nothing.)

I served it with a tomato and cucumber salad on the side, and my guest made it into a pita sandwich – both were delicious! In my opinion it must be served with this delicious tarator sauce, but maybe you have your own favourite.

This recipe came from the awesome cookbook called Taste of Beirut by Joumana Accad. I’ve taken it out of the library so many times and tried a whole bunch of recipes, and I think I finally need to buy this book!

The recipe says to serve at room temperature, but it was also good straight out of the oven. I didn’t change much with this recipe, just the order in which the ingredients are added to the food processor. The most recent batch I made I halved the recipe, using one egg. It was plenty for dinner for two plus leftovers – love leftovers!

What you need for the loaf:

  • 2 cans chickpeas, rinsed and drained
  • 3 large eggs
  • 1/ 2 cup bread crumbs
  • 1 large white onion, chopped
  • 1 cup flat leaf parsley
  • 1 cup cilantro (I like to use the stems too)
  • 1 tablespoon crushed garlic
  • 1/4 cup olive oil
  • 1 teaspoon baking powder
  • 1 & 1/2 teaspoons cumin
  • 1 teaspoon paprika or Aleppo pepper
  • 1 teaspoon salt

What you need for the tarator sauce:

  • 1/2 cup tahini
  • 1 teaspoon crushed garlic
  • 1/4 to 1/2 cup lemon juice
  • 1/4 to 1/3 cup water
  • salt to taste

What you do for the loaf:

  1. Heat the oven to 375F. Line a loaf pan with parchment paper.
  2. Add the chickpeas, eggs, bread crumbs, onions, parsley, cilantro and garlic to the bowl of the food processor and process until the mixture becomes doughy.
  3. Add the baking powder, seasonings and olive oil and process again until all the ingredients are combined.
  4. Spread the mixture into the lined loaf pan and even out the top surface a little.
  5. Bake for about 35 minutes, then check to see if it is done; mine needed more time. You will know when it is done if a knife inserted in the centre comes out pretty much clean.
  6. While the loaf is baking you can make the sauce.

What you do for the sauce:

  1. Mix the garlic in with the tahini.
  2. Add a little bit of lemon juice and mix well. Add lemon juice and water a little at at time until the sauce is creamy but not too runny.
  3. Add salt to taste.
  4. Enjoy!!

parchment paper 1 - trustinkim.com
fold parchment paper in the bottom of the pan

parchment paper 2 - trustinkim.com
open the parchment paper

parchment paper 3 - trustinkim.com
Fill the parchment paper with falafel


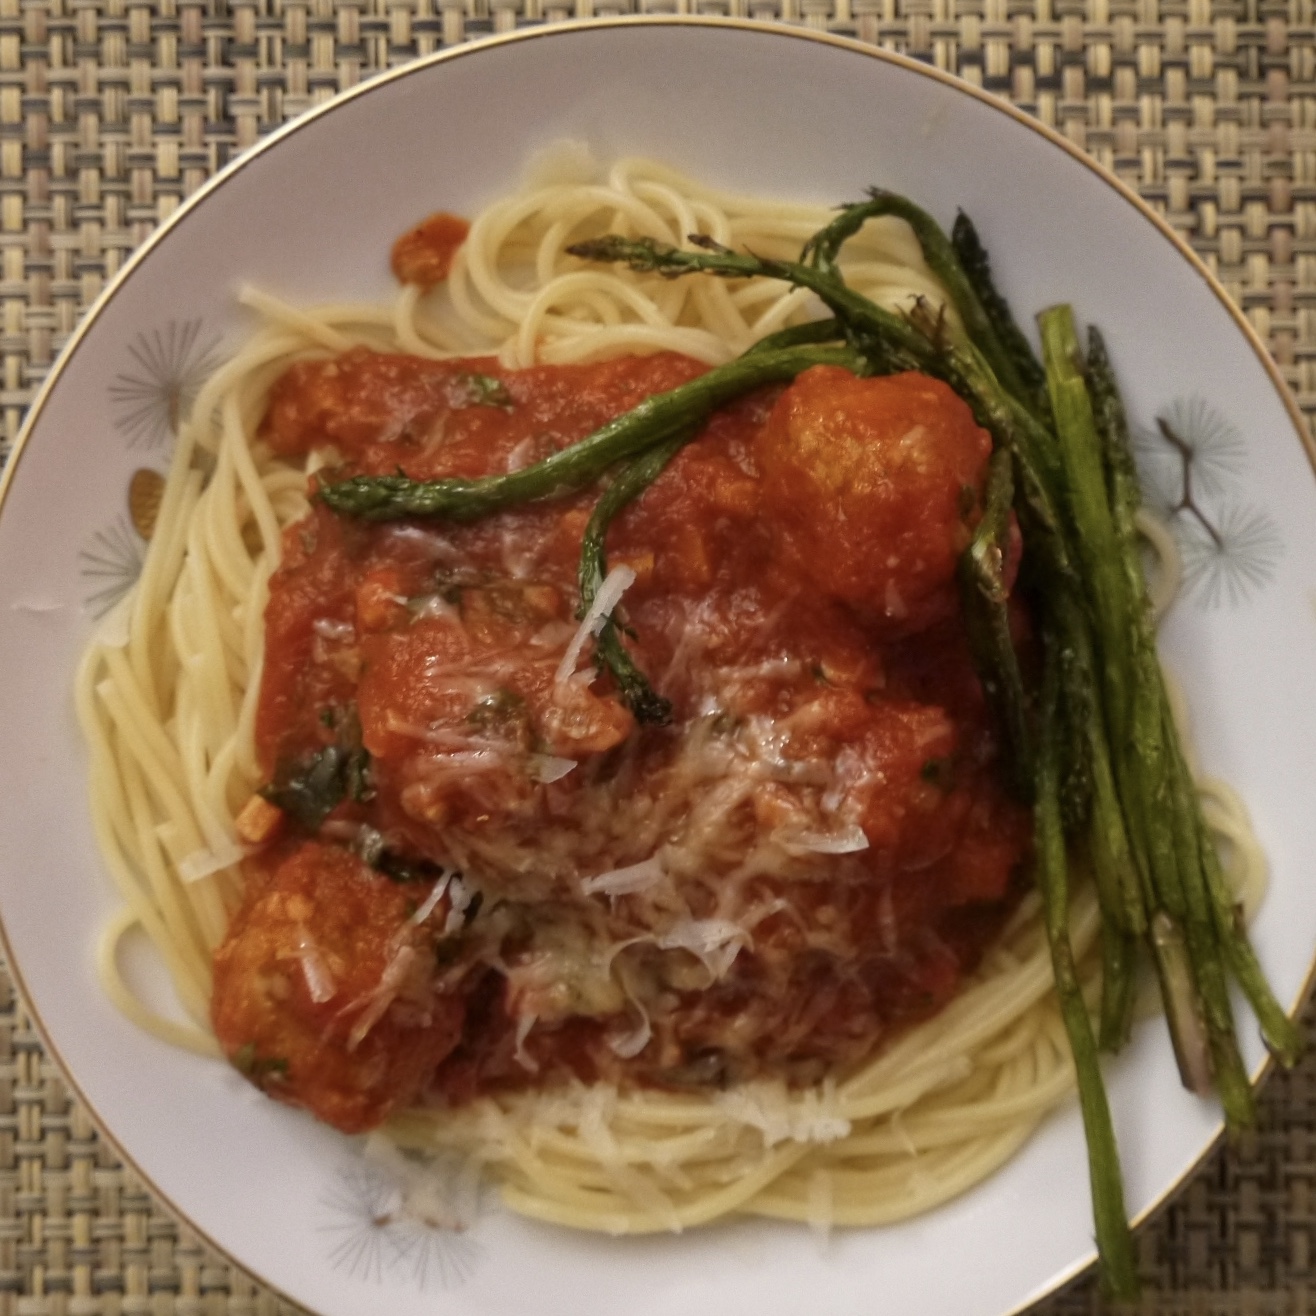
Spaghetti and Turkey Meatballs

spaghetti and turkey meatballs - trustinkim.com

Here’s my own recipe a yummy turkey meatball in tomato sauce. It something I’ve been making regularly for years, but I never think to record what I’m putting in, or to take a photo of it. So, at long last, here it is.

I love this recipe because the turkey makes it a bit lighter than a beef meatball, and both the sauce and meatballs have a great combination of flavours. At the end of the sauce cooking time, a little secret is to add some garlic that you have just heated in a bit of butter. This one is so great if you make it ahead of time, as it only gets better when it sits. It freezes well, so if you make a big batch you will have a quick meal that you can thaw someday when you need it.

You can make the meatballs and add them to your favourite tomato sauce, or use the recipe that I’ve provided. Fresh basil is a must for the sauce, and the Parmesan rind adds some great flavour. 

I’ve served this with pasta, or zucchini noodles, with some Parmesan grated on top.

What you need for the sauce:

  • about 1/4 cup diced onion
  • olive oil
  • 2 cloves garlic, minced
  • 1 jar passata (strained tomato sauce)
  • 1/4 cup tomato paste (optional)
  • red wine (optional)
  • fresh oregano
  • pinch of flaked chili pepper
  • parmesan rind (optional, but really makes this taste great!)
  • 1 bunch fresh basil, chopped
  • salt and pepper to taste
  • butter

What you need for the meatballs:

  • about 1/2 cup panko or other bread crumbs
  • about 1/4 cup milk or cream
  • 1 egg
  • 400-500 grams (less than a pound) ground turkey breasts
  • salt and freshly ground pepper
  • pinch of nutmeg
  • 1/4 cup parmesan
  • 1 small garlic clove, minced
  • 2 tablespoons onion, minced
  • 2 teaspoons chanterelle mushroom powder (optional)
  • butter and olive oil for frying

What you do:

  1. In a large frying pan or pot, heat a glug of olive oil on medium high heat. Add the diced onion and lower the heat a bit so that it cooks but doesn’t brown. Add half of the garlic and cook for a minute, just until the onions are translucent.
  2. Add the passata to the pot, then put some water into the jar and give it a shake to get the rest of the tomato sauce out, then add that to the pan. Add the oregano, chili pepper flakes, some of the basil, as well as the optional tomato paste and red wine. Place the Parmesan rind in the pot and let that simmer on low heat while you prepare the meatballs. The longer you cook the sauce the better!
  3. To make the meatballs, combine the bread crumbs and milk in a large bowl, then add the egg and mix it all together.
  4. Put the ground turkey, some salt and pepper, nutmeg, grated Parmesan, garlic, onion, and optional chanterelle powder in the bowl with the wet bread crumbs. Use your hands to bring the ingredients together, being careful not to over-mix.
  5. Add a bit of olive oil and/or butter to a large frying pan and let it get hot without burning. Form meatballs with wet hands; I find that this works best when I roll them a bit with my palms and then toss them back and forth a bit to make them round. After you form each meatball place it in the hot oil. Don’t overcrowd the pan – you may need to do this in several batches. Roll each meatball once one side has browned, until most of the outside has been browned. They do not have to cook through, as they will continue to cook in the sauce for quite a while. Once the meatballs have browned move them from the frying pan into the pot of sauce, then continue to brown the rest of the meatballs.
  6. Let the sauce cook on a low simmer for at least half an hour, but preferably longer. I find that tomato sauce splatters so much, so I like to put a splatter guard over it; it keeps in the sauce, but lets the steam escape.
  7. Near the end of the sauce cooking time, heat about a tablespoon on butter with a clove of minced garlic in it. Add the butter and garlic to the sauce. Season the sauce with salt and pepper to taste.
  8.  Serve with a grating of Parmesan cheese.