Sour Cherry – Chocolate Bread

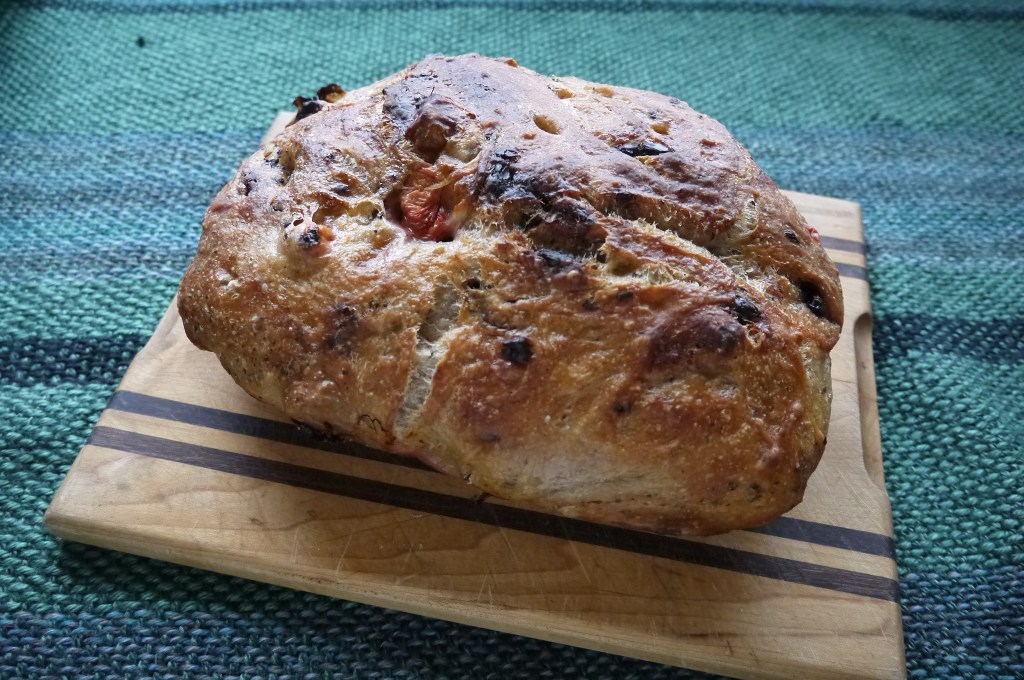
sour cherry and chocolate bread sliced on a cutting board

My mom says, “This is the best bread I have ever had.” And my mom has had a lot of good bread, much of it made by her, so I consider that the strongest endorsement for this delicious chocolate sour cherry bread.

This isn’t a sweet bread, just a loaf of my usual no-knead (Jim Lahey recipe) bread, with the addition of sour cherries I picked in summer and froze, and some good quality dark chocolate. If you’re unfamiliar with no-knead bread, it’s a bread that is left to rise overnight. It is baked in a dutch oven, which helps to create a crunchy crust. So delicious! Just takes a bit of planning ahead – there’s very little hands-on time, but you need to move the dough a few hours before baking.

It was the most delicious the day it was baked, and while still a little warm. But it was also very nice the next day, toasted, with a little butter.

Feel free to add a bit more chocolate or cherries if you want!

What you need:

  • 2 & 1/4 cups all-purpose flour
  • 3/4 cup rye flour (or use all ap flour)
  • 1/4 teaspoon instant yeast
  • 1 & 1/4 teaspoons salt
  • 1 & 1/3 cups water, room temperature
  • 6 oz good quality dark chocolate, chopped (I used Ghirardelli 60%, Bittersweet)
  • 1 cup pitted sour cherries (if using frozen cherries, do not thaw before adding)

What you do:

  1. In a large bowl combine the flour, yeast and salt. Add the water and stir just until it comes together. It will look a bit shaggy, but it’s fine.
  2. Cover the bowl with a lid, plate or plastic wrap and leave to sit at room temperature for 12 to 18 hours. Eighteen-ish hours is preferable, especially if it’s a little cooler in your place. This time around I left mine even longer, and it was probably my best ever. After about 4 hours you can work in the chocolate and cherries. I experimented with adding then in the beginning, but somehow it doesn’t rise as well.
  3. About two hours before baking time, spread out a large piece of parchment paper and put a coating of olive oil over it. Use a spatula to coax the dough out of the bowl, and then use floured hands to gently form it into a loaf, and place it seam-side down onto the parchment paper. Invert the bowl over the dough and allow this to sit for about 2 hours.
  4. About 1/2 an hour before baking, turn the oven to 450°F/ 232°C. (If using a Romertopf/clay baker, make sure you have pre-soaked it, and then place it in the oven BEFORE turning the oven on.) If using a cast iron dutch oven, place it in the cold oven to heat along with the oven.
  5. When the oven is ready, gently place the dough, seam side down, into the lidded baker. This should be pretty easy to do, since you can just pick up the corners of the parchment paper and transfer the whole thing into the pot. If you want to, you can use a sharp knife to make a few slashes a few centimetres deep into the top of the bread.
  6. Place the lid on the baking dish and bake for 30 minutes. After that time, remove the lid and bake for 15-25 minutes. The crust should be dark, and the bread should sound hollow when you tap it.
  7. Allow the bread to cool on a wire rack for about an hour. When it is hot it will be too sticky inside to cut, but after an hour the bread will still be warm enough for the perfect tasting experience.
  8. Enjoy!

No-Knead Bread

no-knead bread - trustinkim

I recently paid $9 for a loaf of bread – it was really beautiful, but it didn’t taste like a $9 loaf of bread. But this one sure does! I’d even bump that up to an $11 loaf.

AND . . . it is so easy to make! You just mix up the flour, salt, yeast and sugar the night before and leave it to do its thing The next day you do one more quick step a few hours hours before baking, and in the end you get this beautiful, delicious, and inexpensive bread. It has a thick dark crust, and a moist and tender inside, and the smell as you’re cutting it and taking that first bite is heavenly.

For this recipe you need a lidded baker; the trapped steam helps to develop a crust. I use a Romertopf clay roaster (see special instructions) which helps to create an excellent crust because of the moisture stored in the clay. I have also used a lidded le Creuset pot, but I would imagine you could use a tall cast-iron pan covered with foil… I’ll let you know when I try this out!

What you need:

  • 3 cups all-purpose flour
  • 1/4 teaspoon instant yeast
  • 1 & 1/4 teaspoons salt
  • 1 & 1/3 cups water, room temperature

What you do:

  1. In a large bowl combine the flour, yeast and salt. Add the water and stir just until it comes together. It will look a bit shaggy, but it’s fine.
  2. Loosely cover the bowl with a lid, plate or plastic wrap and leave in a room temperature spot for 12 to 18 hours. Eighteen-ish hours is preferable, especially if it’s a little cooler in your place. In winter it can be helpful to put the bowl in a warmer spot, like on top of a fridge.
  3. About two hours before baking time, generously flour a tea towel (not a terry cloth one, as the dough sticks too much). Use a spatula to coax the dough out of the bowl, and then use floured hands to gently form it into a loaf, and place it seam-side down onto the floured towel. Sprinkle with a little more flour, then gently place another towel over the top. Allow this to sit for about 2 hours.
  4. About 1/2 an hour before baking turn the oven to 450°F/ 232°C. (If using a Romertopf/clay baker, make sure you have pre-soaked it, and then placed it in the oven BEFORE turning the oven on.)
  5. When the oven is ready gently place the dough, seam side down, into the lidded baker. Use a sharp knife to make a few slashes a few centimetres deep into the top of the bread.
  6. Place the lid on the baking dish and bake for 30 minutes. After that time remove the lid and bake for 15-25 minutes. The crust should be dark, and the bread should sound hollow when you tap it.
  7. Allow the bread to cool on a wire rack for about an hour. When it is hot it will be too sticky inside to but, but after an hour there should still be some warmth.
  8. Enjoy!


No-Knead Fridge Foccacia

over night focaccia - trustinkim

Easy and delicious, this foccacia recipe has that perfect combination that makes it a winner. This is one of those no-knead breads, and although it’s easier than a typical bread, the long sitting time gives it a beautiful texture and flavour. Apparently the bubbles formed by the yeast perform the same action of creating gluten structure as the traditional hands-on kneading method.

You’ll need at least 24 hours, and up to 3 days, to make this foccacia, but most of it is hands-off time. I prefer the longer sitting time, if I’ve planned ahead enough.

I found this awesome recipe on alexandracooks.com

What you need:

  • 4 cups (512 grams all-purpose flour)
  • 2 teaspoons salt
  • 2 teaspoons instant yeast
  • 2 cups lukewarm water
  • olive oil
  • fleur de sel/ sea salt for topping

What you do:

  1. In a large bowl combine the flour, salt and yeast. Add the water and mix it all together until there are no lumps. 
  2. Loosely cover the bowl with a lid, plastic wrap, or a damp towel held in place with an elastic band. Place the bowl in the fridge for at least 12 hours, and up to 3 days.
  3. About 2-3 hours before baking time remove the dough from the fridge. Deflate the dough by pulling it away from the edges of the bowl.
  4. Line two pie plates with parchment paper or butter, then add about a tablespoon of olive oil to each plate. Divide the dough in two balls and place them into the pie plates. Turn the dough to coat it in olive oil. Let the dough sit for 2-3 hours.
  5. Preheat the oven to 425F/220C.
  6. After it has risen pour a little more olive oil over the dough, then use your fingers to poke into the dough to make dimples. Sprinkle with sea salt/fleur de sel. Place the dough in the oven immediately. Bake for about 25 minutes, until golden.
  7. Place the dough on cooling racks and let sit for 10 minutes before serving.


No-Knead Rye Bread

no-knead rye bread - trustinkim

Yes, this crusty beauty was soooo delicious! It’s a slight variation on my usual recipe; I’m always trying to replicate my Oma’s Russian Black Bread, but I can never get it quite right. All the experimenting certainly is delicious, though!

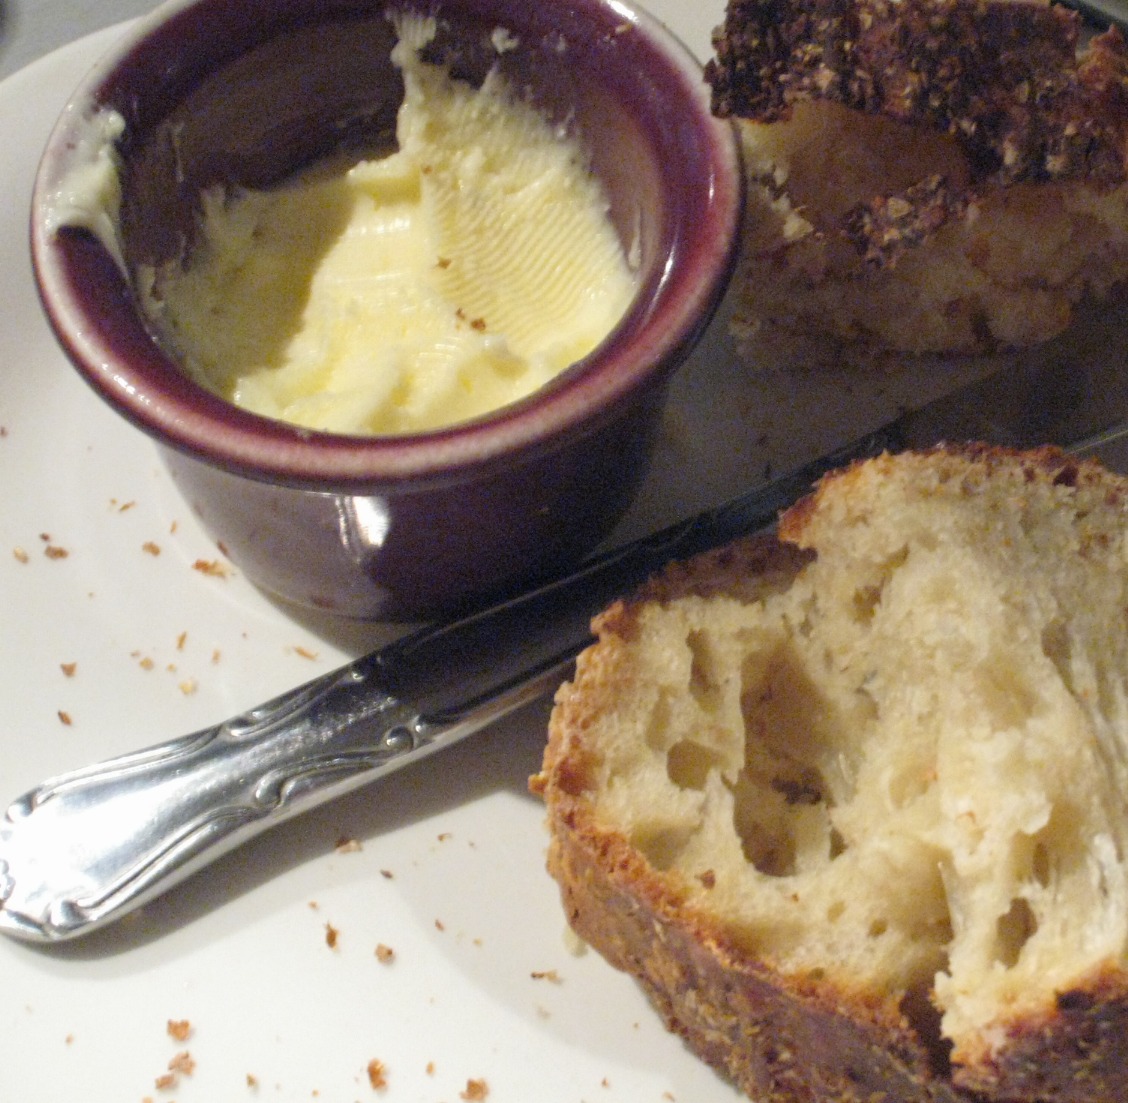
So for this version I used part dark rye flour, and used a coating of oil on the outside of the bread for that really crusty finish – awesome results! The bread has just the right density, with a bit of chewiness to it, and the crust is pretty thick with a crisp outer layer. Excellent with or without butter! A little salted butter is magic, though!

If you’re not familiar with the no-knead concept, here’s the gist of it.

A) It’s delicious. Like the bread you pay $6 for at the Farmer’s Market. Or the stuff you eat when you’re on holiday in Europe, and you wonder: why eat any other kind of bread? I know, I wonder the same thing.

B) It’s really cheap

C) It’s so easy. Yes, you have to plan ahead by mixing the dough (2 minutes) then wait (12-18 hours), then wait (an hour or two), then bake (under an hour), then eat (worth it all!). So the actual hands-on time is minimal; you just have to be home to do a few of the steps.

D) It’s SOOOO delicious!

Here are a few ideas for bread toppings: creamy homemade hummus, tzatziki, grilled Japanese eggplant, sun-dried tomato and basil cream cheese spread, or sopping up the sauce in these delicious ouzo prawns. Please share your favourite bread toppings! I’d love to hear from you.

What you need:

  • 1 cup dark rye flour
  • 2 cups white flour
  • 1 & 1/4 teaspoons salt
  • 1/4 teaspoons yeast
  • 1 & 1/2 cups water (I use slightly warm water in winter)
  • canola oil for coating the bread

What you do:

  1. Combine the flours, salt and yeast in a bowl. Add the water and mix; add more water if needed until you have a wet, sticky dough.
  2. Cover the bowl with plastic wrap or a lid (not airtight), and let sit for 12-18 hours in a warm-ish place, and out of direct sunlight. The dough should double in size and become dotted with bubbles. If your house is a little on the cool side you will likely need the longer rising time. I put mine on top of the freezer, which gives off a bit of heat.
  3. Cut a large piece of parchment paper and place it inside a large bowl, roughly forming it to the bottom of the bowl. Coat the top of the dough in oil using your hands, then turn it out into the parchment paper-lined bowl. Coat the new dough surface dough with oil. Cover loosely with a lid or with some plastic wrap, tucking it in loosely around the edges. Let the dough sit for 1-2 hours, until it has doubled in volume.
  4. About 1/2 hour before you want to put the bread in the oven, set the temperature to 475 F  and place your baking pot on a rack in the lower third of the oven. Let the pot heat up, and when the oven has reached 475 F, remove the pot from the oven. Remove the lid from the dough and pick up the dough by gathering together the corners of the parchment paper. Carefully (remember the pot is smoking hot!) place the dough in the parchment paper into the pot.
  5. Put the cover on the pot and bake for 30 minutes while the bread forms its nice thick crust. Remove the lid from the pot and continue to bake for 15-20 minutes more.  The bread should become a deep brown when it is done, and if you tap on it, it should sound hollow.  Remove the pot from the oven, lift the bread out of the pot, remove the parchment paper, and place it on a rack to cool. It needs to cool for about 1/2 an hour before slicing.
  6. This bread has no preservatives, so if you don’t use it up of the second day, it should be frozen.

Crusty Easy No-Knead Bread

crusty no-knead bread - trustinkim

For this gorgeous loaf I made a few minor modifications to my stand-by European style bread recipe. This time I coated the outside of the bread with oil, giving it a crisper crust, and baked it in parchment paper. It contains 1/3 whole wheat flour. It’s still made using the same method, mixing the dough the day before and letting it sit for 12-18 hours – this slow fermentation is what gives the bread so much flavour. Very easy, very delicious, and economical too.

This loaf was served with salty butter, brie cheese, and some creamy duck pâté.

For this recipe you will need a large container with a lid. I use a le Creuset oval pot or a Romertopf clay baker. You also need parchment paper and plastic wrap.

What you need:

  • 1 cup whole wheat bread flour
  • 2 cups white flour
  • 1 & 1/4 teaspoons salt
  • 1/4 teaspoons yeast (I used Fleischmann’s active dry yeast)
  • 1 & 1/2 cups water
  • canola oil for coating the bread

What you do:

  1. Combine the flours, salt and yeast in a bowl. Add the water and mix; add more water if needed until you have a wet, sticky dough.
  2. Cover the bowl with plastic wrap or a lid, and let sit for 12-18 hours in a warm-ish place, and out of direct sunlight. The dough should double in size and become dotted with bubbles. If your house is a little on the cool side you will likely need the longer rising time.
  3. Cut a large piece of parchment paper and lay it on your kitchen counter. In the bowl, coat the top of the dough in oil, then turn it out onto the parchment paper. Coat the top of the dough in oil, using your hands. Cover with some plastic wrap, tucking it in loosely around the edges. Let the dough sit for 1-2 hours, until it has doubled in volume.
  4. About 1/2 hour before you want to put the bread in the oven, set the temperature to 475 F  and place your baking pot on a rack in the lower third of the oven. Let the pot heat up, and when the oven has reached 475 F, remove the pot from the oven. Remove the plastic wrap and pick up the dough by gathering together the corners of the parchment paper. Carefully (remember the pot is smoking hot!) place the dough in the parchment paper into the pot, as in the photo of the baked bread above.
  5. Put the cover on the pot and bake for 30 minutes while the bread forms its nice thick crust. Remove the lid from the pot and continue to bake for 15-20 minutes more.  The bread should become a deep brown when it is done, and if you tap on it, it should sound hollow.  Remove the pot from the oven, lift the bread out of the pot, remove the parchment paper, and place it on a rack to cool. It needs to cool for about 1/2 an hour before slicing.
  6. This bread has no preservatives, so if you don’t use it up of the second day, it should be frozen.

Sun-Dried Tomato and Basil Cream Cheese Spread

sun-dried tomato cream cheese spread - trust in kim

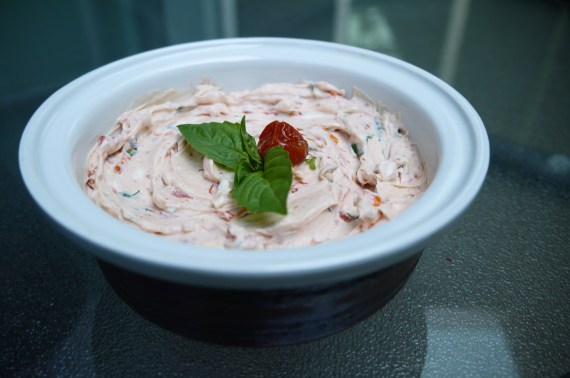
This cream cheese spread makes a great appetizer with a loaf of fresh bread or crackers. A friend of mine used to always buy this spread when we were having wine and appies, and another friend, Sarah, makes her own delicious version. This recipe is a combination of what I guessed to be the ingredients in the store-bought version, and some tips from Sarah.

The one difference with my recipe is that I made my own oven-dried cherry tomatoes. I make up a big batch, and they keep for a long time in the fridge.

Make this recipe at least an hour ahead of time so the flavours have a chance to mingle.

What you need:

  • 1 – 250 gram tub of spreadable cream cheese (or Tofutti non-dairy cream cheese)
  • 1 tablespoon mayonnaise
  • a few sun-dried cherry tomatoes packed in  olive oil (or oven-roasted to make it even better)
  • 1 clove garlic, finely minced
  • a few sprigs fresh basil, chopped
  • a little freshly squeezed lemon juice
  • salt and pepper to taste

What you do:

  1. Combine the mayonnaise and cream cheese.
  2. Chop and add the cherry tomatoes, minced garlic, basil, lemon juice, salt and pepper.
  3. Taste and adjust the amounts of anything you think you need more of.
  4. Refrigerate for at least an hour before serving.
  5. Garnish with a sprig of basil, and serve with a loaf of freshly baked bread or crackers of your choice.

Crusty Rye No-Knead Bread

no-knead rye bread - trust in kim

This beautiful bread has a great crunchy-chewy crust to it, and it is easy to make if you can plan ahead a bit.  The whole process takes about a day, but most of that time is spent just letting the dough rise all by itself, hence the name no-knead.  I’ve made a plain white version before, which was so delicious, but since I like a little more nutrition in my bread I decided to experiment by using part rye flour.  Success! I love that this bread bears some similarity to my Oma’s dark rye bread.

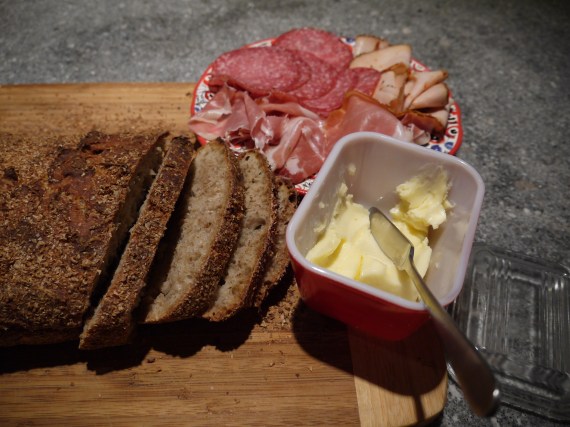
I served it with the butter, sliced meats, and a bowl of  borscht to make a somewhat traditional meal.  I was going for what we called ‘faspa,’ a low-German word  for a meal that always consisted of homemade buns, cheese, jam and cold cuts.

One thing you need for this bread is a container to bake it in, like the Romertopf roaster shown in the photo, or a le Creuset baker.  It must have a lid; baking with the lid on causes the crust to develop in the first half of the baking time.

What you need:

1 cup rye flour

2 cups white flour

1 & 1/4 teaspoons salt

1/4 teaspoons yeast (I used Fleischmann’s active dry yeast, which I store in my fridge)

1 & 1/2 cups water

1/4 cup wheat bran

What you do:

1. Combine the flours, salt and yeast in a bowl.  Add the water and mix; add more water until you have a wet, sticky dough.

2. Cover the bowl with plastic wrap or a plate and let sit at room temperature, in a warm-ish place, and out of direct sunlight for 12-18 hours.  The dough should become about double in size and dotted with bubbles.   When I lived in a house that tended to be colder it always took the full 18 hours or even more. This slow fermentation is what gives the bread its flavour.

3. Lay a tea towel on your counter and sprinkle it with some wheat bran, then scrape the dough onto the towel. Tuck the edges of the dough under to make it round.  Sprinkle it with wheat bran, then lightly pull the edges of the towel over the dough. If your towel isn’t big enough just spread another towel over the top and tuck it in lightly. Let this sit for 1-2 hours, or until it has doubled in volume.

4. Set the oven to 475 F  and place your baking pot (I used a Romertopf baker, which I had to soak in water for at least 15 minutes before using) on a rack in the lower third of the oven. Let the pot heat up, and when the oven has reached 475 F, remove the pot from the oven and carefully tip the dough into the pot.  Put the cover on the pot and bake for 30 minutes while the bread forms its nice thick crust.

5. Remove the lid from the pot and continue to bake for 15-30 minutes.  The bread should be a deep brown when it is done.  Remove it from the oven, and lift the bread out of the pot carefully and place it on a rack to cool before slicing.

Rustic No-Knead Bread

trust in kim - no-knead breadtrust in kim - no-knead bread sliced

This recipe is relatively simple, but you do need about 24 hours to complete the process, so you’ll have to plan ahead for this one.  You really don’t do any kneading, so this is unlike any other bread making method.  You just throw the ingredients together, let it do its thing, pull it out of the bowl, let it reset, then bake it. So if you can plan ahead 24 hours, you can make this bread.  And the best part is that is tastes amazing.  It has a nice thick, chewy crust, and a good density to the bread.

You will need a baking dish with a lid; I used a Romertopf clay baker, which I soaked in water before using.  I have also used a le Creuset baker.

What you need:

3 cups white flour

1 & 1/4 teaspoons salt

1/4 teaspoons yeast (I used Fleischmann’s active dry yeast, which I store in my fridge)

1 & 1/2 cups water

1/4 cup wheat bran

What you do:

1. Combine the flour, salt and yeast in a bowl.  Add the water and mix; add more water until you have a wet, sticky dough.

2. Cover the bowl with plastic wrap or a plate and let sit at room temperature and out of direct sunlight for 12-18 hours.  The dough should be about double in size and dotted with bubbles.  I put mine on top of the fridge because it was warm there.  When I lived in a place that was cold it always took the full 18 hours or even more. This slow fermentation is what gives the bread its flavour.

3. Lay a cotton or linen tea towel (not terry cloth unless you want cotton in your bread) on a cutting board or on your counter and sprinkle it with some wheat bran, then scrape the dough onto the towel. Tuck the edges of the dough under to make it round.  Sprinkle it with wheat bran, then lightly pull the edges of the towel over the dough. If your towel isn’t big enough just spread another towel over the top and tuck it in lightly. Let this sit for 1-2 hours, or until it has doubled in volume.

4. Preheat the oven to 475 F  and place your baking pot on a rack in the lower third of the oven. Let the pot heat up, and when the oven has reached 475 F, remove the pot from the oven and carefully tip the dough into the pot.  Put the cover on the pot and bake for 30 minutes. The bread is forming a nice thick crust.

5. Remove the lid from the pot and continue to bake for 15-30 minutes.  The bread should be a deep brown when it is done.  Remove it from the oven, and lift the bread out of the pot carefully and place it on a rack to cool.  Let the loaf cool before cutting.

I made an herb butter to go with mine.  I just softened some butter, then added a little salt, some dried garlic, and some chopped chives.