Tomato-Lentil Soup with Goat Cheese (or Yogurt)

a photo of a bowl of soup. It is tomato red with lentils in it, and has crumbled goat cheese, herbs and lemon zest on top.

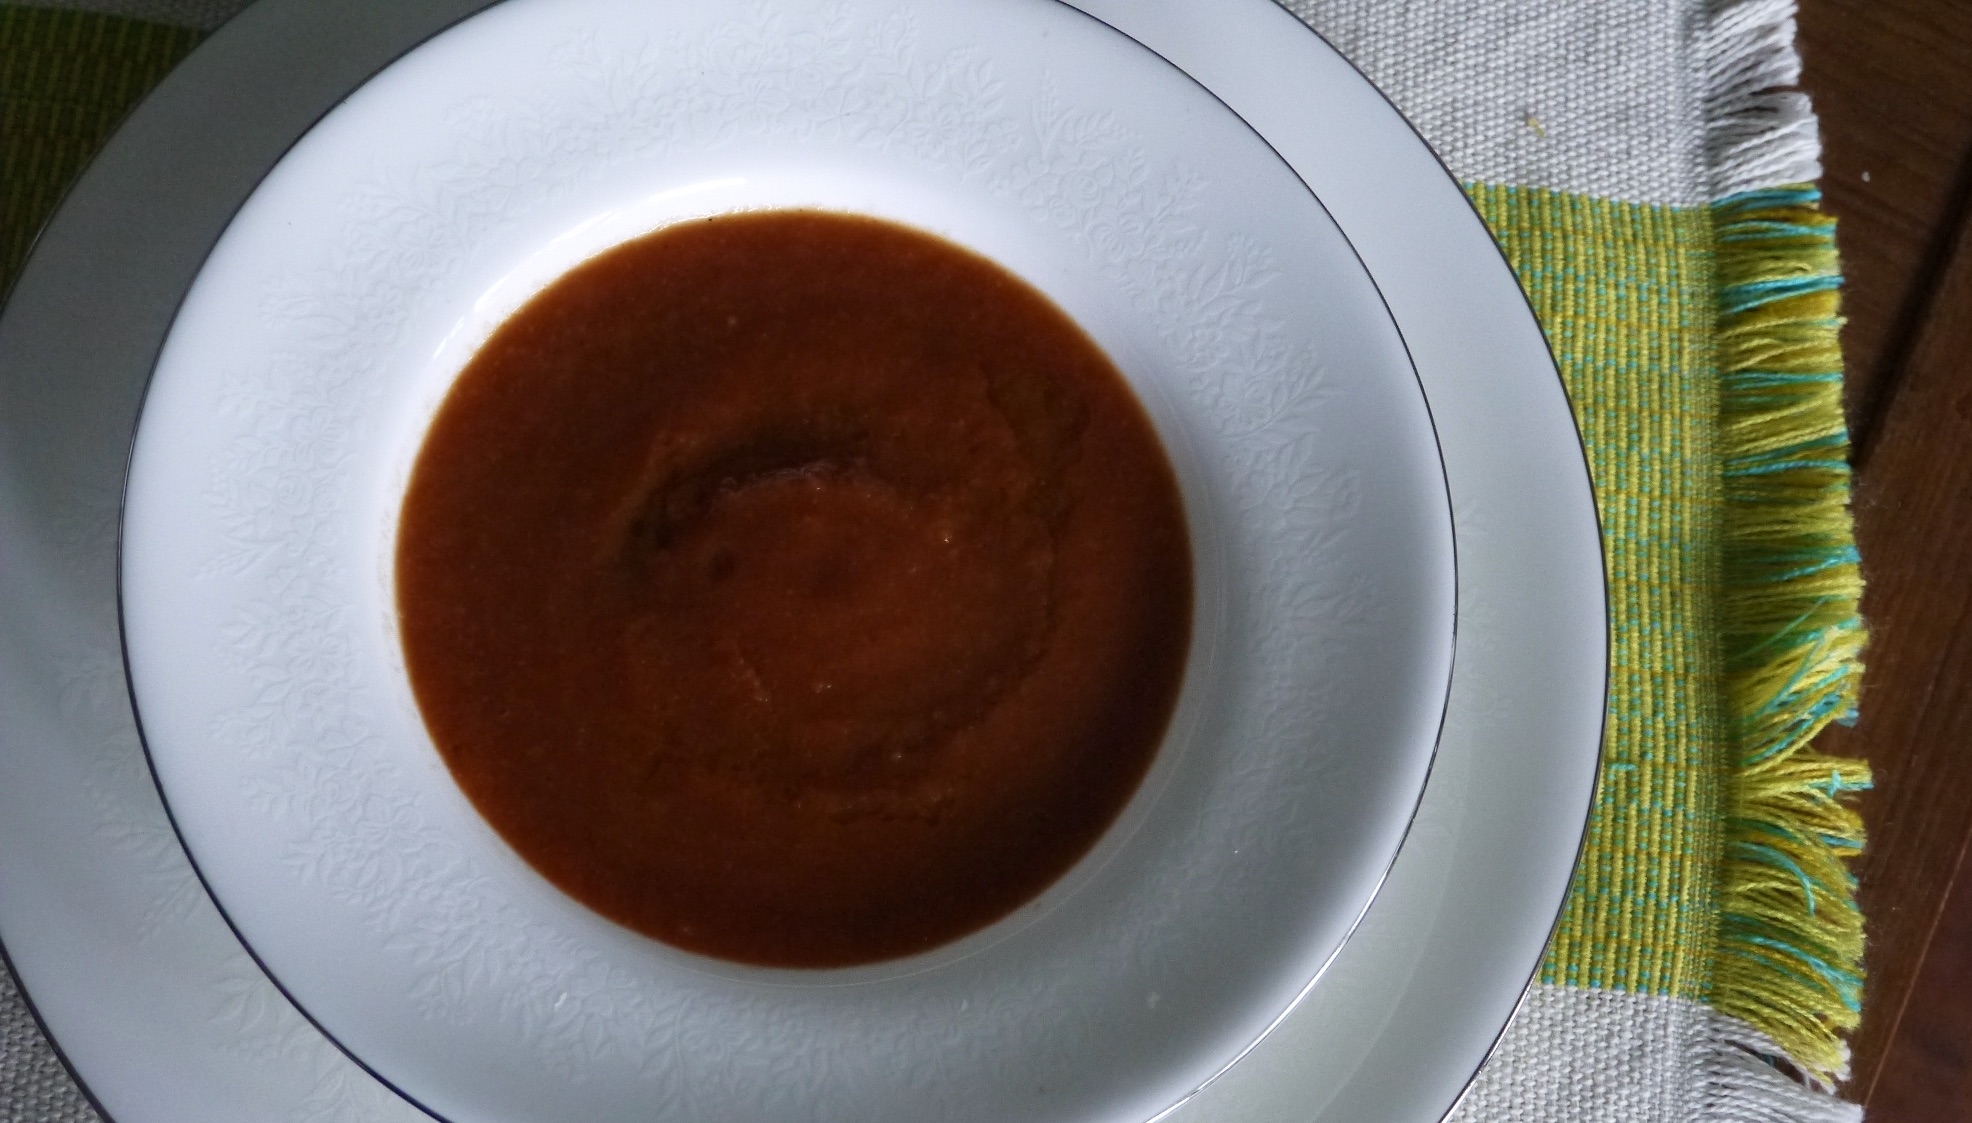
I’m loving this tomato-lentil soup! It’s quite simple to make, and is so delicious when you mix in the goat cheese! For those who don’t like goat cheese, yogurt would work well too. I almost always have these ingredients on hand, so it’s a great one to make when I don’t want to go to the grocery store.

The recipe is by Ali Slagle of the NY Times. The method of cooking the tomato paste with garlic and spices at the beginning is new to me, but it really builds the flavours! The recipe called for butter or olive oil, so I made it with olive oil to keep it healthier. It calls for Italian seasoning or oregano or za’atar, so I used za’atar. Za’atar is a spice mix usually containing sesame seeds, oregano, thyme, and sumac. Sumac has a lemony flavour that I love and can be used in so many ways. You can make it yourself, but I just picked some up at a Middle Eastern shop. I used Mild Aleppo or Pul Biber for the pepper flakes, but feel free to use what you have available. The recipe says to serve the soup with a lemon wedge, but I just added the lemon juice to the soup. The lemon flavour was quite pronounced when I tasted the soup right after cooking. I preferred the milder lemon flavour when the coup had cooled and reheated.

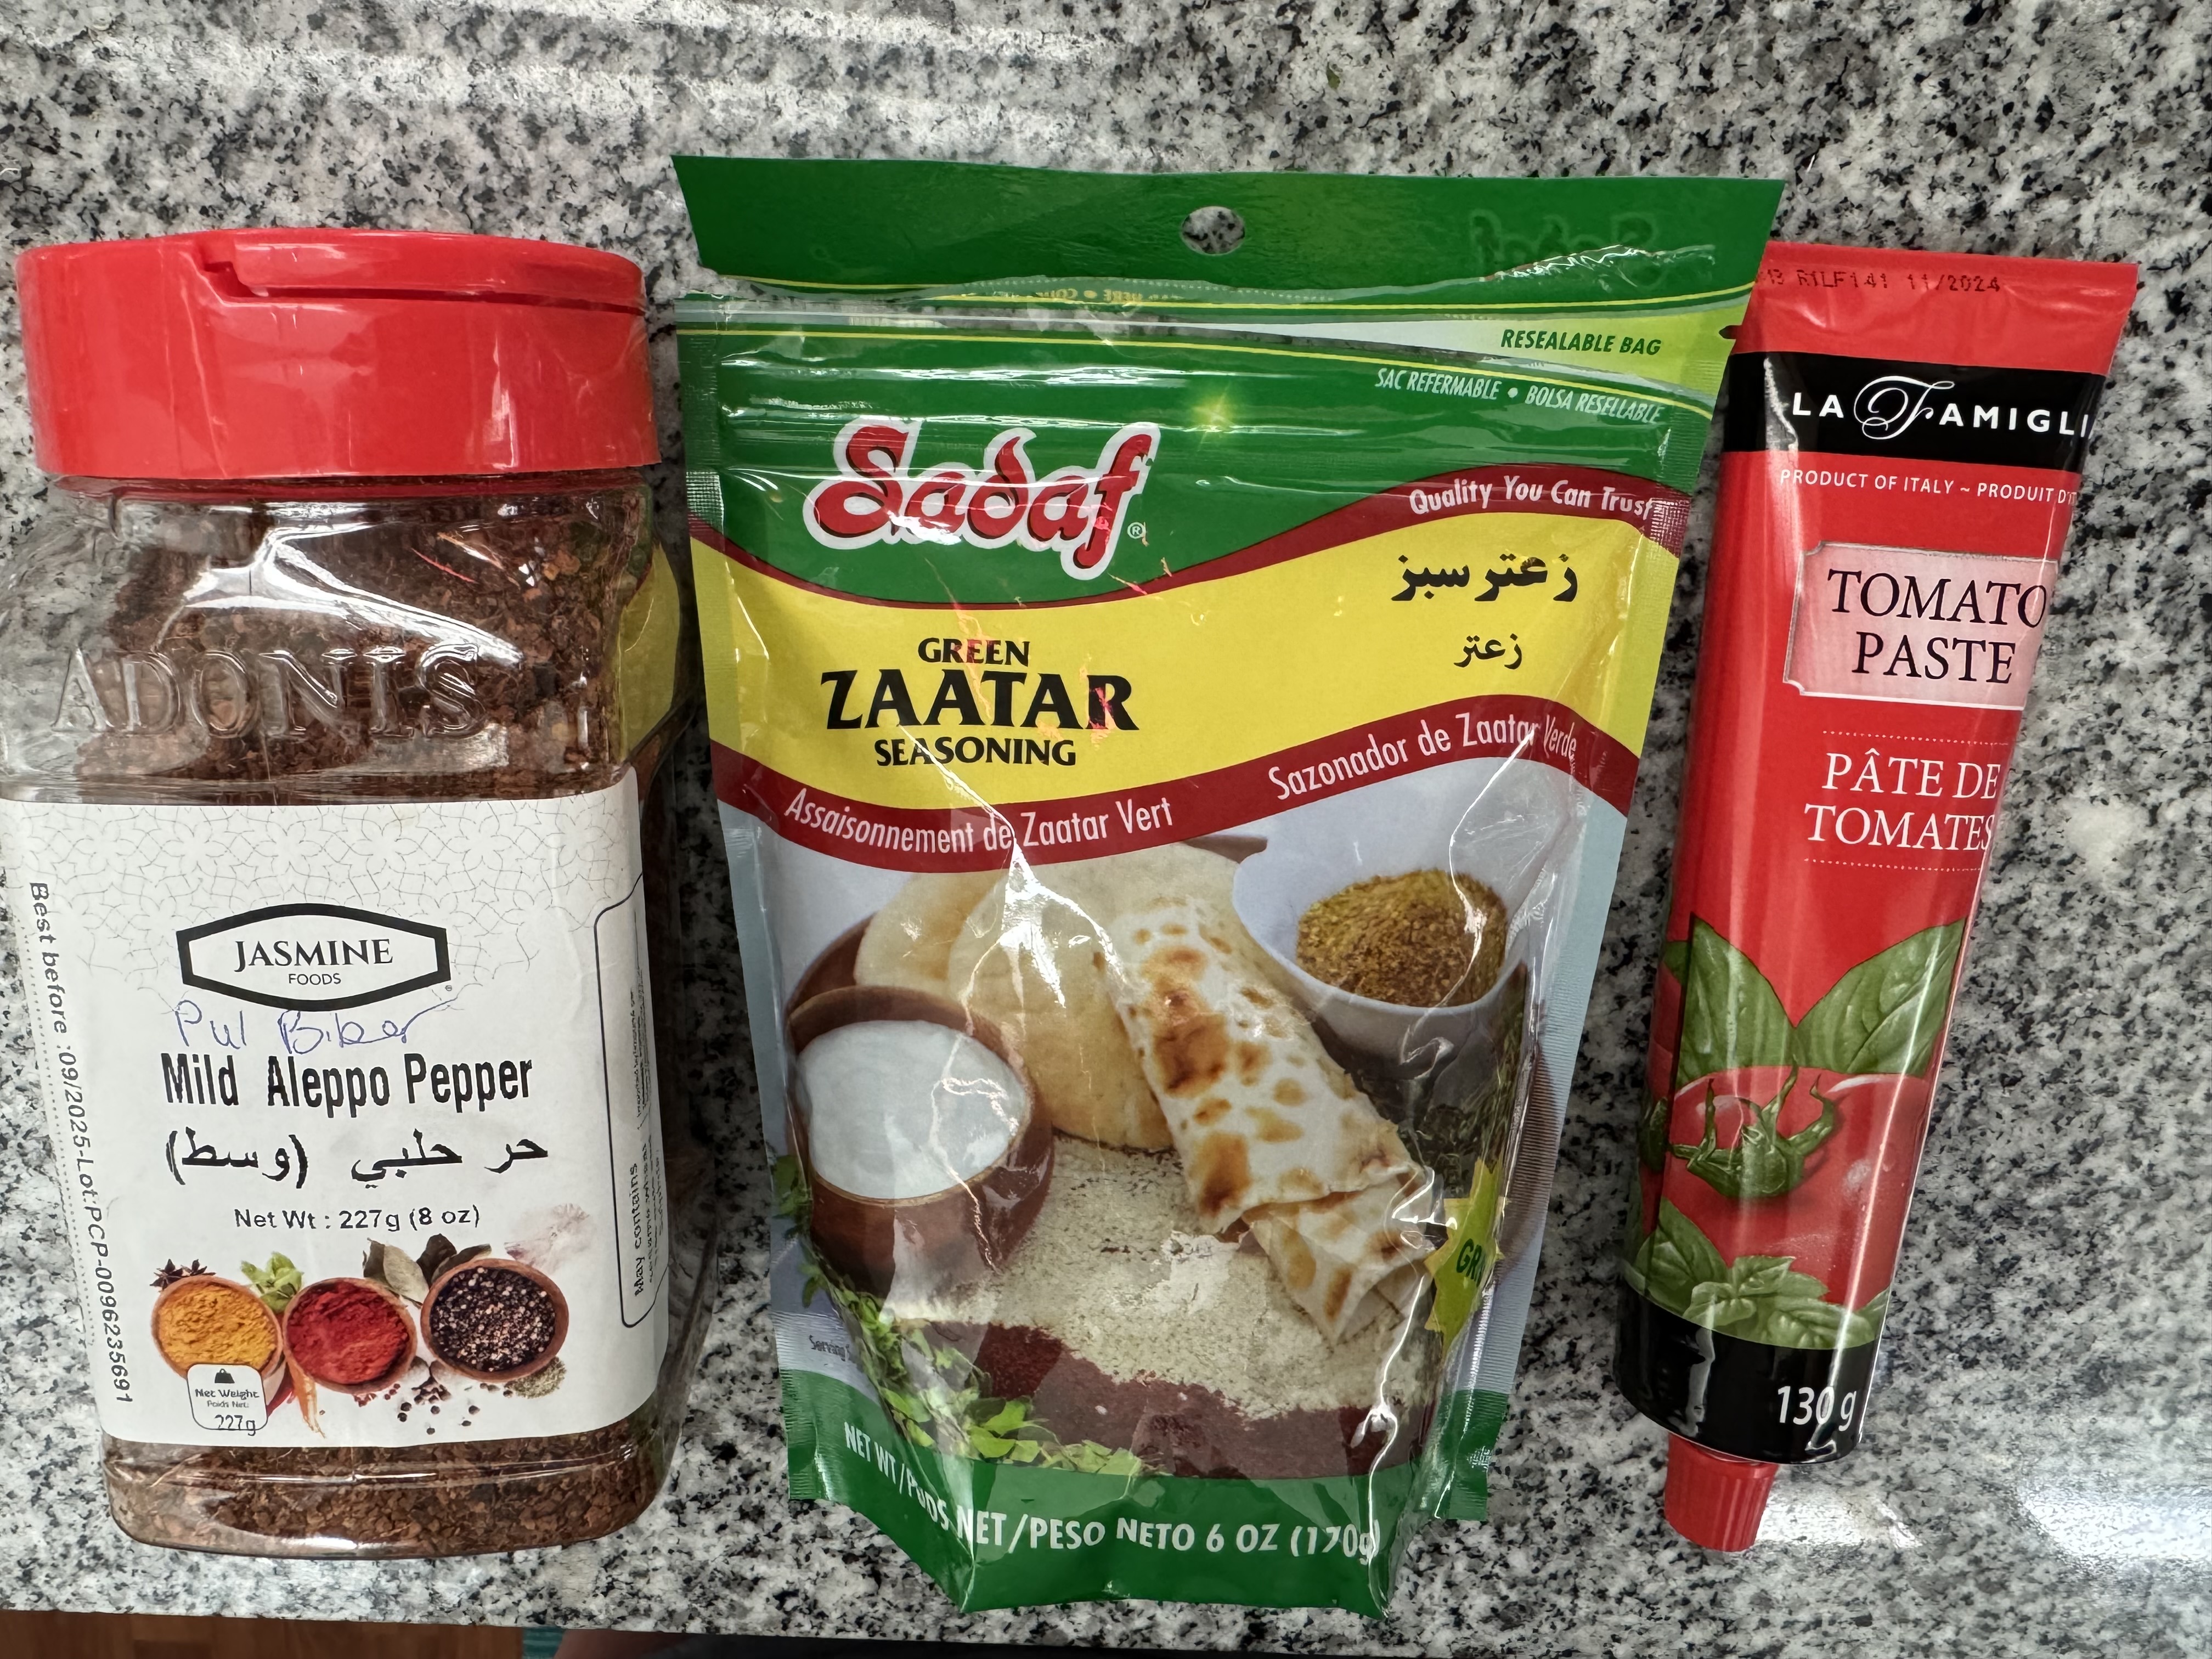
This photo shows the pepper, Za’atar and tomato paste that I used. You can also use a small can of tomato paste if you don’t have the tube.

photo showing three packages of food: a dark red ground pepper labelled "mild Aleppo Pepper" with the brand name "Jasmine," a bag  labelled "green zaatar seasoning" with the brand name "Sadaf," and a tube of tomato paste with the brand name "la famiglia."

The recipe serves four people, and can be frozen.

What you need:

  • 2-3 Tablespoons olive oil
  • 1 tube (130g/ 4.5oz.) double concentrate tomato paste, or 1 can tomato paste (156mL/ 5.5 oz.)
  • 3 cloves garlic, grated
  • 1.5 teaspoons ground coriander
  • 1 teaspoon Za’atar,OR Italian seasoning, OR oregano (plus 1/2 teaspoon for the topping)
  • 1/2 teaspoon or more pepper flakes (plus a pinch more for topping)
  • 4.5 cups water
  • 1 cup red lentils
  • 1 teaspoon Kosher salt OR 1/2 teaspoon table salt
  • juice and zest of one lemon
  • goat cheese (for topping)

What you do:

  • Place a large pot over medium heat and add the olive oil. Stir in the tomato paste, garlic, coriander, 1 teaspoon of za’atar (or other spices), and pepper flakes. Cook, stirring, for 2-4 minutes. The tomato will probably stick to the bottom of the pan, but that’s okay. Just keep stirring and let it darken; this isn’t a step you want to rush, as you are developing a lot of flavour.
  • Add the water, lentils, sand salt. Scrape the bottom of the pot to loosen all the browned bits. Put a lid on and raise the heat; bring it to a simmer, then lower the heat. Put the lid on and let it cook on low heat for 15-20 minutes.
  • While it is cooking, zest and juice the lemon.
  • To make the topping: With your fingertips, mix the lemon zest with the 1/2 teaspoon Za’atar or other spice, a pinch of pepper flakes, and a pinch of salt.
  • When the lentils are soft, stir the lemon juice into the soup pot (add 1/2 and taste to see if you want more… you never know how much juice is in a lemon!)
  • To serve, place some goat cheese on top of each bowl, then sprinkle with the lemon-spice mixture. I enjoyed the soup best when I stirred the goat cheese in, to make it creamy.
  • Enjoy!

Furikake Glazed Squash

photo of a plate of roasted squash with furikake sprinkled on top

Tonight I made this squash dish and I just had to share it! It was so delicious!

The squash is first tossed in a honey soy sauce glaze, then roasted in the oven. To serve it is sprinkled with Furikake. The combination is a winner! A hint of sweetness, saltiness, and nuttiness from the sesame seeds. Love. It.

If you’re unfamiliar with furikake, it is a Japanese condiment made of sesame seeds, seaweed, and sometimes dried fish. The one I bought, Ajishima Nori Komi Furikake, has no fish, and also no MSG which some brands contain. In a pinch you could fake this ingredient with some toasted sesame seeds and a little salt. Even better if you have some nori.

The recipe comes from Jess Damuck’s Health Nut: a Feel-Good Cookbook. It’s got plenty of yummy healthy recipes. I enjoyed the Seed Crackers, recipe which happen to be gluten-free.

This recipe is only half the original, as I only had one acorn squash. It is more than enough for two people as a side dish. I used less oil than the recipe called for.

What you need:

  • 1 delicata or acorn squash
  • 2 tablespoons honey
  • 1 tablespoon soy sauce
  • 2 teaspoons-ish neutral oil
  • 1 tablespoon furikake

What you do:

  1. Preheat the oven to 400F. Line a baking pan with parchment paper.
  2. Combine honey, soy sauce and oil in a large bowl. Taste and adjust to your liking.
  3. Halve the squash then cut into slices about 1cm thick.
  4. Toss the squash in the glaze and make sure it’s all coated. Place the squash on the lined baking pan, and add any remaining glaze.
  5. Roast the squash until it is tender, about 25 minutes. Flip the squash half way through the time.
  6. To serve, sprinkle with furikake.
  7. Enjoy!

Healthy One Pot Carrot Cabbage Tofu Meal with Lime and Peanuts: Nasi Goreng

The title of this recipe in the cookbook is “Carrot and Peanut Nasi Goreng,” but I wanted a title that explains a bit more about the recipe. I’d say the cabbage, tofu, and peanuts are the main features here, with lots of flavour from ginger, garlic, herbs, lime, and the sauce that gets drizzled on at the end. My guests liked that they could add as much of the toppings as they wanted – not everybody loves cilantro and hot sauce it seems . . . so they can choose what they want to add the theirs.

Was a hot summer day the best time to make this? Only if you love standing in front of a hot frying pan . . . with a big fan running at least.

Was my frying pan big enough for this recipe? Of course not, even though it’s a big pan . . . so I just stirred carefully when it was fully loaded.

I only made a few little changes to the recipe: I did not use the complete half of a cabbage because I just couldn’t fit it in the pan; maybe I was meant to use half a small cabbage. I also didn’t put in as much rice as the recipe asked for; the recipe asks for 350g cooked rice, and I started with 1/2 cup dry rice, so that would be a bit less than called for. I used tofu; tempeh is given as an alternative, but I really don’t like tempe, and I really enjoy tofu! I also wrapped my tofu in a towel for about an hour before using it, to soak up some of the water. I put in only a little chilli oil, but put a bowl of it on the table to drizzle on later, so everyone could choose their own spice level. I have a batch of Wil Yeung’s chilli oil, which I highly recommend. I used the 50/50 mix of honey and soy sauce instead of ketjap manis. I didn’t use the optional fried eggs. I always keep ginger in my freezer – so I have it when I need it, and because it is so easy to grate it when it is frozen.

This recipe makes about 4 servings.

Please let me know if you try this recipe and what you thought of it! I’d love to hear from you!

What you need:

  • 1 tablespoon vegetable oil
  • 200 grams firm or extra firm tofu, cut into bite-sized pieces
  • 1 small onion or 2 shallots
  • thumb-sized piece of ginger, grated (easiest to do this with frozen ginger)
  • 2 cloves garlic, finely chopped
  • 1/4 teaspoon turmeric
  • 300-350grams cooked basmati rice (cold, day old rice!)
  • 2 tablespoons soy sauce
  • 1 teaspoon to 1 tablespoon chilli oil or sambal oelek, depending on your heat tolerance
  • 2 carrots, peeled and grated
  • 1/2 a head of cabbage, chopped (or other green veg of your choice)

For serving:

  • juice of 1 lime
  • small bunch of cilantro, chopped
  • 100 grams chopped peanuts
  • 2 spring/green onions, thinly sliced
  • crispy shallots or onions
  • 1 tablespoon ketjap manis OR 50/50 mix of soy sauce and honey
  • (optional 2 eggs for frying)

What you do:

  1. Begin by laying out all the ingredients you need and chopping all the vegetables up as listed in the ingredients.
  2. Heat a large frying pan over medium/high heat, adding a little oil. Fry the tofu (I did mine in 2 batches) for about 5 minutes, turning frequently, until browned. Remove these from the pan into a bowl for later.
  3. Turn the heat to medium and add a little more oil to pan. Fry the shallots until soft, taking care not to burn them. Add the ginger and garlic and fry for another minute. Add the turmeric and fry for another minute.
  4. Add the rice to the pan, then pour on the soy sauce and chilli oil, stirring to coat the rice.
  5. Add the grated carrot and chopped cabbage, frying for about 2 minutes.
  6. Add the tofu and continue to fry until everything is hot. If you choose to fry eggs for this dish, do that now in another pan.
  7. Squeeze the lime juice over the rice and vegetable mixture.
  8. To serve, spoon some ketjap manis/ soy and honey sauce, on each serving. Sprinkle on the cilantro, spring onions, peanuts and crispy onions. Add extra chilli oil if you like a bit more heat!
  9. Enjoy!! Please comment!!

Thanks to everyone who has been so patient in waiting for a blog post! I’ve had some incredibly busy years, completing a Masters degree while working a very full-time job. I got out of the habit of taking photos my new dishes, and sure didn’t have time to write up a blog posting. I also wondered if anybody is out there… I get a bunch of hits on my site, but very few people comment, so I sort of thought no one would really care if I quit this blog. I’m going to make an effort to post from time to time, so I hope you’ll stay tuned!

Lemon-Cilantro Hummus

Well it’s been about eight months since I’ve posted a recipe; working full time and working on a master’s degree doesn’t leave a lot of time for hobbies. I’m still cooking of course, and finally took a photo of something, so thought I’d share this yummy and delicious hummus recipe.

If I had more time I would have cooked my own chickpeas, but happy to have a time-saving can of them in my cupboard!

For the smoothest hummus you can take a few minutes to remove the peels from the chickpeas. It really does make a difference! But of course you can just throw them in there with the skins on.

This is best made in a food processor, but if you have a blender or immersion blender, those could do the trick. I suppose if you had a lot of time you could do it with a potato masher . . . ? Let me know if you try that!

I purposefully didn’t add amounts here. In the procedure below I suggest how much I added, but this is a really good recipe for “adding to taste;” add a little, then a little more if needed. I like mine lemony, and I like to serve it right away . The leftovers are excellent, but the batch fresh out of the food processor is the best.

I have been eating this hummus with crackers and as a dip for veggies.

What you need:

  • can of chickpeas, drained, and preferably with skins removed
  • tahini
  • garlic, crushed
  • cilantro, clean and chopped once or twice, stems and all (unless there are some really thick, woody stems)
  • salt
  • lemon
  • cumin

What you do:

  1. Pour the chickpeas into the bowl of the food processor.
  2. Add a dollop of tahini. I used about 1/4 cup.
  3. Put the lid on the food processor and blend it up for about a minute.
  4. Add a clove of crushed garlic (or more if you love your garlic), a whole bunch of cilantro (mine wasn’t a huge bunch), a little salt, half a lemon to start, and a pinch of cumin to start. Let that process until the cilantro is well chopped, and the hummus is creamy.
  5. Taste your hummus and see what you’d like to add more of. I almost always add a bit more lemon.
  6. Add a bit of water to make it the consistency you like and process again until it is really smooth, and you have the right balance of flavours. If you are going to refrigerate your hummus, keep in mind that it gets firmer when it’s been in the fridge for a while, so adding a bit more water can be a good idea.

Iced Oatmilk Coffee

When the hot weather starts, this is my favourite beverage. To be fair, hot weather in Vancouver isn’t all that hot, but I’m a bit of a lightweight when it comes to heat.

This is one of the easiest “recipes” I have posted. Espresso (or really strong coffee), ice, and Oatmilk (or your choice of “milk.”) And Enjoy.

Thanks to my old friend Mike Peterson for introducing me to Oatmilk through his Cereal reviews! Oatmilk is the perfect non-dairy drink! I prefer the unsweetened version of Earth’s Own Oatmilk, because it works so well in coffee, tea, and in my steel cut oats and breakfast.

What you need:

  • ice
  • espresso or very strong coffee
  • oatmilk, or milk of your choice

What you do:

  1. Prepare espresso.
  2. Put ice in a glass.
  3. Pour the espresso over the ice.
  4. Pour in some oatmilk.
  5. Drink it while it’s nice and cold!

Fava Avocado Spread

I’ve been growing fava beans on my balcony all winter. Planted in November, and beginning to harvest at the end of May. I didn’t think I would be harvesting so late, but it is so worth it! The beans are creamy and have lovely flavour. And check out the photo at the bottom of the page to see the gorgeous green of the bean after shelling!

This recipe is more of a guide. What I thought was going to be a massive crop, ended up being only 8 pods (for now), which yielded 18 beans. So I ended up making a really small portion of this spread, using less than half of an avocado.

In the photo I’ve got some delicious corn crackers, but we actually preferred the fava-cado spread on a piece of bread. The crackers had a lot of flavour on their own, so the milder bread allowed the flavours of the fava and avocado to shine through.

A word on growing fava beans: Yes, you can grow them in summer, but when I did that they got infested with aphids. Growing them over winter, in Vancouver, was pretty easy. I just had to wrap them up a bit when we had a cold snap. So after half a year of growing, I finally get to eat them! This is the first harvest, but there are a lot more pods still growing . . . hmm, what should I make with the next harvest?

What you need:

  • avocado
  • fresh fava beans
  • lime
  • salt
  • bread or crackers

What you do:

  1. To prepare the fava beans, get a pot of salted water boiling. String the pods and remove the fava beans. Boil the beans for 3 minutes. Drain the beans and then put them in a bath of ice water right away. This will help them to stop cooking, and retain their gorgeous bright green colour.
  2. Now you can slide the beans out of their skins, revealing the gorgeous green colour!
  3. Mash the fava beans together with some avocado (I used more fava than avo). Use an immersion blender if you like. Season with a little bit of salt and a squeeze of lime.
  4. Serve with bread or crackers right away. Not as good after refrigeration.

Burgoo’s Tasty Tomato Soup

Burgoo is a popular Vancouver restaurant that serves the best comfort food. I tend to order this tomato soup because there aren’t a lot of meals on their comfort food menu that a lactose-intolerant person can eat.

Not only is this soup lactose-free, but it is soooo delicious! Also, it’s quite easy to make – once you’ve chopped everything up you just simmer for an hour, purée, and you’re ready to go.

I made a few changes to the recipe: since I am making it in Winter, I didn’t have fresh tomatoes that I thought would enhance the flavour. The recipe called for some canned and some fresh, and I have used all canned tomatoes. I added a few carrots, and I made the recipe a little bit smaller so it would fit in my pot.

This soup is even better after reheating, and freezes really well. I love making a massive batch and freezing most so I can have a healthy soup anytime I need it.

Just a word about the wine: please use a wine you would actually want to drink. If you like a sweeter red wine (ick), then you should probably use less brown sugar. The alcohol burns off, so there is none left in the soup, should you be serving it to people who don’t drink alcohol.

This serves 6-8 people.

What you need:

  • 2 – 796 mL cans of whole or chopped tomatoes (San Marzano are the best!)
  • 3 cups water
  • 250-375 mL your favourite red wine
  • 1 very large sweet onion (or two small ones), chopped
  • 4 cloves garlic, chopped
  • 2 carrots, chopped
  • 1/4 cup tomato paste
  • 2 Tablespoons balsamic vinegar
  • 2 Tablespoons brown sugar
  • salt and pepper to taste
  • optional: olive oil for drizzling before serving

What you do:

  1. Put everything in a large pot.
  2. Gently bring it up to a simmer.
  3. Simmer for one hour with the lid off, stirring from time to time.
  4. Purée, and if you want a super smooth soup, run it through a sieve or food mill.
  5. Taste to see if you want to add more salt, pepper, or anything else.
  6. Serve drizzled with a little olive oil, or not.
  7. Enjoy!

Lemony Hummus

You can make your own hummus! It’s so easy, delicious, and saves you money! Whether you use canned chickpeas or cook them from dried, it’s easy to make a great hummus. When I make hummus at home, I appreciate knowing exactly what goes into it, and adding more or less of whichever flavours I choose – and for me it’s all about the lemon right now!

This recipe is a variation of the hummus recipe I make often, but in this one I’ve added lemon zest along with freshly squeezed lemon juice. Plus a bit of cumin and hot sauce to perfect it.

You can use canned chickpeas, or prepare your own from dried chickpeas. I highly recommend removing the skins from the chickpeas to make a really creamy hummus. If you use split dried chickpeas, they are already skinless, so you will not need to remove the skins, but the flavour is a little different than the regular chickpea. Of course, you can always keep the skins on, but your hummus will not be as smooth. If you’ve got the time it’s worth a try, and removing the skins can be somewhat meditative.

One of my favourite meals that includes hummus is hummus kawarma, a Lebanese dish with lamb. Of course hummus also great with fresh pita, or as a veggie dip. I also love to toast day-old pita brushed with a little olive oil and sprinkled with salt to make crackers, and then dip them in hummus.

What you need:

  • 1 & ¼ cups dried chickpeas (or one 540mL can)
  • 1/3 cup tahini 
  • 4  or more tablespoons freshly squeezed lemon juice
  • zest of 1 lemon
  • cumin, to taste (start with 1/4 teaspoon)
  • hot sauce (optional) to taste
  • 1-2 cloves garlic, crushed
  •  Salt to taste
  • 5 or more tablespoons ice-cold water 

What you do:

  1. Cook the chickpeas ahead of time, so they are cold when you use them to make the hummus. If you are using canned chickpeas I highly recommend removing the skins. This is a bit of work, but here’s what I do: I drain them, then put them in a large bowl with water. Then I rub some of them between my hands, and a lot of the skins come off that way. Then I go through them and pull off most of the remaining skins.
  2. Place your drained chickpeas in a food processor or blender. Process them until you have a thick paste. Add the tahini, lemon juice, lemon zest, cumin, a little hot sauce, garlic, and 1/2 teaspoon of salt; blend this. With the machine still running, drizzle in some of the ice water and let it mix for several minutes. You will get a very creamy paste. Taste to see if you want to add any more lemon juice or any of the seasonings. Add more water if you think it needs it to be smoother; I like to add a bit more water than I think I will need, as hummus tends to thicken up a bit when refrigerated.
  3. Cover and refrigerate if you are not using it right away, but remove from the fridge at least half an hour before you want to eat it. A little drizzle of good quality olive oil is a nice way to top it off when serving.

Enjoy!

Blackberry Jam

Last night I finished making a batch of blackberry jam, with berries picked from a secret spot. It’s actually one of those places where you wonder if you’re going to trip over a body . . . but . . . free blackberries!

This recipe is made without added pectin, just the berries, sugar and lemon juice.

I don’t really eat a lot of jam, but I had a request to make this and ended up really enjoying it on an English Muffin this morning. I put a bit of Greek yogurt on as well, but cream cheese or crème fraîche would be wonderful with it too.

It takes a bit of work to get the seeds out of the jam, but I think it is a worthwhile job so you don’t bite down on the hard seeds. I found it easier to get the seeds out when the berries had cooked down a bit.

After removing the seeds, the rest of the process is quite simple. You will need some jars, and if you plan to store the jam in a cupboard you will need the proper lids etc. For freezer jam you can use any kind of jar. I used a thermometer to check the temperature, but you can use this guide to help figure out when it is done if you don’t have thermometer.

What you need:

  • 6 cups blackberries, fresh or frozen
  • 3 cups sugar (some recipes call for more, but I like it this way)
  • 1 tablespoon lemon juice

What you do:

  1. In a large pot, heat the clean blackberries on medium heat until they start falling apart.
  2. Push the berries through a strainer, food mill or chinois. If you use a strainer, as I did, it takes a bit of time and energy to push all the pulp through with the back of a spoon.
  3. Boil water in a large pot, then put your jars in there to sterilize. Turn off the heat and remove the jars with tongs. Place the lids in the pot of hot water. I always use new lids when canning to make sure that they seal properly.
  4. Place the strained berry pulp, sugar and lemon juice in a large pot and bring to a rolling boil, stirring continually. Bring the mixture to 105C/220F, then remove them from the heat.
  5. Fill the jars to 1cm below the top. I used a canning funnel to fill the jars so I had no spills – yay! Use a clean cloth to clean any drips from the rims of the jars.
  6. Use tongs to remove the lids from the hot water and place them on top of the jars. Screw the lids on, and then leave the jars sitting where they are until they have sealed. Over the next hour or so you should hear the tell-tale pinging sound that indicates that the jars have sealed. If the jars have sealed properly the lid should be slightly concave, and will not bend when you push down on it; any jars that haven’t sealed properly can be stored in the fridge or freezer. The other jars can be kept in a cool cupboard for a few years.

Rhubarb Liqueur

AAD31AB3-D5EA-48AA-ABF9-9D66D2DB7DD2

My community garden plot is bursting with rhubarb, so I’ve harvested it and am looking for new ways to use it. I came across this recipe for a rhubarb liqueur, so I thought I’d give it a try. Last year’s blackberry liqueur was a big hit at my 50th birthday party (what? in my soul I’m 34), so I thought maybe this could be the next big hit.

I halved the recipe to make just one jar of liqueur. The only other thing I changed was to make a slit down each rhubarb stalk, because I thought that would help the rhubarby-ness meld with the vodka-ness.

This is the first time I’ve posted a recipe before tasting the end result and getting a thumbs up from at least one other person. But . . .  it takes six weeks to taste the results of this one, so I thought I’d just go ahead and post it now during rhubarb season in case anyone wants to try it out alongside me. And in six weeks or so I’ll post the results, hopefully with a new cocktail recipe. Please let me know if you try it – I’d love to hear how it works out for you!

You might notice that the rhubarb in my picture isn’t particularly red – if you have rhubarb that is redder, is is preferable for this recipe. The liqueur will take on a pretty red colour that way. So mine might not look as pretty, but I’m sure it will be super tasty!

What you need:

  • 1 lb rhubarb
  • 5cm long chunk of fresh ginger
  • the peels of two oranges
  • 750mL vodka (I used Stolichnaya)
  • (to be added in in 6 weeks) – simple syrup: 1 cup sugar, 1 cup water

What you do:

  1. Cut the rhubarb stalks into lengths that will fit in a 1 litre canning jar. Place the rhubarb in the jar.
  2. Cut the ginger into smaller pieces and add them to the jar.
  3. Use a vegetable peeler to cut the peels off the oranges, using only the outer orange part. Add these to the jar.
  4. Add as much vodka as you can fit in the jar, completely covering the rhubarb. My recipe used pretty much the whole bottle.
  5. Screw the lid onto the jar, then store it in a cool dark place for about six weeks. Every few days give the jar a shake, turning it upside down.
  6. After the six weeks are up, make a simple syrup. Just heat the water and sugar to boiling, and let it cool before using.
  7. Strain the contents of the jar through cheesecloth, returning the liquid to the jar. 
  8. Add simple syrup to taste. Remember, you can always add more simple syrup later on if you find it is not sweet enough.
  9. Bottle the liqueur into smaller decorative bottles, or just use some canning jars for this.
  10. Use in cocktails, or just add it to some sparkling water.