Lemon-Cilantro Hummus

Well it’s been about eight months since I’ve posted a recipe; working full time and working on a master’s degree doesn’t leave a lot of time for hobbies. I’m still cooking of course, and finally took a photo of something, so thought I’d share this yummy and delicious hummus recipe.

If I had more time I would have cooked my own chickpeas, but happy to have a time-saving can of them in my cupboard!

For the smoothest hummus you can take a few minutes to remove the peels from the chickpeas. It really does make a difference! But of course you can just throw them in there with the skins on.

This is best made in a food processor, but if you have a blender or immersion blender, those could do the trick. I suppose if you had a lot of time you could do it with a potato masher . . . ? Let me know if you try that!

I purposefully didn’t add amounts here. In the procedure below I suggest how much I added, but this is a really good recipe for “adding to taste;” add a little, then a little more if needed. I like mine lemony, and I like to serve it right away . The leftovers are excellent, but the batch fresh out of the food processor is the best.

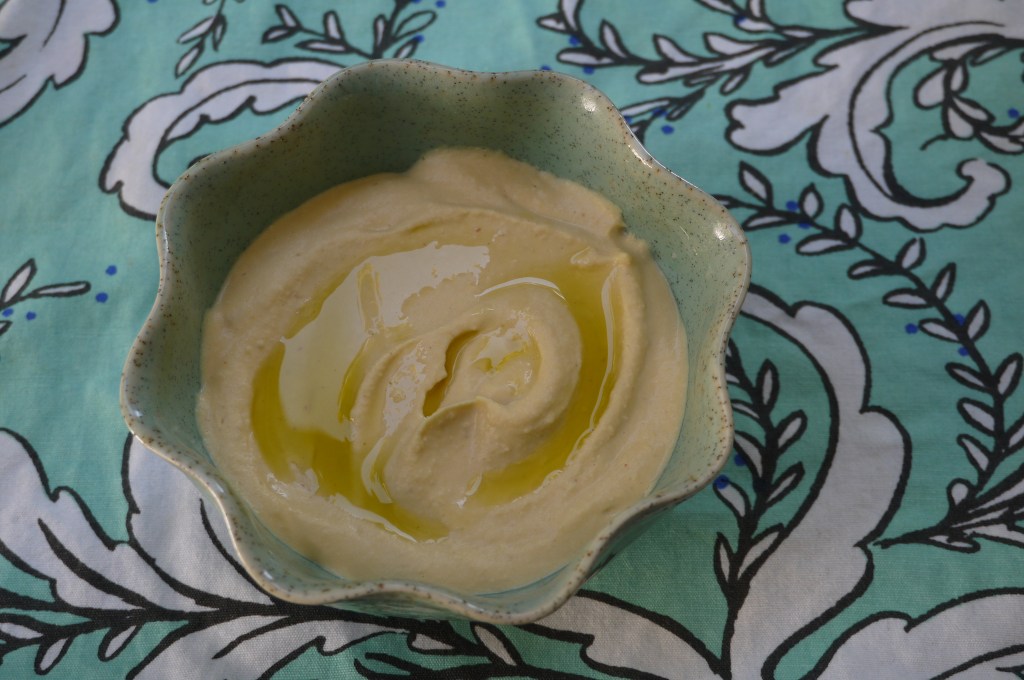
I have been eating this hummus with crackers and as a dip for veggies.

What you need:

  • can of chickpeas, drained, and preferably with skins removed
  • tahini
  • garlic, crushed
  • cilantro, clean and chopped once or twice, stems and all (unless there are some really thick, woody stems)
  • salt
  • lemon
  • cumin

What you do:

  1. Pour the chickpeas into the bowl of the food processor.
  2. Add a dollop of tahini. I used about 1/4 cup.
  3. Put the lid on the food processor and blend it up for about a minute.
  4. Add a clove of crushed garlic (or more if you love your garlic), a whole bunch of cilantro (mine wasn’t a huge bunch), a little salt, half a lemon to start, and a pinch of cumin to start. Let that process until the cilantro is well chopped, and the hummus is creamy.
  5. Taste your hummus and see what you’d like to add more of. I almost always add a bit more lemon.
  6. Add a bit of water to make it the consistency you like and process again until it is really smooth, and you have the right balance of flavours. If you are going to refrigerate your hummus, keep in mind that it gets firmer when it’s been in the fridge for a while, so adding a bit more water can be a good idea.

Lemony Hummus

You can make your own hummus! It’s so easy, delicious, and saves you money! Whether you use canned chickpeas or cook them from dried, it’s easy to make a great hummus. When I make hummus at home, I appreciate knowing exactly what goes into it, and adding more or less of whichever flavours I choose – and for me it’s all about the lemon right now!

This recipe is a variation of the hummus recipe I make often, but in this one I’ve added lemon zest along with freshly squeezed lemon juice. Plus a bit of cumin and hot sauce to perfect it.

You can use canned chickpeas, or prepare your own from dried chickpeas. I highly recommend removing the skins from the chickpeas to make a really creamy hummus. If you use split dried chickpeas, they are already skinless, so you will not need to remove the skins, but the flavour is a little different than the regular chickpea. Of course, you can always keep the skins on, but your hummus will not be as smooth. If you’ve got the time it’s worth a try, and removing the skins can be somewhat meditative.

One of my favourite meals that includes hummus is hummus kawarma, a Lebanese dish with lamb. Of course hummus also great with fresh pita, or as a veggie dip. I also love to toast day-old pita brushed with a little olive oil and sprinkled with salt to make crackers, and then dip them in hummus.

What you need:

  • 1 & ¼ cups dried chickpeas (or one 540mL can)
  • 1/3 cup tahini 
  • 4  or more tablespoons freshly squeezed lemon juice
  • zest of 1 lemon
  • cumin, to taste (start with 1/4 teaspoon)
  • hot sauce (optional) to taste
  • 1-2 cloves garlic, crushed
  •  Salt to taste
  • 5 or more tablespoons ice-cold water 

What you do:

  1. Cook the chickpeas ahead of time, so they are cold when you use them to make the hummus. If you are using canned chickpeas I highly recommend removing the skins. This is a bit of work, but here’s what I do: I drain them, then put them in a large bowl with water. Then I rub some of them between my hands, and a lot of the skins come off that way. Then I go through them and pull off most of the remaining skins.
  2. Place your drained chickpeas in a food processor or blender. Process them until you have a thick paste. Add the tahini, lemon juice, lemon zest, cumin, a little hot sauce, garlic, and 1/2 teaspoon of salt; blend this. With the machine still running, drizzle in some of the ice water and let it mix for several minutes. You will get a very creamy paste. Taste to see if you want to add any more lemon juice or any of the seasonings. Add more water if you think it needs it to be smoother; I like to add a bit more water than I think I will need, as hummus tends to thicken up a bit when refrigerated.
  3. Cover and refrigerate if you are not using it right away, but remove from the fridge at least half an hour before you want to eat it. A little drizzle of good quality olive oil is a nice way to top it off when serving.

Enjoy!

Hummus Sandwich

hummus sandwich - trustinkim.com

I don’t often make meals that are as easy as this one, and when I do I usually don’t think of it as a recipe worth sharing. But this one is! It’s tasty, nutritious, and easy to make. Feel free to alter the ingredients as you see fit.

I don’t recommend this one as a make and take, since it would probably get soggy. But then, I’m a bit of a sandwich snob and I never like sandwiches that have been made ahead of time. 

What you need:

What you do:

  1. The first step is optional, but I think it makes the sandwich extra tasty: slice the ciabatta in half, then heat a frying pan. Add a drizzle of olive oil to the pan, then place the bread cut-side down to grill it a little. Less than a minute is probably good.
  2. Add hummus to the bottom slice of the bun, and add whatever else you are putting on it (you know how to make a sandwich.) Salt and pepper the tomatoes a little.
  3. Put the top on and eat right away!

Hummus Kawarma (Lamb) with Lemon Sauce

Hummus kawarma (lamb) with Lemon Sauce - trust in kim

Yotam Ottolenghi, thank you for this recipe! I have several of his cookbooks, and I think this is my favourite recipe out of all of them. It comes from Jerusalem, which is filled with awesome recipes along with beautiful photos of the food and culture.

There is so much flavour in this dish – the lamb is marinated in herbs, and then it is served on top of hummus and drizzled with a delicious lemon sauce. Completely addictive!

In the colder seasons I serve this with another favourite recipe, roasted cauliflower and butternut squash. In summer I would switch to a refreshing fattoush salad.

You can substitute the hand-chopped lamb with ground lamb, but the hand-chopped meat has a much nicer texture to it. And it’s really easy to chop the meat yourself.

This recipe serves 6 people for an appetizer or small meal. Pita bread is nice served with this.

What you need:

kawarma ingredients:

  • 300g neck fillet of lamb (which I couldn’t find, so I just used a piece of top round)
  • 1/2 teaspoon ground black pepper
  • 1 teaspoon ground allspice
  • 1/2 teaspoon ground cinnamon
  • pinch of freshly grated nutmeg
  • 1 teaspoon crushed dried za’atar or oregano leaves
  • 1 tablespoon white wine vinegar
  • 1 tablespoon chopped fresh mint
  • 1 tablespoon chopped flat-leaf parsley, plus extra to garnish
  • 1 teaspoon salt
  • 1 tablespoon unsalted butter or ghee
  • 1 teaspoon olive oil

lemon sauce ingredients:

  • 10 grams flat-leaf parsley, finely chopped (also delicious without parsley)
  • 1 green chile, chopped finely
  • 4 tablespoons freshly squeezed lemon juice
  • 2 tablespoons white wine vinegar
  • 2 cloves garlic, crushed
  • 1/4 teaspoon salt

optional toppings:

  • pine nuts
  • pomegranate seeds

What you do:

  1. Chop the lamb finely. Combine all the kawarma ingredients except the butter and oil. Mix well, cover and refrigerate for 30 minutes.
  2. Combine all the ingredients for the lemon sauce.
  3. Heat the butter and olive oil in a large frying pan. Add the lamb, in two or three batches, and stir as it fries. It only needs about 2 minutes to turn nicely light-pink inside.
  4. To serve, make a mound of hummus on the plate, and use a spoon to create a well in the middle. Spoon some of the lamb into the well, and top with a generous amount of the lemon sauce. Garnish with more parsley or other optional toppings.

Enjoy it while it’s warm!

Super Creamy Hummus, Ottolenghi Style

hummus - trust in kim

This hummus recipe by Yotam Ottolenghi is so much better than anything you can buy. It is light and creamy, and I like that I can control what goes into it – a little more lemon, a little more tahini. This recipe doesn’t have contain any olive oil, unless you pour some on top before serving.  A lot of the store-bought varieties don’t use olive oil either, often using canola oil or other substitutions. I like to drizzle olive oil on the top to add flavour, make it richer, and make it seems more Mediterranean.

It’s really not that difficult to make an awesome hummus, and there are different lengths you can go to, like starting with dry chickpeas, and peeling the skins off them. For me it’s worth the extra effort to have such a great tasting and smooth hummus, when I have a little bit of time to do it.

When I made mine I did cheat a little and use canned chickpeas, so the recipe below shows how to work with dry or canned chickpeas. One day soon I will use the method in the cookbook, cooking my own chickpeas while quickening the process by adding baking soda. But for now, because I used the canned chickpeas I had to remove the skins – this is one of the things that makes this hummus so creamy, and it only took about ten minutes.

I like to serve hummus with homemade pita crackers, and some veggie sticks.

What you need:

  • 1 & ¼ cups dried chickpeas (or one 540mL can)
  • 1 teaspoon baking soda
  • 3/4 cup tahini 
  • 4 tablespoons freshly squeezed lemon juice
  • 2 cloves garlic, crushed
  •  Salt to taste
  • 6 & ½ tablespoons ice-cold water 

What you do:

  1. Place the chickpeas in a large pot and cover them with at least double their volume of cold water; let them soak overnight. If you are using canned chickpeas you will instead remove the skins. This is a bit of work. Here’s what I do. I drain them and put them in a large bowl with water. Then I rub some of them between my hands, and a lot of the skins come off that way. Then I go through them and pull off any skins that are remaining.
  2. If you are using dried chickpeas, drain them the next day and put them in a pot with the baking soda over high heat; cook for about 3 minutes, stirring constantly. This will help them cook faster. Add 6 & 1/2 cups of water to the pot and bring it to a boil. Lower the heat to simmer, skimming off any foam and skins. Cook for 20-40 minutes until they are tender; they should break easily when squeezed, but not be mushy.
  3. Drain the chickpeas and place in them a food processor or blender. Process until you have a thick paste. Add the tahini, lemon juice, garlic, and 1 & 1/2 teaspoons of salt; blend this. With the machine still running drizzle in most of the ice water and let it mix for about 5 minutes. You will get a very creamy paste. Add more water if you think it needs it, and taste to adjust seasonings.
  4. Put the hummus in a bowl and cover it. Let it rest for at least half an hour. Refrigerate if you are not using it right away, but remove from the fridge at least half an hour before you use it.

Enjoy!