Mom’s Rhubarb-Apricot Platz


Mom's Apricot Platz - trust in kim


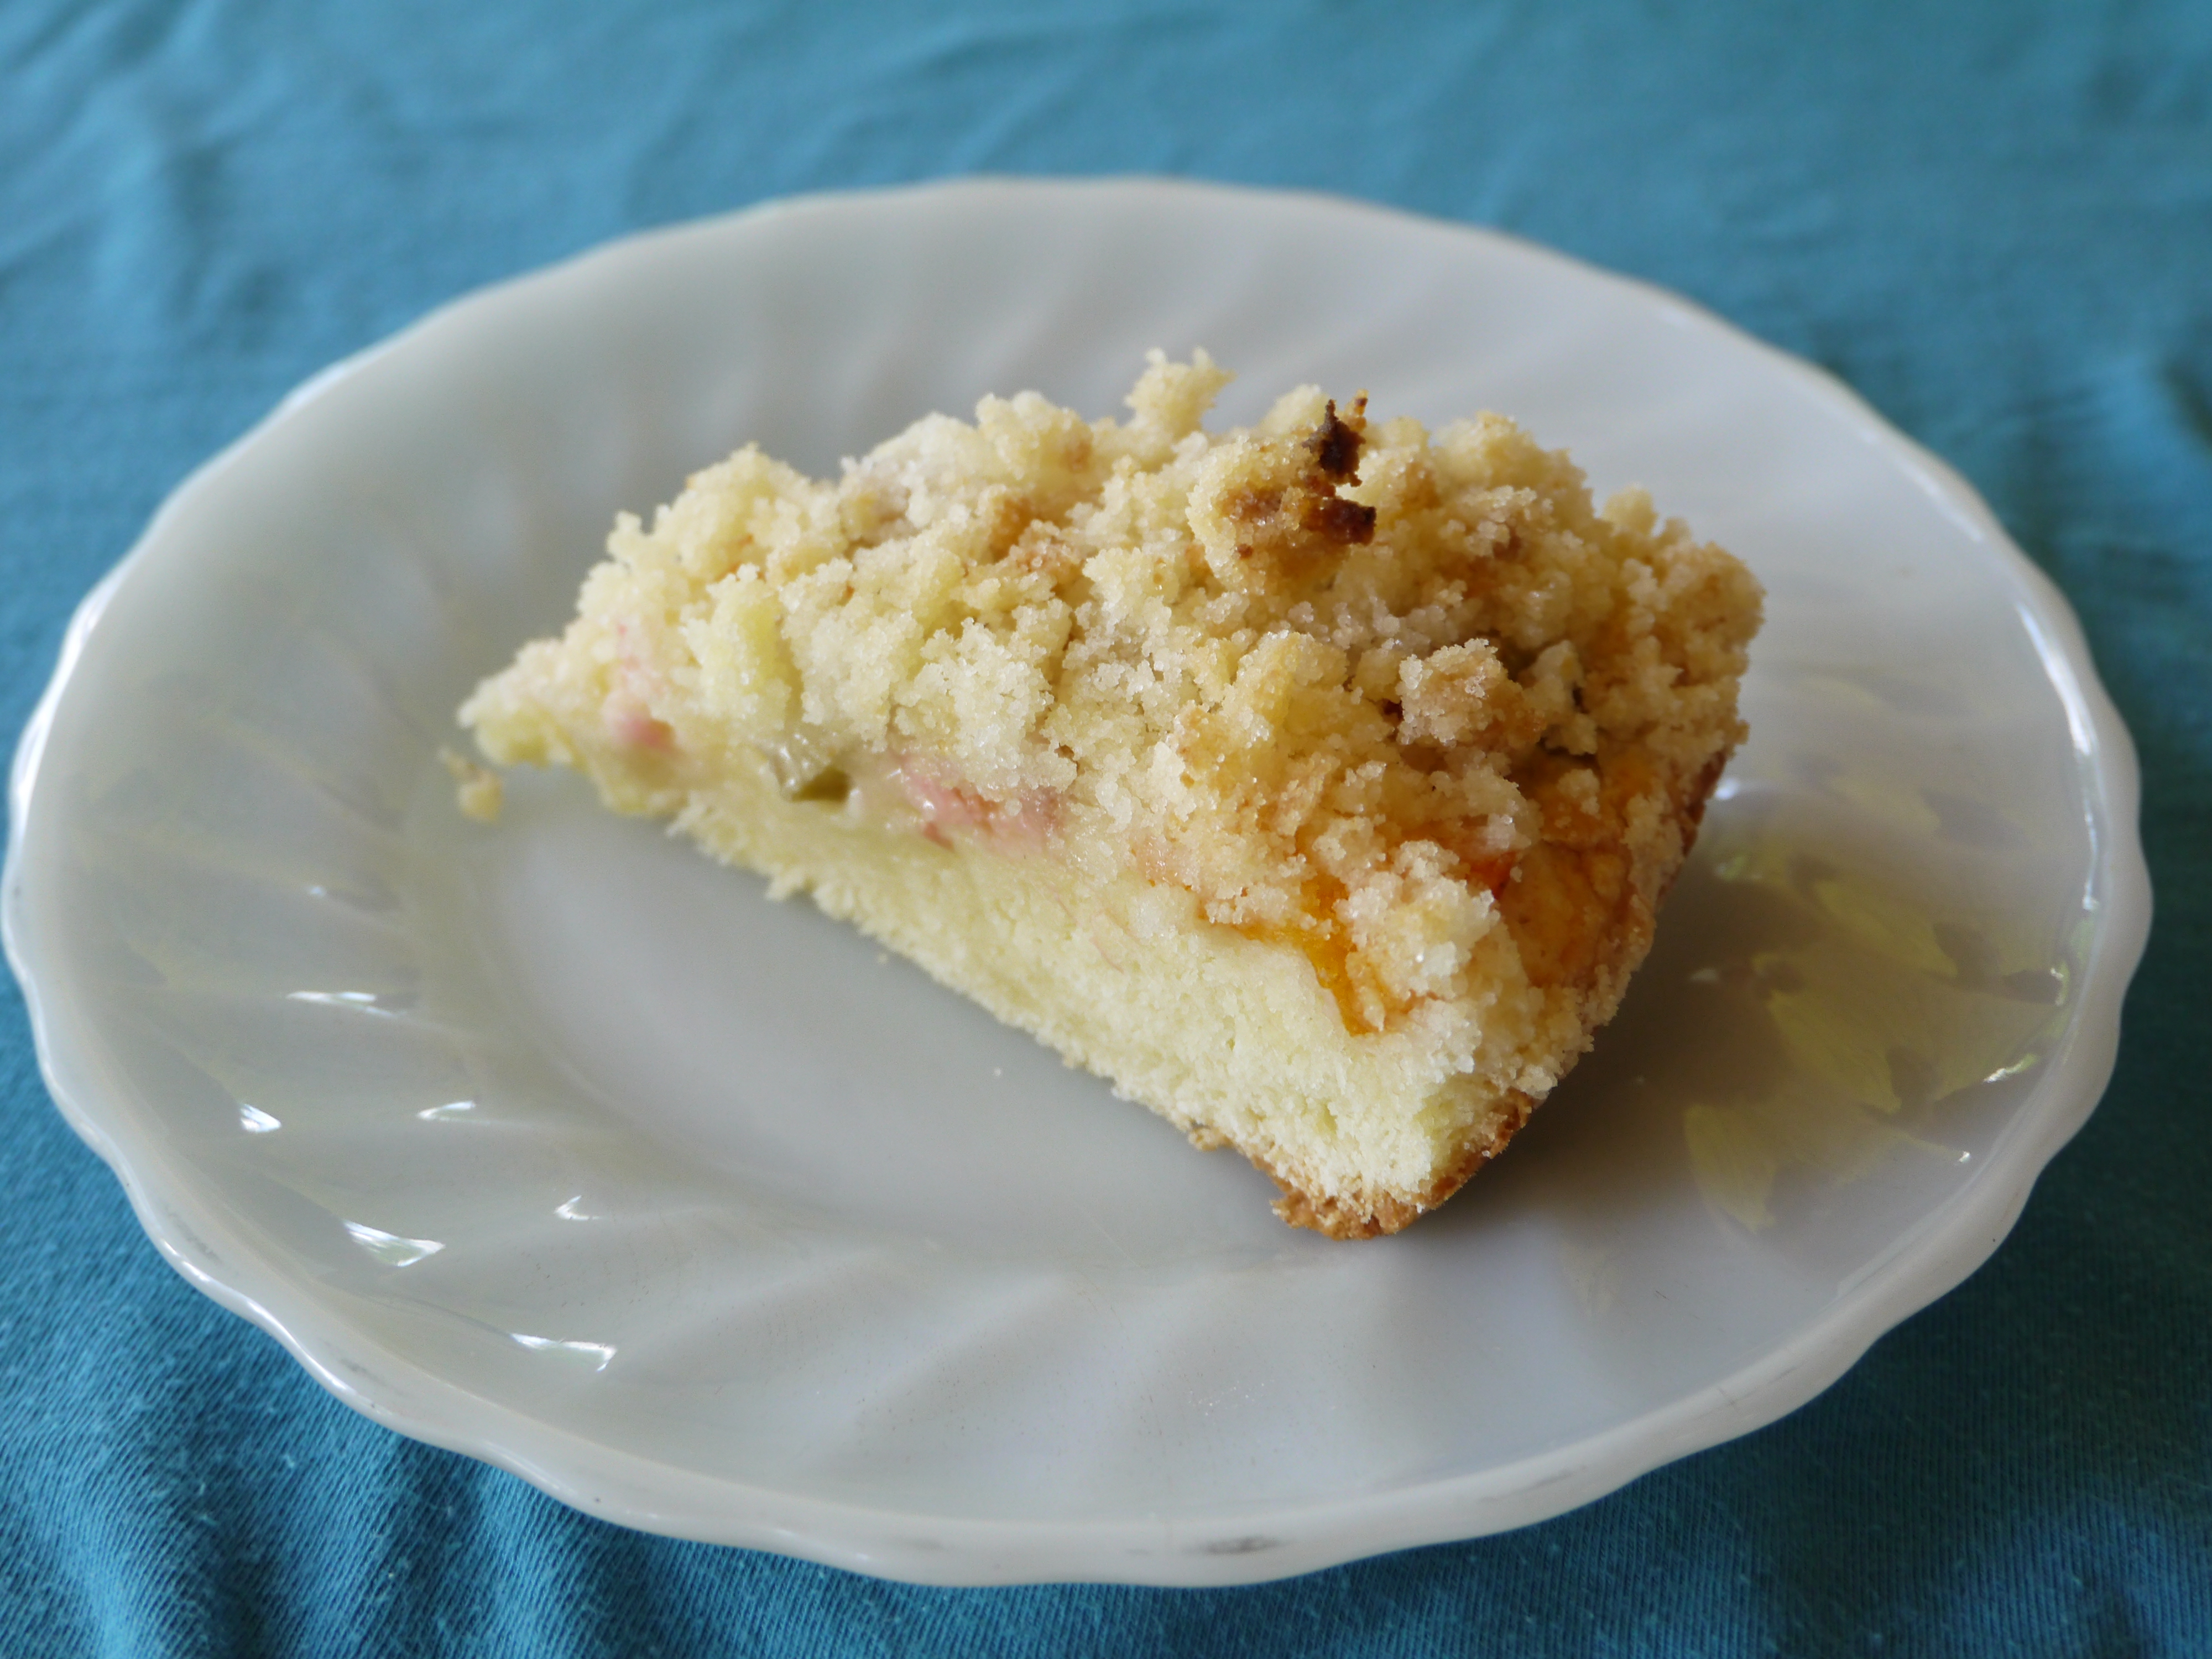
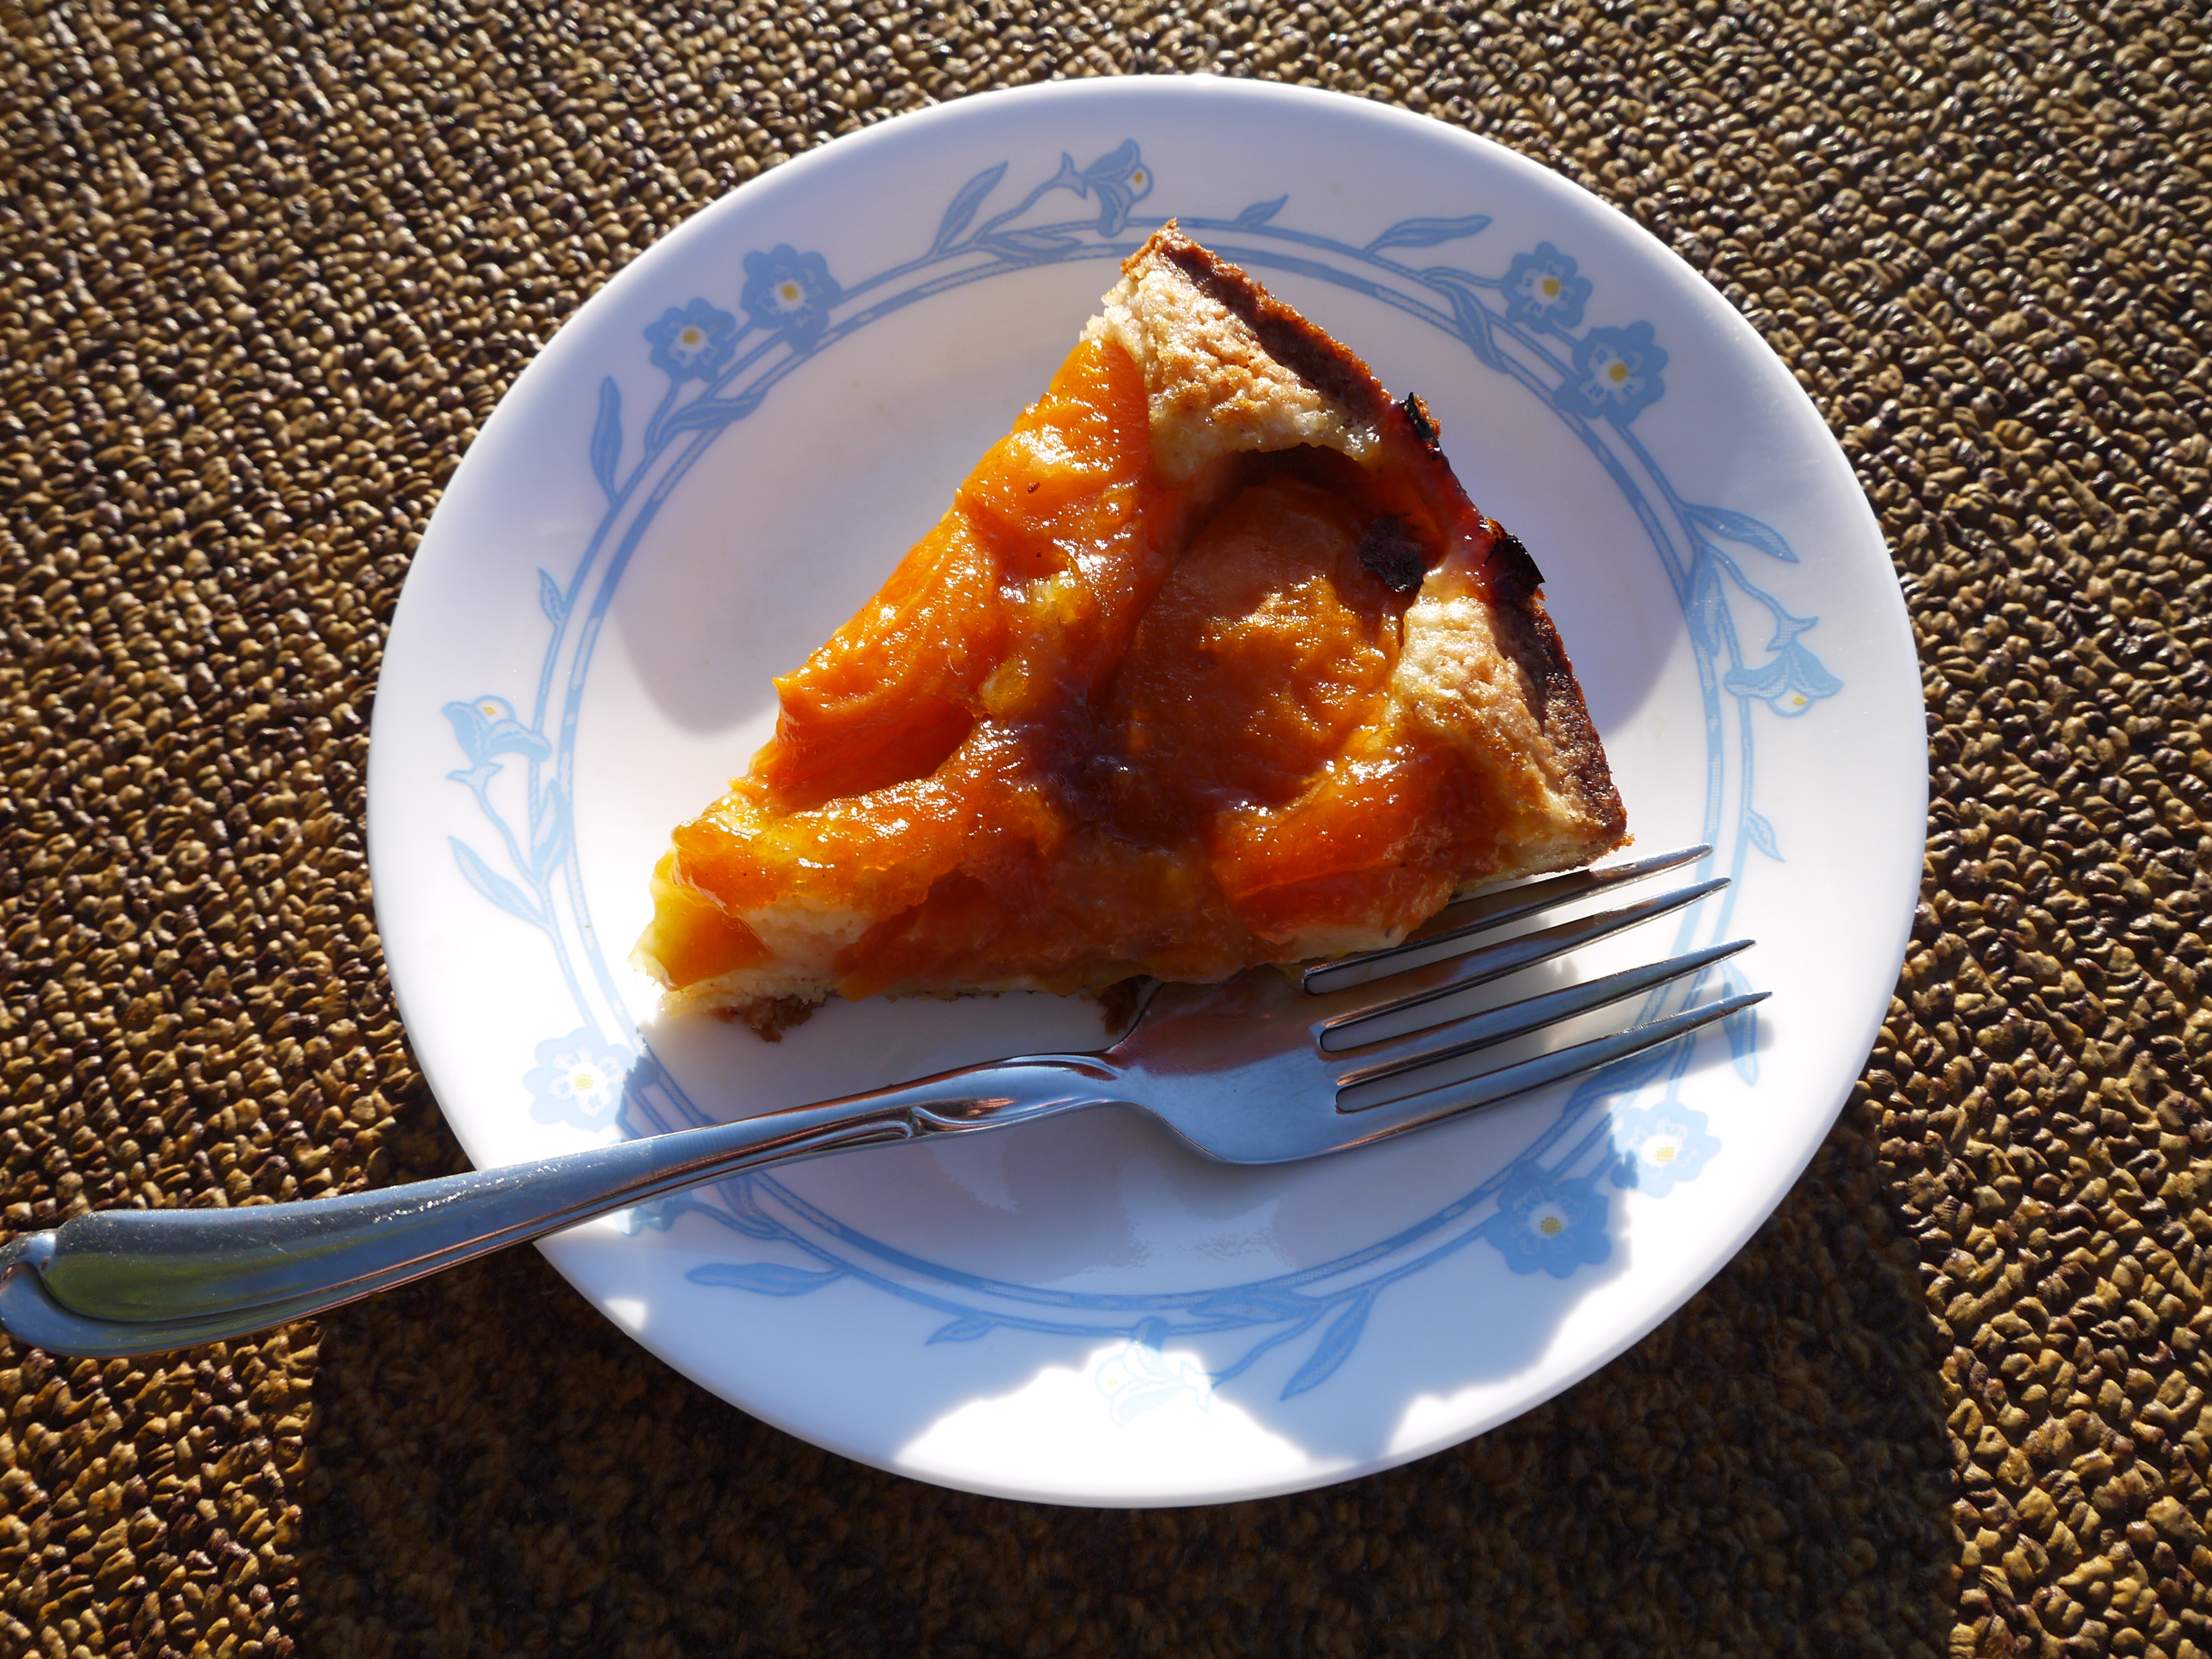
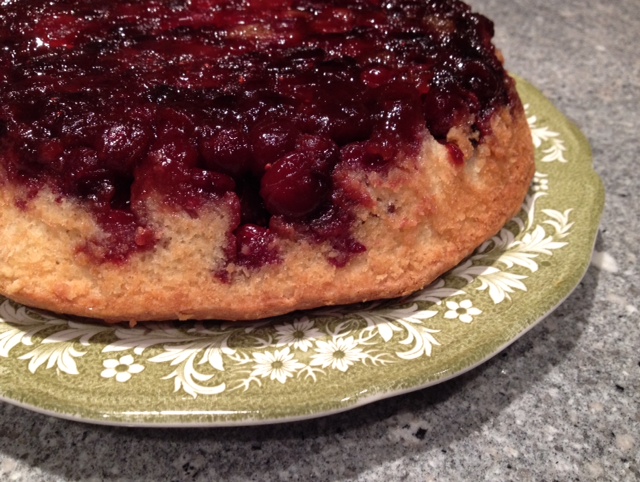
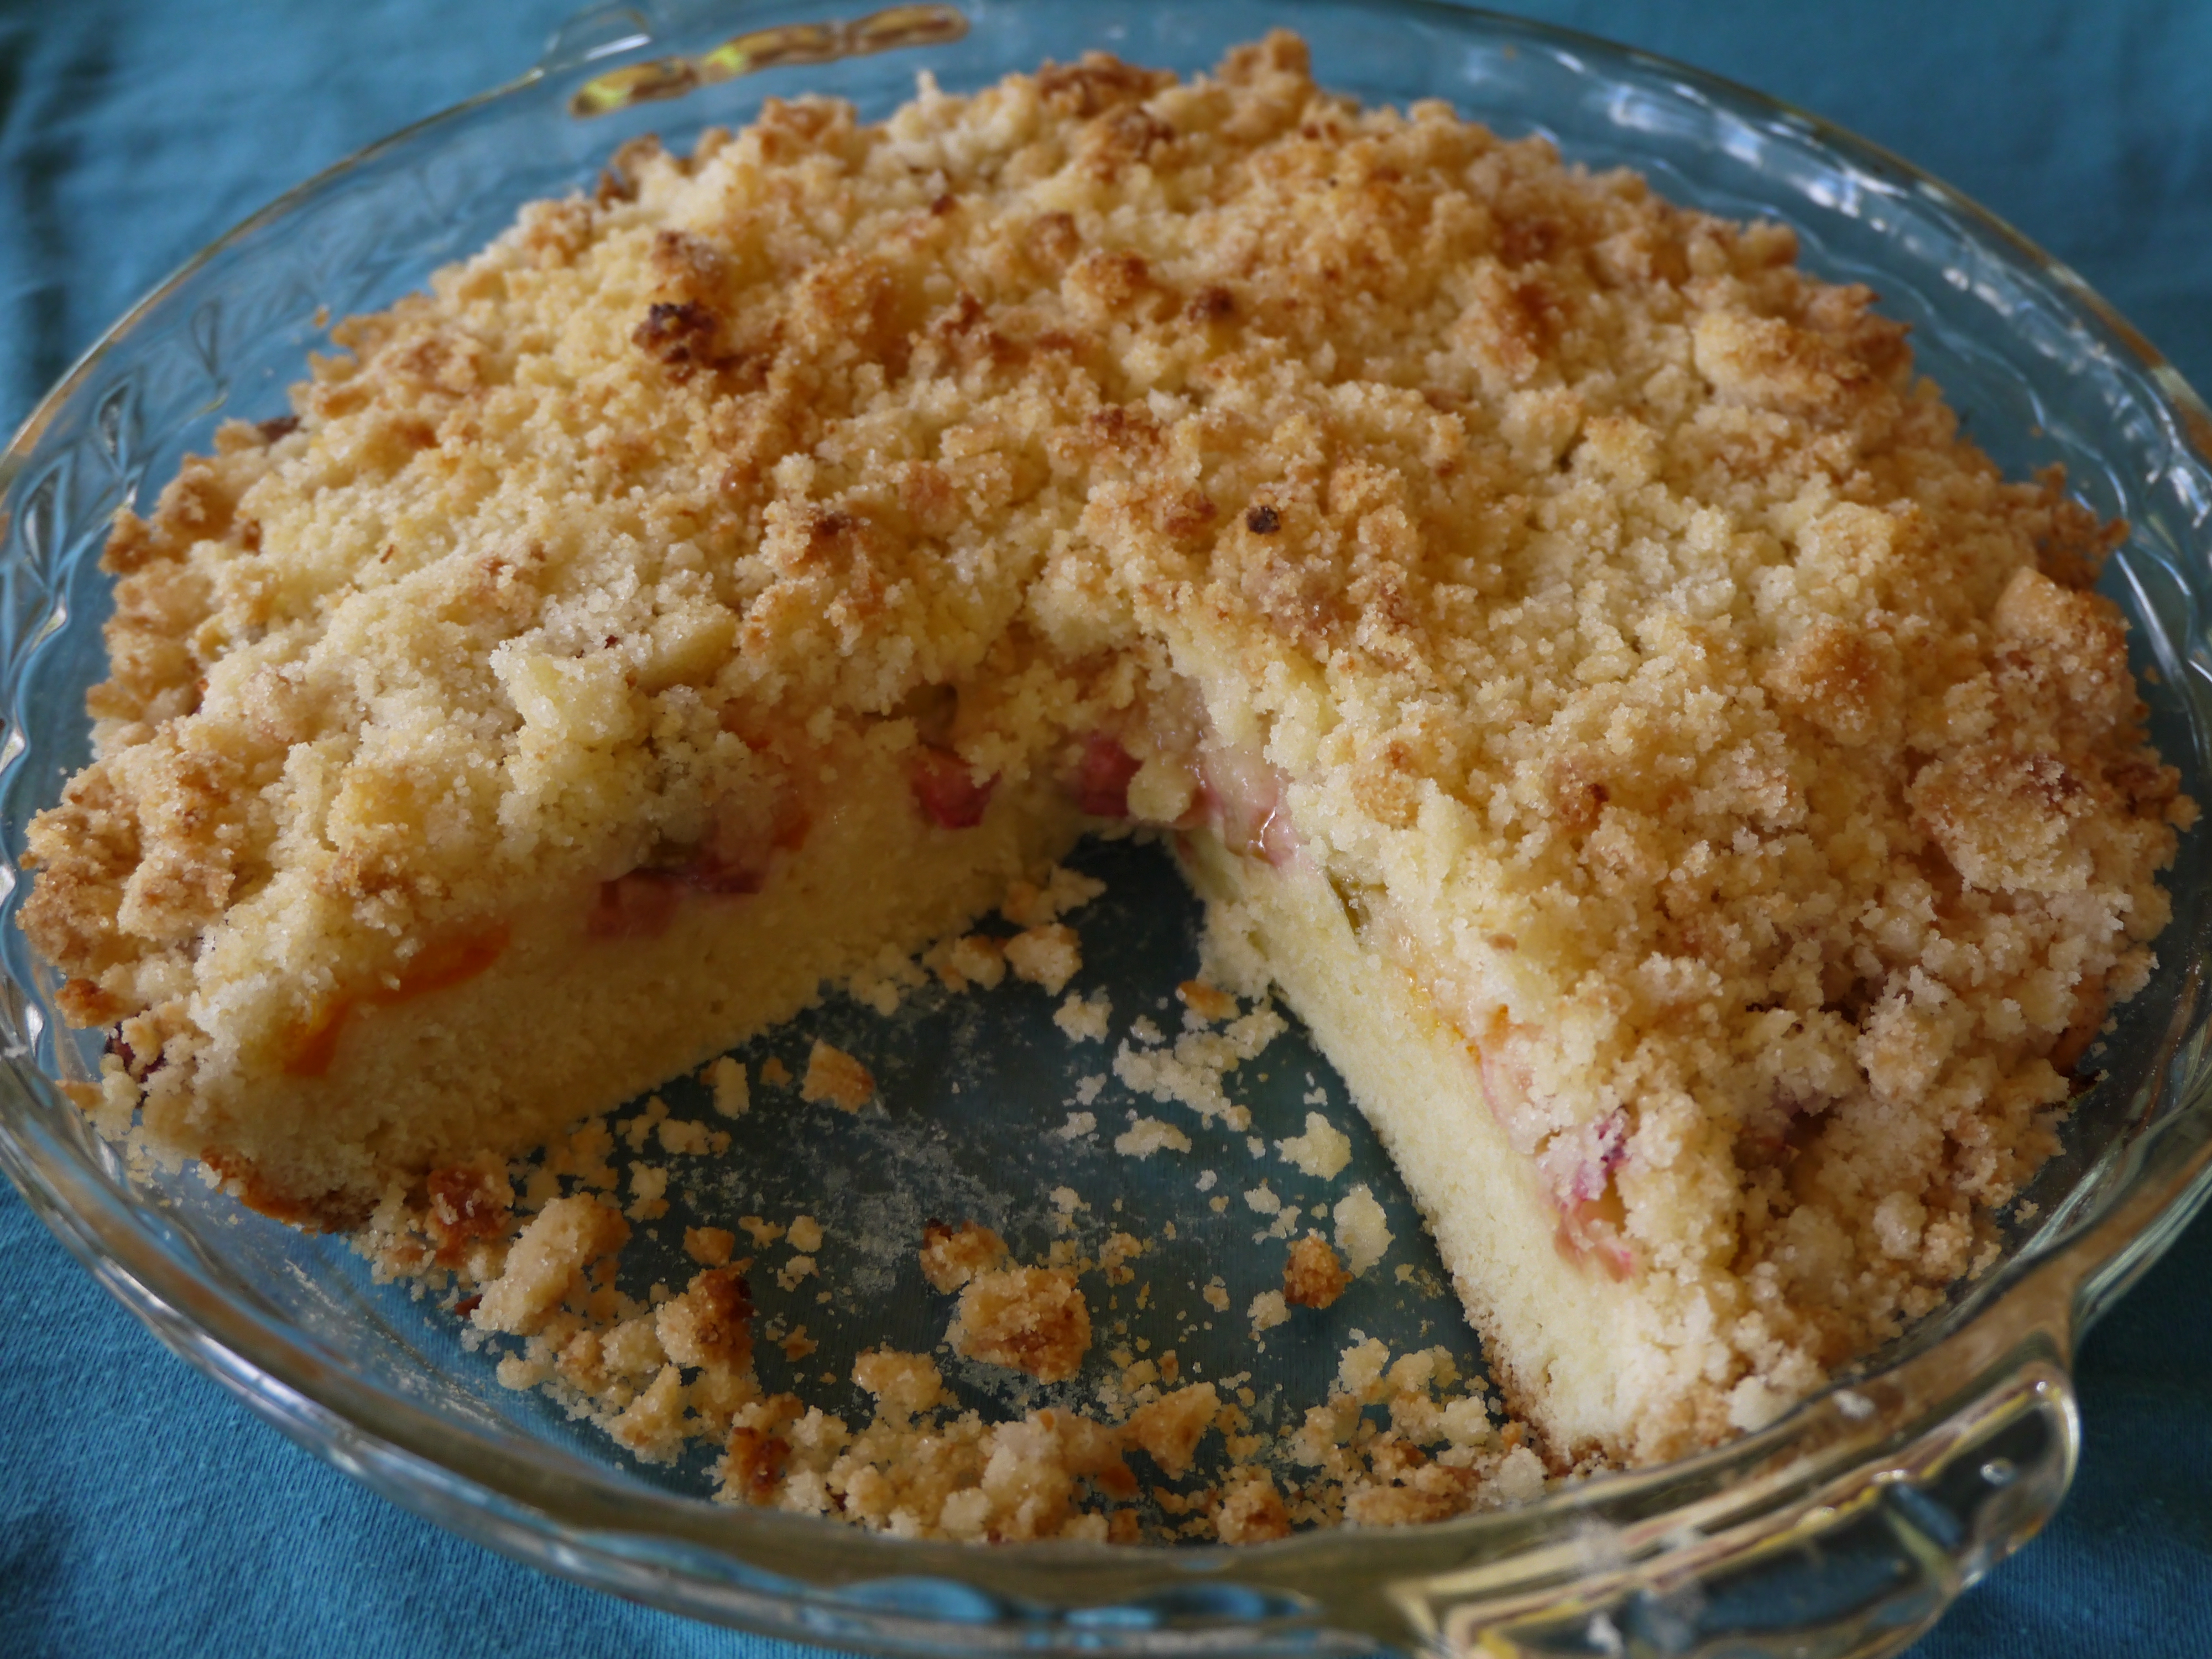
This is a recipe I grew up eating: my Mennonite Mom’s platz.  It is a thin coffee cake with fruit and streusel on top.  Sometimes on the second day the cake layer would get  a bit dried out, but I didn’t mind too much because the fruit and streusel were so yummy.  For this recipe I used a combination of rhubarb and apricots, but plums are another favourite.

Even though the photos show a thick round cake, I grew up with it baked thinly in rectangular form, which was cut into squares.

What you need for the cake:

1/2 cup butter (the original recipe called for crisco or margarine)

1/2 cup sugar

2 cups all-purpose flour

3 teaspoons baking powder

1/2 teaspoon salt

1 egg

about 1/2 cup milk

2-3 cups chopped fruit of your choice

What you need for the streusel:

1/4 cup melted butter

1 cup sugar

3/4 cup flour

pinch salt

splash of vanilla

What you do:

1. Preheat the oven to 35oF.

2. To make the cake, cream the  1/2 cup butter and 1/2 cup sugar well.

3. Combine the flour, baking powder and salt.

4. Crack the egg into a measuring cup and mix it up a little with a fork.  Add enough milk to the measuring cup so it reaches the 2/3 cup mark.

5. Mix in some of the liquid and alternate with the dry ingredients. Spread this mixture in the bottom of a buttered 9 x 13 inch pan.

6. Spread the fruit on top of the batter.

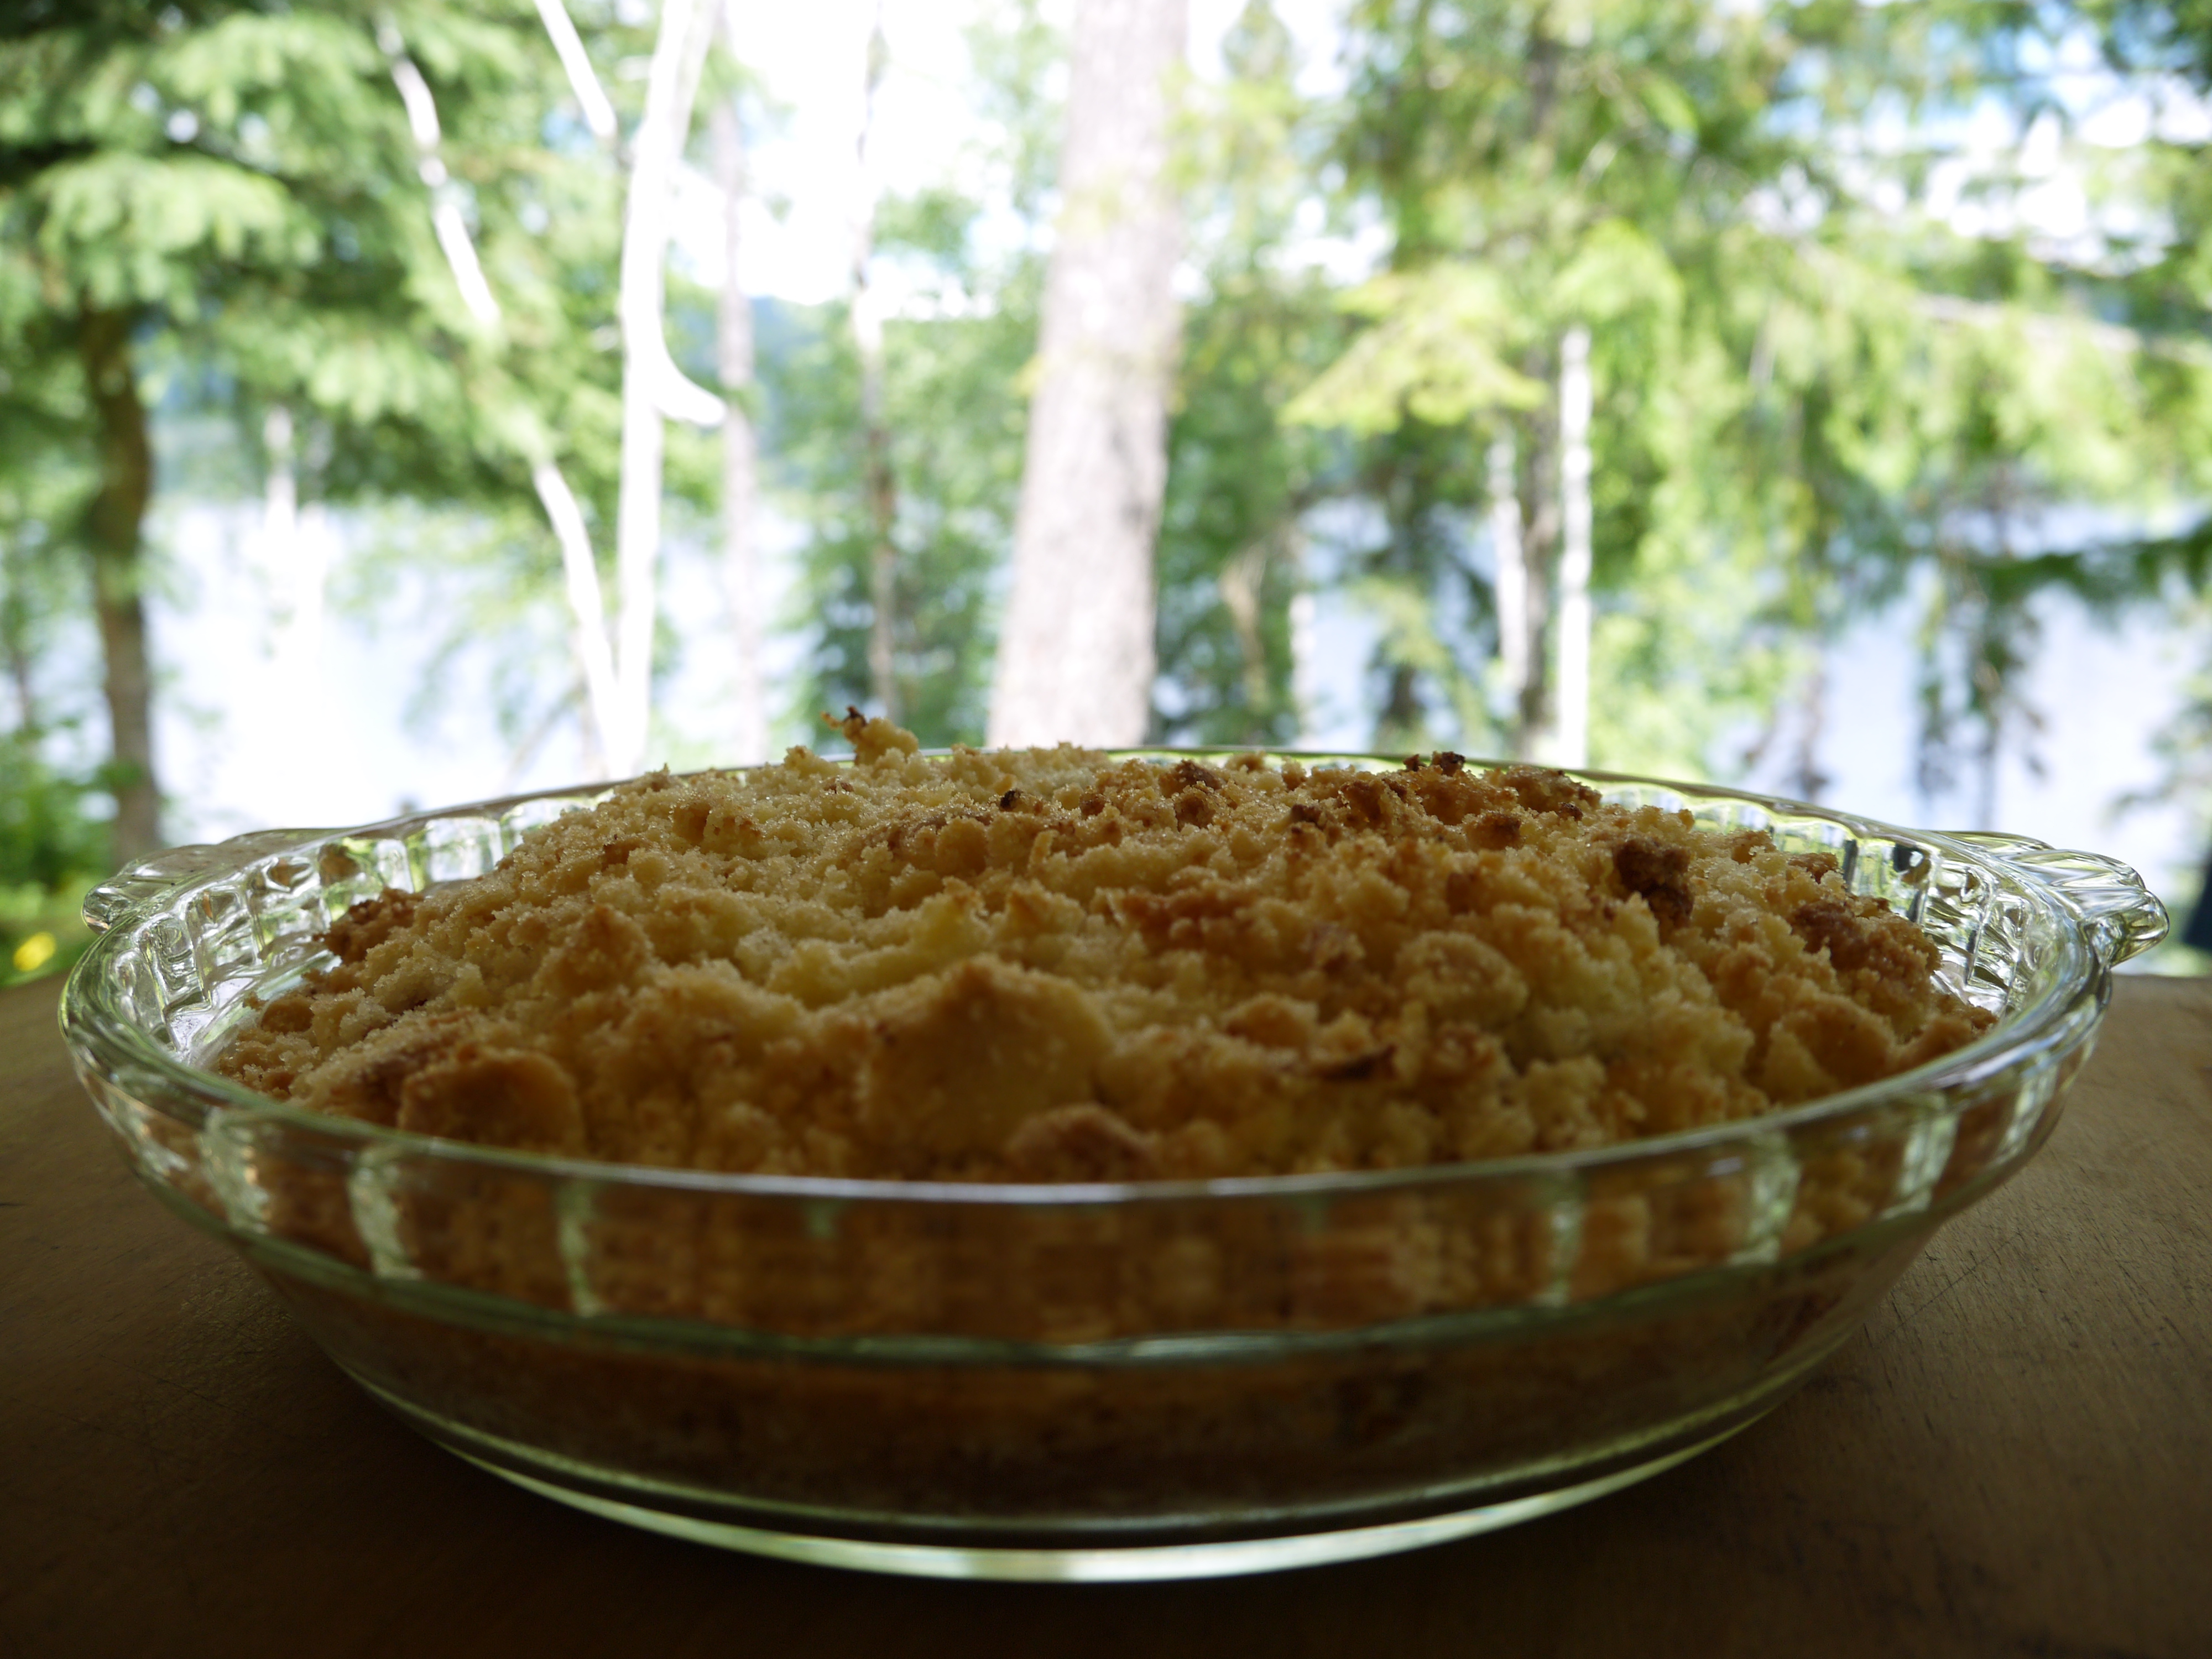
7. To make the streusel topping just combine all the ingredients; my mom says to do it with a whisk, but I just used a fork and then mixed it with my hands, and then sprinkled it on the cake with my hands.

8. Bake for 35-40 minutes.

apricot platz - trust in kim

rhubarb platz - trust in kim

Apricot Almond Cake

almond apricot cake - trust in kim

A big bowl of apricots was sitting in my kitchen ripening, and it was crying out to be made into a cake.  I searched around quite a bit fora recipe that looked more interesting than the usual, and found this gorgeous one on hungryrabbitnyc.com. What I love so much about this recipe is the addition of ground almonds and almond extract in the cake, and the use of rum and apricot jam to bring out the flavour in the apricots. It tasted amazing when it was still slightly warm, and surprisingly good the next day.  I can imagine it would also be really good with plums or nectarines on the top instead of apricots.

What you need:

2 tablespoons apricot preserve

3 tablespoons dark rum

1 pound apricots, halved and pitted

3/4 cup sugar

1/3 cup ground almonds

3/4 cup  unbleached all-purpose flour

1/2 teaspoon baking powder

1/4 teaspoon salt

6 tablespoons/3 ounces unsalted butter , cut into 6 pieces, slightly softened

1 large egg , room temperature

1 large egg yolk , room temperature

1 teaspoon vanilla extract

1/2 teaspoon almond extract

icing sugar for serving (optional – I forgot to sprinkle it on)

What you do:

1. Heat the apricot preserve and the rum in a large saucepan on medium heat.  Add the apricots, cut side down, and cook without touching them for 5-7 minutes, or until they begin to release their juices. Put these aside while you prepare the cake batter.

2. Prepare a 9-inch springform pan by greasing and flouring it.  Heat the oven to 350F, with the rack in the middle of the oven.

3. Combine the sugar, ground almonds, flour, baking powder and salt in a food processor.  (I did this by hand because I was at a cabin without all the gadgets, and it worked fine that way.)  Add the butter and combine until it is the texture of coarse sand.  Add the egg and extra yolk, along with the vanilla and almond extracts, and mix just until combined.

4. Spread the batter into the prepared pan, using a spatula to even out the surface. Carefully stir the apricot mixture to coat the fruit with the rum glaze, then arrange the fruit on top of the batter.  In the original recipe it looks like they are arranged cut side up, but I put mine on cut side down because I wanted to show off the bit or redness in the apricot skins.

5. Bake for 40-50 minutes, or until an inserted toothpick comes out with just a few crumbs attached but is not doughy.  Run a sharp knife around the edge of the cake, then allow it to sit for half and hour before releasing it from the pan.

Sprinkle the icing sugar on top if you wish, then serve delicious wedges of cake.

apricot almond cake slice - trust in kim

Fudgey Oat Bars

oat fudge bar - trust in kim

Over 20 years ago a friend’s mom made these awesome oat fudge bars, and she gave me the recipe.  They were called Mrs. Larson’s bars, and they were awesome!  This mom wasn’t named Mrs. Larson, and I have no idea who she is, but I love her bars.

I hadn’t made these for many years, and I wanted to bring a treat to work the other day, so I pulled out the recipe.  Having tried an chocolate oat fudge bar at Starbucks, I was curious about how similar their recipe was.  I found a few recipes for imitation Starbucks Oat Fudge bars, and they all seem really close or exactly like this one. People at work all said these were better than Starbucks’ – but then homemade usually is, isn’t it? Because you know someone cared enough to take the time to bake for you.

Lots of people at work asked for the recipe, so here it is!  I changed the name from Oar Fudge Bars to Fudgey Oat bars, because let’s face it, we’re all here for the chocolate.

What you need for the base:

1 cup unsalted butter

2 cups brown sugar

2 eggs

2 teaspoons vanilla

2 1/2 cups flour

1 teaspoon baking soda

1 teaspoon salt

3 cups rolled oats
What you need for the chocolate:

12 ounces/340 grams semi-sweet chocolate chips

1  14-ounce can of sweetened condensed milk

2 tablespoons butter

1/2 teaspoon vanilla

1/2 teaspoon salt

What you do to make the base:

1. Prepare a 9 x 13 inch pan or two 8-inch pans by spreading a little butter in them.

2. Cream the butter and sugar well, then add the eggs and vanilla and beat well.  Beat in the flour, baking soda and salt, then mix in the oats. Add about 2/3 of the batter to the pan, reserving the rest for the top.

What you do to make the chocolate filling:

1. Preheat the oven to 350F.

2. Put all the ingredients in the top of a double boiler or in a bowl on top of a pot of water on the stove.  Let it melt, then pour it  on top of the base.

3. Add the rest of the base to the top of the chocolate mixture – I do this using my hands, to make sure none of the pieces are too big.

4. Pop it in the oven and bake for 20-22 minutes, when the top is getting a little browned.

Let it cool, then slice away! Yum!

Chocolate Olive Oil Cake – Gluten Free!

chocolate olive oil cake - trust in kim


A little while ago I made this delicious cake, and then the other day my mom said she had made a new cake recipe I had to try – and it happened to be this one.  Mine was the almond-meal version, and my mom made the wheat flour version, and both were amazing. I made it for a dinner party, topped with brandied cherries and whipping cream, and she served it on its own, which was great too.

People loved that it was light and not too sweet, but still nice and chocolatey.  And if it helps, you can remember that olive oil is healthy fat.  Plus, if it makes you happy, it’s doing something good for you.  Just try to share it.

Thank you Nigella Lawson for the recipe!

What you need:

5 tablespoons boiling water

1/3 cup unsweetened cocoa powder

2 teaspoons vanilla

1 & 1/2 cups almond meal (or 3/4 cup plus 1 tablespoon flour)

1/2 teaspoon baking soda

1/4 teaspoon salt

1 cup sugar

3 large eggs

2/3 cup olive oil

What you do:

1. Preheat the oven to 325F.  Prepare a 9-inch springform pan by lining the bottom with parchment paper.  (My mom made hers in a square dish with no parchment paper and cut it out brownie-style, so that works too.)

2. In a small bowl pour the boiling water over the cocoa and mix; then add the vanilla.

3. Combine the sugar, eggs and olive oil in a large bowl.  Beat on high speed until the batter is fluffy and a light yellow colour.  Beat in the cocoa mixture.

4. Combine the flour, baking soda and salt and add them to the batter, beating just until combined.  Pour the batter into the pan.

5. Bake for about 50 minutes, at which time a toothpick that you insert into the centre of the cake should come out clean.

6. Let the cake cool in the pan for about 10 minutes, then run a knife around the edge and release the cake from the springform. Place on a rack to cool completely, removing the parchment paper before serving.

I served mine with cherries and whipping cream.

For the cherries and cream:

1 cup morello cherries in juice, not pre-thickened (I used Trader Joe’s).

1 tablespoon butter

1 tablespoon brown sugar

1/4 cup brandy

pinch of salt

a little squeeze of fresh lemon juice

125mL whipping cream

1 tablespoon-ish icing sugar

a splash of vanilla

What you do:

1. Heat the cherries (just use the cherries, not the juice), butter, brown sugar and brandy in a saucepan.  Bring to a boil and then simmer for a few minutes, until slightly thickened.  Then add the salt and lemon juice. Let this cool.

2. Whip the cream with the sugar and vanilla.

3. Just before serving top the cake with cherries, add the whipping cream on top, and then serve it up.  Like mine, it’s likely to be gone before you know it!

Grapefruit Olive Oil Poundcake

photo by justin cathcart

Aside from chocolate desserts, a lemon cake is one of my favourite treats.  Since it’s also a citrus cake I thought I’d give this grapefruit cake a try, and I like it for the same reasons I like lemon cake – it is tart and sweet at the same time, and it is nicely moist.

This is the first recipe I am trying from The Smitten Kitchen Cookbook that my sweetheart gave me.  And everyone who tried the cake liked it!

What you need for the cake:

1 & 1/2 cups flour

2 tablespoons grapefruit zest

1 cup sugar

1/2 cup olive oil

2 large eggs, room temperature

1 teaspoon baking powder

1/4 teaspoon baking soda

1/2 teaspoon salt

2 tablespoons freshly squeezed grapefruit juice

1/3 cup buttermilk or plain yogurt (I used yogurt)

What you need for the syrup:

2 tablespoons sugar

1/3 cup freshly squeezed grapefruit juice

What you need for the glaze: (optional)

1 cup icing sugar

2 tablespoons grapefruit juice

pinch of salt

What you do:

1. Preheat the oven to 350F.  Rub butter in a 9×5 inch pan, then coat it with flour.

2. Combine the grapefruit zest and the sugar in a large bowl.  Rub the zest into the sugar using your fingers to release the oils.

3. Whisk the oil into the sugar mixture until smooth.  Whisk in the eggs one at a time.

4. Combine the flour, baking powder, baking soda and salt. In a measuring cup combine the buttermilk and 2 tablespoons of grapefruit juice.  Add the flour and buttermilk mixtures alternately, beginning and ending with the flour.

5. Pour the batter into the prepared pan, smooth the top down, and tap the pan on the counter to remove air bubbles.  Bake for 45 minute to 1 hour, testing with a toothpick. If the toothpick comes out clean, the cake is done.

6. Let the cake cool for 10 minutes before removing from the pan.  In the meantime, prepare the syrup.

7. In a small saucepan, combine the 2 tablespoons of sugar with 1/3 cup grapefruit juice.  Cook over low heat until the sugar has dissolved.

8. After the cake has cooled for 10 minutes and you have removed it from the pan, place it on a wire rack to cool.  Poke holes in it with a toothpick or skewer, then brush the syrup on top.

9. To make the glaze (although it would be amazing even without the glaze), combine the icing sugar, grapefruit juice and salt in a bowl and whisk until it is smooth.  Pour the glaze over the cooled cake and allow the glaze to drip down the sides of the cake.

photo by justin cathcart

Thank you Justin for the amazing photos!

Almond Goji Cacao Chip Cookies

trust in kim - almond goji cacao chip cookies

These are raw, gluten-free, lactose-free, and Awesome! My friend Lance made some for me a while back, and I loved them so much that I had to ask for the recipe.  It’s from a raw foods cookbook by Ani Phyo. They are super easy to make, and will keep in the fridge or freezer for a long time.  They are great for a snack on the road or trail, and my boyfriend likes them crumbled on some yogurt and fruit for breakfast.

What you need:

1/2 cup almond butter

3 tablespoons agave syrup

3 tablespoons vanilla

1/4 teaspoon salt

1 & 1/2 cups ground almonds

1/4 cup cacao nibs

1/4 cup dried goji berries

What you do:

1. Combine the almond butter, agave, vanilla and salt in a large bowl.

2. Stir in the ground almonds, cacao nibs and goji berries.

3. Form into small balls, about 1 tablespoon each, with your hands.  Place them on parchment paper and flatten them a little.

Store in the fridge in an airtight container, or put some in the freezer to keep for longer.

trust in kim - almond goji cacao cookies

Peanut Butter Chocolate Fudge

peanut butter chocolate fudge - trust in kim

This one is a take on my usual chocolate fudge recipe.  It’s so easy to make, and if you love the chocolate-peanut butter combo, you’re gonna love this.

What you need:

3 cups sugar

3/4 cup butter

2/3 cup evaporated milk

175 grams (6oz) semisweet chocolate chips

175 grams (6oz) peanut butter chips

1 7 0z jar marshmallow cream

1 teaspoon vanilla

What you do:

1.  Coat a 9×13 inch pan with butter.

2.  Place the sugar, butter and evaporated milk in a large saucepan.  Bring to a rolling boil, then cook for 5 minutes on medium heat, stirring.

3.  Remove the pot from the stove and stir in the marshmallow and vanilla.

4. Divide the mixture in half, placing one half in a bowl.  Stir the chocolate chips into one half, and the peanut butter chips into the other half.

5. Pour the chocolate part into the bottom of the pan and smooth it out a bit with a spatula, then add the peanut butter mixture and spread it out over the top.

6.  Allow to cool, and then refrigerate.  Take it out of the fridge about 10 minutes before you cut it.  I like to cut it into pretty small squares because it’s pretty sweet.  And people can always have more than one piece.

My Mennonite Mom’s Authentic English Trifle

trifle- trust in kim

Everyone who tries my mom’s trifle says it’s the best, so naturally when I was looking for a trifle recipe for Christmas Eve dinner, I asked her to share her recipe with me.  She gave me a photocopy of a recipe that looks like it came from a magazine.  It says it is from The Best of Mme Jehane Benoit, who is apparently Canada’s Julia Child.

Rather than using fruit, which my mom says makes the cake layer too soggy, this recipe uses jam.  Of course there’s the sherry, custard, and whipping cream – so good and so bad all at the same time! It’s not very difficult to make, but you do need to make it ahead of the time so the sherry, jam and pudding can soak into the cake. It’s nice to serve this in a glass bowl so you can see the layers.  You could also make it in individual dishes, but I like the way it is beautifully layered andthen becomes a beautiful mess of creamy, jammy goodness when it is served.

Hmmm, I think there’s some leftovers in the fridge…

What you need for the cake: (or just buy a sponge cake)

3 eggs

1 cup sugar

2 cups sifted flour

1 & 1/2 tablespoons baking powder

1/4 teaspoon salt

1/2 cup cold water

1 teaspoon almond extract

What you need for the other layers:

4 eggs yolks

2 cups half and half cream

1/4 cup sugar

1 tablespoon vanilla

2 cups whipping cream

1/2 cup icing sugar

1 teaspoon vanilla

1/2 cup raspberry jam

1/2 cup sherry

toasted almonds to garnish (optional)

What you do:

1. To make the cake, beat the eggs with the sugar for about 5 minutes, until it is very light in colour.

2. Sift the flour with the baking powder and salt, and lightly beat it into the egg mixture.

3. Briefly mix in the water and almond extract.  Pour into a greased 9 by 11 inch pan and bake for 30 minutes.  Allow the cake to cool completely.

4. To make the custard, beat the egg yolks until they are  pale yellow. Heat the half and half cream with the 1/4 cup sugar and vanilla.  Add the egg yolks to the hot cream, beating very hard.  Cook without boiling, stirring continuously, until the custard has thickened a little. It won’t be a thick custard, but this is good because it will soak into the cake easily.  Allow the custard to cool.

5. Whip the cream with the icing sugar.

6. I like to remove the seeds from the jam because I don’t like to bite them or get them stuck in my teeth, but you don’t need to do this step if you don’t mind the seeds.  I just press the jam through a sieve with a spatula.

7. Spread the jam over the cake, then cut it into finger-sized pieces.  Dip each piece in the sherry (or just place it in the sherry bowl and sprinkle sherry over the top.)

8. Make a layer of the jammy sherried cake fingers in the bottom of the bowl, with the jam side facing up. Spread half of the custard over the cake layer, then spread half of the whipping cream over the custard.  Repeat with another layer of cake, custard and cream.

9. Refrigerate for at least 12 hours.  Top with toasted almonds, if you wish, and then indulge in creamy goodness!

Triple Ginger Cookies

triple ginger cookies

If you love ginger, these are for you!  Even with three kinds of ginger, they aren’t overwhelming, and are a favourite of several of my friends.  They aren’t difficult to make, although you do need to plan ahead because you need to put them in the fridge for a few hours, or over night.

What you need:

3/4 cup butter, room temperature

1 cup brown sugar

1/4 cup molasses

1 large egg

2 & 1/4 cups flour

2 teaspoons ground ginger

2 teaspoons baking soda

1/2 teaspoon salt

1 & 1/2 tablespoons grated ginger (I keep mine in the freezer)

1/2 cup finely chopped crystallized ginger

1/4 cup white sugar for dipping the cookies

What you do:

1. Cream the butter and sugar.

2. Beat in the molasses and egg,

3. Sift, then stir the flour, ground ginger, baking soda and salt into the batter.

4. Stir in the grated and crystallized ginger.

5. Refrigerate for about 2 hours, or overnight. If you have it in the fridge over night, take it out about 20 minutes before you want to roll them.

6. Form into balls with your hands, about 1 tablespoon each, and slightly flatten the ball.  Dip the tops of each cookie in the white sugar, then place it on a parchment-lined baking tray.

7. Bake for about 10 minutes at 350F.

Let them cool on a rack when they are done.  Store in an airtight container and put any in the freezer that you won’t be eating in the next few days, if you wish.

Cranberry Caramel Upside-Down Cake

cranberry caramel upside-down cake - trust in kim

With the holiday season comes a lot of parties and dinners, and a good excuse to try out some new recipes.  Searching for cranberry dessert recipes, I saw this one on Lotti + Doof and thought I’d give it try – and I’m so happy I did.  It is moist, and the sweetness of the caramel, and tartness of the cranberries work really well together.  I made it in a cast-iron frying pan, but you could make it in a cake pan.  It took about twice as long to bake as the recipe said, but since I’m just learning about how my new oven works, I’ve listed the original baking time.

What you need:

3/4 cup brown sugar

3/4 cup butter (1/2 and 1/4 for separate parts of the recipe)

2 & 3/4 cups fresh or frozen cranberries

1/4 cup freshly squeezed orange juice

2 eggs, separated, at room temperature

1/2 cup whole or homogenized milk, room temperature

1 & 1/2 cups flour

2 teaspoons baking powder

1/4 teaspoon salt

1 cup granulated sugar

1 teaspoon

vanilla

What you do: 

1. Melt the butter with 1/4 cup brown sugar in a 9 inch cast-iron frying pan, stirring, until it begins bubbling. Let this cool. (If you don’t have a frying pan this size, just make the caramel in another pot, then pour it into your cake pan.)

2. Cook the cranberries and orange juice in a small pot until the cranberries begin to pop.  Pour the cranberries over the cooled caramel.

3. Beat 1/2 cup butter and the granulated sugar until it is fluffy.  Beat in the egg yolks one at a time.  Stir in the vanilla.

4.  Combine the flour, baking powder and salt.  Add 1/3 of it to the batter, then 1/2 the milk, 1/3 more flour, the rest of the milk, then the rest of the flour.  Mix only until the flour is combined.

5. Beat the egg whites in a separate bowl until soft peaks form.  Fold in 1/3 of the egg whites, then fold in the rest.

6. Pour the batter on top of the cranberries and smooth the top of it down a little.

7. Bake for 30-35 minutes at 350F.  The cake should be a little browned and pull away from the sides of the pan.  I also tested mine with a toothpick, which told me I needed to bake for a lot longer.

8. When the cake is baked, remove it from the oven and let it rest for about 15 minutes. Then run a sharp knife around the edge and invert it onto the serving plate.

Yum! Enjoy!

upside down cake