The Best Stollen Ever!

stollen - trustinkim

2025 edit: This isn’t the best stollen ever! I have improved this recipe and you can find the new one here.  There are issues in this recipe with the alcohol inhibiting the yeast. The new version deals with that issue, making a much lighter stollen!

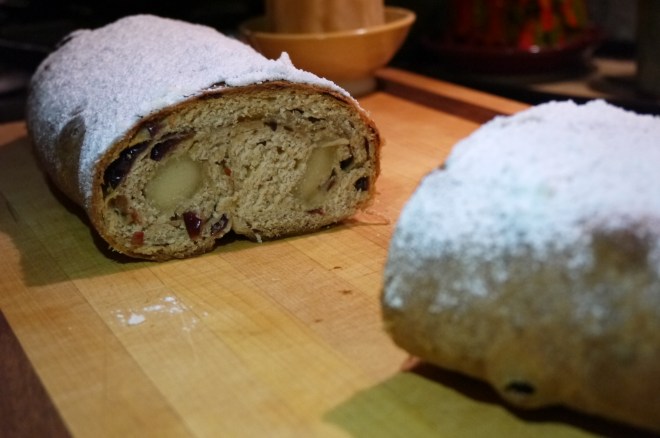
I had some of my cousins over the other evening, and I wanted to make something seasonal, since it is the Christmas season, and most of us were brought up in Mennonite homes in which we ate stollen at Christmas. Everyone who tried it said it was the best stollen they had ever had.

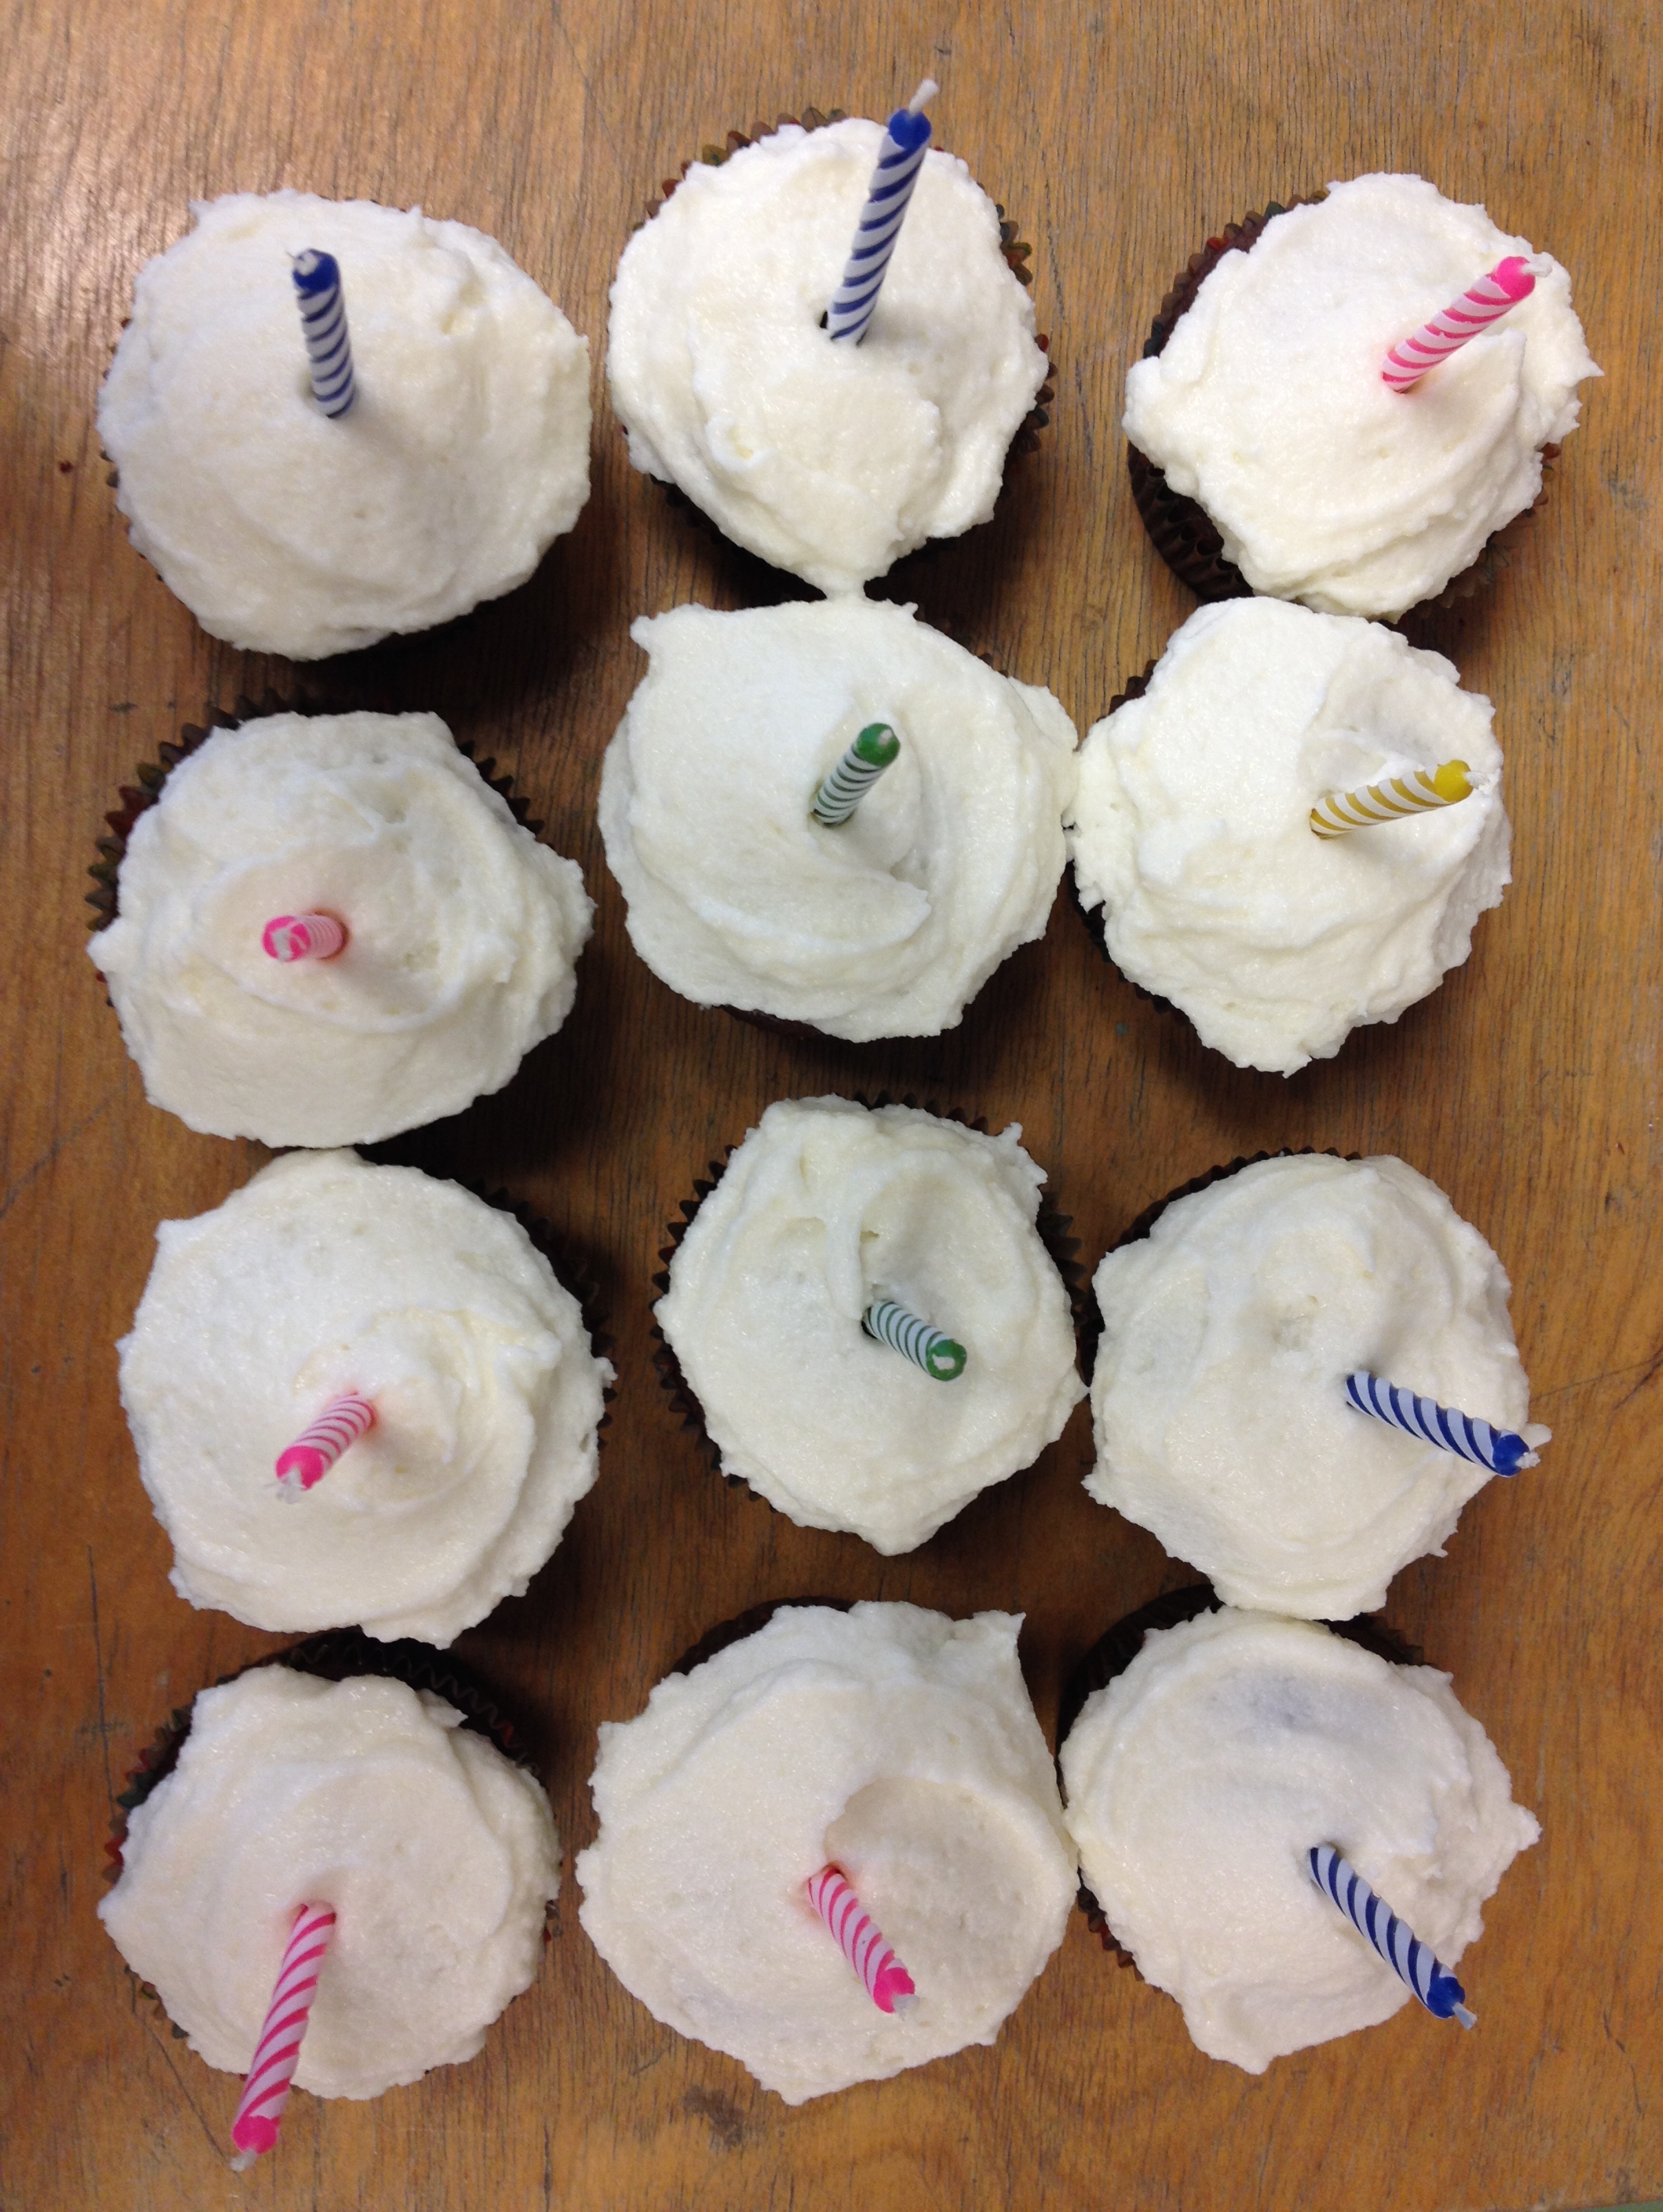
The most ringing endorsement, though, came from my parents. It was my dad’s birthday, so I made one stollen for the cousins, and one for my dad. Both of my parents said it was the best they’d ever had – and they’ve had a lot more stollen-eating years than all of the cousins have.

My memory of stollen involves what I consider to be nasty tasting preserved fruits, the bright red and green cherries, or whatever those things were.

The soaking of the fruit in the booze needs to be begun at least the day before, if not another day or two, so plan ahead accordingly.

I looked at several recipes, thought about my own preferences, and then mainly followed this recipe. I made a few changes: I forgot to add the orange zest -oops, but still awsome. I added a little bit of almond extract and slivered almonds, used dried cherries instead of currants, soaked the fruit for longer, added rum, and used a little more marzipan. Plus a whole lotta love (you have to do that if you don’t have a kneading machine – hand kneading is a labour of love). I also added one last brushing of butter after baking – who doesn’t love just a little more butter! And that way there’s something for the sugar to stick to!

You can keep the stollen, wrapped tight in the fridge for a few weeks, or in the freezer for a few months. I think one of the reasons why people enjoyed this so much was that it was served the day it was made. So if you can plan to have company the day you bake it, all the better.

What you need:

  • 1/2 cup raisins
  • 1/2 cup dried cranberries
  • 1/2 cup dried sour cherries
  • 1/4 cup brandy
  • 1/4 cup dark rum
  • 4 to 5 cups flour, divided
  • 2 packages active dry yeast (4 & 1/2 teaspoons, or 14 grams)
  • 1/2 cup sugar
  • 1/2 cup milk
  • 1 teaspoon salt
  • 1/2 teaspoon vanilla
  • a few drops of pure almond extract
  • 2 eggs, at room temperature
  • 1/2 cup butter, softened
  • 1/3 cup slivered almonds, toasted
  • 200 grams (7 ounces) marzipan (or a little more if you love marzipan)
  • Melted butter (1/4 t0 1/3 cup)
  • 1/4 cup powdered sugar

What you do:

  1. Combine the raisins, cranberries and cherries in a bowl and cover with the brandy and rum. Stir every few hours, and let sit for 12 – 48 hours. Drain the brandy and rum, keeping it for later use. Pat the fruit dry with paper towels and toss the fruit in 2 tablespoons of flour.
  2. Toast the almonds until very lightly browned.
  3. Stir 1 teaspoon of sugar into 1/4 cup warm water (110-115 degrees-any hotter will kill the yeast, colder and it won’t activate). Sprinkle the yeast on top and let it sit until the yeast starts to bubble, about 5 minutes.
  4. Heat the milk, salt and 1/2 cup sugar in a small pot over medium heat, until warm (110-115 degrees).
  5. Add the milk mixture, vanilla and almond extracts, and eggs to the yeast mixture and combine by beating with a fork. Beat in the reserved brandy and rum.
  6. Add two cups of flour and use a dough hook in your machine, or a wooden spoon by hand, to combine. Cut the 1/2 cup butter into small pieces and beat in. Add enough flour, little by little, until the dough forms into a ball.
  7. Continue working the dough with the dough hook, or if working by hand begin to knead for 10 minutes. The dough should become smooth and elastic.
  8. (Update Dec 2021: move to step 9, allowing the dough to rise. Then add the fruit and nuts. The dough rises better this way). Either add the fruit and nuts to the dough in the machine, or flatten the dough out and work it in by hand, adding more flour to your kneading surface.
  9. Shape the dough into a ball, then place it into a buttered bowl. Turn the dough butter-side up and loosely cover. Let the dough rise until it has doubled in volume, about 2 hours. I put mine on top of the fridge, where it was a little warmer , to make this happen.
  10. Line a baking pan with parchment paper. Melt the remaining butter.
  11. (Update, knead in the fruit and nuts now) Divide the dough into two parts. Roll one half into an oval and brush with melted butter.
  12. Cut the marzipan into quarters and roll each one into a rope, the length of the dough. Place two of the marzipan ropes on top of the dough, leaving space between them, then roll the edges of the dough over the marzipan, pressing down in the middle. roll the ends of the dough over a little, and then gather the loaf and place it rolled-side down on the parchment paper. Repeat this process with the other half of the dough.
  13. Brush the loaves with butter. Let the loaves rise until doubled in size. Heat the oven to 375F. Bake for 30-40 minutes; if you tap on the loaf it should sound hollow, and it will be dark golden brown.
  14. Remove the loaves from the oven and brush with more butter! Dust them with powdered sugar and let them cool completely before packing.
DAD at the cabin - trustinkim
Happy Birthday Dad!

Turkey and Chocolate Chili with loads of vegetables

Turkey and Chocolate Chili - trustinkim

With this chili recipe I was looking to keep it healthy (lots of veg and lean ground turkey), while giving it fabulous flavour – and I succeeded! There are many layers of flavour – multiple types of peppers, spices, and a hint of  chocolate and lime. I’ve actually made a chili similar to this many times, but I’ve always forgotten to write down what I put in it. I’m so glad I wrote it down this time, because I think this is one of my best. I’ve made a similar recipe to this in a vegetarian version, exactly the same but without the turkey of course.

The recipe makes a large quantity, so you can halve it if you don’t want as much, or throw some in the freezer for a quick meal down the road.

If you can plan ahead, make it a day ahead of time – chili always tastes best the next day. There are a lot of ingredients, and a fair bit of chopping in this recipe, I know. But really worth it! This recipe turns out best if it is allowed a long cooking time.

I served mine with a garnish of x’nipek, a red onion salsa I learned to make in Mexico. It’s really easy to make, but totally optional.

Here’s a great little article about differentiating between chopping, dicing and mincing.

What you need:

  • 1 cup chicken, beef or vegetable stock
  • 2 dried guajillo or ancho peppers
  • 300-400 grams lean ground turkey
  • 1 large onion, medium chop
  • 3 cloves garlic, minced
  • 1 jalapeño pepper, finely chopped(remove the seeds if you don’t want much heat)
  • 1 serrano pepper, finely chopped
  • 2 poblano peppers, diced
  • 1 sweet red or banana pepper, diced
  • 1 small zucchini, grated
  • 8-10 mushrooms, small chop
  • 2 carrots, grated
  • 1 & 1/2 teaspoons oregano
  • 1 teaspoon cumin
  • 3 tablespoons Mexican chili powder
  • 1/4 teaspoon cinnamon
  • 1 teaspoon paprika
  • 1 teaspoon cayenne pepper
  • 1 can red kidney beans, drained and rinsed
  • 1 can pinto beans, drained and rinsed
  • 1-796mL/28oz can crushed tomatoes
  • 1 -796mL/28oz can diced tomatoes
  • 1-156mL/5.5oz can tomato paste
  • 1 ounce bittersweet chocolate, finely chopped
  • juice of 1 lime
  • salt and pepper to taste

What you do:

  1. Turn an element on the stove (works best with a gas stove, but you can throw them under the broiler if you don’t have one – watch carefully that they don’t burn!). Wave the dried guajillo peppers over the flame, turning to heat both sides. They will start to smell fragrant. Remove the stem and seeds and place in a small pot with the stock. Heat this up to a simmer, then let it sit off the heat for about half an hour. You can go about making the other parts of the chili while it sits. After the half hour, purée the pepper with the stock in a blender.
  2. Now heat a very large pot over a medium flame, then drizzle in a little olive oil. Cook the turkey until it is no longer pink, then remove it from the pot.
  3. Add a little more olive oil to the pot, then add the onions and cook, stirring, until it begins to soften. Add the garlic and cook for about a minute.
  4. Add all the peppers (except the soaking guajillo), zucchini, mushrooms, and carrots. Stir the veggies while they cook, until slightly softened.
  5. Add the oregano, cumin, chili powder, cinnamon, paprika and cayenne. Stir to coat the vegetables in the spices and cook for a minute or so.
  6. Add the beans, tomatoes, tomato paste and the puréed chili and stir it all together. Once it starts to bubble, turn the heat to low. Let this cook for at least an hour, but preferably two or more. Give it a good stir from time to time, making sure it doesn’t burn.
  7. Add the chocolate and let it melt in as you stir. Stir in the lime.
  8. Enjoy!

Tomato-Glazed Meatloaves with Brown Butter Mashed Potatoes

fullsizeoutput_15af

Since comfort food season is upon us (lots of rain!), this seemed like the perfect recipe to try. I don’t think I’ve ever made meatloaf, because it just seems like a big chunk of ground beef, and that doesn’t sound very appetizing to me. But these giant meatballs looked a lot more appealing. The recipe is from The Smitten Kitchen Cookbook by Deb Perelman.

The cookbook says the recipe serves 6, but for me it served 5 with a lot of leftovers. I served it with a salad and bread on the side.

I changed the potato recipe a bit, cutting the butter amount in half. As well, I took a shortcut and made ‘smashed potatoes,’ with the peels still on. The recipe said to peel them after cooking, but I was running short on time. Plus the skins contain more nutrients. So unless you want really smooth mashed potatoes, leaving the skins on is an option.

What you need for the glaze:

  • 4 teaspoons vegetable oil
  • 4 tablespoons tomato paste
  • 2 tablespoons cider vinegar
  • 2 teaspoons honey
  • 2 teaspoons Worcestershire sauce
  • 1 tablespoon Dijon mustard
  • 1/4 teaspoon table salt

What you need for the meatballs:

  • 2 slices sandwich bread
  • medium onion, finely chopped
  • garlic clove, finely chopped
  • 1 stalk celery, finely chopped
  • medium carrot, finely chopped
  • olive oil, for cooking
  • 1 teaspoon salt
  • freshly ground black pepper
  • 900g (2 pounds) extra lean ground beef
  • 1 tablespoon tomato paste
  • 1 teaspoon smoked paprika
  • 1 teaspoon Dijon mustard
  • 2 tablespoons Worcestershire sauce
  • 1/2 cup (120ml) milk
  • 1/4 cup fresh flat-leaf parsley, finely chopped
  • large eggs

What you need for the potatoes:

  • 2 pounds Yukon Gold potatoes
  • 1/4 cup browned butter*
  • 1 cup buttermilk
  • 1-2 teaspoons salt
  • freshly ground black pepper

What you do:

  1. To make the glaze, whisk the ingredients together in a small saucepan for two minutes. Set aside.
  2. To make the meatballs, begin by tearing the bread into chunks, then blend in a food processor into fine breadcrumbs. Place the breadcrumbs in a large bowl.
  3. Put the onion, garlic, celery and carrot in the food processor and process until finely chopped. Heat a frying pan over medium heat and coat the bottom of it with a little olive oil. After the oil has heated, add the chopped vegetables. Stir often and cook until they begin to brown, which will take 10-15 minutes.
  4. Add the vegetables to the bowl with the breadcrumbs, then add the salt, pepper, beef, tomato paste, paprika, Dijon, Worcestershire sauce, milk, parsley and eggs. (now you can preheat the oven to 350F and begin cooking the potatoes – see step #5) Stir this mixture together with a fork, then use wet hands to form 12 balls. Place them, with some space between, on a baking tray. Spread some of the tomato glaze on each meatloaf, then bake for about 20 minutes. If you test with a thermometer inserted into the centre it should read 160-165F.
  5. Place the potatoes in a pot and cover with water. Bring to a boil, then lower the heat to a simmer for 20-30 minutes, until a knife can be easily inserted into the potatoes. Drain the potatoes, then put them back in the pot (peel first if you wish), then add the butter, buttermilk, salt and pepper. Use a potato masher to break up the potatoes and mix in the liquid. Mash until creamy.
  6. Serve the meatloaves on a bed of potato, garnishing with some parsley.

*To make browned butter, melt it in a pot on medium-low heat. It will become foamy, then golden, and then it will begin to turn brown and smell nutty. Stir often, and remove from the heat once it becomes browned.


Turkey, Cauliflower, Squash Soup with Buckwheat Groats

roasted cauliflower, squash, and turkey soup - trust in kim

I’ve already made this soup twice since Thanksgiving (Canadian Thanksgiving was a few weeks ago) because it is so delicious and an awesome one bowl meal. I’m a sucker for roasted cauliflower and butternut squash, and I often make it as a side dish. So I thought about how I could use the combination in a soup, along with leftover turkey, and this is what I invented . . .

A really good soup really does depend on an excellent stock or broth, which is an awesome thing to make in a big batch and store in the freezer. I made a stock ahead of time with the turkey bones, a stalk of celery, a carrot, an onion, some peppercorns, bay leaf, a knob of ginger, and a star anise. No worries if you skip this step; you can use whatever stock you have on hand, chicken, turkey, or vegetable.

At work this week I enjoyed the leftovers for my lunches. Looking forward to a delicious lunch makes a stressful work day more interesting!

What you need:

  • 1/2 head of cauliflower, broken into bite-sized pieces
  • 1/2 butternut squash, chopped into bite-sized pieces
  • olive oil
  • 6-7 cups turkey or chicken stock
  • 1/2 onion, chopped
  • 2 cloves garlic, sliced
  • 1/2 jalapeño, seeds removed, finely diced
  • leftover turkey or chicken, or a couple of skinless thighs
  • 1/2 teaspoon garam masala
  • 1/2 teaspoon coriander
  • 1/2 cup buckwheat groats
  • salt and pepper to taste

What you do:

  1. Heat the oven to 400F. Toss the cauliflower and squash in a little olive oil, then place it in the oven. Roast for 20 minutes or so, until the vegetables have browned. Flip them halfway through the roasting.
  2. In a large pot on medium heat, drizzle in a little olive oil. Add the onions and sauté for a few minutes, until they begin to soften. Add the garlic, jalapeño, garam masala and coriander – cook this, stirring, for about a minute. If you are using raw turkey or chicken, add it now. Add the chicken stock and bring to a low boil. Cook until the chicken or turkey has cooked all the way through. Remove the meat from the pot and chop it, then throw it back in. Add the buckwheat groats and cook for about 20 minutes, testing partway through to see if they are done.
  3. If you are using leftover meat, you can just add the buckwheat groats after you have cooked the garlic, jalapeño and spices. Cook the buckwheat for about 20 minutes, checking towards the end of the cooking time to see if it is done. Chop and add the meat.
  4. Whether you are using leftover meat not, at this point add the roasted cauliflower and squash. Cook until heated through. Add salt and pepper to taste.

I hope you will enjoy this as much as I have. Please send me a not to let me know what you think, whether you enjoyed it or not.

Chocolate Cupcakes

chocolate cupcakes - trust in kim

In my grade 5/6 class we recently made these chocolate cupcakes. I like to have one big birthday party with my class where we all pretend it is each of our birthdays. We play games, give each other Birthday cards, and we bake these delicious cupcakes. It’s important for me to provide the kids with an opportunity to eat the best cupcake possible, since most of the time they eat the fluffy store-bought cupcakes with the oily icing. A birthday cupcake should be a real treat – and these really are.

I found the recipe on the Hershey’s website, and made up the icing recipe myself. It makes 24 cupcakes.

This recipe can be adapted to make a cake as well – see below for baking times.

What you need for the cupcake:

  • 2 cups sugar
  • 1 & 3/4 cups all-purpose flour
  • 3/4 cup cocoa, sifted
  • 1 & 1/2 teaspoons baking powder
  • 1 & 1/2 teaspoons baking soda
  • 1 teaspoon salt
  • 2 eggs
  • 1 cup milk
  • 1/2 cup vegetable oil
  • 2 teaspoons vanilla extract
  • 1 cup boiling water
  • 24 muffin tin liners

What you need for the icing:

  • 1 & 1/4 cups unsalted butter, softened
  • 4-5 cups icing sugar
  • 1 teaspoon vanilla extract
  • 2 or more tablespoons whipping cream

What you do:

  1. Heat oven to 350°F. Place the liners in the muffin tins.
  2. Stir the sugar, flour, cocoa, baking powder, baking soda and salt in large bowl. Add the eggs, milk, oil and vanilla and beat on medium speed with an electric mixer for 2 minutes. Stir in the boiling water. Pour the thin batter into the muffin tin liners to 2/3 full.
  3. Bake for 22-25 minutes or until a toothpick inserted in the centre comes out clean. Remove from the muffin tins and place on wire racks to cool completely.
  4. To make the icing, beat the butter, using an electric mixer, until light and fluffy.
  5. Sift in 4 cups of the icing sugar and beat in. Add the vanilla and gradually add 2 tablespoons of whipping cream. Add more icing sugar if it needs to be thickened, and more cream if it needs softening.
  6. Ice the cupcakes and refrigerate. I like to eat them with the icing firm and cold from the fridge, but room temperature works too. 

    To make a one pan cake: Grease and flour a 13 x 9-inch baking pan. Bake 35 to 40 minutes.

    To make a two layer cake: Grease and flour two 9-inch round baking pans. Bake 35 to 40 minutes.

    To make a three layer cake: Grease and flour three 8-inch round baking pans. Bake 30 to 35 minutes.


thiebauld cakes - trust in kim
Cake artwork by a previous grade 5/6 class


cupcake art - trustinkim
Cupcake collage art made by my grade 5/6 class this year, using painted pages from an old dictionary.

Lemon Pistachio Loaf

Lemon Pistachio Loaf

I made this cake a while ago, but misplaced the recipe, so it’s been on hold for a while. I finally tracked the recipe down, in Cakes and Loaves by Ilona Chovancova. The bottom of the cake has a bit of a green colour to it from the pistachios – I made it because I liked the colour contrast, and also enjoy a lemony loaf. At first I was hesitant to post this recipe because the colour didn’t turn out quite as green as it looked it the cookbook. But it ended up being really tasty, so I have almost gotten over the disappointment of the colour. And it still looks pretty good.

I just changed a little bit of the process of mixing this cake. The cookbook asks you to add the baking powder and soda at the end of the mixing, but I worried that I might have pockets of these ingredients that would cause an unpleasant eating experience. So I added the flour in two portions, with the baking powder and soda mixed in.

The only other thing I might change is to add a little more lemon zest, because I really like a more pronounced lemon flavour.

What you need:

  • 100 grams (3 & 1/2 ounces) shelled pistachios
  • 1/2 cup plus 2 tablespoons butter
  • 3 eggs
  • 3/4 cup plus 2 tablespoons sugar
  • 2/3 cup flour
  • zest of one organic lemon
  • 1/2 tablespoon baking powder
  • 1/2 teaspoon baking soda
  • pinch of salt

What you do:

  1. Butter and flour a loaf pan. Preheat the oven to 350F.
  2. Grind the pistachios into a powder in a food processor or spice grinder.
  3. Melt the butter.
  4. In a large mixing bowl, beat the eggs and sugar until light and fluffy, and doubled in volume.
  5. Gradually add 1/3 cup of flour, salt, melted butter, lemon juice and zest. Combine the last 1/3 cup of flour with the baking powder and baking soda, then gently fold in to the batter.
  6. Divide the batter into two portions, folding the pistachios into one part.
  7. Pour the pistachio batter in first, then the other one on top. Swirl together with a fork gently.
  8. Bake for about 40 minutes, checking for doneness with a toothpick – there should be some crumbs clinging to the toothpick, but no wet batter. Let  the cake cool slightly before removing from the pan to cool.


Brick Oven Pizza with Arugula and Shaved Parmesan

arugula and parmesan pizza - trustinkim

Continuing the tradition of making pizza up at the cabin, and inspired by pizza I ate on a recent trip to Italy, this is one of the pizza we made this summer.

A successful pizza really depends on an awesome crust. I start this one two or three days before making the pizza. It gets taken out of the fridge the morning that it gets used – so this does take some planning ahead! It is totally worthwhile, and not any extra work, as the dough just sits in the fridge most of the time. The recipe for the crust comes from the A16 Food and Wine cookbook by by Nate Appleman and Shelley Lindgren.

The pizza sauce is really simple, just canned tomatoes and a little salt.

You can do any toppings you like, but keeping it simple is the way to go – too many toppings and you get a soggy pizza.

If you don’t happen to have a brick oven sitting around, you could just fire your oven up to 500F. This will make really good pizza too.

What you need for the dough:

  • 1/4 teaspoon yeast
  • 1 & 1/2 cups warm water
  • 2 teaspoons olive oil
  • 2 teaspoons salt
  • 4 cups “oo” flour or all-purpose

What you need for the rest of the pizza:

  • semolina flour for sprinkling on the baking sheet
  • one 28-ounce can of tomatoes (San Marzano preferably)
  • 1-2 teaspoons salt
  • fresh buffalo mozzarella
  • sweet onion, sliced
  • baby arugula
  • a chunk of good quality parmesan

What you do:

  1. Begin preparing the dough two or three days before you want to make the pizza. You can do this by hand, but it’s a bit more work than using a machine. Pour the warm (not hot – just body temperature) water into a mixer fitted with a dough hook, and then sprinkle the yeast on top.  Leave it for about 10 minutes and it should dissolve and become foamy – if it doesn’t your water was the wrong temperature, or the yeast is dead, so you need to try again with new yeast.
  2. Stir in the olive oil and salt.  Add most of the flour and mix on low for 2 minutes.  Knead on medium-low for about 10 minutes – it will pull away from the bowl and begin to look smoother.
  3. Cover the bowl with a damp towel and let it rest for 5 minutes. Knead once more on medium-low for 10 minutes – it will be smooth and quite soft.  If it seems much too sticky you can add a little more flour, but don’t add too much since the finished product should be quite soft and workable.
  4. Coat a large bowl with a little olive oil, and then coat both sides of the dough with olive oil, placing the dough in the bowl.  Cover the bowl with plastic wrap and put it in the fridge over night (or two or three nights). Each morning you can punch the dough down and then cover and refrigerate it again.
  5. On the morning of the day you are going to make your pizza, remove the  dough from the fridge and punch it down.  Fold the sides of the dough under and put it back in the bowl.  Cover the bowl with a damp towel and let it sit in a warm (not hot) place until about 2 hours before you are going to use it.
  6. Punch the dough down again and divide it into 4 pieces.  Form each piece into balls and cover them with a damp towel for about 2 hours.  By this time the dough should have doubled in volume.  Checking from time to time throughout the two hours, see if it starts to get a skin on it, in which case you can spray it with a little bit of water.
  7. To prepare the sauce, just put the tomatoes and their juice into a bowl and squish them into little bits with your hands.  Stir in the salt.
  8. Preheat the oven to 500-550 F or heat the brick oven. It takes a few hours to get the brick oven up to the right temperature.
  9. To form the crusts, shape the dough into a disk with your hands.  I like to pick the disk up and let the weight of the dough stretch it into its larger pizza shape, moving my fingers around the edge of the circle until I have a pizza crust that is about 25-30 cm in diameter with a slightly raised edge. Dust your baking pan generously with the semolina (or cornmeal, or more of the oo flour) and place the crust on it.  I don’t have a proper pizza stone or pan, and the baking tray I used worked just fine.
  10. Spread some tomato sauce onto the crust, then add the onion and some of the buffalo mozza broken into chunks.
  11. Bake for 6-7 minutes, until the crust is crisp, golden, with some dark blistering, and the top is bubbling.
  12. Top with a mound of arugula, then shave some parmesan on it. You could add a drizzle of olive oil if you like.

Enjoy!

fox licking his lips - trustinkim
This fox was watching us make the pizza; here he is licking his lips.

Thug Kitchen’s Sweet Potato, Zucchini, and Black Bean Enchiladas

thug kitchen enchiladas - trustinkim

This vegan recipe comes from the Thug Kitchen cookbook, which came out of the Thug Kitchen blog. It’s a great recipe, but since the book is full of expletives (a lot of f***ing this and that), I’ve written up a clean version for those who prefer that.

It’s a super tasty recipe, and I enjoyed my leftovers for a few days.

For those who feel they really need some meat in their enchiladas, Mexican chorizo would be a nice addition.

I serve this with lots of Cholula hot sauce, along with some Mexican cotija cheese sprinkled on top for those who are not vegan.

What you need for the Enchilada Sauce:

  • 2 & 1/4 cups vegetable broth
  • 1/3 cup tomato paste
  • 2 & 1/2 tablespoons chili powder
  • 2 teaspoons ground cumin
  • 1 & 1/2 teaspoons dried oregano
  • 3 cloves garlic, minced
  • 2 teaspoons soy sauce or tamari
  • 1 tablespoon lime juice

What you need for the filling:

  • 1 large sweet potato (about 1 pound), chopped into nickel-sized pieces
  • 2 teaspoons olive oil
  • 1/2 yellow onion, chopped
  • 1 medium zucchini, grated
  • 1 teaspoon chili powder
  • 1/2 teaspoon ground cumin
  • 1/2 teaspoon salt
  • 2 cloves garlic, minced
  • 1 & 1/2 cups cooked black beans (or one 15-ounce can)
  • 1 teaspoon maple syrup
  • a pack of tortillas (mine were a corn and flour blend)
  • sliced avocado (garnish)
  • chopped fresh cilantro (garnish)

What you do:

  1. First make the enchilada sauce, which can be done ahead of time and refrigerated. Put all the ingredients for the sauce except the lime juice into a medium saucepan. Whisk the tomato paste and let the sauce simmer for 10-15 minutes until it has thickened up a bit. Add the lime juice and take the sauce off the heat.
  2. To make the filling, begin with the sweet potato. Put a few centimetres of water into a medium pot and place a steamer basket in it. Bring the water to a boil. Place the sweet potato in a steamer basket to steam for 10-15 minutes, until tender. When the sweet potato is done, put it into a bowl and mash it. It’s okay to leave some chunks.
  3. While the sweet potato is steaming, heat a large frying pan and add a little oil to the pan. Sauté the onion until it begins to brown, then add the zucchini and cook for another minute. Add the chili powder, cumin, salt, garlic and black beans and cook for another few minutes. Turn off the heat and stir in the sweet potato and maple syrup.
  4. Preheat the oven to 375F. Spread a bit of the sauce in the bottom of a large baking dish. Warm up the tortillas in a frying pan or microwave. Dip each tortilla in a bit of sauce so the bottom of it is coated. Fill the tortillas with a few spoons of the filling, then roll and place it seam-side down on the baking dish.
  5. Spread the remaining enchilada sauce over the tortillas, then cover the baking dish tightly with foil. Bake for 20 minutes, then take off the foil and bake for 5 more minutes.
  6. Top with avocado slices and cilantro. Serve with hot sauce or your favourite salsa.


Cabbage Slaw with Toasted Sunflower Seeds

seedy cabbage slaw - trustinkim

After making a batch of borscht I always have some leftover cabbage, so I like to make a coleslaw with it. A while ago I found a few awesome recipes in the cookbook Mamushka by Olia Hercules. The unrefined sunflower oil she uses in the recipe has a more pronounced sunflowery taste than the refined stuff, so it’s worth a try.

I added red bell pepper to mine for a little extra colour.

What you need:

  • 2 tablespoons unrefined sunflower oil
  • 1/2 tablespoon white wine vinegar
  • 1/2 teaspoon sugar
  • salt
  • 1/4 red onion, thinly sliced
  • 1 small green cabbage, thinly sliced
  • 2 carrots, grated
  • 0ptional: 1/2 red bell pepper, thinly sliced
  • 3 tablespoons sunflower seeds, toasted
  • 1 tablespoon dill, chopped

What you do:

  1. Toast the sunflower seeds in a dry frying pan on medium heat. Watch them carefully so they don’t burn! Remove the seeds from the pan to cool down.
  2. Mix the sunflower oil, vinegar, sugar and a little salt together in a salad bowl. Add the onion and let it sit in the dressing for 5-10 minutes. This will allow the flavour of the onion to mellow a little.
  3. While the onion and dressing are getting to know each other, prepare the cabbage, carrots and optional bell pepper. Add them to the bowl, and mix to coat them in dressing.
  4. Garnish with the dill and toasted sunflower seeds.

Very Chocolatey Zucchini Cookies

triple chocolate zucchini cookies - trustinkim

Because these cookies contain zucchini, we can pretend they are healthy. Because they contain three kinds of chocolate, we can call them delicious.

This summer I had a bumper crop of zucchini, so a gardener friend suggested I grate and freeze some of it. I grated and froze it in two cup portions, because my awesome zucchini loaf calls for that amount of zucchini. The other day I was looking for something to bring to work for my somewhat stressed-out colleagues (let’s just say the beginning of the school year isn’t just hard on the students) and I found this recipe. People liked the idea that they could trick themselves into thinking it was a somewhat healthy recipe, but mostly they loved the intense chocolaty-ness of the cookies. I use Ghirardelli semi-sweet chocolate chips because I think their quality it quite good!

The one change I will make next time I make these is in the fineness of the grated zucchini. I used the thicker side of my box grater, but I found that there were pieces of zucchini that stuck out of a few of the cookies, so next time I will use the finer grater.

The only thing I did differently from the original recipe was to bake for a minute or two less, and I put a little sea salt on top of each cookie before baking for an awesome chocolate and salt combination!

What you need:

  • 2/3 cup semisweet chocolate chips
  • 1/2 cup butter, at room temperature
  • 1/4 cup granulated sugar
  • 1/2 cup packed light brown sugar
  • 1 egg
  • 1 teaspoon vanilla extract
  • 1 cup shredded and drained zucchini
  • 2 cups all-purpose flour
  • 1/4 cup unsweetened cocoa powder
  • 1 teaspoon baking soda
  • 1/2 teaspoon salt
  • 1 cup semisweet, semi- or bitter-sweet chocolate chips
  • optional:sea salt

What you do:

  1. Grate the zucchini and let it drain in a sieve. Press the zucchini down to extract some of the liquid.
  2. Melt the chocolate chips in the top of a double boiler. Set aside to cool to room temperature.
  3. In a large bowl whip the butter, granulated and brown sugars for 1-2 minutes, until light and creamy. Add the egg and vanilla and mix for about a minute. Stir in the grated zucchini.
  4. Pour in the melted chocolate and mix.
  5. Sift in the dry ingredients and mix on low speed until almost combined. Stir in the chocolate chips until everything is just incorporated.
  6. Scoop the cookie dough using a tablespoon or small ice-cream scoop, and place  them a few centimetres apart on the cookie sheets. Add a little sea salt to the top of each cookie before baking – optional but awesome!
  7. Bake for 9-10 minutes until just set.