Cucumber and Tomato Salad with Basil and Dijon Vinaigrette

cucumber, tomato and red pepper sa

tomatoes - trust in kim


I was lucky enough to be given some home-grown cucumbers, and then I went and picked these tomatoes and some basil from my garden.  If you don’t have access to garden-fresh produce you can visit your local farmer’s market, or just try to find some that look tasty in the produce store.  I like cherry tomatoes and the smaller cucumbers because they and often the tastiest option from the produce store.

I don’t use measuring tools to make my salad dressing, so the ingredients are ‘a little of this, a little of that’ and then you can taste your own way to a yummy dressing.

What you need:

some tomatoes

some cucumbers

part of a sweet onion

a few sprigs of fresh basil

dijon mustard

a little sugar

salt and freshly ground pepper

apple cider vinegar

olive oil

What you do:

1. Cut the tomatoes and cucumbers into bite-sized pieces.  Cut a bit of onion into smaller pieces.  Put them all into a bowl.

2. To make the dressing, put a small spoonful of dijon into a bowl or cup. Add a few pinches of sugar and a little salt and pepper.  Combine these, then pour in a touch of vinegar and mix it up.  Add a few tablespoons more vinegar and mix it, then slowly add some olive oil.  When you’ve mixed in a few tablespoons of olive oil, have a taste and see if you need more oil or anything else.  It shouldn’t taste too acidic, but you also don’t want it to be too oily.

3. Pour some salad dressing over the veggies and toss them until everything is coated.  Chop up a few leaves of basil and garnish the salad with them.

Enjoy!

Cannellini Beans and Kale

cannellini beans and kale - trust in kim

I tried out this new recipe to deal with the overabundance of kale that is growing in my garden.  It makes a great meal or side dish with a salad, and would be great served with  sausage.  I crumbled a little bacon on top, but it is great without it as well.  There’s a surprising amount of flavour in here for and beans and greens recipe.

This isn’t a difficult recipe, but it does require soaking the beans a day ahead, then cooking them for up to two hours.  After that it’s quick to get it ready.

The source for this recipe is Alice Waters’ Chez Panisse.

What you need:

2 cups dry cannellini beans

1 stalk celery

a few sprigs of thyme

a few sprigs of parsley

2 bay leaves

1 onion

1 carrot

6 cups water or more

1 bunch kale (or spinach or mustard greens), spines removed, chopped roughly

6 cloves garlic finely chopped

1-2 tablespoons olive oil (the original recipe calls for 5-6 tablespoons)

1 tablespoon chopped rosemary leaves

salt and pepper

What you do:

1. Soak the beans overnight, then drain them.  Put them in a pot with the celery, thyme, parsley, bay leaves, onion and carrot and over with water.  Bring to a boil, then simmer for 1-2 hours, until the beans are very soft.  Salt the beans once they begin to get soft.  Remove them from the heat when they are very soft.  Drain the liquid, reserving some of it to add back later.  Remove the vegetables and herbs.

2.  Add a little olive oil to a large frying pan on medium heat and add the garlic and rosemary; saute for about one minute.  Add the beans and about a cup of the liquid and simmer for about 5 minutes. Add the kale and cook until it is wilted and becomes tender.  Add a little more liquid if it starts to get dry.  Add salt and pepper to taste.

Drizzle with a little olive oil as you serve it up hot.  Enjoy!

Kamut and Veggie Salad

kamut salad - trust in kim

During summertime I like to have food in the fridge that I can grab as a quick healthy snack, or take out on a picnic.  I love the taste of Kamut (which is a trademarked name for khorasan wheat) because it tastes buttery and nutty, and I like that it’s a sturdy grain that has a good chewy bite to it. It is high in protein, so it makes a good meal-in-a-bowl salad.  It is also high in a number of nutrients, including zinc, manganese and magnesium. I’m particularly interested in the magnesium because it helps absorb calcium.

I love this dressing, from the Whitewater Cooks book.  I use it often on a green salad, but it works great on this heartier salad as well.

So yes, it’s nutritious, but it also tastes great.

What you need: 

about 3/4 cup Kamut (I used farro because I couldn’t find any Kamut at the stores near my place)

1/2 cup sugar snap peas, chopped into 2cm pieces

1/2 large sweet onion, chopped

1 sweet orange or red pepper

a few medium-sized tomatoes chopped, or a whole bunch of cherry tomatoes, sliced in half

optional: herbs of your choice, or salad greens

optional: freshly ground black pepper

What you need to make the Whitewater Glory Salad Dressing:

1/4 cup nutritional yeast

3 tablespoons tamari or soy sauce

3 tablespoons apple cider vinegar

3 tablespoons water

1 tablespoon tahini

1 clove garlic, crushed

1/2 cup vegetable oil

What you do:

1. Cook the Kamut in lots of water for at least an hour, or until the grains are tender.  Drain any excess water and let the grains cool. This step can be done ahead of time.

2. Put all the dressing ingredients except the oil into a blender, or use an immersion blender, and give it a good mix. In a steady slow stream, add the oil until it is all blended in.

3. Put all the chopped veggies into a bowl along with the cooled Kamut and mix with the dressing.  Add some dressing and taste to see if it needs a little more dressing, or some pepper.

4. Serve cold or room temperature, either on its own or on a bed of salad greens.

Chorizo Pistachio Savoury Cake

savoury pistachio chorizo cake - trust in kim

This is a repeat recipe from a few summers ago. I’ve never repeated a recipe posting before, but I chose to share this again because:

A) It’s a great picnic food that you and your friends will adore

B) It’s super easy to make

C) I just made it and looked so delicious that I was inspired to share it

D) I have a new camera and would like to have a better image that fits the amazing quality of this recipe

What you need:

room temperature butter for greasing the pan

2 tablespoons sesame seeds, for the bottom of the pan

1 & 1/4 cups flour

1 tablespoon baking powder

1/2 teaspoon salt

1/4 teaspoon chile powder

3 eggs at room temperature

1/2 cup plain yogurt

85 grams or so of cured chorizo sausage, preferably one with a bit of spice to it

8 sun-dried tomato halves, finely diced

3/4 cup unsalted pistachios

1/4 cup parsley, chopped (optional)-you could substitute some onion or basil

What you do:

1.  Spread the butter into the bottom and sides of a 9-inch loaf pan.  Toss the sesame seeds around in the pan until there is a layer of them over the bottom and sides.  Preheat your oven to 350F.

2.  Mix the egg and yogurt together in a bowl.  Add flour, baking powder, salt and chili powder and stir it in, being careful to mix only until just incorporated.

3.  Fold in the chorizo, tomatoes, nuts and parsley.  Spread the batter into the loaf pan.

4.  Bake for 40-50 minutes and test with a toothpick to see if it is done.  Let the loaf sit in the pan for about 15 minutes after you’ve taken it out of the oven before removing it to cool on a rack.

When it’s cool you can cut it into thin slices to serve.  Apparently it keeps for a few days on the counter, but if I have leftovers I prefer to wrap them in plastic wrap and either store in the fridge, or freeze for later use.  It tastes best at room temperature, so take it out of the fridge with enough time in advance of eating to allow it to some to room temperature.

I got this recipe from David Lebovitz’s website, and he adapted it from Clotilde Dusoulier’s Chocolate and Zucchini cookbook.

Grilled Pattypan Squash

grilled pattypan squash - trust in kim

These adorable sunny squash are great on the grill. I planted two pattypan squash plants in my garden this year because they are the kind of thing I can often only find at a Farmer’s Market. They are taking over my little garden now and every day I’m finding more squash that are ready to pick, so I’m thinking of ways to cook ’em up.  I pick them while they are still pretty small and tender, so they will be thin enough to heat through on the grill. This is a super simple recipe that enhances the flavour of the squash.

What you need:

pattypan squash

a few sprigs of thyme

olive oil

salt and pepper

What you do:

1. Heat the grill to medium-high.  Cut the squash in half along the frilly edge. Rub the cut side with olive oil.

2. Sprinkle some salt and pepper and thyme onto the cut side.

3. When the grill is hot, place the squash cut-side down on the grill and leave in that position for the whole cooking process so you get one nice set of grill lines. Grill for 8-10 minutes with the lid down. Check it in the last few 4-5 minutes, as everybody’s grill works a little differently.

4. I decided mine were done when I could see a bit of browning around the edge, and when I touched the outside of the squash it had a little bit of give to it.

Serve it hot!

pattypan squash growing - trust in kimpattypan squash - trust in kim

Tomatillo Salsa

tomatillo salsa - trust in kim

Here’s another recipe I got from the awesome cooking class I took in Tulum Mexico with Eric Fischer at Altamar Restaurant.  It’s not too spicy, and you can alter that by adding more or less pepper.  I served it with Mexican Barbecued Chicken, and it is also great on tacos.  The key to the flavour here is roasting the tomatillo, onion and chili peppers over a flame; I did this on my gas stove, but a barbecue works great too.  You can keep this in the fridge for a few days.

What you need:

500 grams tomatillo

1 small sweet white onion

20 grams cilantro

1 jalapeno and 1 banana pepper

20 grams garlic

2 grams salt

2 grams black pepper

olive oil

What you do:

1. Roast the onions over a flame, turning often, until the outside is blackened and the inside is soft, about half and hour.

2. Roast the peppers until blackened then put them in an airtight container for about 15 minutes.  Remove most of the skin along with the stem.

3. Roast the tomatillos until they are lightly blackened.

4. Put everything into a blender and mix well.

5. Preheat a pot then add some olive oil and cook the sauce for 7-10 minutes.

6. Allow the sauce to cool, then store it in the fridge.

Pad Thai with Shrimp and Tofu

pad thai - trust in kim

Having tried several pad thai recipes, and not finding them to my liking, I assumed all my pad thai eating would be from a restaurant.  Or in Thailand, where I’d love to take  cooking classes one day…

This recipe, from Cook’s Illustrated April 2013, is definitely a winner.  The other recipes I’ve tried were bland or ketchuppy, while this one had lots of flavour, and no ketchup.  Real pad thai doesn’t contain ketchup, so don’t be tempted to substitute, no matter how many recipes you see online for pad thai with ketchup.  The real ingredient is tamarind paste or concentrate; I got mine in Mexico, but I’ve seen it in Vancouver in Filipino shops. If you’re in Vancouver I’ve heard you can also get it at T&T and Famous Foods.

What you need for the sauce:

1 tablespoon (I added extra) tamarind concentrate mixed with 2/3 cup boiling water, or 2 tablespoons tamarind paste with 3/4 cup boiling water

3 tablespoons fish sauce

3 tablespoons sugar

2 tablespoons vegetable oil

1 tablespoon rice vinegar

3/4 teaspoon cayenne pepper

For the noodles, shrimp and tofu:

8 ounces/225 grams of 1/4 inch wide rice noodles

12 ounces/ 340 grams medium shrimp

4 ounces/120 grams extra-firm tofu, cut into 1/4 inch cubes or thinner, longer strips like I did

salt and pepper

pinch of salt

2 tablespoons vegetable oil

3 garlic cloves, minced

1 shallot, minced

2 large eggs, slightly beaten

6 ounces/ 170 grams/ 3 cups bean sprouts

1/4 cup dry-roasted peanuts plus extra for garnishing

3 scallions, sliced thin on bias

1/4 cup cilantro

lime wedges

What you do to make the sauce:

1. If you are using the tamarind PASTE you need to let it soak for about 10 minutes, then run it through a fine-mesh sieve to remove the fibres.  I used the CONCENTRATE, so it was easier; I just had to add the boiling water.  Stir in the rest of the sauce ingredients and set aside.

What you do to make the noodles, shrimp and tofu:

1. Bring a large pot of water to a boil.  Remove it from the heat and let the noodles sit in the hot water for about 10 minutes, until softened but not mushy.  Drain the noodles and set them aside.

2. Toss the shrimp with 1/8 teaspoon each of salt and pepper, and a pinch of sugar.  Heat a tablespoon of oil in a large frying pan. Add the shrimp in a single layer and cook without stirring for about a minute, then flip them over and cook for about another 30 seconds.  Transfer the shrimp to a bowl with a cover and set aside.

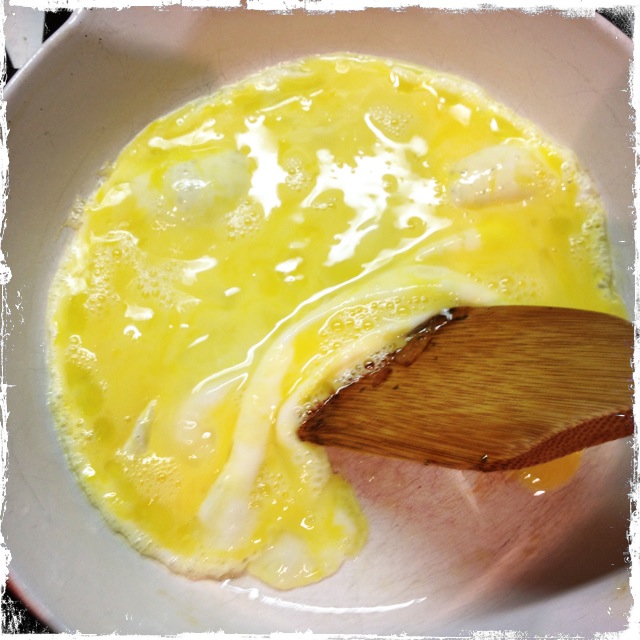
3. Add a tablespoon of oil to the pan along with the garlic, shallot, and 1/8 teaspoon of salt, and cook on medium heat until they are golden brown.  Add the eggs and cook while stirring constantly for about 20 seconds, and the eggs are barely moist.

4. Toss in the drained noodles, then add the sauce.  Increase the heat to high and cook while tossing the noodles constantly for about one minute, until the noodles are evenly coated.  Add the bean sprouts, peanuts, and all but 1/4 cup of scallions.  Continue to cook, tossing constantly for about 2 minutes, or until the noodles are tender.

5. Add the shrimp and tofu to the pan and cook until heated through, about 30 seconds.

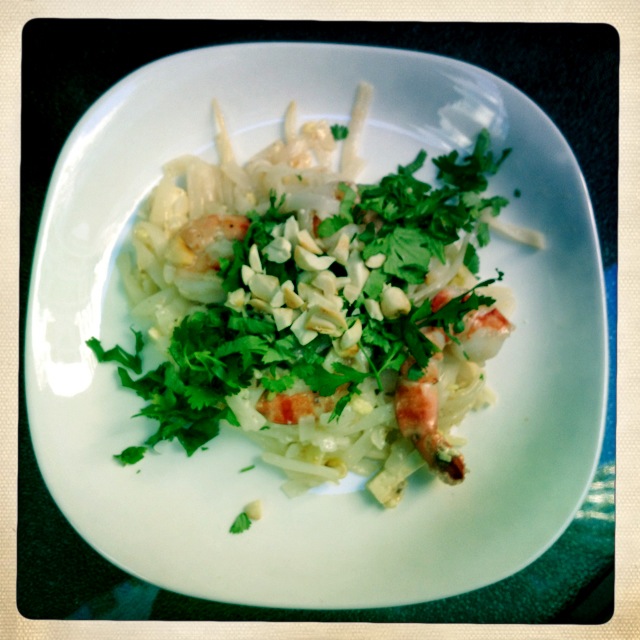
To serve, put the noodles on a large platter and garnish with the remaining scallions, peanuts and cilantro.  Serve with lime wedges.

Eggs with Veggies and Guajillo Chili Salsa

eggs with veg and guajillo chili - trust in kim

For breakfast this morning I took a little inventory of the fridge contents and made up this meal.  It’s just some fried veg mixed with guajillo chili salsa, and added to some scrambled eggs.  Feel free to substitute for another kind of salsa, and substitute mushrooms or tomatoes if you have them. It is, after all, a clean-out-the-fridge recipe. Use what you’ve got!

The amounts really depend on how many people you are serving, and how much you like the various ingredients.  The amounts suggested in brackets are for two people.

This recipe draws on the omelette-making I learned about in Spain, and the Mexican cooking I learned about with Eric Fischer at Altamar Restaurant in Tulum, Mexico.

What you need:

eggs, lightly beaten with a fork (4)

sweet onion, chopped (1/4 cup)

red bell pepper, chopped (1/2 a pepper)

garlic, finely minced (2 cloves)

avocado, chopped (1/2 an avocado)

olive oil (2-4 teaspoons)

salt and pepper to taste

guajillo chili salsa (or another salsa or some hot sauce) (2 teaspoons)

What you do:

1. Heat a little olive oil in a frying pan on medium heat. Add the onions and cook for about 2 minutes, then add the peppers and cook for a few more minutes.  If the pan is getting a little dry you can add some water to let the peppers soften up a little.  Add the garlic and cook for about another minute. Add some salsa and mix it in.

2. In another fying pan, heat some olive oil to medium-high heat.  Add the egg and let it bubble a little.  Rather than stirring the eggs around, push them away from the edge of the pan and let the uncooked egg move to the edges of the pan.  When the egg is just cooked, serve it alongside the veggies.  Serve immediately with some avocado on top!cooking eggs - trust in kim

Chili Guajillo Salsa

chili juahillo sauce - trust in kim

I learned to make the most amazing guajillo chili sauce at a cooking class at Altamira Restaurant in Tulum, Mexico. Chef Eric Fischer showed us how to make this, and we tasted it with shrimp tacos and nopal cactus empanadas.  I recently served it with Mexican barbecued chicken, rice and beans, and it was awesome. The chef said it is also great if you spread it on chicken and bake it, or on seafoods such as shrimp, squid, mussels or scallops, and then serve it on pasta.

What you need:

1/3 cup olive oil

2 tablespoons finely minced garlic

salt and pepper

1/2 cup white wine

2 dried guajillo chili peppers, cut into strips

1/4 cup parsley finely chopped

What you do:

1. Heat the olive oil in a frying pan, then add the garlic.  Move the garlic around so it doesn’t burn, and add a big pinch each of salt and pepper.  When it starts to just get brown around the edges, add the wine.  Add the chili strips  – I removed the seeds from one pepper, and it was medium- hot, so you can add more or less of the seeds depending on your heat tolerance. Let this simmer for a few minutes.

2. Remove from the heat and put it in a blender with the parsley, or use an immersion blender, as I did. Taste and see if you think it needs more salt.

This should be kept refrigerated until you plan to use it, and should last a week if not more in the fridge.

Mexican “Mother” Sauce – salsa fresca

salsa fresca - trust in kim

I’ve made the classic salsa fresca, or pico de gallo, many times before. This recipe is very similar, but I got it from a cooking class I took at Altamira Restaurant in Tulum, Mexico with chef Eric Fischer.  He called it the Mexican Mother Sauce, because it goes with everything. The thing I learned about salsa fresca from his class was that you don’t use the tomato seeds; not a big deal, but ends up being way less watery that way.

What you need:

100 grams tomato, diced, without seeds

50 grams sweet white onion, diced

5 grams cilantro, chopped

50 ml lime juice

2 grams serrano chili, finely minced

a large pinch each of salt and pepper

What you do:

1. Put everything in a bowl and stir it up.  Check the seasoning and add salt and pepper to taste.

Refrigerate until you use it.

Serve with tortilla chips, or on the side of a meal with beans and rice.