Healthy Air-popped Popcorn with Olive Oil and Nutritional Yeast

healthy popcorn - trust in kim

This is one of my absolute favourite snacks. I know, butter on popcorn is delicious. But so is this! And olive oil has so many health benefits. One that I just found about is that it can help prevent osteoporosis because it aids in calcium absorption. As well, nutritional yeast has many nutrients, including B vitamins. You can adjust the amount of salt in this homemade popcorn, if that is a health issue for you.

Many a savoury craving have been done away with by this bowl of goodness. Right now I’m using a Tuscan herb infused olive oil to drizzle on it, but I’ve typically used a nice extra-virgin olive oil. There are a lot of infused olive oils out there these days, so you could experiment with them.

I used to make popcorn in the microwave – throw the kernels into a paper bag, fold the top over a little and nuke it, turning the microwave off as soon as the popping stops. This was an excellent method until one day when the bag caught on fire and melted the inside of my microwave. Now I use the stove top method.

What you need:

  • popcorn kernels, a few tablespoonfuls per person
  • olive oil – good quality extra-virgin, or an infused one
  • salt and freshly ground pepper
  • nutritional yeast

What you do:

  1. Place the popcorn kernels in a large pot that isn’t too heavy (unless you have super strong wrists) and put the lid on it. Have a large bowl standing by.
  2. Turn the stove on high heat and place the pot on it, giving it regular shakes. As soon as you hear the first pop you have to keep shaking, so the popcorn doesn’t burn, and each kernel has a chance to pop. As soon as you don’t hear any popping take the pot off the stove.
  3. Lift the lid carefully (some of those unpopped guys like to jump out at this point) and pour the popcorn into the bowl.
  4. Drizzle a little olive oil onto the popcorn. Add salt and freshly ground pepper to taste. Add a tablespoon or two of nutritional yeast. Mix it all up so the popcorn is evenly coated. Taste and add more of whatever you think it needs. Eat it while it’s still warm.

Enjoy! And know that it is as good for you as it tastes.

Duck Broth (or Chicken)

P1040954


This the duck that keeps on giving. It began as a roast duck, then was turned into this broth which was used to make a delicious mushroom and duck risotto, as well as a tomato soup. You could substitute chicken to make this if you don’t happen to have duck.

This recipe is as simple as putting everything in a pot to simmer for a number of hours, then giving it time to cool before refrigerating it.

Thanks again Tony, the Accidental Agrarian, for the duck!

What you need:

  • 1 duck or chicken carcass
  • 1 onion, cut in half
  • 1 stalk celery
  • 1 or 2 carrots
  • 1 knob of ginger, sliced
  • a few cloves of garlic
  • 1 teaspoon peppercorns
  • 2 pieces of star anise
  • a bunch of parsley stems, if you have them

What you do:

  1. Put everything in a stock pot and cover with cold water. Bring it to a slow simmer and skim of any foam.
  2. Keep on a low simmer – just barely bubbling – for 3 to 4 hours, or more if you have the time.
  3. Strain off the liquid from the bones and vegetables and discard the solids. I use a fine sieve to do this, and line it with some cheesecloth if I want to keep all the fine bits out.
  4. Allow to cool to room temperature. I put the broth into canning jars and place them in a sink of cold water, changing the water when it gets warm. If it is cold enough outside I just put it out for the night.
  5. You can use it up or keep it for a few months in the freezer.

Fresh from the Cupboard Salad

canned vegetable salad - trust in kim

This is my new favourite quick salad for bringing leftovers to work or a picnic (when we’re back in picnic season, that is). Everything you need can be found in the cupboard (if you stocked up ahead of time) except the spinach, which you can easily do without. Plus it is healthy and so tasty.

It’s really as easy as adding  a vinaigrette to cans of veggies and adding some greens. If you leave the spinach out it keeps great for leftovers, and you can just add the greens when you eat it.

I found the recipe in a terrific cookbook that has a lot of great information about which vegetables to eat for different needs, like improved energy, stronger bones, stress relief, cardiovascular care, and so much more. The recipe is called ‘Veggie Yard Dash Salad’ in the cookbook; I’m not sure my title is any better, but I wanted to call it something that would let people know that it didn’t have a lot of ingredients that you might not have on hand. The book is The Nutrition Twins’ Veggie Cure by Tammy Lakatos Shames and Lyssie Lakatos. The only thing I did differently from the original recipe, aside from adding the spinach as I served it instead of mixing it in, was to use home-roasted red peppers instead of jarred. I think they taste way better, and I make them ahead of time and keep them in the freezer. But jarred work well too!

Feel free to use more or less of whatever you like; I made my recipe a lot bigger so I’d have more leftovers, and I love red peppers and artichokes, so I used more of them. This recipe serves four people, more or less.

What you need:

  • 1/4 cup jarred or homemade roasted red pepper, cut into strips
  • 1/2 cup canned black beans, drained
  • 1 cup peaches and cream (or whatever kind you like) canned corn
  • 1 – 227mL can sliced water chestnuts, drained
  • 1/4 cup canned sliced artichokes, drained
  • 2 tablespoons raw sunflower seeds
  • 1/2 cup vinaigrette of your choice (herbed vinaigrette recipe below)
  • a bunch of baby spinach

What you do:

  1. Pour the canned goods into a bowl, chopping the artichokes up a bit if they aren’t already. I used the juice from the canned corn, but the original recipe says to drain it – up to you!
  2. Add the sunflower seeds.
  3. Add the vinaigrette and combine all the ingredients.
  4. Chop up some spinach and add it to the portion you will be serving, or add a whole bunch of you think you’ll eat the whole thing in one go.

Enjoy!

Here’s the vinaigrette recipe:

  • 1 garlic clove
  • 2 tablespoons red wine vinegar
  • 1 tablespoon extra virgin olive oil
  • 1/4 teaspoon black pepper
  • 1/8 teaspoon dried oregano
  • a bit of chopped fresh or frozen basil (recipe say dried but I think this is 100x better!)
  • 1/8 teaspoon salt

What you do:

  1. Crush the garlic and let it sit for 5 minutes, which is supposed to release more health-promoting properties.
  2. Combine the ingredients.

Voila, done!

Chocolate Chip Seed Cookies – for hormonal balance

seed cycling cookies - trust in kim

I’m really happy to be posting this recipe, as I have found these to be very useful little cookies. I know, the word “useful” isn’t usually associated with cookies, but in this case the word fits. You see, I was first interested in the recipe because I wanted to find a tasty way to eat a lot of ground seeds, as part of a natural hormonal balance technique called “seed cycling.”  Seed cycling can help with  PMS, low energy, menstrual cramps, irregular cycles, acne, back aches, headaches, uterine fibroids, hot flashes and more. These symptoms are not normal, although many of us have lived with them for years.

But what is seed cycling, you ask? It involves eating ground seeds daily at different phases of the month, and helps the body naturally re-balance hormone levels. This is for women who are menstruating, peri-menopausal and menopausal. And apparently for men too – they have hormonal cycles as well! There’s more information about seed cycling on this site and here.

The first phase, the follicular phase, happens the beginning of a menstrual cycle. If there is no menstrual cycle, this can be timed to the first day of the new moon. At this time you eat a tablespoon of freshly ground flax seeds and a tablespoon of ground pumpkin seeds daily.

In the second, the luteal phase 14 days later, you eat a tablespoon of ground sesame and sunflower seeds each daily. If there is no menstrual cycle this time coincides with the full moon.

It is important to grind the seeds daily, so they don’t become rancid. Grinding them also allows the body to digest the seeds; flax and sesame seeds in particular pass right through you if they are not ground. I store my seeds in the freezer so they stay fresh.

Now, you might be wondering why I made these cookies when I could just sprinkle the seeds on my yogurt, oatmeal or salad. Well, the truth is that I couldn’t force myself to eat them any other way. I tried mixing it with my plain yogurt  with fruit, but I had a strong dislike of the texture of the seeds in the yogurt, and I wanted to keep enjoying my yogurt snacks.

So I searched around for a while until I found this recipe, and it changed everything. Now taking my medicine is delicious. I altered the recipe a bit to incorporate both phases of the seed cycling, and changed a few other parts of the recipe to suit what I had in my kitchen, and how I thought it would taste better. You could also exchange the chocolate chips for some dried fruit.

So because of the seed cycling I started making these, but there are some other benefits to this recipe. It is gluten-free, nut-free, egg-free and dairy-free.  They also make a great protein snack. So I think a lot of people might enjoy this one.

Oh, and anybody can eat these, not just people who are trying to balance their hormones, or who have food sensitivities. They are a yummy cookie.

I’d love to hear your feedback if you found these cookies helped you, or if you just enjoyed eating them.

Makes 24-28 cookies.

What you need for phase 1 cookies:

  • 1 cup ground pumpkin seeds
  • 1 cup ground flax seeds
  • 1/2 cup ground rolled oats
  • 1 teaspoon baking powder
  • 1/2 teaspoon salt
  • 1 teaspoon vanilla
  • 1/3 cup maple syrup
  • 1/3 cup melted coconut oil or butter
  • 1/2 cup semi-sweet chocolate chips

What you need for phase 2 cookies:

  • 3/4 cup ground sesame seeds
  • 3/4 cup ground sun flower seeds
  • 1/2 cup ground flax seeds
  • 1/2 cup ground rolled oats
  • 1 teaspoon baking powder
  • 1/2 teaspoon salt
  • 1 teaspoon vanilla
  • 1/3 cup maple syrup
  • 1/3 cup melted coconut oil or butter
  • 1/2 cup semi-sweet chocolate chips

What you do:

  1. Choose which phase you are going to bake for, then combine the freshly ground seeds, rolled oats, baking powder and salt in a large bowl and stir to combine.
  2. Add the vanilla to the melted coconut oil/butter, then pour it into the bowl with the maple syrup. Stir to bring it all together.
  3. Mix in the chocolate chips.
  4. Preheat the oven to 350F.
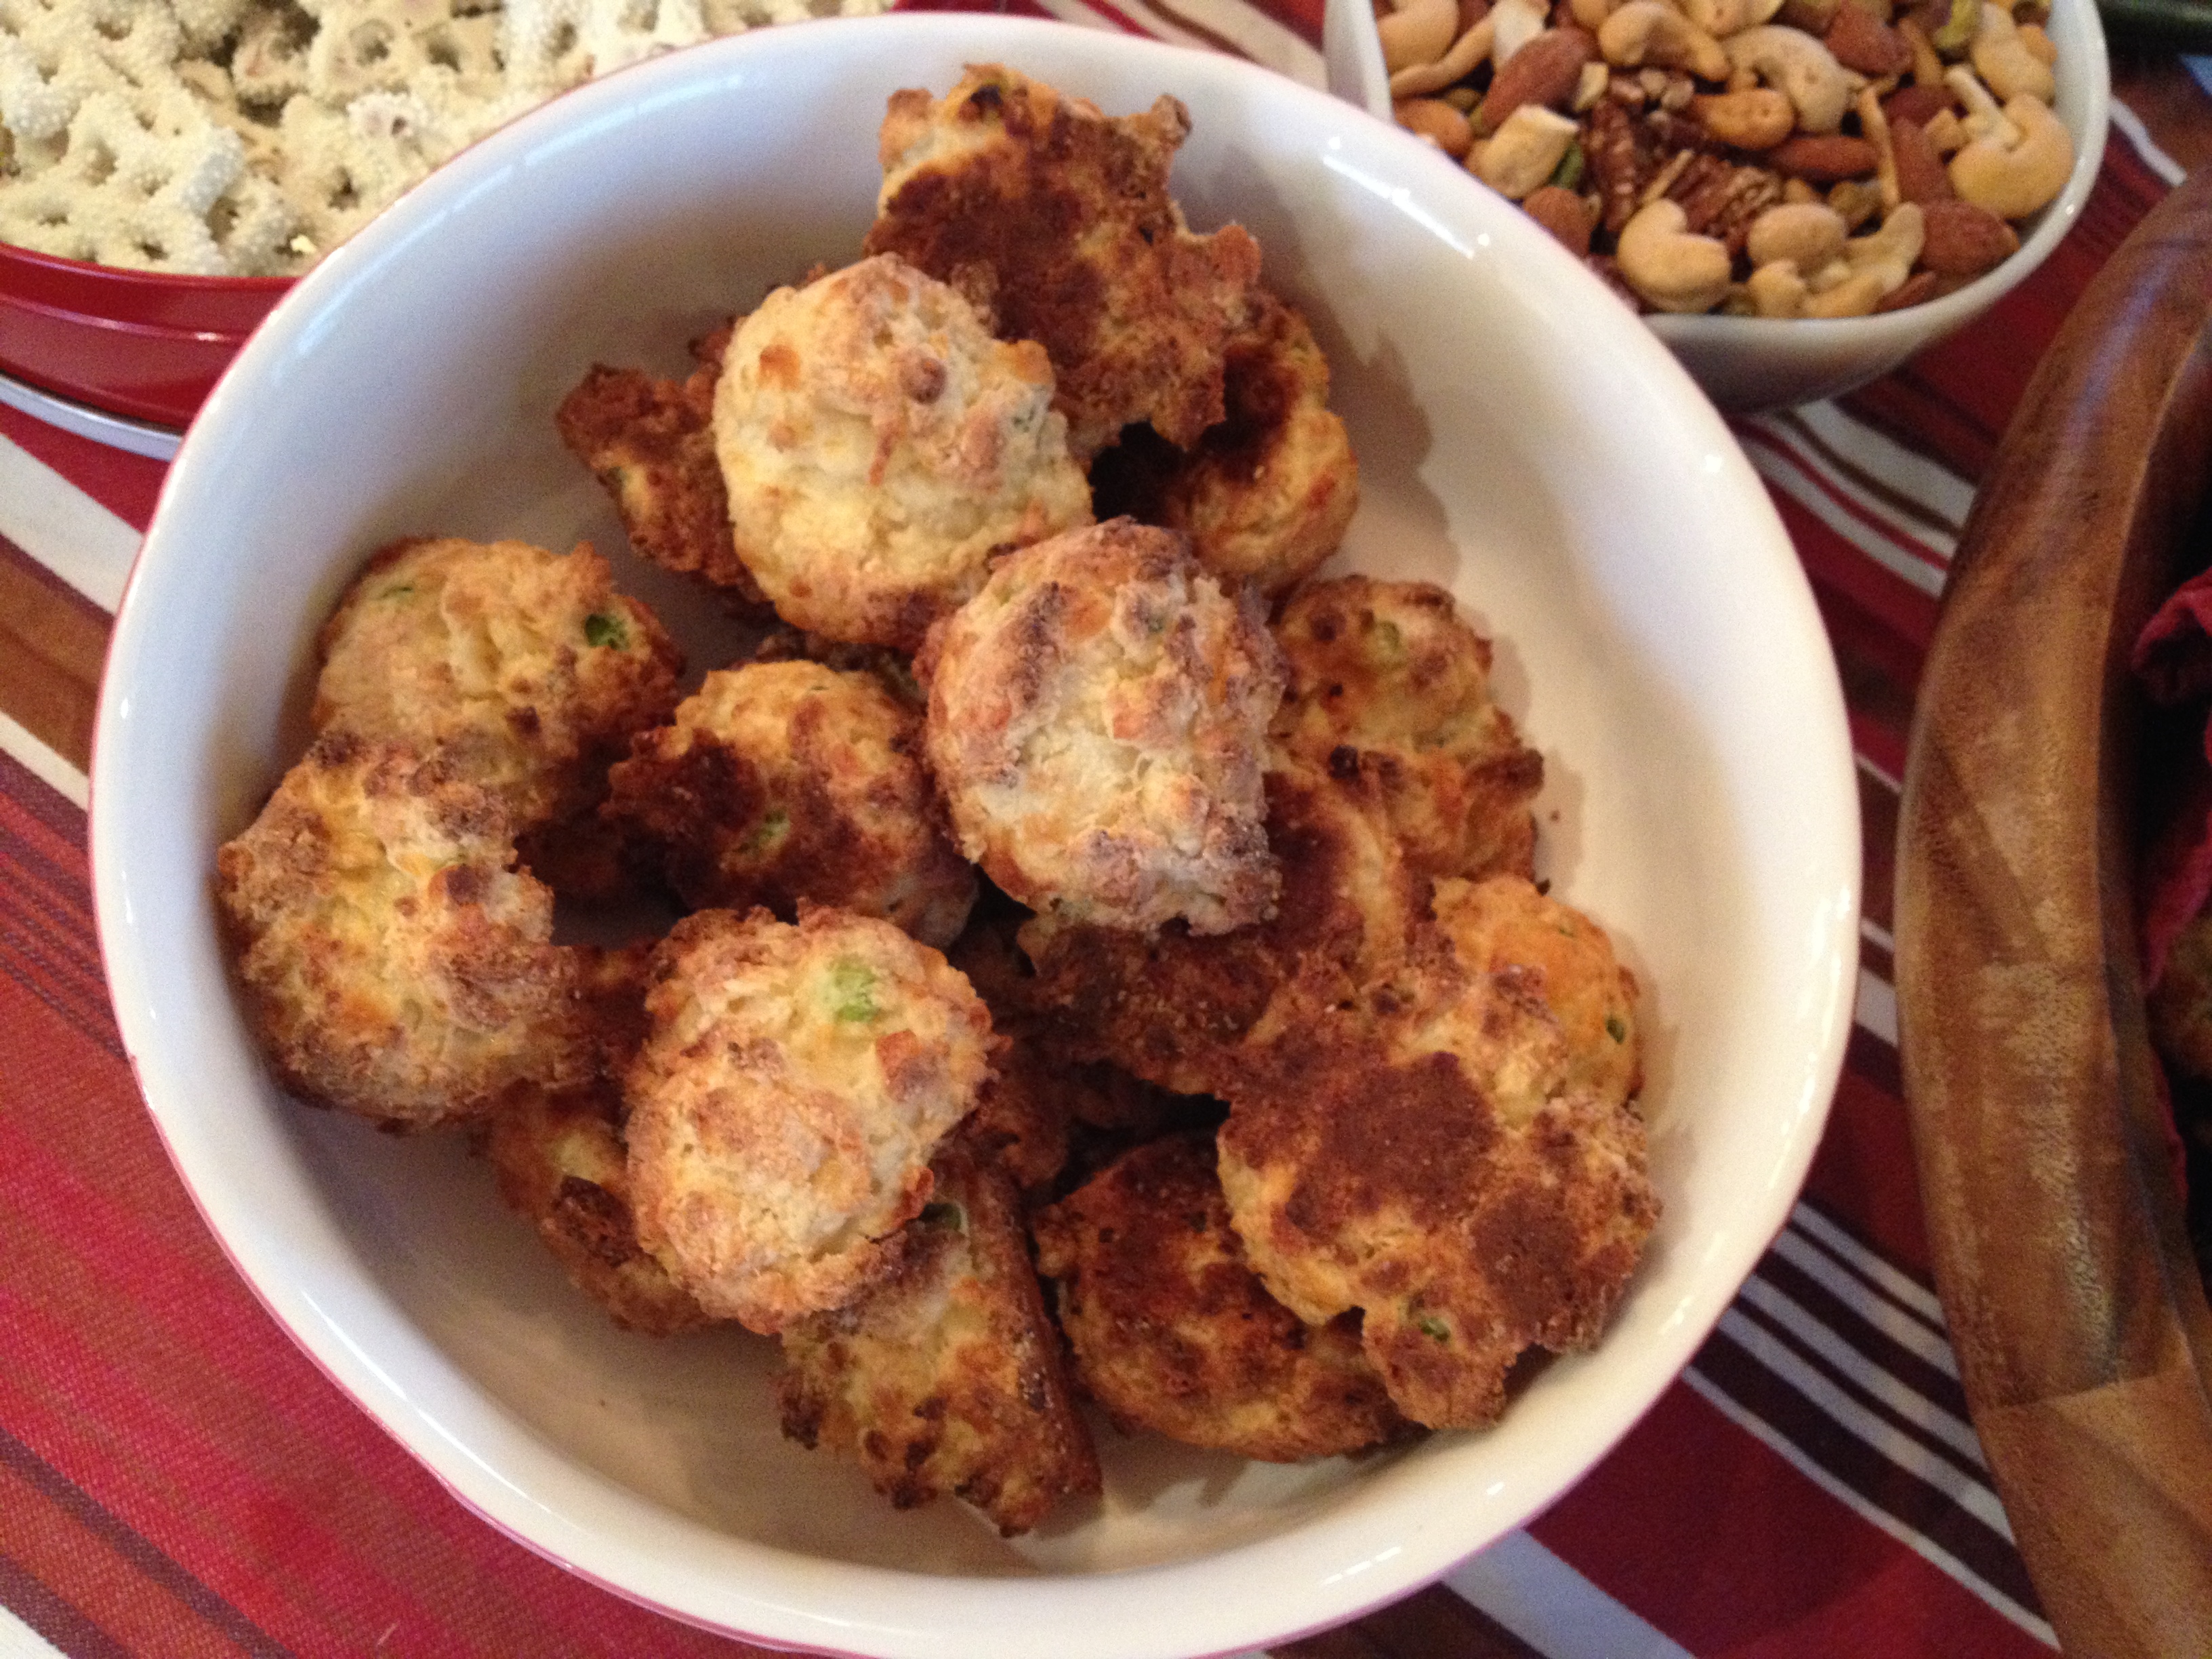
  5. Using wet hands, form the mixture into slightly flattened balls, about 2 dozen of them. I divide the mixture into 4 sections, then make each into 6 or 7 cookies. Make sure they each have a couple of chocolate chips in them.
  6. Bake for 10-12 minutes, one tray at a time in the center of the oven.
  7. After removing the slightly browned cookies from the oven, let them rest for about 5 minutes before removing them to a cooling rack.
  8. Store in the freezer, removing as many as you need for the day. I eat 2 a day.


Persimmon Salad with Ginger Dressing

persimmon salad - trust in kim

I haven’t made this for years, and I was sure I’d posted the recipe before, but apparently not. So here goes…

You can use this for an appetizer or a side dish. The dressing is slightly sweet, and has a nice gingery taste to compliment the sweetness of the persimmons. The hardest part is finding persimmons that are the right ripeness. I find the Fuyu, the smaller flatter ones, are best, as the other varieties seem to go straight from hard to mushy. So I buy them when they are still unripe and put them in the fridge when they start to feel slightly soft. Then they are ready to use within a few days.

I made this one as a side dish for a family Christmas dinner. There is an optional garnish of mint, but I knew some people in my family might not like that, so I left it off. I honestly can’t remember the last time I made this, so I have no idea how it tastes with the mint, but I know it’s really good this way:

What you need:

  • 3-4 Fuyu persimmons
  • 1 tablespoon butter
  • 1 tablespoon olive oil
  • 2 tablespoons finely grated ginger
  • pinch of salt
  • pinch of pepper
  • 1 tablespoon maple syrup
  • 1 teaspoon white wine vinegar
  • 1 tablespoon fresh mint leaves (optional)

What you do:

  1. Heat the butter and olive oil in a small saucepan and add the ginger, salt and pepper, and let this cook on low for about 5 minutes, stirring.
  2. Stir in the maple syrup and vinegar and remove from the heat. Taste to adjust seasonings, adding a little more maple syrup or vinegar if you think it needs it. Let it cool down before using it. If you make it ahead of time, remove it from the fridge early enough to let the butter soften again, at least 1/2 hour.
  3. Peel the persimmons and slice them into wedges, then arrange them on a serving plate. Spoon some sauce over the top and sprinkle on the mint if you are using it.

Enjoy!

John’s Spicy Lentil Soup

lentil soup - trust in kim

lentil soup - trust in kim


My good friend John made this soup for me a while back. We both wanted to eat something pretty healthy and warming, and something that wouldn’t take too long to cook. Don’t be afraid of the word ‘spicy;’ it has a only hint of chill, but loads of flavour.

John’s recipe is vegan, using vegetable broth, but I used chicken broth and added some chicken pieces that I had left over. Both versions are super tasty. I also used less olive oil; the original recipe says 3 tablespoons and I used about one.

The recipe is from the Food Network.

What you need:

  • 1 tablespoon olive oil
  • 1 large onion, chopped
  • 4 cloves garlic, sliced lengthwise
  • 1/2 teaspoon cumin seeds (or ground if that’s what you have)
  • 1/2 cup green lentils
  • 1/2 cup red lentils
  • 1 small dried chili, crushed
  • 2 carrots, diced
  • 2 stalks celery, diced
  • 2 bay leaves
  • 6 cups vegetable or chicken stock
  • leftover chicken, shredded or diced (optional)
  • salt
  • freshly cracked pepper
  • 1 tablespoon red wine vinegar

What you do:

  1. Drizzle the oil in a large pot and sauté the onion on medium heat until golden.
  2. Add the garlic and cumin and cook for 2-3 more minutes, until the garlic is golden.
  3. Add the stock, lentils, chili, carrots, celery, bay leaves and optional chicken to the pot and bring to a boil. Cover and simmer on low heat for 30 minutes.
  4. Uncover and simmer for 10-15 minutes, until the lentils are tender. Add the vinegar, then add salt and pepper to taste.

Enjoy!

Thanks for the recipe John!

John Cloutier - trust in kim
Chef John

Preserved Lemon

preserved lemon - trust in kim


Preserving lemons takes a few weeks to accomplish, but it is really simple, and adds so much to Middle Eastern dishes like a chicken tagine.

Preserved lemons are pickled in their own juice and salt. They sit for a number of weeks, and when they are done can be kept in the fridge for months. The peel of the lemon becomes full of flavour through the preserving process, so you use this part and get rid of the flesh.

I still have to do some experimenting with other uses of preserved lemons, but I have tried them in a dip, and on some fish, as well as with chicken. So good!

I’ve only made this once, and I halved the recipe just in case I didn’t like it. Here is the full recipe from Yotam Ottolenghi’s The Cookbook.

What you need:

  • 1 jar just large enough to hold all the lemons squished in tightly
  • boiling water
  • 6 unwaxed lemons
  • 6 tablespoons coarse sea salt
  • 2 sprigs rosemary (optional)
  • 1 large red chile
  • juice of 6 lemons
  • olive oil

What you do:

  1. Fill the jar with boiling water and let it sit for a minute to sterilize it. Pour the water out and let it sit without touching or drying it.
  2. Wash the lemons and cut a cross in them from one end to about 2cm from the bottom so the 4 quarters are still attached. Pour a tablespoon of salt into each lemon, then fit them tightly into the jar. Seal the jar and leave it for at least a week. I left mine in a cupboard.
  3. After the first week, remove the lid and push the lemons down to squeeze as much juice out as you can. Add the rosemary, chile, and as much lemon juice as you need to cover the lemons. Pour a thin layer of olive oil on top. Seal the jar and leave in a cool place for at least 4 weeks. I put mine in the fridge at this point and forgot about them for a few months. They turned out awesome!
  4. To use the lemons, remove the flesh from the inside of one and rinse the peel. Chop it up and use as you wish.

preserving lemons - trust in kim


Yotam Ottolenghi's shop on Motcomb Street in London from my visit in July 2014
Yotam Ottolenghi’s shop on Motcomb Street in London from my visit in July 2014

Easy Salmon Dinner

easy salmon dinner - trust in kimHere’s one of my easiest hot dinners; a great result of being in a rush and experimenting with just throwing food in the oven. One pan in the oven, and only 15-20 minutes of your time. Plus it is healthy and delicious. During the holidays it’s nice to have a quick healthy meal like this, a bit of a break from all the heavy foods. Feel free to add some bread or rice if you wish.

This is for one person, so double, triple or whatever you need.

What you need:

  • 1 small salmon fillet
  • cherry tomatoes, about a dozen
  • 1/2 head of broccoli, split into florets
  • salt & pepper
  • olive oil
  • lemon

What you do:

  1. Heat the oven to 400F. Put the broccoli on a baking pan and drizzle with a little olive oil. Shake it around a little, then put it in the oven for 5 minutes.
  2. Add the tomatoes to the pan, shaking them around a little, then bake for 5 minutes more.
  3. Add the salmon to the pan, skin-side down. Place some of the cherry tomatoes around the salmon – I think this keeps it moister. Cook for 5 minutes more, or until the salmon is just cooked through – we don’t want it to dry out.
  4. Remove the food from the oven to a dinner plate, then add salt and pepper, and a squirt of lemon. I put lemon on everything, but the salmon is the part that really needs it.

Eat it while it’s hot!


Scrambled Eggs ‘n Veg

scrambled eggs and vegetables - trust in kimRecently I realized that I don’t tend to post my easy meals, the ones that I make pretty often that don’t take much time. So this recipe marks the beginning of my attempt to post more of these. They aren’t fancy, but I keep making them because they feed me when I don’t feel like taking a lot of time too cook, and they taste good.

This is one of my favourite weekend breakfasts. I usually have a pepper, onion, garlic and egg on hand, and sometimes I even have mushrooms. So I just fry up a whole bunch of veggies and add a scrambled egg. It’s delicious, and gives me energy to run errands or do other weekend activities.

This recipe is for one person.

What you need:

  • 1/2 red bell pepper
  • 1/4 cup-ish onion (I prefer sweet onions)
  • 1 clove garlic
  • 1 egg
  • salt and pepper
  • olive oil or butter

What you do:

  1. Chop up the onion and pepper. Heat a frying pan to medium high and add a little olive oil or butter (1/2 teaspoon or so). When the pan is hot, add the onion, then turn the heat down and cook them, stirring from time to time, for a few minutes. Turning the heat down allows the onions to mellow and sweeten.
  2. Add the pepper and cook until the vegetables are lightly browned.
  3. Slice the garlic and add it to the pan, cooking for about another minute.
  4. Crack the egg into a bowl, add a little salt and pepper to it and beat lightly with a fork.
  5. Turn the frying pan heat a little higher and push the veg to the side. Add a little more butter or olive oil to the pan, then pour in the egg. When the egg starts to cook, push it around a little so the rest of the egg runs onto the surface of the pan to cook. I don’t like to move the egg around too much, so it cooks but doesn’t get mushy.
  6. Combine the veg with the egg and serve. Season to taste with more salt and pepper if you wish. Hot sauce could be awesome on this too! Buttered toast is a nice accompaniment.

A pot of tea makes this perfect for me, but I understand that there are a lot of people who prefer coffee – do what you love!


Cheddar-Scallion Biscuits

cheddar chive biscuits - trust in kim


I made a batch of these up quickly the other morning before bringing them to a great big brunch celebration. If I had brought my camera there might be a better picture posted here – oops – but I think you get the idea. Cheesy and salty biscuits with nice crispy edges.

My favourite coffee shop makes a cheddar scone that is the best I’ve ever tried. They are almost always sold out when I go in for one, so in order to feed my craving I tried to find a recipe that approximates the coffee shop ones. Mine aren’t as pretty, but they taste pretty close to the real thing. This recipe is from Gourmet Magazine, but it seems to be a really common one that comes up in a web search.

Makes 12 biscuits

What you need:

  • 2 & 1/4 cups flour
  • 2 & 1/2 teaspoons baking powder
  • 3/4 teaspoon baking soda
  • 2 teaspoons sugar
  • 1 teaspoon salt
  • 6 tablespoons cold butter
  • 1 & 1/2 cups aged white cheddar, grated
  • 3 scallions, chopped
  • 1 cup buttermilk (I used soured milk – add 1 tablespoon vinegar to milk)

What you do:

  1. Whisk together the dry ingredients in a large bowl.
  2. Preheat the oven to 450F and prepare baking sheets with parchment paper.
  3. Cut the cold butter up and then blend it into the dry ingredients with your fingertips until the butter is about the size of small peas. Add the cheddar and scallions to combine.
  4. Add the buttermilk and stir only until it is combined.
  5. Scoop onto the cookie sheets (I used an ice-cream scoop) into 12 mounds. Add a touch of salt to the top if you wish.
  6. Bake 18-20 minutes, one tray at a time, in the middle of the oven. Mine baked really fast, so they came out a little earlier. They look nice and browned when they are done, thanks to the cheese.
  7. Eat ASAP so they are still warm, or let them cool. Yummy either way! Some people might want a little butter to slather on them, but I think they have enough flavour without.