X’nipek / Yucatan Red Onion Salsa

x'nipek - trust in kim

Here is another of the recipes I learned in Tulum, Mexico at a cooking class I took at Altamar Restaurant. I love to put a few strips of this on top of a taco.  Yes, it is quite hot because of the Habanero chili, but you could use a piece of banana pepper instead if you’re afraid of the heat, or just leave it out altogether.  It is a really simple recipe, and it only needs to sit for about half hour before consuming, but I prefer it after it has sat overnight or even a few days.

What you need:

  • 100 grams red onion
  • 100 ml sour orange juice (or lemon juice with a little orange juice mixed in)
  • 10 grams Habanero chili

What you do:

  1. Roast the Habanero on a gas stove or barbecue until it has blackened slightly all over.  Chop it very finely.  Only use a little piece of it if you want this to be milder.
  2. Slice the red onion as thinly as you can and put it into a bowl or jar.  Add the Habanero to the onions, then pour the orange/lemon juice over the top.  Give it a little stir, then cover and refrigerate for half an hour or overnight.
  3. Serve on tacos, empanadas, or another favourite Mexican dish.  A little sour cream or plain yogurt will help cut the heat.
x'nipek on tacos - trust in kim
X’nipek on tacos

Bocconcini, Cherry Tomato and Pesto Pizza

pizza - trust in kim

Time again for making pizza in the brick oven up at the cabin.  My Opa built it over 30 years ago, in the same style as the one they used when they lived in Paraguay.  Of course, those of you without a Paraguayan brick oven are welcome to use a regular oven, and this is the process I will describe here.

The dough, which needs to be started the day before, and the sauce recipes are from A16 Food and Wine by Nate Appleman and Shelley Lindgren. This is my favourite pizza crust and I believe it is worth the extra effort, but I hear there is also some really good ready-made pizza dough out there, like the one at Trader Joe’s.

This recipe makes enough for 3-4 medium-sized pizzas with a thin crust.  Of course you can make yours with any toppings you like, but I recommend that more is less. I’ve only included toppings for one pizza here, so you can come up with a few other ideas for toppings for the other ones. Our favourite combination of toppings this time around was the prosciutto and mushroom one, but I didn’t manage to get a picture of that one.

What you need for the crust:

  • 1/4 teaspoon yeast
  • 1 & 1/2 cups warm water
  • 2 teaspoons olive oil
  • 2 teaspoons salt
  • 4 cups “oo” flour or all-purpose (I used all-purpose)

What you need for the tomato sauce and toppings for one pizza:

  • one 28-ounce can of tomatoes (San Marzano if you can find them)
  • 1-2 teaspoons salt
  • 7-8 baby bocconcini, sliced
  • 10-12 cherry tomatoes, halved and seeds removed
  • a few tablespoons of pesto, store-bought or this recipe
  • about 1/2 cup grated smoked gruyere, or cheese of your choice

What you do:

1. Begin preparing the dough a day before you want to make the pizza. You can do this by hand, but it’s just a bit more work. Pour the warm (not hot – just body temperature) water into a mixer fitted with a dough hook and then sprinkle the yeast on top.  Leave it for about 10 minutes and it should become foamy – if it doesn’t your water was the wrong temperature, or the yeast is dead.  Stir in the olive oil and salt.  Add the flour and mix on low for 2 minutes.  Knead on medium-low for about 10 minutes – it will pull away from the bowl and begin to look smoother.  Cover the bowl with a damp towel and let it rest for 5 minutes. Knead once more on medium-low for 10 minutes – it will be smooth and quite soft.  If it seems much too sticky you can add a little more flour.  Coat a bowl with a little olive oil and then coat both sides of the dough with olive oil, placing the dough in the bowl.  Cover the bowl with plastic wrap and put it in the fridge over night.

2. In the morning remove the  dough from the fridge and punch it down.  Fold the sides of the dough under and put it back in the bowl.  Cover the bowl with a damp towel and let it sit in a warm (not hot) place until about 2 hours before you are going to use it.

3. Punch the dough down and divide it into 4 pieces.  Form them into balls and cover them with a damp towel for about 2 hours.  By this time the dough should have doubled in volume.  If it starts to get a skin on it you can spray it with a little water.

4. To prepare the sauce, just put the tomatoes and juice into a bowl and squish them into little bits with your hands.  Add the salt.

5. Preheat the oven to 500-550 F.

6. To form the crusts, shape the dough into a disk with your hands.  Push down in the center with your palm and pull the dough out gently with your other hand, rotating slightly until you have a crust that is about 10-12 inches/25-30 cm in diameter with a slightly raised edge. (or you can use a rolling-pin) Dust your baking pan generously with flour and place the crust on it.  I don’t have a proper pizza stone or pan, and the baking tray I used worked just fine.

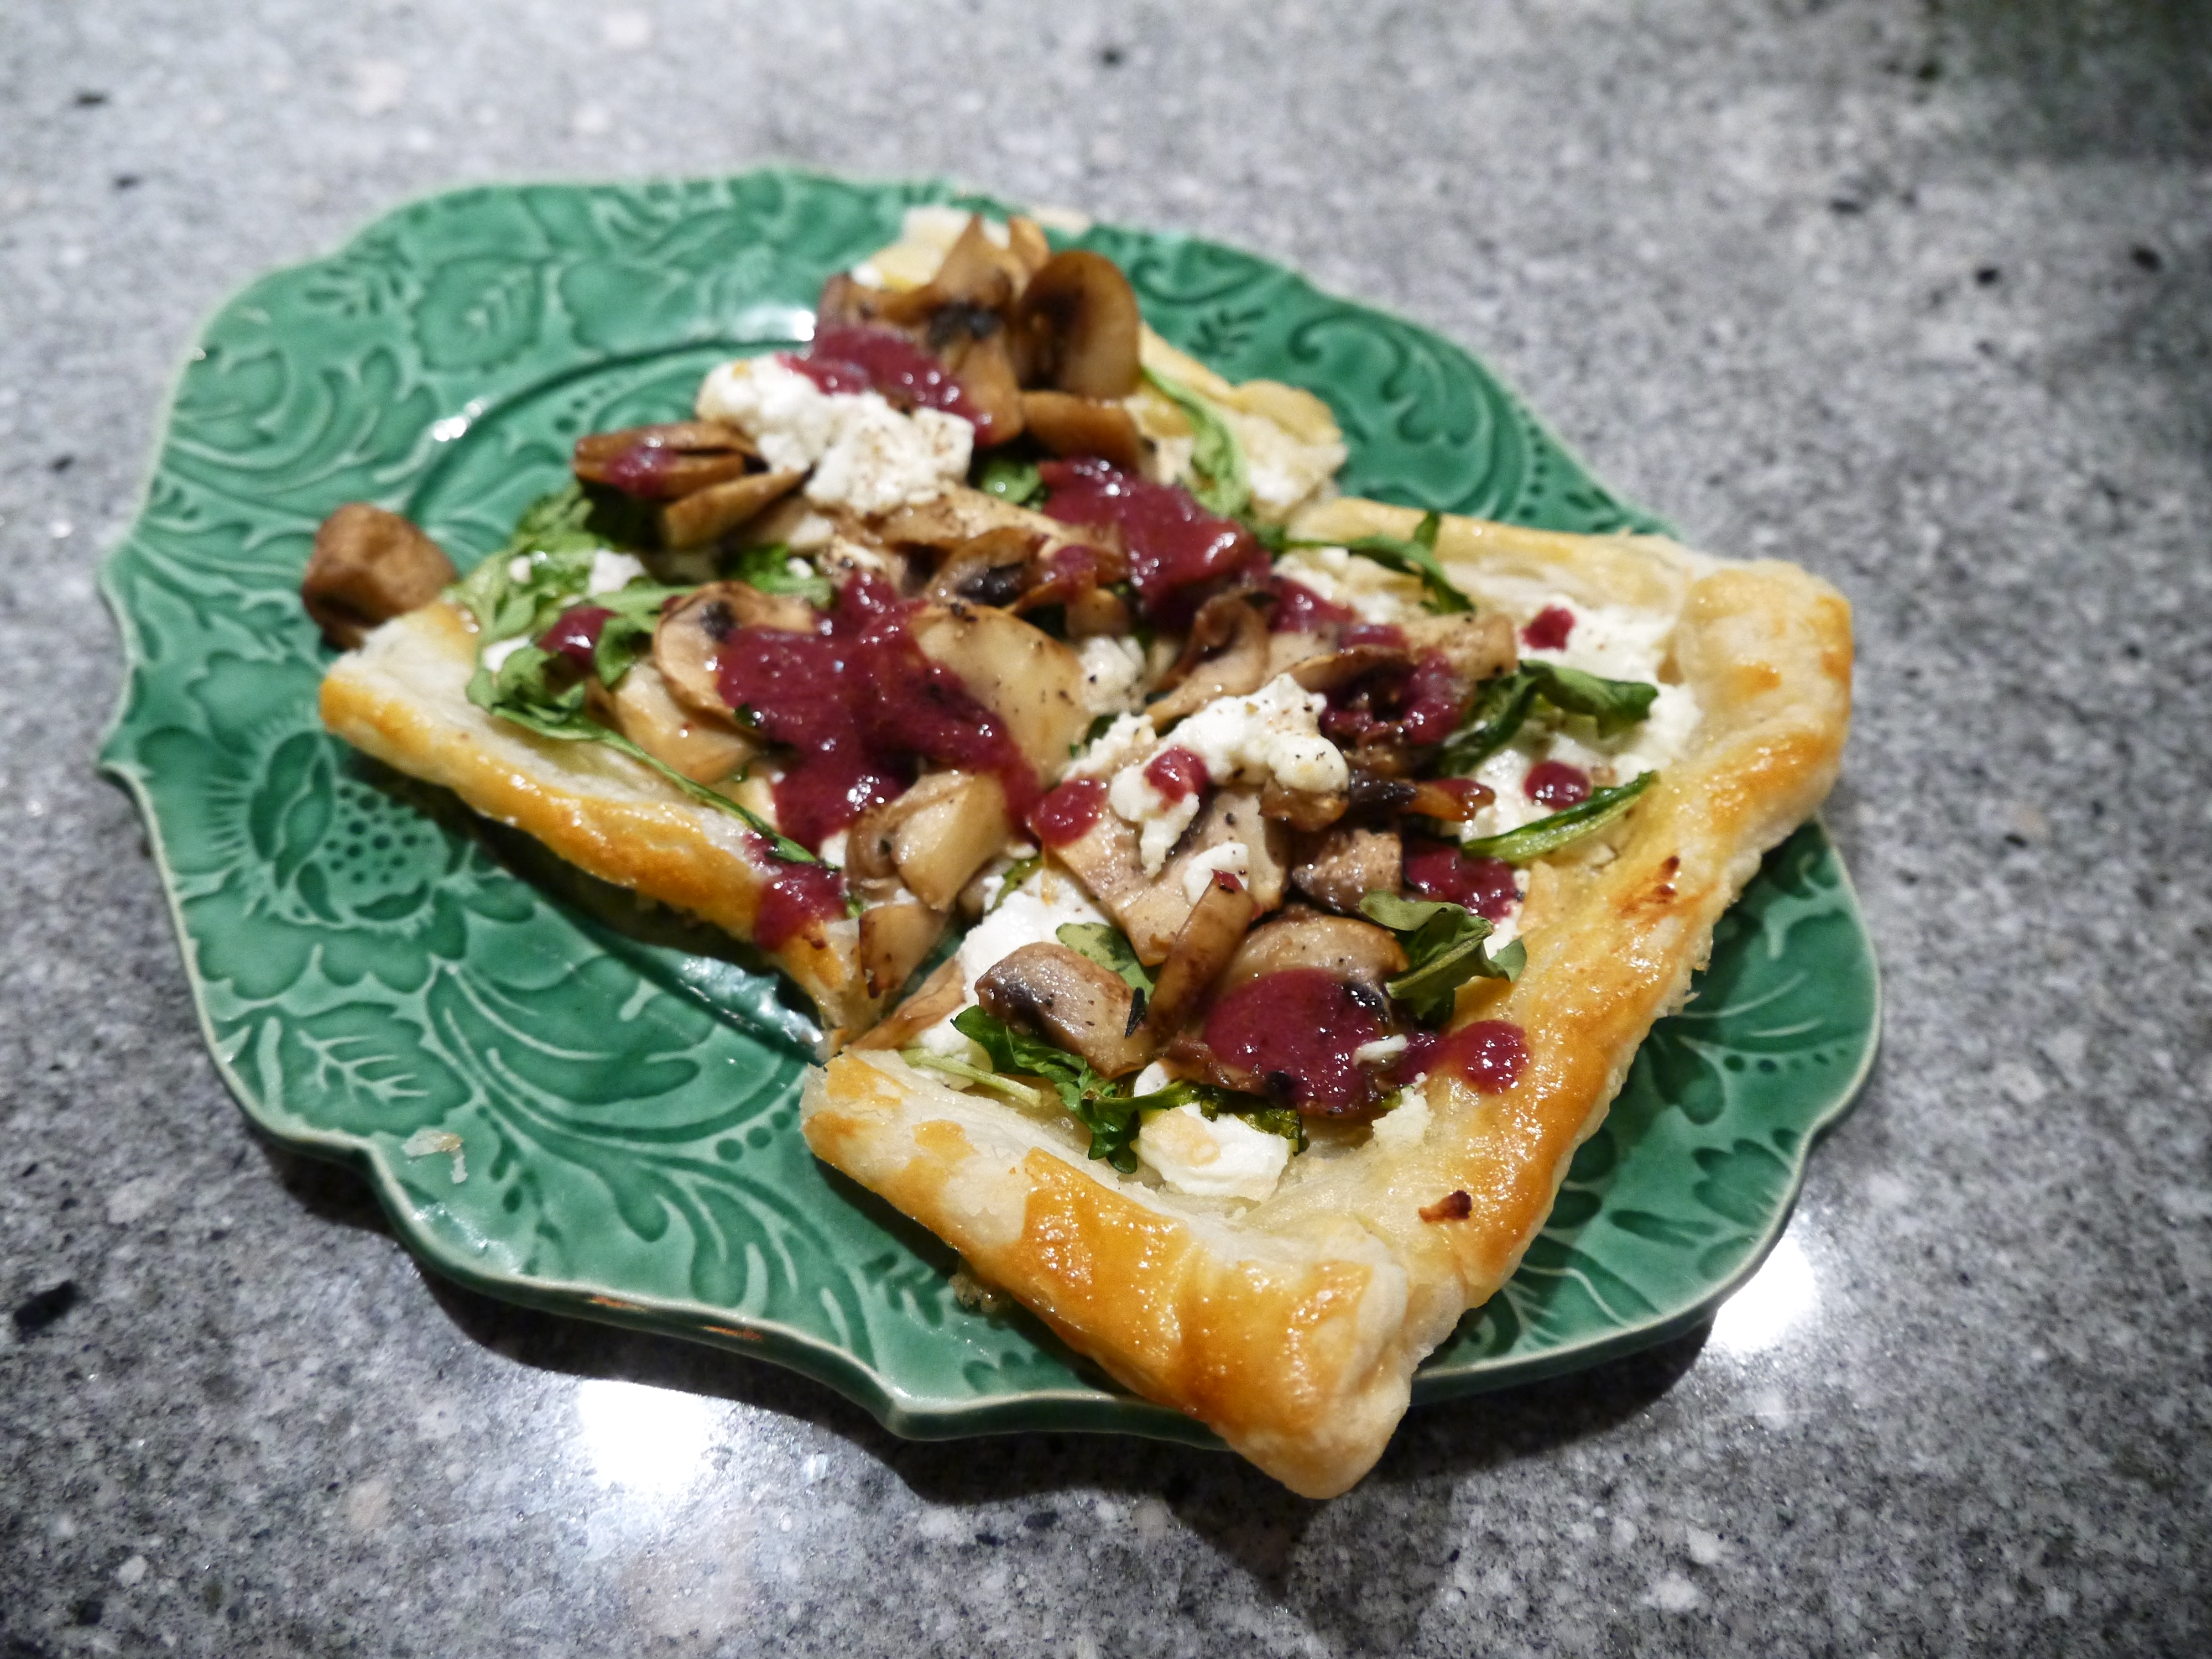
7. Spread some tomato sauce onto the crust, then the tomatoes, dollops of pesto, bocconcini slices, and the gruyere on top. 

8. Bake for 6-7 minutes, until the crust is crisp and golden, and the top is bubbling.

Paraguayan brick oen - trust in kim

Grilled Corn on the Cob

grilled corn on the cob - trust in kim

Grilled corn on the cob is the perfect summer treat, as long as it’s crisp and fresh. To choose the best corn I peel the husk back at the top of the cob and pierce one of the kernels with a fingernail. If it pops it is a fresh one; if it doesn’t you’ll want to put it back and try another one. When corn is really fresh I believe the very best way to eat it is plain.  That way you can really taste the pure flavours of the corn.

What you need:

  • corn on the cob – I do one per person, plus an extra to put in a recipe like this or this the next day
  • a barbecue or coals left over from a fire
  • optional: butter, salt, mayonnaise, chili powder

What you do:

  1. Immerse the corn cobs in a large bowl or sink full of water for 1/2 hour to an hour.  The husks are less likely to burn this way.
  2. When the barbecue is hot place the cobs on it – they still have the husks on them (not like in the picture – that comes later).
  3. Use tongs to turn every few minutes so the husks don’t burn. Right now you are steaming the corn inside the husks so they are mostly cooked through.  This process doesn’t take long, so I don’t leave them on for more than 8-10 minutes.
  4. Remove the corn from the barbecue and pull back the husks (as shown in the picture).  Place them back on the grill, turning every minute or so until there is a little bit of browning happening to the corn.
  5. Enjoy as you wish, plain (yummiest ever), with butter and salt, or some mayonnaise and chili powder.


Cherry Tomato and Baby Bocconcini Salad

tomato and bocconcini salad - trust in kim

These pretty little yellow tomatoes came out of my garden this summer, along with the greens, so I just added the bocconcini to make a salad.  Nothing says summer like tomatoes fresh from the garden, and the cheese is mild enough that it doesn’t steal the limelight from their flavour. It’s nice with a little bit of bread to soak up any extra balsamic glaze. Delicious and super fast!

What you need:

  • some cherry tomatoes
  • fresh greens
  • baby bocconcini
  • basil
  • balsamic glaze, storebought
  • salt and pepper

What you do:

  1. Place the greens on plates.
  2. Distribute the whole tomatoes and bocconcini on top of the lettuce.
  3. Stack a few basil leaves up, roll them, then slice the roll thinly – this is a chiffonade.  Loosen up the basil strips and place a few on each plate.
  4. Drizzle a little balsamic glaze on top, then add a tiny bit of salt and pepper.
  5. Enjoy right away!

Cilantro Guajillo Chili Tofu

cilantro guajillo chili tofu - trust in kimguajillo chili tofu - trust in kim

This is one of my favourite new recipes, and I’ve made it a few times this summer already.  I can honestly say that this is my favourite tofu recipes I’ve ever made, and right now one of my favourite meals period.  And I’m not a vegetarian!

The guajillo chili salsa is a garlicky olive oil sauce with orange juice and cilantro – packed with flavour, which is just what tofu needs.  I make up a recipe of the salsa and keep it in the fridge to use on various foods, including grilled chicken and shrimp.  This time I served it on a bed of greens with grilled fresh zucchini. Another time I made it with spinach and my favourite dressing. 

What you need:

  • 1/3 cup extra-virgin olive oil
  • 1 head garlic, chopped
  • salt and pepper
  • juice of 1 large orange
  • 2 dried guajillo peppers, cut into strips (I use kitchen scissors to do this)
  • 1 bunch cilantro, washed and dried
  • 1 block medium-firm tofu

What you do:

  1. I like to prepare the guajillo chili salsa a while before I need to use it so the flavours have a chance to mingle.  To begin, heat a frying pan to medium heat and add the olive oil.  Add the garlic, pepper and a liberal amount of salt, and stir once in a while.  When it is slightly golden add the orange juice and guajillo pepper strips, seeds and all.  Let this simmer for a few minutes. Set aside to cool, then use an immersion blender or food processor to blend with the cilantro, stems and all.  Season to taste with salt and pepper; I find it usually needs a bit more salt. Refrigerate to use when you wish.
  2. Pat the tofu dry on a towel then slice about 1.5 – 2 cm thick.  Heat a little olive oil in a frying pan and add the tofu strips. Spoon about one teaspoonful of guajillo chili salsa on each strip of tofu, then flip them.  Let them fry for about 2-3  minutes on that side, then add another teaspoonful of salsa to the other side and fry that for another 2 minutes or so until it has darkened a bit.
  3. When you remove it from the pan make sure to scrape up any baked-on bits of salsa and spread them over the tofu.  So tasty!

guajillo chili in olive oil - trust in kim

Slightly Homemade French Onion Dip

Slightly Homemade French Onion Dip - trust in kim

Sometimes there just isn’t enough time to do it all.  I have a lovely, time-consuming recipe for a French onion dip  made from scratch.  But this one is for when you need a little something to go with the veggies and you’re short on time.  I make my recipe with yogurt, but other people use sour cream and mayo, so feel free to use those if you wish.  I prefer it to be a little healthier, hence the yogurt, plus  think it tastes really good this way.

What you need:

  • plain yogurt (homemade recipe here) I use 3.5% fat
  • packaged dry onion soup mix
  • a little red onion
  • cheesecloth for straining (optional)

What you do:

  1. If you’re really in a hurry you can skip this first step; your dip will just be a bit more watery.  In this case it might be good to use a little sour cream or mayonnaise to mix with the yogurt. Here’s what you do: Place a sieve above a bowl and line the sieve with cheesecloth.  Put about 1 & 1/2 cups of yogurt into the cheesecloth.  Place in the fridge and drain the yogurt for an hour, or longer if you have time. You may need to remove some liquid from the bowl during the draining process.
  2. Finely chop some red onion (a few tablespoons).  Remove the yogurt from the cheesecloth and put it in a bowl; add some of the red onion, reserving a little for a garnish.
  3. Add some onion soup mix to taste, a little at a time.
  4. Garnish with some more red onion.
  5. Serve with veggies and/or chips.

Guajillo Chile Salsa Grilled Prawns

guajillo chile salsa prawns - trust in kim

I got this guajillo chile salsa recipe from chef Eric Fischer at Altamar restaurant.  I decided to alter the recipe a little by using orange juice in place of white wine, and then I brushed these beautiful fresh prawns with it and grilled them.  Freshness is so important with seafood, as is grilling only enough to cook it.  Previously frozen prawns have a tougher texture, and overcooking also makes them tough.  That said, even at the fish counter the prawns may just be thawed after being previously frozen, so buy what you can.

This recipe makes enough salsa to keep in the fridge for a few weeks and use for other purposes, like grilling meats, or topping tacos or empanadas.  It’s not very spicy hot, but full of flavour, so if you like it really hot you’ll want to add a bit of hot sauce.

What you need:

  • 1/3 cup olive oil
  • 2 tablespoons finely minced garlic
  • salt and pepper
  • 1/2 cup freshly squeezed orange juice
  • 2 dried guajillo chili peppers, cut into strips
  • 1/4 cup parsley finely chopped
  • fresh prawns, shells removed but tails remaining

What you do:

  1. Chop the garlic rather than using a garlic press; the press just makes it mushy.
  2. Heat the olive oil to medium high in a frying pan, then add the garlic.  Stir the garlic around so it doesn’t burn, and add a big pinch each of salt and pepper.  When it starts to just get brown around the edges, add the orange juice.  Add the chili strips along with their seeds. Let this simmer for a few minutes.
  3. Remove the frying pan from the heat and put the salsa into a blender with the parsley, or use an immersion blender, as I did. Taste and see if you think it needs more salt.
  4. Heat the grill to medium.
  5. Skewer the prawns.  I like to skewer each one through two parts, as you can see in the picture, so they don’t move around when I flip them.
  6. Brush some salsa on each prawn.  Make sure the rest of your meal is ready to go before you grill these, because they will be done quickly, and you want to eat them right away.
  7. Grill the prawns briefly on each side.  You will know they are done when they change colour from grey to salmon-coloured (depending on the type of prawns you are using). Remove from the grill immediately after they change colour, and serve.

I served mine with a lightly dressed salad.

Enjoy!

Green Gazpacho

green gazpacho - trust in kim

This soup is awesome! I was a little hesitant at first, as I’m not a big fan of green bell peppers, but since I have loved red gazpacho so much I thought I should at least give this a try.  After all, Yotam Ottolenghi wrote in his lovely cookbook Plenty that this is by far his favourite cold soup, so it must be good.  It is now one of my top favourites too.  It has so much flavour, and it’s got lots of healthy ingredients.  I made one big change, though – the recipe serving six people called for one whole cup! of olive oil! I cut that down to 1/4 cup.  Still takes great, and I feel better knowing I’m not eating almost 3 tablespoons of oil per serving.

While there is no cooking, there’s a bit of chopping, and then blending, so it’s not as quick as I thought it would be.  But it is totally worth a little extra chopping.

What you need:

  • 2 celery stalks (including leaves)
  • 2 small green bell peppers
  • 6 mini cucumbers (1 & 1/4 lbs), peeled
  • 3 slices stale white bread with crusts removed
  • 1 fresh green chile (I used a jalapeno)
  • 4 garlic cloves
  • 1 teaspoon sugar
  • 1 & 1/2 cups walnuts
  • 6 cups baby spinach
  • 1 cup basil leaves
  • 2 tablespoons chopped parsley
  • 4 tablespoons sherry vinegar (I used white balsamic vinegar)
  • 1/4 cup olive oil
  • 3 tablespoons Greek yogurt (I just used my plain yogurt)
  • about 2 cups cold water
  • 9 oz ice cubes
  • 2 teaspoons salt
  • white pepper (I just used black)

What you do:

  1.  Lightly toast the walnuts in a dry frying pan or in the oven. Let them cool.
  2. Roughly chop the celery, bell peppers, cucumbers, bread, chile and garlic and place it in a blender. If you are using an immersion blender, as I did, just put the ingredients into a large bowl.  If you have the option to use a blender I recommend that, as it would be a bit easier to get the right consistency for all the vegetables.  Add the sugar, walnuts, spinach, basil, parsley, vinegar, oil, yogurt, most of the water, half of the ice cubes, salt, and some pepper.  Puree until smooth.  Add more water if you need, in order to get the right consistency.  Taste and adjust seasonings if you need to.
  3. Add the remaining ice and blend for just a second or two to break it up a little.
  4. Serve with homemade croutons or a few walnuts sprinkled on top.

This makes 6 very generous portions.  I cut the recipe in half, which would be a great option for a starter-sized portion.


Arugula & Pine Nut Savoury Bread

arugula and pine nut bread - trust in kim

Here’s a really easy and delicious bread you can make as an appetizer or to pair up with a meal.  It uses eggs and baking powder for leavening, so no need to wait for it to rise. I brought a loaf to a party where we slathered our slices with a bit of butter, and the whole loaf went really quickly. With picnic season coming up I can see myself making this one a few times to eat al fresco.

I substituted spinach for the arugula, which was delicious, but I imagine the arugula would give it even more flavour. She uses self-raising flour, but I changed the recipe a little so I could use all-purpose flour.  This bread is light enough that you could use some whole wheat flour.

This recipe is from Yvette Van Boven’s book Home Made Summer.

What you need:

  • 100 grams washed and dried arugula or spinach
  • 1 & 1/2 cups all-purpose flour
  • 2 & 1/4 teaspoons baking powder
  • 1 teaspoon salt
  • 1/2 teaspoon freshly ground pepper
  • 3 large eggs
  • 2 tablespoons sour cream (I used 2% yogurt)
  • 1 tablespoon Dijon mustard
  • 4 tablespoons olive oil
  • 1/2 cup pine nuts

What you do:

  1. Preheat the oven to 325F and grease a 5-by-9 loaf pan with butter.
  2. Chop the arugula and set it aside.
  3. In a bowl whisk the baking powder, salt and pepper into the flour, then add the eggs, sour cream or yogurt, olive oil and mustard.  Mix on high for about a minute – this makes a very thick batter, but don’t worry, it will make a nice light loaf.
  4. Fold in the arugula and pine nuts, then pour the batter into the pan and press it into the corners.
  5. Bake for 40 minutes, or until an inserted toothpick comes out clean. Let the loaf cool for about 5 minutes, then remove it from the pan.
  6. Serve it either hot or at room temperature with a bit of butter.

spinach and pine nut bread - trust in kim


Goat Cheese and Arugula Tarte Flambée

tarte flambee - trust in kimtarte flambee - trust in kim

There is a fabulous French restaurant in Vancouver called Les Faux Bourgeois where I have in the past enjoyed their tarte flambée.  I was having company the other night and wanted to make a special appetizer, so I thought I’d make up my own version.  Never having used puff pastry before, there was some trial and error, but the results were excellent.  The olive dressing adds a nice salty kick.

What you need:

  • 3 tablespoons minced kalamata olives or black olive tapenade
  • 2 tablespoons freshly squeezed lemon
  • 1 tablespoon red wine vinegar
  • 2 tablespoons olive oil
  • puff pastry, thawed in the fridge over night
  • a dozen or so mushrooms, sliced
  • a splash or two white wine, optional
  • baby arugula
  • goat cheese
  • 1 egg, lightly beaten, for brushing the pastry
  • pepper

What you do:

  1. Preheat the oven to 425F.
  2. Fry the mushrooms in a little olive oil or butter until slightly browned. Part way through you can add the splash of wine if you are using it, and continue cooking until all the liquid is absorbed or evaporated.
  3. To make the dressing purée the olives with the lemon and vinegar, then slowly drizzle in the olive oil as you purée.
  4. Roll out the thawed puff pastry on a lightly floured surface until it is about half a centimeter thick. Place on a parchment-lined baking sheet. (you could also make this into several squares to serve individual portions.) Brush the pastry with the egg.
  5. Spread a little goat cheese over the surface of the pastry, then lay some baby arugula over the cheese.  Distribute the mushrooms, then add a few bits of goat cheese to the top.  Crack some pepper on the top, and it’s ready to go into the oven.
  6. Bake for about 25-30 minutes, then let it sit for a minute before you cut and serve it.  Drizzle each portion with the olive dressing.

Bon appétit!