Scallion Turkey Meat”balls” with Soy Ginger Glaze


scallion meatballs with soy ginger glaze - trust in kim

As I was making these I swore (a lot) that I’d never make them again. I love baking, and I like cooking, but rolling and frying meatballs – this I do not enjoy. I guess the part that bugs me the most is: no matter how nicely I roll them into perfect little balls, they turn into triangles and other fancy shapes in the frying pan. That’s why I’ve renamed the recipe meat”balls.” I was going to call them meat”shapes” but I thought that might scare people away from this recipe.

But. . . when the results came in, and they were a big hit, I realized that like it or not, I will be making these again. I guess that means I just want to please the people I love.

These got rave reviews at a family party that I brought these to this weekend. I wasn’t sure how they’d go over, as there were a lot of kids (aka picky eaters). I didn’t think they’d like the cilantro in the meat”balls”, but they loved it; maybe it’s the slightly sweet sauce that made it go down so nicely. I really liked how tender the meatballs were.

I got this recipe from the Smitten Kitchen blog, and she adapted it from Canal House Cooking. The only changes I made were to halve the sauce recipe (it was plenty), and grate the ginger instead of chopping.

You can make the sauce ahead of time, and even the meatballs. Because I had to travel a way to my party, I cooked them ahead of time, then just reheated them at the party.

What you need for the Meatballs:

  • 1 pound ground turkey
  • 4 large or 6 small scallions, finely chopped
  • half a bunch of cilantro, finely chopped (about 1/2 cup)
  • 1 large egg
  • 2 tablespoons sesame oil, preferably toasted
  • 2 tablespoons soy sauce
  • freshly ground black pepper
  • vegetable oil

What you need for the sauce:

  • 1/4 cup brown sugar
  • 1/4 cup water
  • 1/4 cup soy sauce
  • 1/4 cup mirin (sweet rice wine), or 1/4 cup sake with 2 tablespoons sugar
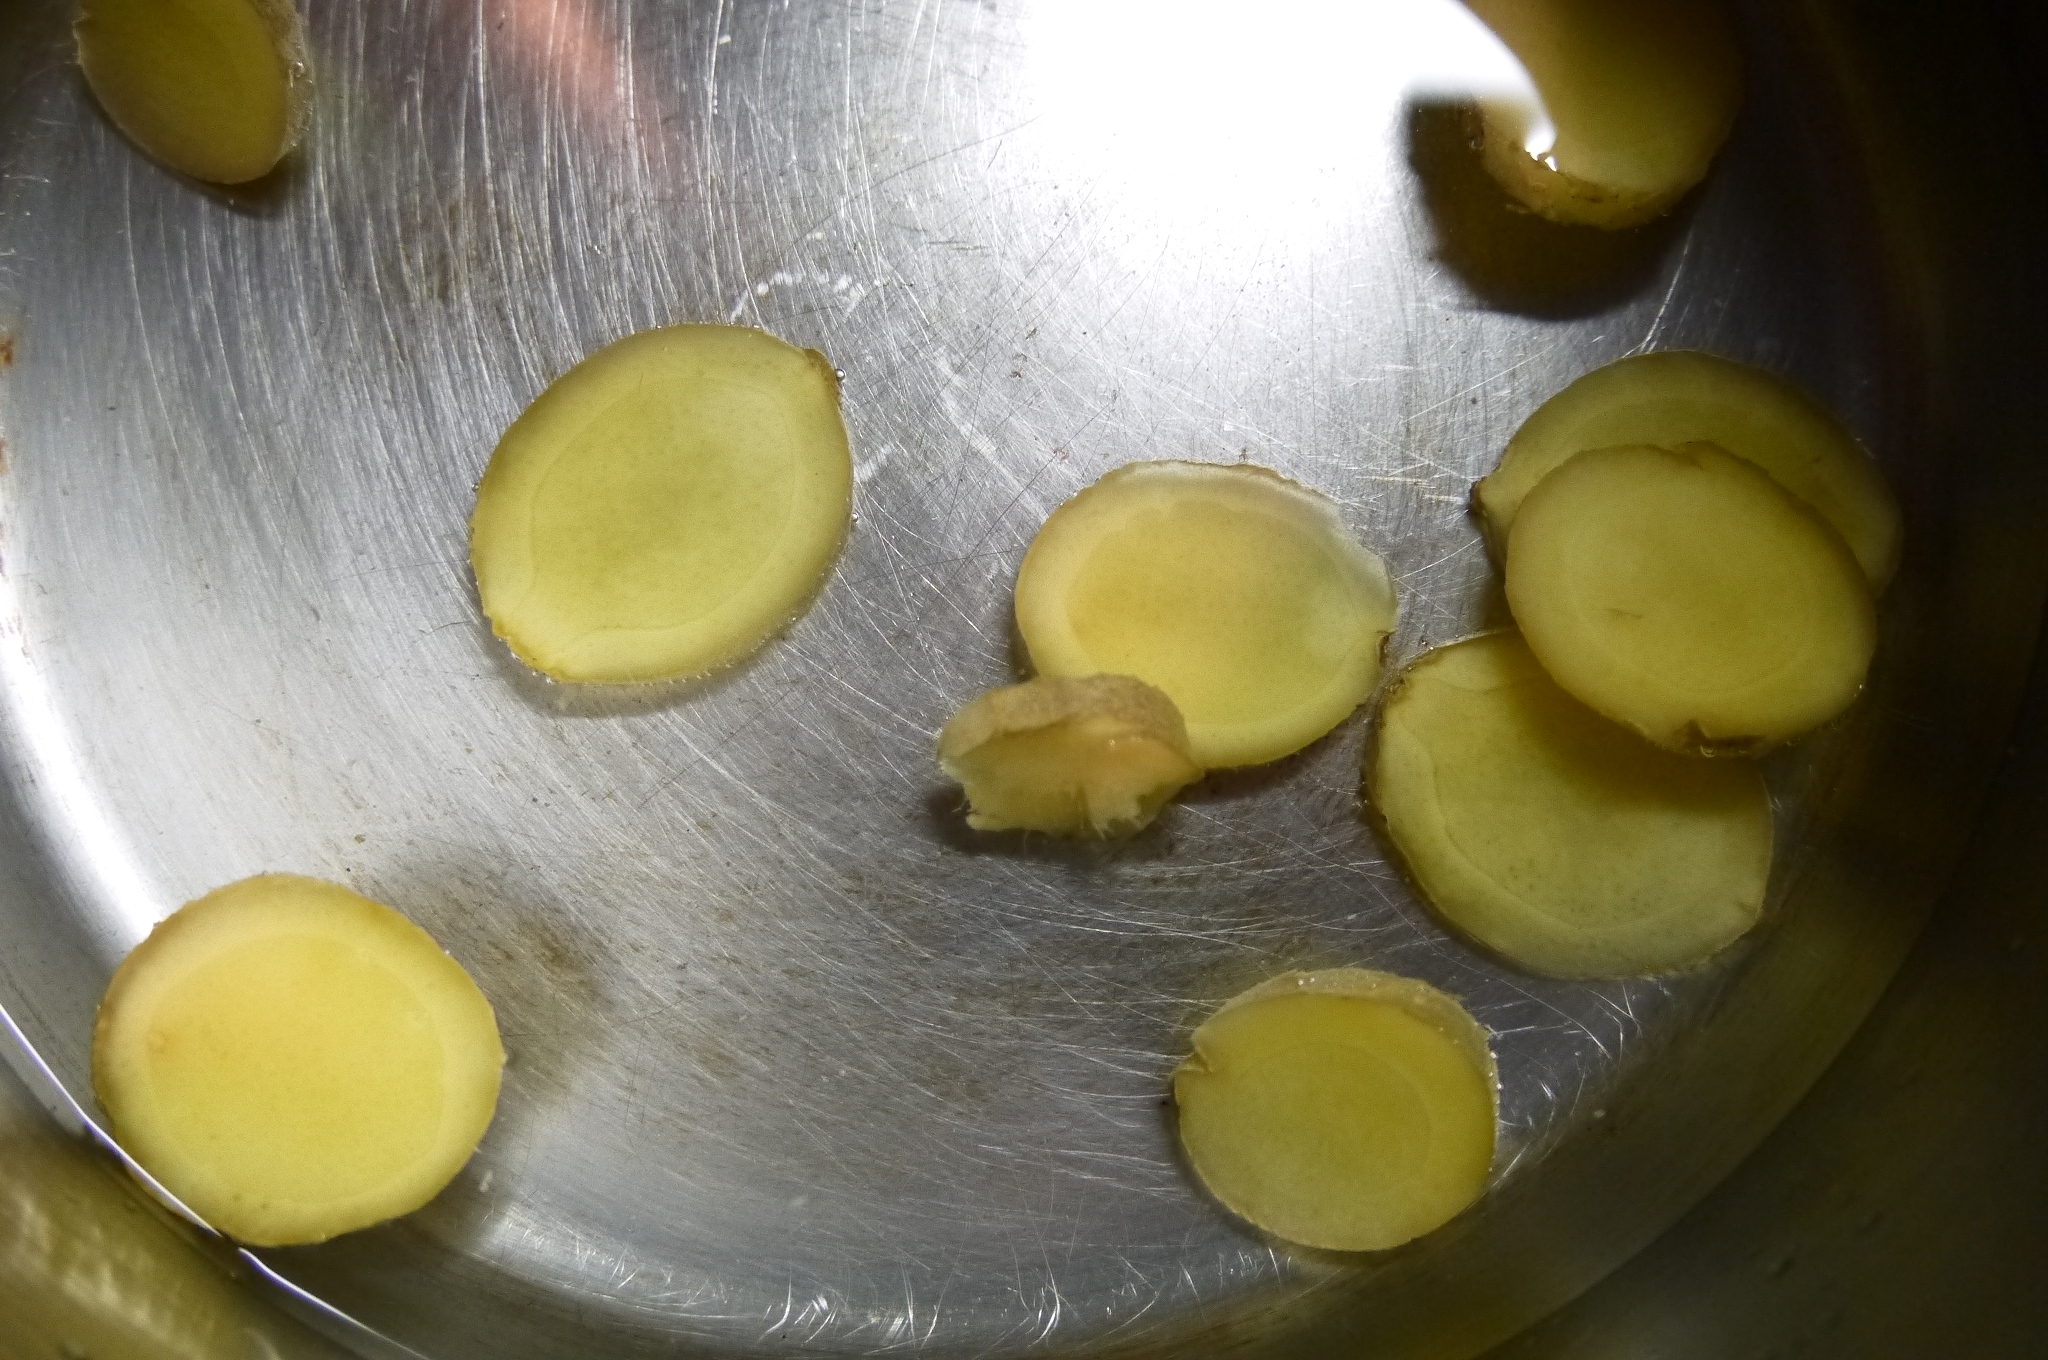
  • 1 tablespoon peeled, grated ginger
  • 1/2 teaspoon ground coriander
  • 2 whole black peppercorns

What you do:

  1. To make the sauce, combine the brown sugar and water in a saucepan and heat until the sugar is dissolved. Add the rest of the sauce ingredients and let it boil, stirring, until it reduces by half. You want a thick liquid that coats the meatballs. Oops, I was supposed to strain it through a sieve – do this, or just remove the peppercorns like I did… oh, maybe I left them in. Sorry whoever got the peppercorns.
  2. Combine the meat”ball” ingredients in a large bowl and use a fork to mix it all together. Form them into balls, about 1 tablespoon in each. Use wet hands to do this.
  3. Heat a little vegetable oil in a frying pan over medium-high heat. Add some meatballs to the pan, not overcrowding the pan; you want some room to move them around. Fry them until they are nice and browned on the outside (key to flavour!) and cooked through.
  4. Place on a (preferably) heated plate and top with sauce. Serve with toothpicks.


Ginger Sparkling Water

ginger drink for nausea - trust in kim

This is what you need if you’re suffering from nausea, or a touch of the flu as I have been. I was drinking ginger tea, but my stomach didn’t seem to like the hot drink. Likewise, cold drinks weren’t working for me, so I made this one room-temperature. I didn’t want to buy ginger ale, because I know there isn’t any real ginger in most of them, plus I don’t want all that sugar. Even though there is no added sugar in this, it seems to have a natural sweetness of its own.

This is a drink you can sip throughout the day, making more as you need it. It will keep you hydrated, and hopefully the ginger will help to ease the nausea a little.

You could just use flat water, and you can add a little lemon if you want.

I keep a knob of ginger in my freezer, so I always have some on hand to cook with if I need it.

I think I’ll be drinking this even when I’m feeling better, because it tastes so good, and it’s easy to make.

What you need:

  • fresh ginger, sliced
  • sparkling or flat room temperature water

What you do:

  1. Pour about 2 cups of tap water into a pot (unless you live somewhere tap water that is not safe to drink).
  2. Add about a dozen slices of ginger to the water and bring to a boil. Simmer for about 10 minutes.
  3. Let the ginger liquid cool down a bit, then put a small ladle-ful into a glass and top it up with sparking water. Taste to see if you want to add a little more ginger water.
  4. Sip it, and refill throughout the day.

You can add more water to the ginger if you start running low; the ginger has more goodness to give if you cook it a second time.

ginger - trust in kim

Lemongrass Chicken Banh Mi Sandwich

lemongrass banh mi - trust in kim

A little while ago I posted a recipe for tofu banh mi wraps, which were quite delicious. On Halloween I ate a lemongrass chicken banh mi from a place that my friend John loves in the West End of Vancouver. It was so tasty that I knew I had to feed John’s addiction for these things by making them for him at my house. So I found this recipe on thedilettantechef, and I love the flavour. Marinating the chicken overnight really infuses it with the lemongrass and other flavours. It is topped it off with some homemade pickled daikon & carrots, cilantro, Thai basil, cucumbers and optional jalapeño, and you’ve got the best sandwich ever.

I’m a bit of a sandwich snob – if I’m going to eat bread it has to be fresh and awesome, and if I’m going to eat a sandwich it has to be made on the spot, and have interesting flavours. Plus it has to contain a reasonable amount of fresh vegetables. No pre-made, plastic-wrapped sandwiches for this princess! This one passes my guidelines easily.

Be careful of the jalapeño – sometimes they are hotter than other times, so you might want to go easy on them if you don’t love them really hot. The jalapeños I bought for this one were so hot that our mouths and lips were on fire, and it took away from the flavour and enjoyment a bit.

For a later, gluten-free version, I used rice paper wraps to make up some sandwiches – loved that too!

What you need for the chicken:

  • 6 boneless, skinless chicken thighs or breasts(~2 lbs)
  • 2 stalks lemongrass, finely chopped
  • 1 clove garlic, finely chopped
  • 1 red Thai chili pepper, finely chopped
  • 1 tablespoon fish sauce
  • 2 teaspoons vegetable oil
  • 2 teaspoons soy sauce
  • 1 tablespoon honey
  • 1/2 teaspoon sesame oil
  • a few teaspoons peanut or canola oil for frying

What you need for the pickled carrot and daikon:

  • 1 large julienned carrot
  • 1 cup julienned daikon (optional)
  • 1 cup warm water
  • 2 tablespoons rice vinegar
  • 2 tablespoons sugar or honey
  • a large pinch of salt
  • a large pinch of red chili flakes

What you need for the sandwich:

  • a fresh crusty baguette
  • cilantro
  • Thai basil (if you absolutely can’t find it you can substitute fresh mint)
  • cucumber, thinly sliced
  • soy sauce
  • mayonnaise
  • Sriracha sauce
  • jalapeño slices

What you do:

  1. The day before you want to make these sandwiches, or at the very least 3-4 hours before, prepare the marinade for the chicken. Cut each chicken breast or thigh into about 3 pieces. Place each piece between a sheet of parchment paper and pound it until it is about 2cm thick. Combine all the marinade ingredients in a sealable container and coat the chicken with the sauce. Refrigerate for 3 hours or overnight.
  2. You can also make the pickled carrot and daikon ahead of time. It needs at least a few hours to pickle the vegetables. Combine all the ingredients in a jar, put the lid on it and shake it up a bit, then refrigerate. If the liquid doesn’t quite cover the vegetables, make up a little more of it.
  3. To prepare to build the sandwiches, get the toppings ready. Chop the cilantro and Thai basil, and slice the cucumbers and jalapeño pepper. Add a little bit of Sriracha sauce to the mayonnaise and stir it up. Have the soy sauce and pickled veg on hand, and slice the baguette open hotdog style. I like to let people make their own sandwich, so I just lay all the ingredients out on a platter.
  4. To prepare the chicken, heat a heavy frying pan on medium high and add a little bit of the peanut or canola oil. When it is hot add some of the chicken, not crowding the pan. Fry until the first side gets some dark colour, just a few minutes, then flip it and fry the other side until cooked through.
  5. To serve, sprinkle a little soy sauce on the inside of the bread (you might remove a little bit of bread from the inside before doing this), and spread on a little bit of Sriracha mayo. Add the chicken and some of each of the toppings as you desire, and enjoy immediately.

Salty Roasted Pumpkin Seeds

roasted pumpkin seeds - trust in kim

Better late than never! I bought a pumpkin for Halloween and never got around to carving it 😦  My excuse is that I was working on my costume, but really I was just too busy and never got around to carving it in time for the holiday. A craving for some salty goodness encouraged me to find the time to do this, and I realized it really didn’t take long at all – carving the pumpkin would have taken some time, but making these roasted seeds did not.

The secret to these is boiling them in salty water before cooking. This way there is salt throughout the seeds and evenly distributed, not just sprinkled on top.

You could also add some chill or other spices, but I’m a bit of a purist on this one. I only make them once in a year, and share them, so I only get a little taste once a year.

What you need:

  • seeds from pumpkin (mine contained about 1 cup of seeds)
  • salt

What you do:

  1. Remove the seeds from the pumpkin and get rid of any stringy bits.
  2. Preheat the oven to 400F. Place the seeds in a pot with 1 cup of water and 1 tablespoon of salt. Bring to a boil and simmer for about 10 minutes.
  3. Strain the seeds and place on a baking pan. Salt lightly, then place in the oven. Roast for about 10 minutes, removing from the oven once halfway through to move them around a little.
  4. Remove the seeds from the oven when they are lightly browned and let them cool completely before storing in as airtight container.


cereal box character halloween costume - trust in kim


Cauliflower Leek Soup

cauliflower leek soup

Because of my ongoing quest for soup recipes, and because of my newly acquired blender I have been searching for more puréed soup recipes. The ingredients are really simple, so in my opinion the success of this recipe depends largely on using a quality broth. I used my homemade chicken stock, but you could use a flavourful vegetable one to make it a vegan recipe. I make up a big batch of stock, then freeze it in portions to use in future soup recipes. A bit of work to do ahead of time, but it’s really handy and makes better soups.

I found this recipe on freshtart.com, and I made two changes: I cut the amount of oil in half (1 tablespoon per portion is too much for me), and I didn’t serve it with the fried shrimp on top, although this sounds yummy.

Serves 4

What you need:

  • 2 tablespoons extra-virgin olive oil
  • 1 large leek, washed and thinly sliced
  • 2 heaping cups cauliflower florets
  • 1 garlic clove, minced
  • 3 cups chicken broth (homemade is always best)
  • 1 bay leaf
  • 2 generous handfuls of spinach
  • 2 tablespoons chives, minced
  • juice of 1 lemon
  • sea salt to taste

What you do:

  1. Heat the olive oil in a large saucepan, add the leek to it and sauté for 5 minutes.
  2. Add the cauliflower and garlic and sauté for 5 more minutes.
  3. Add the chicken broth and bay leaf and bring to a boil. Simmer for 10-15 minutes, or until the cauliflower is very soft. Remove from the heat and allow to cool slightly. Remove the bay leaf.
  4. Place the spinach and chives in the blender, then add the cauliflower and broth and purée until smooth. If the liquid is hot it will make a bit of an explosion, se be careful. You could purée on very low to start, then allow some steam to escape, and then continue until it is smooth.
  5. Add the lemon juice and salt to taste. Drizzle with a little olive oil to serve, and add some minced chives for garnish if you like.

Roasted Vegetable Salad with Roasted Garlic Dressing

roasted vegetable salad - trust in kim

Please trust me on this one – this is the perfect fall and winter salad. It is so flavourful because of the combination of roasted vegetables, and the roasted garlic dressing is to die for. I could eat this every day. It makes a great starter, but throw the optional nuts on and it can work as a main course.

There were two surprises for me in this recipe: I’ve never really enjoyed turnips before, and I never imagined roasting apples with other vegetables, but I enjoyed every bite.

I made 1/4 recipe of the dressing since this was the first time I was making it, just in case I didn’t like it. I will definitely make more next time, as I imagine it would be good on top of many other foods. If you come up with other ways to use this dressing, please leave a comment so I can try it too. It will keep in the fridge for about a week.

This recipe  comes from Candle 79 restaurant in Manhattan, as printed in Brendan Brazier’s Whole Foods to Thrive. Thanks for sharing!

Serves 4

What you need for the dressing:

  • 1/4 cup garlic cloves, peeled
  • 1/4 cup extra-virgin olive oil
  • 2 tablespoons water (or more)
  • 1 tablespoon balsamic vinegar
  • 1 tablespoon sherry vinegar or red wine vinegar
  • 1 tablespoon white miso
  • 1/4 teaspoon dried oregano
  • tiny pinch of nutmeg
  • 1/4 teaspoon sea salt
  • 1/2 teaspoon freshly ground black pepper

What you need for the salad:

  • 1 fennel bulb, trimmed and cut into bite-sized pieces
  • 2 cups new potatoes, cut into bite-sized pieces
  • 1 cup baby turnips, cut into bite-sized pieces
  • 2 medium-sized beets, cut into bite-sized pieces
  • 2 medium apples, cut into bite-sized pieces
  • 1 teaspoon sea salt
  • freshly ground black pepper
  • 3 tablespoons extra-virgin olive oil
  • arugula
  • toasted walnuts or pecans (optional)

What you do:

  1. Preheat the oven to 350F.
  2. Place the peeled garlic cloves in a baking dish and add olive oil until they are covered. Cover the dish with foil and roast for about 25 minutes. When they have cooled slightly, remove the garlic and put it in a blender (I used an immersion blender). Keep the olive oil to use at another time, like for a stir fry or tomato sauce.
  3. Add all the other ingredients for the dressing to the blender, and blend until smooth. Add a little more water if necessary.
  4. When the garlic is roasted turn the oven up to 400F.
  5. Place all the cut vegetables and apples in a large bowl and toss with olive oil, salt and pepper.
  6. Spread the vegetables in a single layer on a baking sheet and roast for about 35-40 minutes, until tender. Mine were slightly browned, which I really enjoyed.
  7. Toss the vegetables in about 2 tablespoons of the roasted garlic dressing.
  8. Arrange the arugula on plates and top with the roasted vegetables. Sprinkle with some nuts if you are using them, and add a little more dressing if you wish.
  9. Serve immediately!

Enjoy!

roasted vegetables - trust in kim

John’s Tuna Sashimi

Tuna Sashimi - trust in kimOh, my mouth is watering as I type this.  This is one of the simplest and most pleasant ways to eat tuna.  And one of my favourite things to eat, period.

My friend John brought a piece of frozen tuna up to the cabin this summer and served it with buckwheat soba.  It is so tender and tasty, and takes only minutes (a minute?) to prepare.  The vital factor in the success of this dish is the quality of the fish. Only the very best will do. If you’re in Vancouver Fujiya on Clark, or Seafood City in the Granville Island Market are sure bets to get amazing quality tuna.

What you need:

  • the freshest sushi-grade ahi tuna you can find
  • spring onions/scallions
  • soy sauce
  • chopsticks
  • small bowls for soy sauce

What you do:

  1. If the tuna is frozen then take it out of the freezer about an hour before you want to serve it.  If it is fresh you will want to put it in the freezer for about 20 minutes before serving.  This makes it easier to cut.
  2. Slice the tuna with a very sharp knife. Arrange the tuna on a plate.
  3. Chop the green part of a spring onion and sprinkle them on top of the tuna.
  4. Each person should have a small bowl of tuna to dip their tuna in. Serve immediately.

Wondering what to do with the root and white part of the spring onion? Did you know that you can grow them to use a few days later, or just enjoy watching them grow? Here are the simple instructions.


Nicoise Salad

nicoise salad - trust in kim

Niçoise salad makes a great meal salad. I made this one in the summer, and am finally getting around to posting it now.  Of course you can make it in the winter, but just make sure to try to get the freshest tasting ingredients.  A good bet for tasty winter tomatoes is to buy cherry tomatoes; they seem to have more flavour. It is still September, so I still have a few tomatoes on the vine that I’m going to use to make this again soon.

Oops! I never measure when I make salad dressings, so I’ve given approximations. When the dressing is mixed you’ll have to taste and see if you need a little more of anything.

Part of what makes this a successful recipe is that you add some of the dressing to the potatoes while they are hot. When they are still hot they absorb the dressing really well. No more of those cold, bland potatoes sitting on the side of your niçoise salad!

What you need for the salad:

  • one large free-range egg per person
  • tomatoes
  • fresh green beans, or a mixture of green and yellow
  • tender salad greens
  • new potatoes, cut in half
  • olives (niçoise if you can find them – I could not – kalamata work too)
  • (niçoise salad often has tuna on it; add that if you wish)

For the dressing:

  • 2 tablespoons finely chopped onion
  • 1 tablespoon Dijon mustard
  • 1/2 teaspoon sugar
  • salt
  • freshly ground pepper
  • white wine vinegar
  • olive oil

What you do:

  1. Begin by placing the eggs in a small pot; cover with a lid and let this heat up until they have just barely reached a boil.  Now turn off the heat, keep the lid on and set the timer for 12 minutes. Pour the hot water out of the pot and place the eggs in cold water. There are many methods for boiling egg – in this one we don’t actually boil it; boiling an egg makes it tougher.  12 minutes works for a large egg; use more or less time with different sizes of eggs, and longer if you are at a high altitude. When they have cooled (I actually like to add them when they are still slightly warm) you can peel and quarter them.
  2. Place the halved potatoes in a pot with some salted water and bring to a boil.  Cook until you can pierce the potato easily with a sharp knife. You will need to prepare the dressing while they are cooking.
  3. Chop the onion.  Add the Dijon, sugar, a pinch of salt and a few grindings of pepper to a bowl. Mix the onion into this.  Now slowly add a few tablespoons of white wine vinegar as you mix with a fork until combined.  Drizzle in a few tablespoons of olive oil, constantly mixing with the fork, and stopping to taste as you go. Add as much olive oil as you think tastes good, then adjust the salt and pepper to taste.
  4. When the potatoes are cooked, drain the water.  Keep the potatoes in the pot and add about half of the dressing to them while they are still hot, and then give them a gentle stir.  Set them aside to cool.
  5. Bring another liberally salted pot of water to a boil while you clean and cut the ends off the beans. Some of the salt will absorb into the beans as they cook. Have a large bowl of ice water waiting for the beans when they come out. Cook them for only a few minutes; they should still be bright green and tender-crisp. I say better to err on the side of undercooked. As soon as they are done, drain the boiling water and add the beans to the ice bath. Leave them there until completely cooled.  This stops the cooking process, so you don’t end up with sad wilted beans. I like to drain them and then roll them in a clean dish cloth to dry them off.
  6. Wash the tomatoes and cut into wedges if you are not using cherry tomatoes.
  7. Toss the salad greens with a little bit of dressing, then arrange on the plate.  Decorate with the beans, potatoes, eggs tomatoes and olives. You can add a drizzle more dressing if you want. I like to add another little sprinkle of salt and pepper to the top.


Roasted Pepper and Tomato soup

roasted pepper and tomato soup - trust in kim


This is a flavourful, somewhat spicy, and quite healthy soup – a perfect storm for me.

I created this soup to use up some chicken stock and red peppers that I had in my fridge, as well as some fresh corn that a friend brought over.  I’ve never made such a big batch of chicken stock, and ran out of room in my tiny freezer – this was a great way to use it up.  It’s got roasted bell and poblano peppers, as well as a dried ancho chile pureed into the tomatoes – I think the anchos are what takes this recipe to the next level, and I will definitely use this strategy of adding flavour into recipes in the future.

This would be great topped with avocado, or cilantro, or some Mexican crumbling cheese. And a wedge of lime to squeeze in.

Just a word about the roasted peppers: I know that some people like to get rid of every trace of the skin by washing the peppers, but I like to keep little bits of the skin on. This way it reminds me of the amazing sauces I ate in Mexico.  You always knew they were homemade and delicious if they had those flecks of black skin in them.

What you need:

  • 1 dried ancho chile
  • 1 – 398mL/14 oz fire roasted tomatoes
  • 1 red, orange or yellow bell pepper
  • 1 poblano pepper
  • olive oil
  • 1/2 a large sweet onion, diced
  • 1 chicken breast or 2 thighs (omit for vegetarians!)
  • 3 cloves garlic, chopped
  • 1 – 425 grams / 15 oz can of pinto beans, drained
  • 2 ears of fresh corn (substitute with peaches and cream canned corn  – I don’t personally like frozen)
  • 4-6 cups chicken broth (substitute vegetable broth)
  • optional:
  • lime
  • avocado
  • Mexican crumbling cheese
  • cilantro
  • hot sauce for those who like it

What you do:

  1. Roast the peppers over a gas stove or barbecue, turning frequently with tongs until all the skin is charred and black.  Place in a container fitted with a lid until it cools a bit, 10-15 minutes.
  2. Roast the dry ancho chile very briefly over the flame, then remove the stem and seeds.  Add this to a blender along with the can of tomatoes.  Puree until smooth.
  3. In a large pot over a medium flame drizzle in a little olive oil (I use less than 1 tablespoon).  Add the onions and cook, stirring from time to time, for a few minutes.  Add the garlic and cook for another few minutes, but don’t let the garlic brown.
  4. Add the chicken, if you are using it, and let that cook for a few minutes before pouring in the broth and tomato/ancho mixture. Let this simmer for 15-20 minutes. Remove the chicken and chop it up, then add it back to the soup.
  5. Meanwhile, remove the blackened skin from the peppers, then remove the stem and seeds.   Chop the peppers, then add them to the soup.
  6. Drain and rinse the beans and add them to the soup.  Cut the corn off the cobs and add that to the soup.  Let this simmer for a few minutes, then season with salt and a little pepper to taste.
  7. Garnish with toppings of your choice.

Green Chile Chicken Soft Tacos

green chile chicken soft tacos - trust in kim

Last weekend I got together with some friends and made an amazing Mexican meal.  We made our own soft corn tortillas with various salsa toppings, and this awesome chicken filling.   We also had some homemade refried beans and a nice light jicama salad. And of course some beer – Negro Modelo is my favourite Mexican beer because it is a little darker than most.

This is another Rick Bayless recipe, from his Mexican Everyday cookbook.  So far every recipe of his that I’ve tried has been so delicious, and the meals I had at his restaurant Xoco in Chicago were out of this world.

You can buy the tortillas if you don’t want to make them; just warm them up before serving. The homemade ones were the best, but a lot of work. If you get everyone involved and have a bit of an assembly line going it could be fun (well, I think so, but other people seemed to disagree that this this might be an option for next time).

This recipe serves about 4 people.

I like for people to be able to dress up their tacos to their liking, so it’s great to have a variety of toppings.  Here’s a list of possibilities (you don’t have to do them all!); I would choose at least two salsas and a few other items.

What you need for the chicken filling:

  • 2 large poblano peppers
  • 2 tablespoons vegetable or olive oil
  • 1 large white onion, sliced about 1/4 inch thick
  • salt
  • about 1 pound boneless skinless chicken breasts
  • freshly ground black pepper
  • 3 tablespoons fresh lime juice
  • 2 garlic cloves, minced
  • jalapeno or other hot pepper slices

What you do:

  1. Roast the poblano peppers over a gas stove or a barbecue, turning often with tongs.  The skin should become all black.  Place the peppers in a sealable container and leave for about 15 minutes to cool and let the skins soften.
  2. Turn your oven on very low.
  3. Heat 1 tablespoon of oil in a large skillet over medium-high heat. Add the onion and cook, stirring, until they are golden but still have a bit of crunch to them. Place these in a heatproof container and put in the oven to keep warm.
  4. Rub most of the blackened skin off the peppers and remove the stem and seeds.  Cut into 1/4 inch strips and add to the onions. Season with salt and return to the oven.
  5. Sprinkle the chicken breasts with salt and pepper. Place the skillet on medium heat and add 1 tablespoon of oil. Lay the chicken in the pan when the oil is hot. Brown on one side for about 5 minutes, then the other for about 4 minutes. When the meat has cooked add the lime juice and garlic to the skillet. Cook for about a minute, turning the chicken to coat in the lime juice, until the lime had formed a glaze over the chicken. (We didn’t cook the chicken all the way through in the pan – we added the garlic and lime and let it glaze the chicken, and we threw the chicken on the grill before slicing it – this gave it that nice smoky flavour).
  6. Cut the chicken into 1/4  inch strips and toss with the onions and poblano peppers. Taste and see if you need to add more salt.
  7. Serve in fresh warm tortillas with a choice toppings.

homemade tacos - trust in kim