Almond Cake

Almond Cake - trustinkim

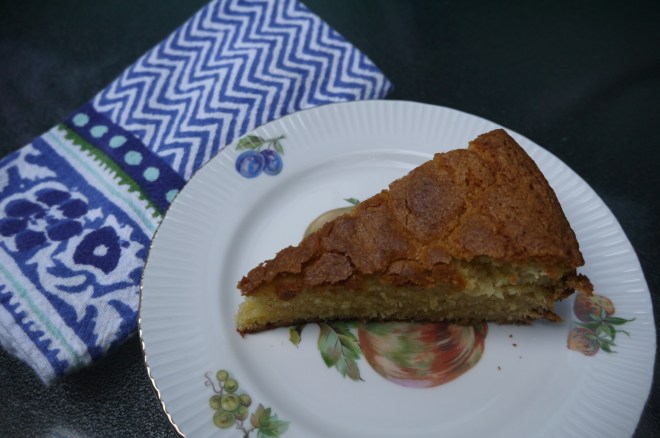
At Christmas I made the best-ever stollen, and had a whole lot of marzipan left over that have been storing in the freezer. Recently I searched for the perfect way to use the marzipan, and found a lot of sites where people raved about this Almond Cake recipe from Amanda Hesser’s book Cooking for Mr. Latte. I used the recipe from this site, and I can see why so many people raved about it. The cake is quite moist, has an amazing sweet almond flavour.

To make this cake you will need to plan ahead by giving refrigerated items time to come to room temperature.

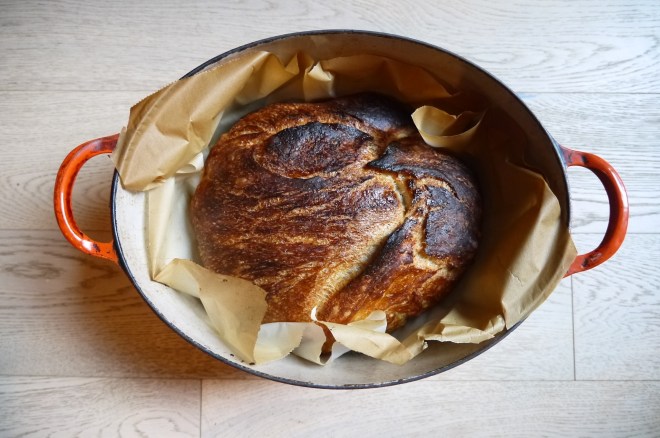
The recipe calls for a springform pan, but you could try using a loaf pan. When using a springform pan the cake sinks in the middle, and that might not happen in a loaf pan – please let me know if you do experiment with it!

This cake keeps well for a week or so unrefrigerated. I froze half of it and pulled it out a week later when I needed it.

What you need:

  • 1 cup butter, room temperature
  • 1 cup sour cream, room temperature
  • 1 teaspoon baking soda
  • 2 cups all purpose flour, sifted and then measured
  • 1/2 teaspoon salt
  • 1 & 1/2 cups sugar
  • 7 ounces almond paste, cut into pieces (I used marzipan)
  • 4 egg yolks
  • 1 teaspoon almond extract
  • optional: icing sugar for sprinkling over the cake before serving.

What you do:

  1. Line a 9-inch springform pan with parchment paper and butter it. Preheat the oven to 350F.
  2.  Mix the sour cream and baking soda together in a small bowl.
  3. Sift the flour and salt.
  4. Cream the butter and sugar until fluffy. Add the almond paste little by little, then beat for 8 minutes.
  5. Beat the egg yolks in one at a time, then beat in the almond extract and sour cream mixture.
  6. Reduce the mixer speed to low and gradually add the flour and salt, beating just until combined.
  7. Pour the batter into the springform pan and use a spatula to even out the top.
  8. Bake immediately for about an hour; it will be done when you press the top lightly and it returns to its original shape. I rotated my pan carefully half way through baking so it would bake evenly.
  9. After removing the cake from the oven, allow it to cool completely on a wire rack.
  10. To serve, remove the ring from the springform pan, and if you wish you can sift a little icing sugar over the top.


17th Century Italian Cucumber Salad

cucumber salad - trustinkim

I stumbled upon this recipe while searching for recipes to use the cucumbers that are growing in my garden. This blogger has a love for old recipes, and published this one, which is her version of a 17th century dish. She says it is “An interpretation of a dish described in Salvatore Massonio’s Archidipno overo dell’insalata e dell’vso di essa, published in Venice in 1627.”

It’s a really simple recipe, as are many of the best vegetable recipes. It should be prepared an hour or two before you plan to eat it.

I substituted sweet onion for regular, as I often do, and I peeled my cucumber because the peel on this variety is a little too bitter for me. In the original recipe the basil is added before refrigerating, but I like to add it at the end so that it retains its green colour. My version of the recipe is for two, and the measurements are approximate.

Please, please, please, don’t use dried basil for this recipe. It’s just not right. It really doesn’t taste like fresh basil. If you have no fresh basil, I’d opt to leave it out. You can freeze basil, so it retains the fresh flavour; if you use previously frozen basil in this salad it will be darker than fresh basil, but will still taste good.

After eating the salad I used the remaining dressing to pickle some cucamelons – these adorable little cucumbers that resemble a miniature watermelon. It was this summer’s garden experiment. The verdict? Cute, but I prefer a regular cucumber. The peel to inside ratio is a little high on the peel side.

cucamelon salad - trustinkim

What you need for two people:

  • 1 small cucumber or 1/2 an English cuke
  • a small chunk of an Onion, sliced very thinly
  • 1-2 tablespoons extra virgin olive oil
  • 2 teaspoons white wine vinegar
  • a few pinches of salt
  • a few grinds of fresh pepper
  • 1 tablespoon fresh basil, finely chopped

What you do:

  1. Combine the olive oil, vinegar, salt and pepper in a bowl or large jar.
  2. Cut the cucumber in half, then slice it lengthwise. Slice as thinly as you can, using a mandoline if you have one. Cut the onion in half and slice it as thinly as you can. Place the cucumber and onion in the container with the dressing and toss it well so it’s all coated.
  3. Refrigerate for an hour or two.
  4. Before serving chop the basil finely and stir it in.

Enjoy!

No-Knead Rye Bread

no-knead rye bread - trustinkim

Yes, this crusty beauty was soooo delicious! It’s a slight variation on my usual recipe; I’m always trying to replicate my Oma’s Russian Black Bread, but I can never get it quite right. All the experimenting certainly is delicious, though!

So for this version I used part dark rye flour, and used a coating of oil on the outside of the bread for that really crusty finish – awesome results! The bread has just the right density, with a bit of chewiness to it, and the crust is pretty thick with a crisp outer layer. Excellent with or without butter! A little salted butter is magic, though!

If you’re not familiar with the no-knead concept, here’s the gist of it.

A) It’s delicious. Like the bread you pay $6 for at the Farmer’s Market. Or the stuff you eat when you’re on holiday in Europe, and you wonder: why eat any other kind of bread? I know, I wonder the same thing.

B) It’s really cheap

C) It’s so easy. Yes, you have to plan ahead by mixing the dough (2 minutes) then wait (12-18 hours), then wait (an hour or two), then bake (under an hour), then eat (worth it all!). So the actual hands-on time is minimal; you just have to be home to do a few of the steps.

D) It’s SOOOO delicious!

Here are a few ideas for bread toppings: creamy homemade hummus, tzatziki, grilled Japanese eggplant, sun-dried tomato and basil cream cheese spread, or sopping up the sauce in these delicious ouzo prawns. Please share your favourite bread toppings! I’d love to hear from you.

What you need:

  • 1 cup dark rye flour
  • 2 cups white flour
  • 1 & 1/4 teaspoons salt
  • 1/4 teaspoons yeast
  • 1 & 1/2 cups water (I use slightly warm water in winter)
  • canola oil for coating the bread

What you do:

  1. Combine the flours, salt and yeast in a bowl. Add the water and mix; add more water if needed until you have a wet, sticky dough.
  2. Cover the bowl with plastic wrap or a lid (not airtight), and let sit for 12-18 hours in a warm-ish place, and out of direct sunlight. The dough should double in size and become dotted with bubbles. If your house is a little on the cool side you will likely need the longer rising time. I put mine on top of the freezer, which gives off a bit of heat.
  3. Cut a large piece of parchment paper and place it inside a large bowl, roughly forming it to the bottom of the bowl. Coat the top of the dough in oil using your hands, then turn it out into the parchment paper-lined bowl. Coat the new dough surface dough with oil. Cover loosely with a lid or with some plastic wrap, tucking it in loosely around the edges. Let the dough sit for 1-2 hours, until it has doubled in volume.
  4. About 1/2 hour before you want to put the bread in the oven, set the temperature to 475 F  and place your baking pot on a rack in the lower third of the oven. Let the pot heat up, and when the oven has reached 475 F, remove the pot from the oven. Remove the lid from the dough and pick up the dough by gathering together the corners of the parchment paper. Carefully (remember the pot is smoking hot!) place the dough in the parchment paper into the pot.
  5. Put the cover on the pot and bake for 30 minutes while the bread forms its nice thick crust. Remove the lid from the pot and continue to bake for 15-20 minutes more.  The bread should become a deep brown when it is done, and if you tap on it, it should sound hollow.  Remove the pot from the oven, lift the bread out of the pot, remove the parchment paper, and place it on a rack to cool. It needs to cool for about 1/2 an hour before slicing.
  6. This bread has no preservatives, so if you don’t use it up of the second day, it should be frozen.

Japanese Grilled Eggplant

Japanese Roasted Eggplant - trustinkim

I’m always looking for new ways to prepare vegetables, and with barbecue season finally arriving, this seemed like a great dish to try out. It’s got a slightly sweet sauce that glazes the soft eggplant. I will definitely be making this one again.

I found the recipe on this site, where they suggest serving the eggplant in an udon noodle dish. We ate it on its own as an appetizer, but I think it might also be good on small slices of bread, used like a spread.

What you need:

  • 3 japanese eggplants (the long skinny ones)
  • 2 tablespoons red miso
  • 2 tablespoons mirin (or a sweet rice wine)
  • 2 tablespoons tamari
  • 1 tablespoon brown sugar
  • vegetable oil for griling
What you do:
  1. Whisk the miso, mirin, tamari and sugar together in a small saucepan. Over medium heat, whisk until the mixture comes to a boil. Continue to cook briefly, just until it has thickened. Set aside to cool.
  2. Trim the stems from the eggplants and halve them lengthwise. Cut slits into the flesh of the eggplants, cutting almost through to the skin, but being careful not to slice all the way through it.
  3. Preheat the grill. Brush the fleshy side of each eggplant lightly with oil. When the grill is hot, place the eggplant cut-side down, on the grill. Cook for about 3 minutes; the eggplant should have grill marks on the fleshly side, and be somewhat softened.
  4. Turn the eggplants skin-side down, and spread the sauce over the fleshy side, all the way to the edges. Cook for about 3 more minutes. The eggplant should be very tender, and the sauce bubbling up.
  5. Enjoy!

japanese grilled eggplant - trustinkim

Leek, Mushroom and Goat Cheese Tart

leek, mushroom and goat cheese tart- trustinkim

This is one awesome dish! The puff pastry gets rolled out and baked first, then comes a layer of goat cheese, with egg to thicken it, is added and baked. Finally, the vegetables are piled on, topped with more goat cheese, and then finished under the broiler. A little bit of freshly cracked pepper finishes it off before it gets devoured. I brought this to a potluck while ago and it was a big hit. People have been patiently waiting for me to post the recipe… so here it is, finally.

The mushroom/leek/fennel part can be done ahead of time if you want to have everything ready to go before you prepare the tart. You need to defrost the puff pastry ahead of the time; following the instructions, I put it in the fridge over night, but you may also defrost for just two hours before cooking.

I found the recipe here, and I believe I used the recipe without changing a thing (except the freshly ground pepper on top) – a rare occurrence! Oh, I did do one thing differently; I burned the crust ever so slightly. But it was still delicious. To avoid this next time I will rotate the pan part way through baking, and have some tin foil on hand to cover any parts of the pastry that seem to be getting too dark.

What you need:

  • 1 small bulb fennel
  • 2 medium leeks,  halved lengthwise and rinsed carefully
  • 16 medium white mushrooms
  • 1 tablespoon plus 1 teaspoon olive oil
  • Salt and pepper
  • 1 package puff pastry (I used Le Baguette et l’Echalotte’s), defrosted according to package directions
  • 3 eggs
  • 225 grams (8 ounces) goat cheese (substitute cream cheese if you dislike goat cheese)

What you do:

  1. Preheat the oven to 400 F. Trim the green top and root off the fennel; quarter it from top to bottom. Using a mandoline or knife, slice the fennel, and then the white and light-green parts of the leeks, as thinly as you can.
  2. Clean and slice the mushrooms.
  3. Heat 1 tablespoon of olive oil in a frying pan over medium heat; add the fennel and leeks and sauté until they are just tender, about 6 minutes. Place the fennel in a bowl and set aside.
  4. Heat the remaining teaspoon of oil in the frying pan over medium-high heat; add the mushrooms and sauté until they are browned, about 5 minutes. Combine the fennel mixture with the mushrooms and cook briefly. Season with salt and pepper to taste and remove from the stove top.
  5. Lightly flour your countertop and unfold the pastry onto it. Cut the pastry in half lengthwise to create two long rectangles. Roll out to about 12 x 30 cm (5 x 14 inches) and place on baking sheets. Trim about 1cm off the edges all around. Break one of the eggs into a small bowl and beat it slightly. Brush the edges of the pastry with the egg, then use the trimmed pieces to create a raised border around the edges. Brush the whole surface of the pastry with the egg. Prick the inside surface of the pastry all over with a fork, then bake for about 10 minutes until it is a pale gold colour.
  6. While the pastry is in the oven, use a fork to beat 170 grams (6 ounces) of the goat cheese with the remaining two eggs. If the pastry has puffed up, press it down gently, then spread the goat cheese mixture onto the interior of the pastry. Bake for about 4 minutes, until set.
  7. Spread the vegetable mixture over the tart, then crumble the rest of the cheese on top. Broil for a few minutes just before serving, watching carefully so it doesn’t burn. Top with freshly cracked pepper and serve immediately.

Thai Salmon Burgers

thai salmon burger - trustinkim

This is a really great salmon burger recipe, tender and full of flavour. Add a little salad and you’ve got a great little meal. I served them with a refreshing cucumber salad. They were pretty quick to whip up for a weeknight dinner.

I like the idea of making my own patties, partly so I know the fish is really fresh, and so I can adjust the spices, depending on the preferences of the people eating them (including e!). It’s easy enough to chop up the salmon, but you could buy ground salmon if you prefer. I thought the patties would fall apart when frying, but they stayed together nicely.

I found the recipe here; I just added lime zest, used a little less curry paste, and made a lime mayonnaise to serve the burgers. You could also add a little tomato or other toppings to the burger as you see fit. I like my buns toasted, and just a little lime mayo and a slice of tomato.

Enjoy! This recipe serves two people.

What you need for two salmon burgers:

  • 2 boneless, skinless salmon fillets, about 275g in total
  • 2 teaspoons Thai red curry paste
  • 4 cm piece fresh root ginger, grated finely
  • 1 tsp soy sauce
  • zest of one lime
  • 1/4 bunch cilantro, finely chopped
  • 1 tsp vegetable oil for cooking
  • two buns

What you need for the mayonnaise sauce:

  • a few tablespoons of mayonnaise
  • a tablespoon or so of lime juice
  • salt and pepper to taste

What you do:

  1. Finely chop the salmon. Add the curry paste, ginger, soy sauce, lime juice, and finely chopped cilantro and mix until well combined (or use a food processor). Refrigerate for about 10 minutes.
  2. Prepare the mayonnaise sauce by combining the mayonnaise, lemon juice, and a little salt and pepper.
  3. Add the oil to a pan on medium heat, then fry the patties 4-5 minutes per side.
  4. Enjoy them while they are hot!


Hot Fudge Sauce

ice cream and hot fudge sauce - trust in kim

We are finally having our first warm days in Vancouver, so I thought it was the perfect time to post a recipe featuring ice cream.  I’ve made this hot fudge sauce a few times, but never got a photo I liked. So here it is. Easy to make, and a crowd-pleaser. It was served on vanilla ice cream, but it’s also delicious on a brownie or this amazing chocolate rum cake. There was a little bit of the eating it right off the spoon going on too.

I found the recipe here, and the only change I made was to cut the recipe in half. It will keep in the fridge for a few weeks, but even this portion was more than eight people used for one dessert.

Enjoy!

What you need:

  • 125mL cocoa powder (1/2 cup)
  • 125mL granulated sugar (1/2 cup)
  • 125mL whipping cream (1/2 cup)
  • 70mL salted butter, cut into pieces (2 tablespoons)
  • 7mL pure vanilla extract (1& 1/2 teaspoons)

What you do:

  1. In a medium-sized pot whisk together the cocoa and sugar. Whisk in the cream, then turn the heat on to medium.
  2. Whisk the mixture as it warms, then add the butter. Stir until it melts.
  3. Remove from the heat, then add the vanilla and stir to combine.
  4. Let the sauce cool for  a few minutes, then pour it into a jar.
  5. You can store this in the fridge for a long time, but before using it, scoop out the amount you need and either microwave it for a few seconds, or heat it in a small pot until it is warm.

Dark Chocolate Chip Power Cookie

chocolate chip oat and seed cookie - trustinkim

These cookies are a delicious detour en route to finding the perfect cookie. My friend John set me on a mission to recreate the Avocado Chocolate Chip Cookie from Hello Toast Restaurant in Kamloops, BC. After one big fail (which people said was good, but too different from the original for me to be happy with it), these are a crunchier version of what will eventually be the perfect cookie. They are seedy and filled with dark chocolate chips. But I’m looking for a cookie that is crunchy on the outside, and softer on the inside…. and the experimenting is fun and delicious.

So these are awesome, just not what I was looking for. So if you are looking for a crunchy, seedy power cookie, these might be just what you’re looking for.

The recipe I based these on is found here. I replaced some of the flour with ground seeds, used darker chocolate, and omitted the raisins and nuts.

What you need:

  • 1/2 cup butter 
  • 1 cup brown sugar
  • 1 egg
  • 1/3 cup milk or almond milk
  • 4 teaspoon vanilla extract
  • 3/4 cups all-purpose flour 
  • 1/4 cup ground pumpkin seeds
  • 1/4 cup ground sunflower seeds
  • 2 tablespoons ground flax
  • 1/2 teaspoon sea salt
  • 3/4 teaspoon baking powder
  • 1/4 teaspoon baking soda
  • 1/2 teaspoon cinnamon
  • 1 cup large-flake rolled oats
  • 2 tablespoons whole flax seeds
  • 1/4 cup sesame seeds
  • 1/4 cup whole pumpkin seeds
  • 1/2 cup unsweetened coconut
  • 3/4 cup good quality dark chocolate chips

What you do:

  1. Pre-heat your oven to 375°F (190° C). Line baking trays with parchment paper.
  2. Melt the butter in a small pot on the stove or in the microwave. Let it cool to room temperature.
  3. Add the sugar to the cooled butter and mix. Whisk in the egg, then add the milk and the vanilla extract, and mix until it is combined.
  4. Add the flour, ground pumpkin seeds, sunflower seed and flax, as well as the salt, baking powder, baking soda, cinnamon, and oats to the wet ingredient mixture. Mix to combine evenly.
  5. Mix in the whole flax seeds, sesame seeds, pumpkin seeds, coconut and chocolate.
  6. Use an ice cream scoop to portion the batter on the parchment-lined baking tray. Using a fork dipped in water, gently squish the cookies until they are about two centimetres thick.
  7. Bake for 15 minutes or until the cookies are slightly golden. Place the cookies on wire racks to cool. Store in an airtight container, or freeze for a few weeks.


Crusty Easy No-Knead Bread

crusty no-knead bread - trustinkim

For this gorgeous loaf I made a few minor modifications to my stand-by European style bread recipe. This time I coated the outside of the bread with oil, giving it a crisper crust, and baked it in parchment paper. It contains 1/3 whole wheat flour. It’s still made using the same method, mixing the dough the day before and letting it sit for 12-18 hours – this slow fermentation is what gives the bread so much flavour. Very easy, very delicious, and economical too.

This loaf was served with salty butter, brie cheese, and some creamy duck pâté.

For this recipe you will need a large container with a lid. I use a le Creuset oval pot or a Romertopf clay baker. You also need parchment paper and plastic wrap.

What you need:

  • 1 cup whole wheat bread flour
  • 2 cups white flour
  • 1 & 1/4 teaspoons salt
  • 1/4 teaspoons yeast (I used Fleischmann’s active dry yeast)
  • 1 & 1/2 cups water
  • canola oil for coating the bread

What you do:

  1. Combine the flours, salt and yeast in a bowl. Add the water and mix; add more water if needed until you have a wet, sticky dough.
  2. Cover the bowl with plastic wrap or a lid, and let sit for 12-18 hours in a warm-ish place, and out of direct sunlight. The dough should double in size and become dotted with bubbles. If your house is a little on the cool side you will likely need the longer rising time.
  3. Cut a large piece of parchment paper and lay it on your kitchen counter. In the bowl, coat the top of the dough in oil, then turn it out onto the parchment paper. Coat the top of the dough in oil, using your hands. Cover with some plastic wrap, tucking it in loosely around the edges. Let the dough sit for 1-2 hours, until it has doubled in volume.
  4. About 1/2 hour before you want to put the bread in the oven, set the temperature to 475 F  and place your baking pot on a rack in the lower third of the oven. Let the pot heat up, and when the oven has reached 475 F, remove the pot from the oven. Remove the plastic wrap and pick up the dough by gathering together the corners of the parchment paper. Carefully (remember the pot is smoking hot!) place the dough in the parchment paper into the pot, as in the photo of the baked bread above.
  5. Put the cover on the pot and bake for 30 minutes while the bread forms its nice thick crust. Remove the lid from the pot and continue to bake for 15-20 minutes more.  The bread should become a deep brown when it is done, and if you tap on it, it should sound hollow.  Remove the pot from the oven, lift the bread out of the pot, remove the parchment paper, and place it on a rack to cool. It needs to cool for about 1/2 an hour before slicing.
  6. This bread has no preservatives, so if you don’t use it up of the second day, it should be frozen.

Chicken Teriyaki

chicken teriyaki - trustinkim

I had plans to make a delicious fried rice with veggies, and wanted to add a little chicken to it, so I found this recipe for Classic Chicken Teriyaki here. The only change I made was to use skinless chicken – I know it’s not authentic, but it’s healthier, and the sauce was so delicious that I felt it didn’t need the skin. I don’t have the fried rice recipe posted (oops, forgot to write down how I made it!), but here’s an awesome one that I posted a long time ago: Kale and Scallion Fried Rice.

The chicken just needs to marinate for at least 30 minutes, and that time can be used to prepare your rice, or whatever else you want to serve with it. Alternately, you could begin marinating the day before, or earlier in the day.

I usually keep a knob of ginger in the freezer, so that I always have some on hand, and because it is easier to grate when it is frozen.

What you need:

  • 300 grams (2/3 lb) of chicken thighs, boneless and skinless (unless you prefer skin-on)
  • salt and pepper
  • 1/4 of a medium sized onion
  • 4 cm knob of ginger
  • 1 clove garlic
  • 2 tablespoons soy sauce
  • 1 tablespoon saké
  • 2 tablespoons mirin
  • 1 tablespoon sugar
  • 1 tablespoon canola oil
  • 2 more tablespoons saké
  • 1 tablespoon butter

What you do:

  1. Cut the chicken into pieces and sprinkle with a little salt and pepper.
  2. In a container large enough to fit all the chicken, finely grate the onion and ginger, and mince the garlic.
  3. Add the soy sauce, 1 tablespoon of saké, mirin, and the sugar. Stir to combine. Add the chicken and coat it completely with the sauce. Cover and place in the fridge to marinate for at least 30 minutes.
  4. Heat the oil in a frying pan on medium-high heat. Remove the chicken from sauce and it  add to the pan. Cook until browned, then flip chicken, and turn the heat down to medium. Add the remaining saké, cover, and cook until saké is absorbed.
  5. Add the rest of the sauce to the pan and cook until it thickens. Add the butter and stir until it has evenly coated the chicken.
  6. Enjoy!