Homemade Irish Cream (Bailey’s)

P1050879

Many years ago I made some homemade Irish Cream, and used a chocolate mould to make Irish Cream chocolates. They were delicious and messy. This winter I decided to try it again, minus the chocolates; so I’d have something different to bring to Christmas parties. The recipe I used before, as most of the ones I was able to find this time around, contain canned condensed milk, chocolate syrup and instant coffee powder. This time I wanted to try a recipe that used fresh cream, home-made chocolate extract, and cold-pressed coffee. And it’s really yummy!

You need to plan a day or two in advance to make the chocolate extract and cold-pressed coffee. I have only included enough ingredients to make enough extract and coffee for this recipe. If you double the recipe for the chocolate extract you will have some left over to add to other recipes, like cakes and brownies.

The Homemade Irish Cream should keep in the fridge for about a month. I know that Bailey’s has no artificial preservatives in it, and it keeps for up to two years because the alcohol and sugar work as preservatives. Let me know how long yours lasts! I’ll be giving mine away, so it won’t last long enough to test the shelf-life.

A few things you’ll need are some bottles for storing the Irish Cream, coffee filters, and a funnel for pouring.

Some of the ingredients settle when it’s in the fridge, so you have to give it a shake before serving.

What you need:

  • 2 tablespoons vodka or whiskey (for chocolate extract)
  • 1 tablespoon dark chocolate cocoa (for chocolate extract)
  • 1/2 cup coarsely ground coffee beans (for cold-press coffee concentrate)
  • 1 cup cold water (for cold-press coffee concentrate)
  • 2 tablespoons  Ghirardelli Bittersweet Chocolate Chips  60% Cacao
  • 2 cups fresh organic cream (I used Avalon)
  • 1/3 cup sugar
  • 1 tablespoon pure vanilla extract
  • 1 & 1/2 cups Irish Whiskey (I used Jameson’s)

What you do:

  1. Two days in advance prepare the chocolate extract: In a small container stir the cocoa, vodka or whiskey, and 1 tablespoon of water. Let this sit at room temperature for the two days, stirring once or twice a day. After the two days, moisten a coffee filter with water, then strain the chocolate mixture. It will take time to strain all the liquid out, but you will be left with a gorgeous chocolate extract.
  2. The night before making the Irish Cream you can make the cold-press coffee concentrate: Coarsely grind the coffee beans, then pour them along with 1/2 cup cold water into a jar, making sure all the beans get moistened. Add the other 1/2 cup of the water, then seal the jar and store in the fridge overnight. In the morning you can strain the liquid using a coffee filter.
  3. Using a double boiler over medium-low heat, or a bowl over a pot that has some water in it, place the chocolate chips along with about 2 teaspoons of cream. Stir the chocolate chips until they have melted.
  4. In a bowl whisk the remaining cream and the sugar together. Little by little add the sugar and cream mixture to the melted chocolate, until it has all been incorporated and the sugar has dissolved.
  5. Pour the mixture into a large bowl that has a pouring spout, or into a large jar. Use an immersion blender to pulse a few times to combine, or whisk for a minute. Add the chocolate and vanilla extracts, cold-pressed coffee concentrate, and whiskey. Pulse the blender a few more times to combine.
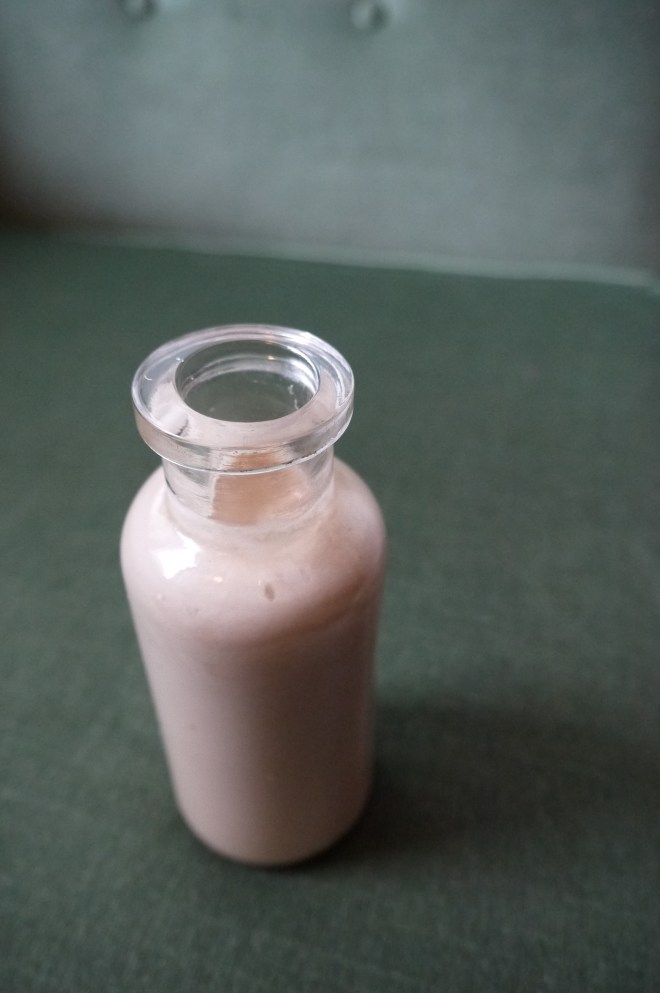
  6. Use a funnel to pour the Irish Cream into clean jars.
  7. Refrigerate, and enjoy over ice, in coffee, or on top of ice cream. Don’t forget to shake it up first!

P1050873

P1050875

French Lentil Soup with Hot Turkey Sausage and Kale

P1050837

Here’s a tasty and healthy recipe – perfect for the wet Vancouver weeks we’ve been having, or the cold weather anywhere else. Apparently this is a typical French soup. Since I have only visited France in the summer, I have never had a chance to try this, but it’s delicious!

I found the recipe here, and only changed it a little. I used a few cups of chicken broth along with the water, and about half the amount of sausage. I used less olive oil than the original recipe called for, and I discarded the fat from the sausages instead of adding it to the soup. I think it’s leaner, but still really tasty.

What you need:

  • 1 & 1/2 cups French lentils
  • 300 grams hot Italian sausage (omit for a vegetarian soup)
  • 2-3 cups kale
  • 1 large leek, diced
  • 3 carrots, shredded
  • 3 stalks celery, diced
  • 1 tablespoon red wine vinegar
  • 3 bay leaves
  • 1 Tbs Thyme
  • 1/4 teaspoon red pepper flakes
  • 1 & 1/2 tablespoons olive oil
  • 6-7 cups water (or 3 cups chicken broth, the rest water)
  • salt and pepper

What you do:

  1. Pick through the lentils to make sure there are no small stones hidden in them.
  2. Remove the stems from the kale and cut it into ribbons.
  3. Remove the casing from the sausage. Heat about 1/2 tablespoon of olive oil in a large pot and sear the sausage on both sides, then break it apart. Remove the sausage and discard most of the fat.
  4. Add the red pepper flakes to the little bit of sausage fat, and then add the kale. Season with salt and pepper, and sauté the kale for about 2 minutes. Add it to the removed sausage.
  5. Pour the remaining tablespoon of olive oil into the pot and add the vegetables.  Sauté them for about 10 minutes, or until the vegetables become soft and transparent.
  6. Add the thyme, bay leaves, lentils and 6 cups of water.  Season with salt and pepper, bring to a simmer and cook for 25 – 30 minutes, at which time the lentils should be done.
  7. Add the vinegar, kale, sausage, and any more water to achieve the thickness you want.  Cook for 5 more minutes to reheat the kale and sausage. Taste and adjust seasonings.
  8. You can serve it right away, but it also makes fantastic leftovers. The flavours are even more developed with next day!

Hummus Kawarma (Lamb) with Lemon Sauce

Hummus kawarma (lamb) with Lemon Sauce - trust in kim

Yotam Ottolenghi, thank you for this recipe! I have several of his cookbooks, and I think this is my favourite recipe out of all of them. It comes from Jerusalem, which is filled with awesome recipes along with beautiful photos of the food and culture.

There is so much flavour in this dish – the lamb is marinated in herbs, and then it is served on top of hummus and drizzled with a delicious lemon sauce. Completely addictive!

In the colder seasons I serve this with another favourite recipe, roasted cauliflower and butternut squash. In summer I would switch to a refreshing fattoush salad.

You can substitute the hand-chopped lamb with ground lamb, but the hand-chopped meat has a much nicer texture to it. And it’s really easy to chop the meat yourself.

This recipe serves 6 people for an appetizer or small meal. Pita bread is nice served with this.

What you need:

kawarma ingredients:

  • 300g neck fillet of lamb (which I couldn’t find, so I just used a piece of top round)
  • 1/2 teaspoon ground black pepper
  • 1 teaspoon ground allspice
  • 1/2 teaspoon ground cinnamon
  • pinch of freshly grated nutmeg
  • 1 teaspoon crushed dried za’atar or oregano leaves
  • 1 tablespoon white wine vinegar
  • 1 tablespoon chopped fresh mint
  • 1 tablespoon chopped flat-leaf parsley, plus extra to garnish
  • 1 teaspoon salt
  • 1 tablespoon unsalted butter or ghee
  • 1 teaspoon olive oil

lemon sauce ingredients:

  • 10 grams flat-leaf parsley, finely chopped (also delicious without parsley)
  • 1 green chile, chopped finely
  • 4 tablespoons freshly squeezed lemon juice
  • 2 tablespoons white wine vinegar
  • 2 cloves garlic, crushed
  • 1/4 teaspoon salt

optional toppings:

  • pine nuts
  • pomegranate seeds

What you do:

  1. Chop the lamb finely. Combine all the kawarma ingredients except the butter and oil. Mix well, cover and refrigerate for 30 minutes.
  2. Combine all the ingredients for the lemon sauce.
  3. Heat the butter and olive oil in a large frying pan. Add the lamb, in two or three batches, and stir as it fries. It only needs about 2 minutes to turn nicely light-pink inside.
  4. To serve, make a mound of hummus on the plate, and use a spoon to create a well in the middle. Spoon some of the lamb into the well, and top with a generous amount of the lemon sauce. Garnish with more parsley or other optional toppings.

Enjoy it while it’s warm!

Spinach Gomae (Horenso No Gomae)

spinach gomae-ae - trust in kim

I love to order spinach gomae when I eat in a Japanese restaurant. I’ve been making it at home for a while now, and I love how easy and delicious it is.

I’ve tried a few recipes, which were all good, but I’ve lost track of them. So here’s the one I made most recently. It comes from a recipe by chef Takashi Mizukami of the Dirty Apron Cooking School, and was published in the Vancouver Sun newspaper.

My favourite thing to make with Spinach Gomae is Tuna Sashimi. So delicious!

The recipe is for two people.

What you need:

  • 400 grams spinach, washed
  • 6 tablespoons toasted white sesame seeds
  • 3 tablespoons sake
  • 3 tablespoons sugar
  • 2 tablespoons soy sauce

What you do:

  1. Toast the sesame seeds and grind them in a mortar and pestle or electric grinder.
  2. Combine the sesame seeds in a bowl with the sake, sugar and soy sauce.
  3. Bring a large pot of water to a boil and add some salt.
  4. Optional: if you are going to use an ice bath, get that ready first. The rest happens quickly.
  5. Gather a bundle of spinach together and dip the stems in the boiling water for about 15 seconds, then let the whole bunch fall into the water, submerging for 10 more seconds. Remove the spinach with tongs and quickly place it under cold running water or submerge it in an ice bath. The cooling will prevent it from overcooking.
  6. Once the spinach has cooled, arrange the spinach so the stems are aligned, and then squeeze out the excess water.
  7. Arrange on a serving plate and pour the sauce over top.
  8. Enjoy!

Limoncello

limoncello - trust in kim

Here’s a recipe for Limoncello, a summery liqueur that is easy to make at home. It is typically served to sup on, icy cold, as a digestif after dinner. For more options, this site has tons of mixed drinks you can make using your homemade Limoncello.

Do-it-yourself liqueurs are great because you can control the amount of sugar that goes into them, and it’s fun to make them. I read a lot of recipes online, and most were similar, so I did what seemed right to make this one. I had some of the simple syrup left over, since I didn’t want to add too much sugar; it tastes sweeter when it is cold. You can always add more sugar later, or for individuals with more of a sweet tooth.

For this recipe you’ll need a large jar for the first part that sits for a week or two, then some bottles for the finished product. It’s best to buy organic lemons for this recipe, since the peels are what flavours this drink.

What you need:

  • zest of 4-5 organic lemons
  • 1 litre 80-proof vodka
  • 3 & 3/4 cups water
  • 2 & 1/4 cups sugar

What you do:

  1. Wash the lemons well and dry them.
  2. Peel the yellow part of the lemon rind – it is important that you don’t use even a trace of the white part of the rind, as this will give your Limoncello a bitter taste. I used a very sharp vegetable peeler, but you could also do this carefully with a knife. Alternatively you can use a zester to grate the peel.
  3. Place the lemon zest in a large jar and top it up with the litre of vodka. Tighten a lid on the jar and put it in a cool, dark place for a week or two. I covered mine with a tea towel.
  4. Wait. Give the jar a shake every other day.
  5. After a week or so you should see that the vodka has turned yellow. Strain the lemon zest out of the vodka.
  6. Combine the water and sugar in a pot and heat it gently on the stove. Let the simple syrup cool to room temperature. (When I make this again I will use less water in the simple syrup so that I can store it in the freezer.)
  7. Add some of the simple syrup to the vodka and taste to see if it needs more. I used about equal parts of each, maybe less of the simple syrup.
  8. This drink is best served icy cold out of the fridge (depending on how much simple syrup you used, this may contain too much water and turn into a slushy, and possibly break the bottle), and keeps indefinitely.

Enjoy!


Lemony Greek Ribs

greek rib dinner -trust in kimgreek ribs - trust in kim

These dry Greek ribs are so flavourful – lemony and salty. The secret is to make a dry rub containing lemon zest, and let that sit for a few hours.

I lived in a small town way back when for a few years and there was, in my opinion, only one good meal available in a restaurant in that town at the time. It was Greek ribs, and it was awesome. But I’ve been in big(ger) cities for a long time, where there are endless possibilities for delicious meals to inspire my cookery, so I had sort of forgotten how much I loved these until this summer. I finally got around to trying to recreate the taste experience, and I am so pleased with the results. I already have requests from the friends who ate them to make them again soon.

I gleaned ideas from many recipes, and then just put together what I thought would work into this recipe.

Lemony potatoes, Greek salad, and some tzatziki make this an awesome Greek meal.

What you need:

  • 1 large rack baby/pork back ribs
  • 2-3 cloves garlic, finely minced
  • zest of two lemons
  • 1-2 teaspoons dried oregano
  • salt and pepper
  • juice of two lemons

What you do:

  1. A few hours before you plan to grill them, make up the dry rub. Combine the garlic, lemon zest, oregano and pepper, and work it a little with your fingertips to help the zest release its oil. Place the ribs on a baking pan or another dish that they fit into. Generously salt both sides of the ribs. Rub each side with the zest mixture. Cover with plastic wrap and refrigerate until half an hour before you will be grilling.
  2. Pour the juice of the lemons over each side of the ribs and let them sit for about half an hour.
  3. Heat the grill on high. When the grill is hot, put the ribs on (meatier side down) and turn the heat to low. Cook for about 20 minutes on each side. It might need a little longer depending on the size of the ribs and the heat of your grill.

Καλή όρεξη (Enjoy your meal!)

Apricot and Peach Jam

apricot and peach jam - trust in kim

In the middle of winter it’s a little reminder of summer when I open a jar of jam and spread it with some butter on a crispy piece of toast. I usually make apricot jam, but this year I decided to go crazy and add some peaches to my usual. I’m happy with the results, and look forward to eating this as the weather turns colder.

I found this award-winning jam recipe on this site. I used fewer peaches than the recipe called for, partly because I didn’t have enough, but also because I really love apricots and wanted to make sure their flavour came through.

What you need:

  • 300 grams peaches, cut into small pieces
  • 600 grams apricots, quartered
  • 785 grams sugar
  • 100 mL water
  • 2 tablespoons lemon juice
  • zest from half a lemon
  • about 1 tablespoon butter
  • about 12- 125mL canning jars, or 6 – 250mL
  • rings and new lids for the jars

What you do:

  1. Place a few metal spoons in the freezer for use later with testing to see if the jam has set.
  2. Prepare the jam jars by boiling them or running through the dishwasher.
  3. Put all the ingredients except the butter in a large pot and stir it together. Heat on low, then bring to a rolling boil for 10 minutes..
  4. Turn the heat off and put a few drops of jam on one of the frozen spoons to check if it has set. Let it cool for a few minutes, and then push your finger through it. If the jam crinkles a bit, it is ready. If it is not ready, put it back on to boil for 2 minutes. Test again, and repeat until it has set. Mine took almost 20 minutes to set.
  5. Off the heat, stir in the butter to remove any surface bubbles.
  6. Heat the lids in hot water and have the jars ready for filling on the counter.
  7. Fill each jar so it has just about 2mm of space at the top. Wipe the rims of the jars if they have any jam on them. Place the heated lids on the jars and fasten them with the rings.
  8. Place the jars on a towel on the counter in a place they can stay until they have sealed. Place another towel on top of the jars. You will begin to hear a series of ‘pings’ that will let you know that the jar has sealed. You will also be able to see that the lid has indented. Any jars that do not indent (seal) properly can be refrigerated. The rest are fine in a cool storage place. Some say they are only good for a few months, but I’ve kept mine for up a year, and they are great still.


Super Creamy Hummus, Ottolenghi Style

hummus - trust in kim

This hummus recipe by Yotam Ottolenghi is so much better than anything you can buy. It is light and creamy, and I like that I can control what goes into it – a little more lemon, a little more tahini. This recipe doesn’t have contain any olive oil, unless you pour some on top before serving.  A lot of the store-bought varieties don’t use olive oil either, often using canola oil or other substitutions. I like to drizzle olive oil on the top to add flavour, make it richer, and make it seems more Mediterranean.

It’s really not that difficult to make an awesome hummus, and there are different lengths you can go to, like starting with dry chickpeas, and peeling the skins off them. For me it’s worth the extra effort to have such a great tasting and smooth hummus, when I have a little bit of time to do it.

When I made mine I did cheat a little and use canned chickpeas, so the recipe below shows how to work with dry or canned chickpeas. One day soon I will use the method in the cookbook, cooking my own chickpeas while quickening the process by adding baking soda. But for now, because I used the canned chickpeas I had to remove the skins – this is one of the things that makes this hummus so creamy, and it only took about ten minutes.

I like to serve hummus with homemade pita crackers, and some veggie sticks.

What you need:

  • 1 & ¼ cups dried chickpeas (or one 540mL can)
  • 1 teaspoon baking soda
  • 3/4 cup tahini 
  • 4 tablespoons freshly squeezed lemon juice
  • 2 cloves garlic, crushed
  •  Salt to taste
  • 6 & ½ tablespoons ice-cold water 

What you do:

  1. Place the chickpeas in a large pot and cover them with at least double their volume of cold water; let them soak overnight. If you are using canned chickpeas you will instead remove the skins. This is a bit of work. Here’s what I do. I drain them and put them in a large bowl with water. Then I rub some of them between my hands, and a lot of the skins come off that way. Then I go through them and pull off any skins that are remaining.
  2. If you are using dried chickpeas, drain them the next day and put them in a pot with the baking soda over high heat; cook for about 3 minutes, stirring constantly. This will help them cook faster. Add 6 & 1/2 cups of water to the pot and bring it to a boil. Lower the heat to simmer, skimming off any foam and skins. Cook for 20-40 minutes until they are tender; they should break easily when squeezed, but not be mushy.
  3. Drain the chickpeas and place in them a food processor or blender. Process until you have a thick paste. Add the tahini, lemon juice, garlic, and 1 & 1/2 teaspoons of salt; blend this. With the machine still running drizzle in most of the ice water and let it mix for about 5 minutes. You will get a very creamy paste. Add more water if you think it needs it, and taste to adjust seasonings.
  4. Put the hummus in a bowl and cover it. Let it rest for at least half an hour. Refrigerate if you are not using it right away, but remove from the fridge at least half an hour before you use it.

Enjoy!


Walnut Vinaigrette

walnut vinaigrette - trust in kim

When I was in France last summer I picked up a tube of walnut Dijon mustard. It isn’t something that is easy to find at home; in fact, I’ve never seen it, even in specialty stores, in Vancouver. Soon I will devise a recipe for it, so we won’t have to search for it anymore.

Here I’ve also used a walnut oil, just to bring out the nutty flavour. I love a combination of garlic and walnut, so I put in a clove of garlic. It needs to sit for a while, so you’ll need to make this a few hours in advance or the day before if you want to get that garlicky flavour in there.

What you need:

  • 1 tablespoon walnut Dijon mustard
  • 1/4 teaspoon sugar
  • 3 tablespoons white balsamic vinegar (or white wine vinegar)
  • 1/4 cup walnut oil
  • salt and pepper to taste
  • 1 clove garlic

What you do:

  1. In a bowl or jar combine the mustard, sugar, and a little salt and pepper.
  2. Add a little bit of the vinegar to mix into the mustard, then add the rest, beating with a fork until combined.
  3. Add the walnut oil slowly, whisking in with the fork.
  4. Add more salt and pepper to taste.
  5. Peel the skin off the garlic clove, cut it in half and place it in the dressing. Let it sit for a few hours to allow the garlic flavour to be released. You can leave the garlic clove in the dressing for a week or two, or as long as it takes you to use it up.

Homemade Healthier Tartar Sauce

homemade tartar sauce - trust in kim

Tartar sauce with fish is so delicious, but typical recipes contain a lot of mayonnaise that is just way to easy to gobble up. I’ve recently bought some frozen, breaded fish to keep in my freezer for last-minute meals. I’ve also got some pickles and yogurt and a few other bits and bobs in the fridge that I can use to whip up this yummy sauce.

I served the fish and tartar sauce with oven-baked breaded zucchini and baked onion rings. The tartar sauce is a nice dip for those too. If I was in more of a hurry I would probably have just eaten it with some frozen peas, making it a great last-minute meal!

The amounts are estimates, so you’ll have to taste it and see what you think you need to add more of.

What you need:

  • 1 teaspoon Dijon mustard
  • 1/2 cup plain yogurt (I use 3.5%)
  • about 1/4 cup finely chopped dill pickle
  • 1 teaspoon chopped capers
  • 1-2 teaspoons minced onion
  • 1-2 teaspoons lemon juice
  • a dash or two of hot sauce (I used Frank’s Red Hot)
  • salt and pepper to taste

What you do:

  1. Combine the Dijon and yogurt.
  2. Add everything else. Mix it in. I like quite a bit of pepper in mine, but taste and see what you think.

Enjoy!