This blog is my way of sharing recipes I love. I don't make a penny from the blog, it's just for fun! I do pay to keep it Ad-Free so it's a better experience for you. Please write a comment if you use a recipe! I'd love to hear your thoughts.
When the hot weather starts, this is my favourite beverage. To be fair, hot weather in Vancouver isn’t all that hot, but I’m a bit of a lightweight when it comes to heat.
This is one of the easiest “recipes” I have posted. Espresso (or really strong coffee), ice, and Oatmilk (or your choice of “milk.”) And Enjoy.
Thanks to my old friend Mike Peterson for introducing me to Oatmilk through his Cereal reviews! Oatmilk is the perfect non-dairy drink! I prefer the unsweetened version of Earth’s Own Oatmilk, because it works so well in coffee, tea, and in my steel cut oats and breakfast.
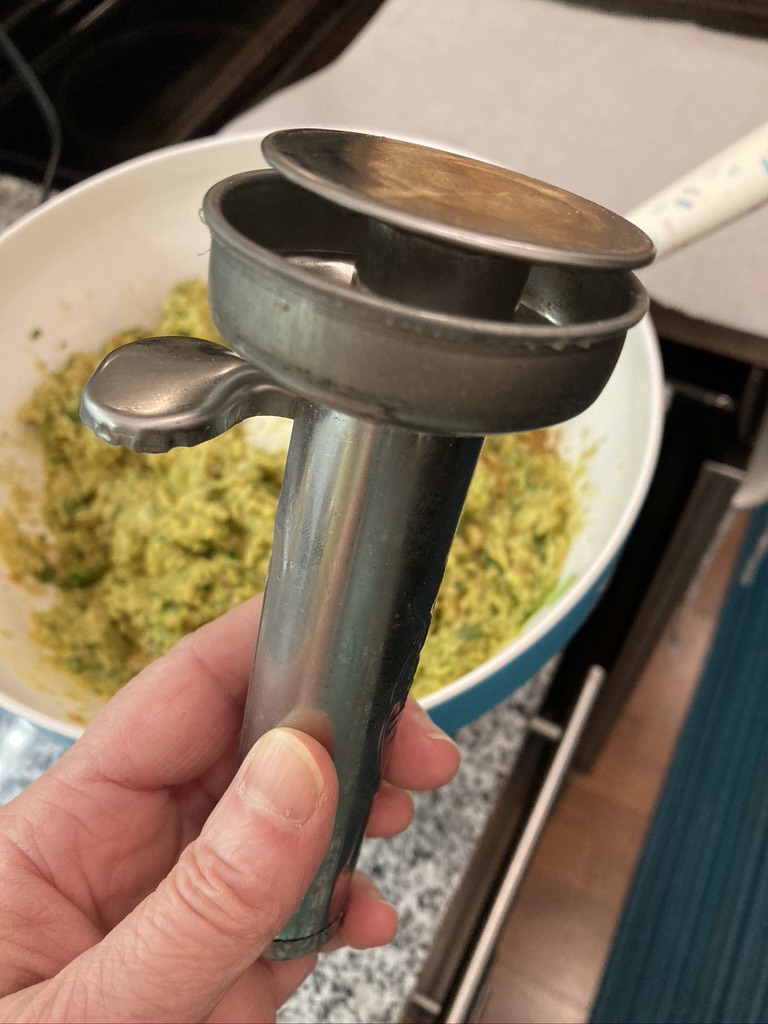
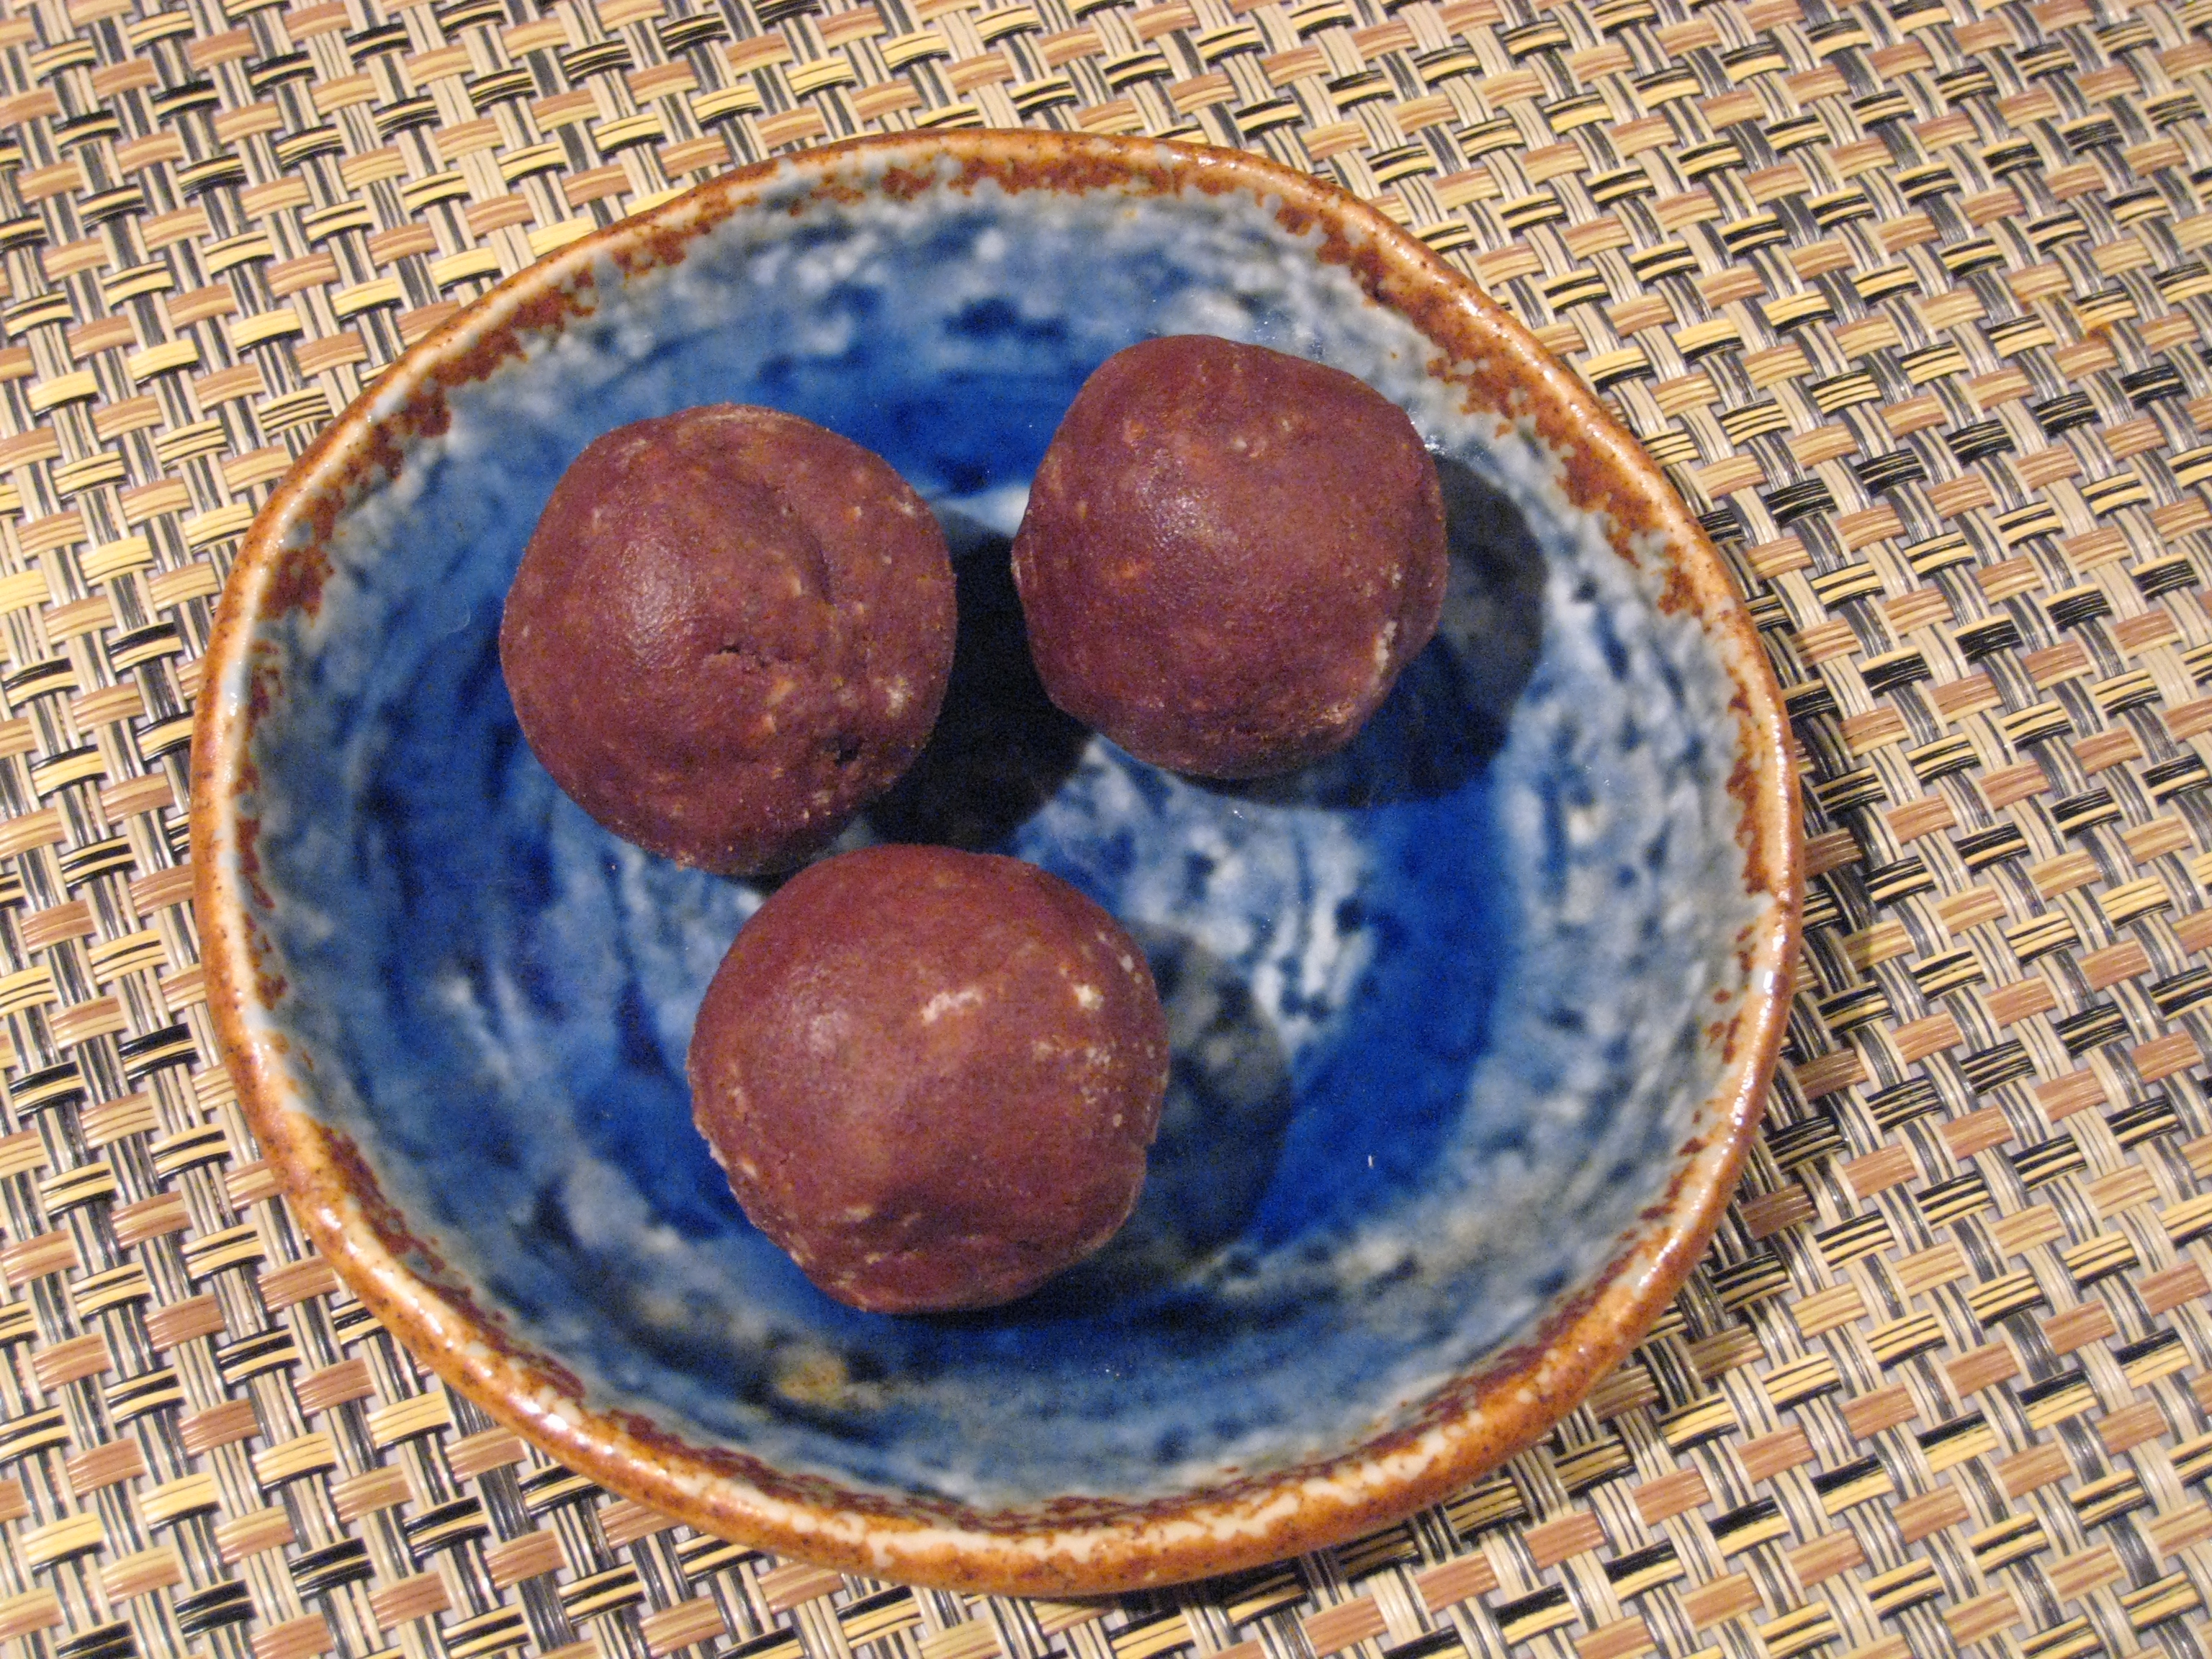
I’ve been growing fava beans on my balcony all winter. Planted in November, and beginning to harvest at the end of May. I didn’t think I would be harvesting so late, but it is so worth it! The beans are creamy and have lovely flavour. And check out the photo at the bottom of the page to see the gorgeous green of the bean after shelling!
This recipe is more of a guide. What I thought was going to be a massive crop, ended up being only 8 pods (for now), which yielded 18 beans. So I ended up making a really small portion of this spread, using less than half of an avocado.
In the photo I’ve got some delicious corn crackers, but we actually preferred the fava-cado spread on a piece of bread. The crackers had a lot of flavour on their own, so the milder bread allowed the flavours of the fava and avocado to shine through.
A word on growing fava beans: Yes, you can grow them in summer, but when I did that they got infested with aphids. Growing them over winter, in Vancouver, was pretty easy. I just had to wrap them up a bit when we had a cold snap. So after half a year of growing, I finally get to eat them! This is the first harvest, but there are a lot more pods still growing . . . hmm, what should I make with the next harvest?
What you need:
avocado
fresh fava beans
lime
salt
bread or crackers
What you do:
To prepare the fava beans, get a pot of salted water boiling. String the pods and remove the fava beans. Boil the beans for 3 minutes. Drain the beans and then put them in a bath of ice water right away. This will help them to stop cooking, and retain their gorgeous bright green colour.
Now you can slide the beans out of their skins, revealing the gorgeous green colour!
Mash the fava beans together with some avocado (I used more fava than avo). Use an immersion blender if you like. Season with a little bit of salt and a squeeze of lime.
Serve with bread or crackers right away. Not as good after refrigeration.
These oven-baked falafel are super tasty, and my official taster is looking forward to eating them again! Deep-fried falafel are delicious, I don’t enjoy cooking with boiling oil, and I think baking is healthier.
This photo was taken before the tahini sauce, hot sauce and pickled turnips went on – oops! Somebody was eager for the photos to be done so the eating could begin. I’ve also served these with some hummus and a cucumber, tomato and herb salad.
I found an aleb falafel, a falafel shaping device, for under $10 at a local Middle Eastern store. You can use a spoon or your hands to form them if you don’t have an aleb falafel.
This recipe is especially easy to make if you have a food processor, but you could also give it a try with a potato masher. It’s quite simple: all the ingredients go into the food processor bowl, you whiz it up, form the balls, and bake them. While they are baking you can prepare sauce and veggies.
These falafel freeze quite nicely!
What you need for the falafel:
2 cans chickpeas, rinsed and drained, or equivalent home-cooked
3 large eggs
1/ 2 cup bread crumbs
1 large white onion, chopped
1 cup flat leaf parsley
1 cup cilantro (I like to use the stems too)
1 tablespoon crushed garlic
1/4 cup olive oil
1 teaspoon baking powder
1 & 1/2 teaspoons cumin
1 teaspoon paprika or Aleppo pepper
1 teaspoon salt
olive oil for brushing on top of falafel before baking
What you need for the tarator sauce:
1/2 cup tahini
1 teaspoon crushed garlic
1/4 to 1/2 cup lemon juice
1/4 to 1/3 cup water
salt to taste
What you do for the falafel:
Heat the oven to 375F. Line a baking pan with parchment paper.
Add the chickpeas, eggs, bread crumbs, onions, parsley, cilantro and garlic to the bowl of the food processor and process until the mixture becomes doughy.
Add the baking powder, seasonings and olive oil and process again until all the ingredients are combined.
Form falafels with an aleb falafel (I lightly oiled mine before use), or scoop with a tablespoon and form into flattened balls with your hands.
Use a pastry brush to brush a little bit of olive oil on the tops of the falafel, to help them brown nicely. Browning = flavour!
Bake for about 25 minutes, then check to see if it is done; mine needed more time. You will know when it is done if a knife inserted in the centre comes out pretty much clean.
While the falafel are baking you can make the sauce.
What you do for the taratour sauce:
Mix the garlic in with the tahini.
Add a little bit of lemon juice and mix well. Add lemon juice and water a little at at time until the sauce is creamy but not too runny.
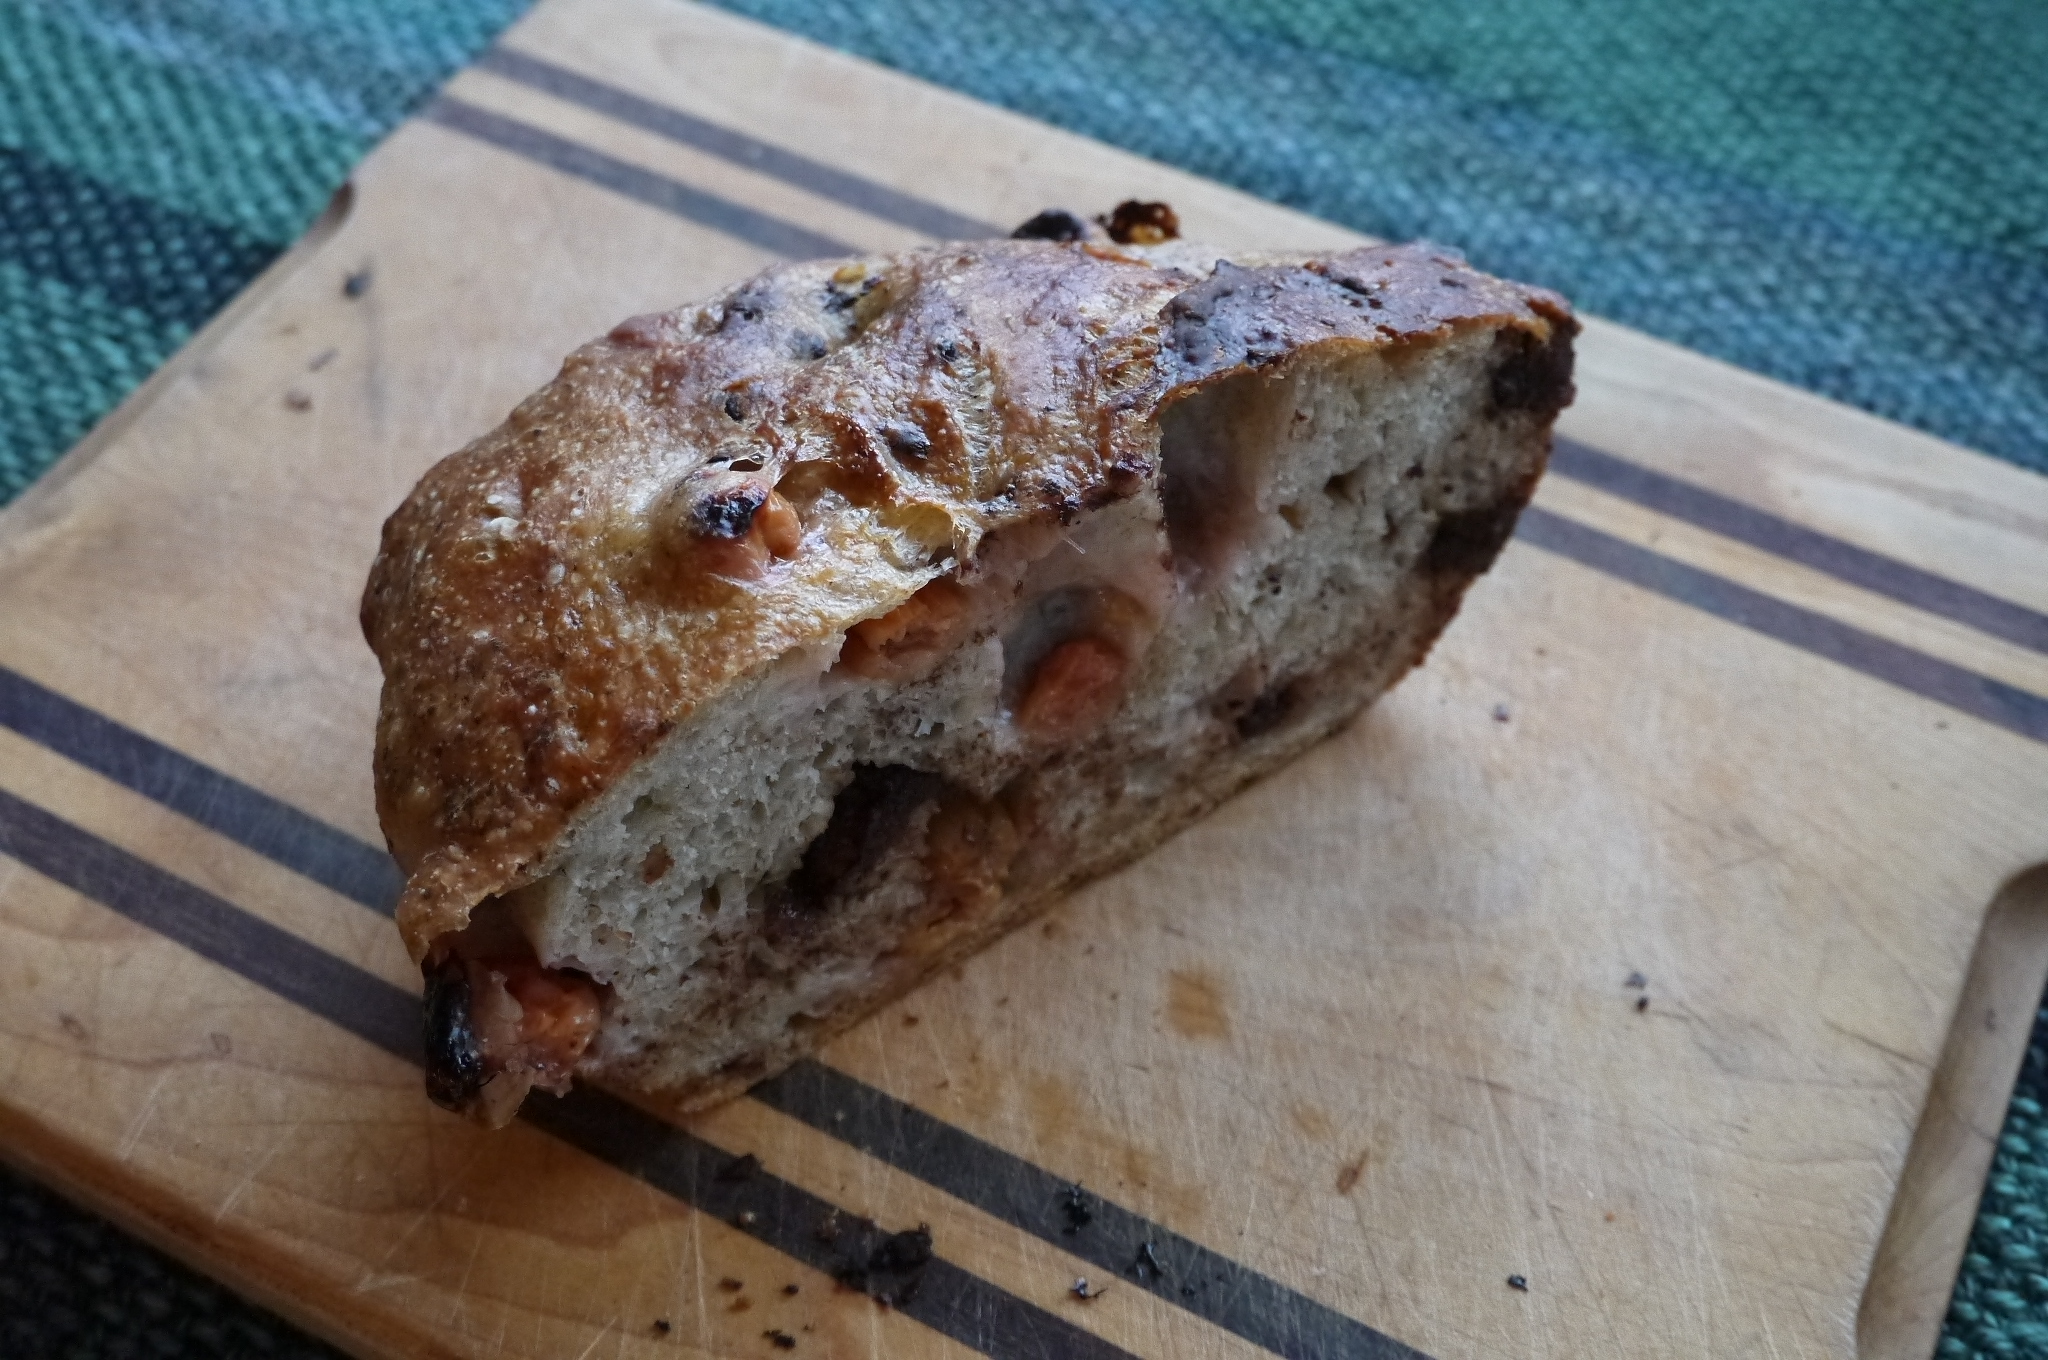
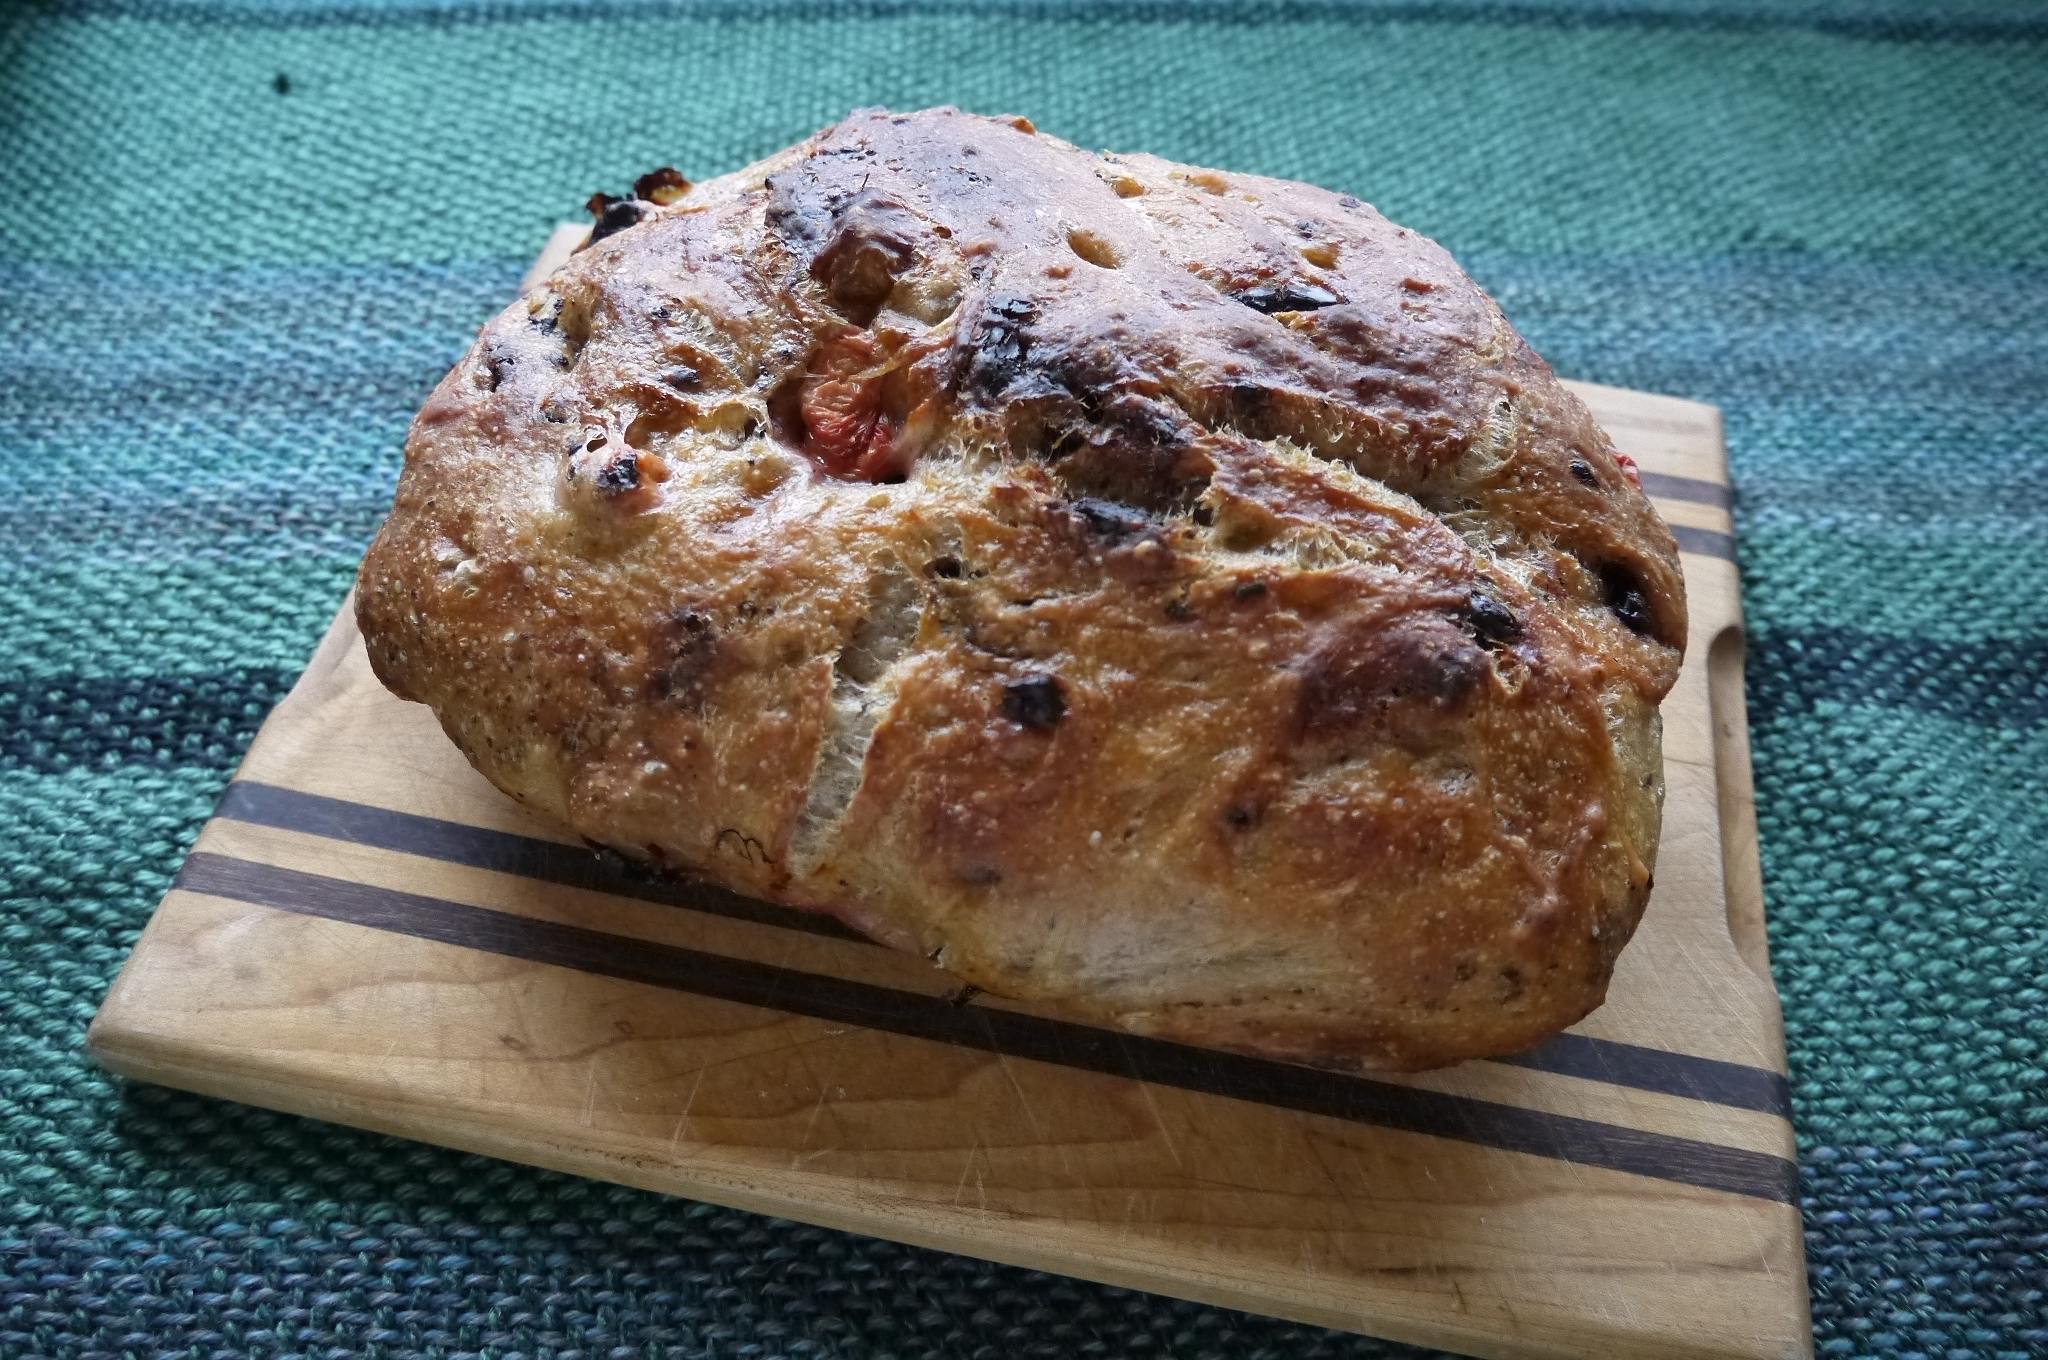
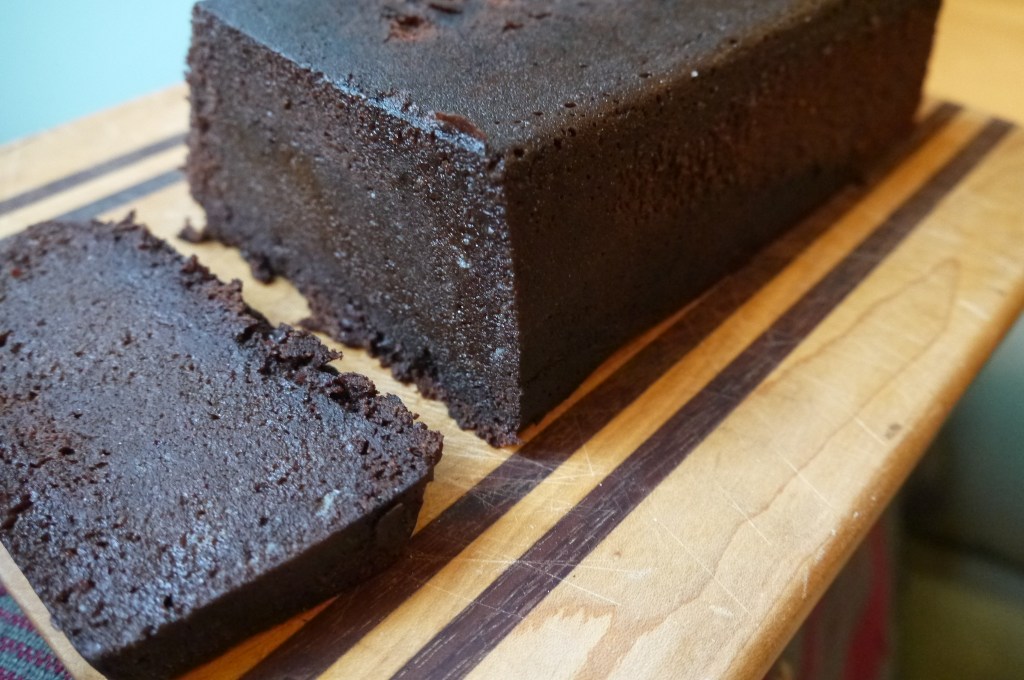
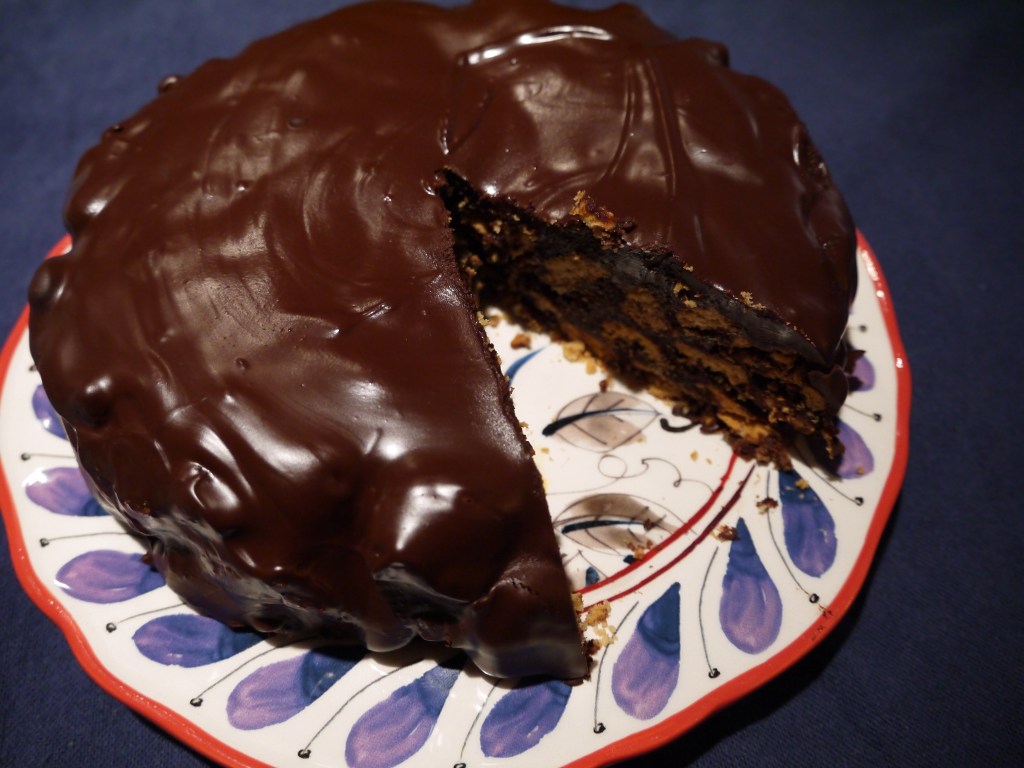
My mom says, “This is the best bread I have ever had.” And my mom has had a lot of good bread, much of it made by her, so I consider that the strongest endorsement for this delicious chocolate sour cherry bread.
This isn’t a sweet bread, just a loaf of my usual no-knead (Jim Lahey recipe) bread, with the addition of sour cherries I picked in summer and froze, and some good quality dark chocolate. If you’re unfamiliar with no-knead bread, it’s a bread that is left to rise overnight. It is baked in a dutch oven, which helps to create a crunchy crust. So delicious! Just takes a bit of planning ahead – there’s very little hands-on time, but you need to move the dough a few hours before baking.
It was the most delicious the day it was baked, and while still a little warm. But it was also very nice the next day, toasted, with a little butter.
Feel free to add a bit more chocolate or cherries if you want!
What you need:
2 & 1/4 cups all-purpose flour
3/4 cup rye flour (or use all ap flour)
1/4 teaspoon instant yeast
1 & 1/4 teaspoons salt
1 & 1/3 cups water, room temperature
6 oz good quality dark chocolate, chopped (I used Ghirardelli 60%, Bittersweet)
1 cup pitted sour cherries (if using frozen cherries, do not thaw before adding)
What you do:
In a large bowl combine the flour, yeast and salt. Add the water and stir just until it comes together. It will look a bit shaggy, but it’s fine.
Cover the bowl with a lid, plate or plastic wrap and leave to sit at room temperature for 12 to 18 hours. Eighteen-ish hours is preferable, especially if it’s a little cooler in your place. This time around I left mine even longer, and it was probably my best ever. After about 4 hours you can work in the chocolate and cherries. I experimented with adding then in the beginning, but somehow it doesn’t rise as well.
About two hours before baking time, spread out a large piece of parchment paper and put a coating of olive oil over it. Use a spatula to coax the dough out of the bowl, and then use floured hands to gently form it into a loaf, and place it seam-side down onto the parchment paper. Invert the bowl over the dough and allow this to sit for about 2 hours.
About 1/2 an hour before baking, turn the oven to 450°F/ 232°C. (If using a Romertopf/clay baker, make sure you have pre-soaked it, and then place it in the oven BEFORE turning the oven on.) If using a cast iron dutch oven, place it in the cold oven to heat along with the oven.
When the oven is ready, gently place the dough, seam side down, into the lidded baker. This should be pretty easy to do, since you can just pick up the corners of the parchment paper and transfer the whole thing into the pot. If you want to, you can use a sharp knife to make a few slashes a few centimetres deep into the top of the bread.
Place the lid on the baking dish and bake for 30 minutes. After that time, remove the lid and bake for 15-25 minutes. The crust should be dark, and the bread should sound hollow when you tap it.
Allow the bread to cool on a wire rack for about an hour. When it is hot it will be too sticky inside to cut, but after an hour the bread will still be warm enough for the perfect tasting experience.
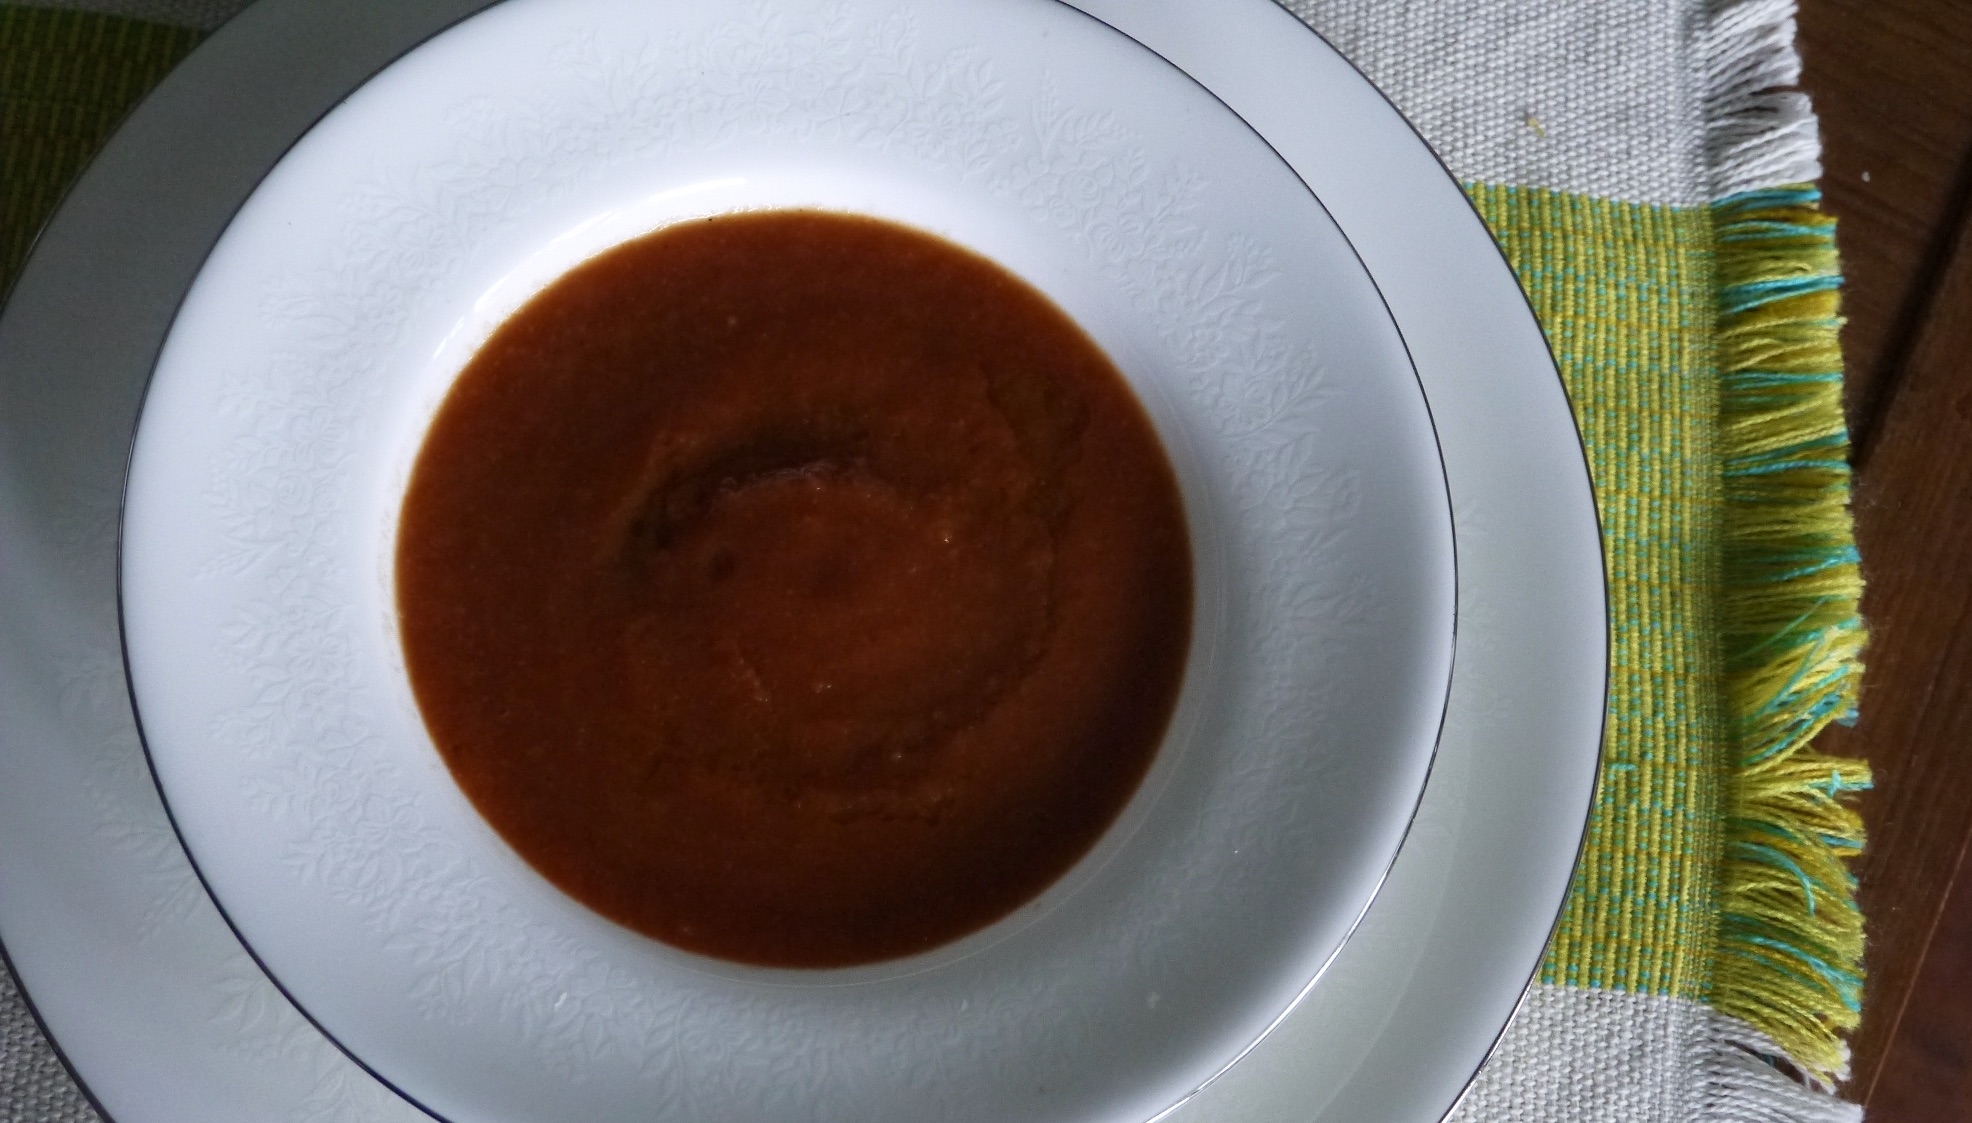
Burgoo is a popular Vancouver restaurant that serves the best comfort food. I tend to order this tomato soup because there aren’t a lot of meals on their comfort food menu that a lactose-intolerant person can eat.
Not only is this soup lactose-free, but it is soooo delicious! Also, it’s quite easy to make – once you’ve chopped everything up you just simmer for an hour, purée, and you’re ready to go.
I made a few changes to the recipe: since I am making it in Winter, I didn’t have fresh tomatoes that I thought would enhance the flavour. The recipe called for some canned and some fresh, and I have used all canned tomatoes. I added a few carrots, and I made the recipe a little bit smaller so it would fit in my pot.
This soup is even better after reheating, and freezes really well. I love making a massive batch and freezing most so I can have a healthy soup anytime I need it.
Just a word about the wine: please use a wine you would actually want to drink. If you like a sweeter red wine (ick), then you should probably use less brown sugar. The alcohol burns off, so there is none left in the soup, should you be serving it to people who don’t drink alcohol.
This serves 6-8 people.
What you need:
2 – 796 mL cans of whole or chopped tomatoes (San Marzano are the best!)
3 cups water
250-375 mL your favourite red wine
1 very large sweet onion (or two small ones), chopped
4 cloves garlic, chopped
2 carrots, chopped
1/4 cup tomato paste
2 Tablespoons balsamic vinegar
2 Tablespoons brown sugar
salt and pepper to taste
optional: olive oil for drizzling before serving
What you do:
Put everything in a large pot.
Gently bring it up to a simmer.
Simmer for one hour with the lid off, stirring from time to time.
Purée, and if you want a super smooth soup, run it through a sieve or food mill.
Taste to see if you want to add more salt, pepper, or anything else.
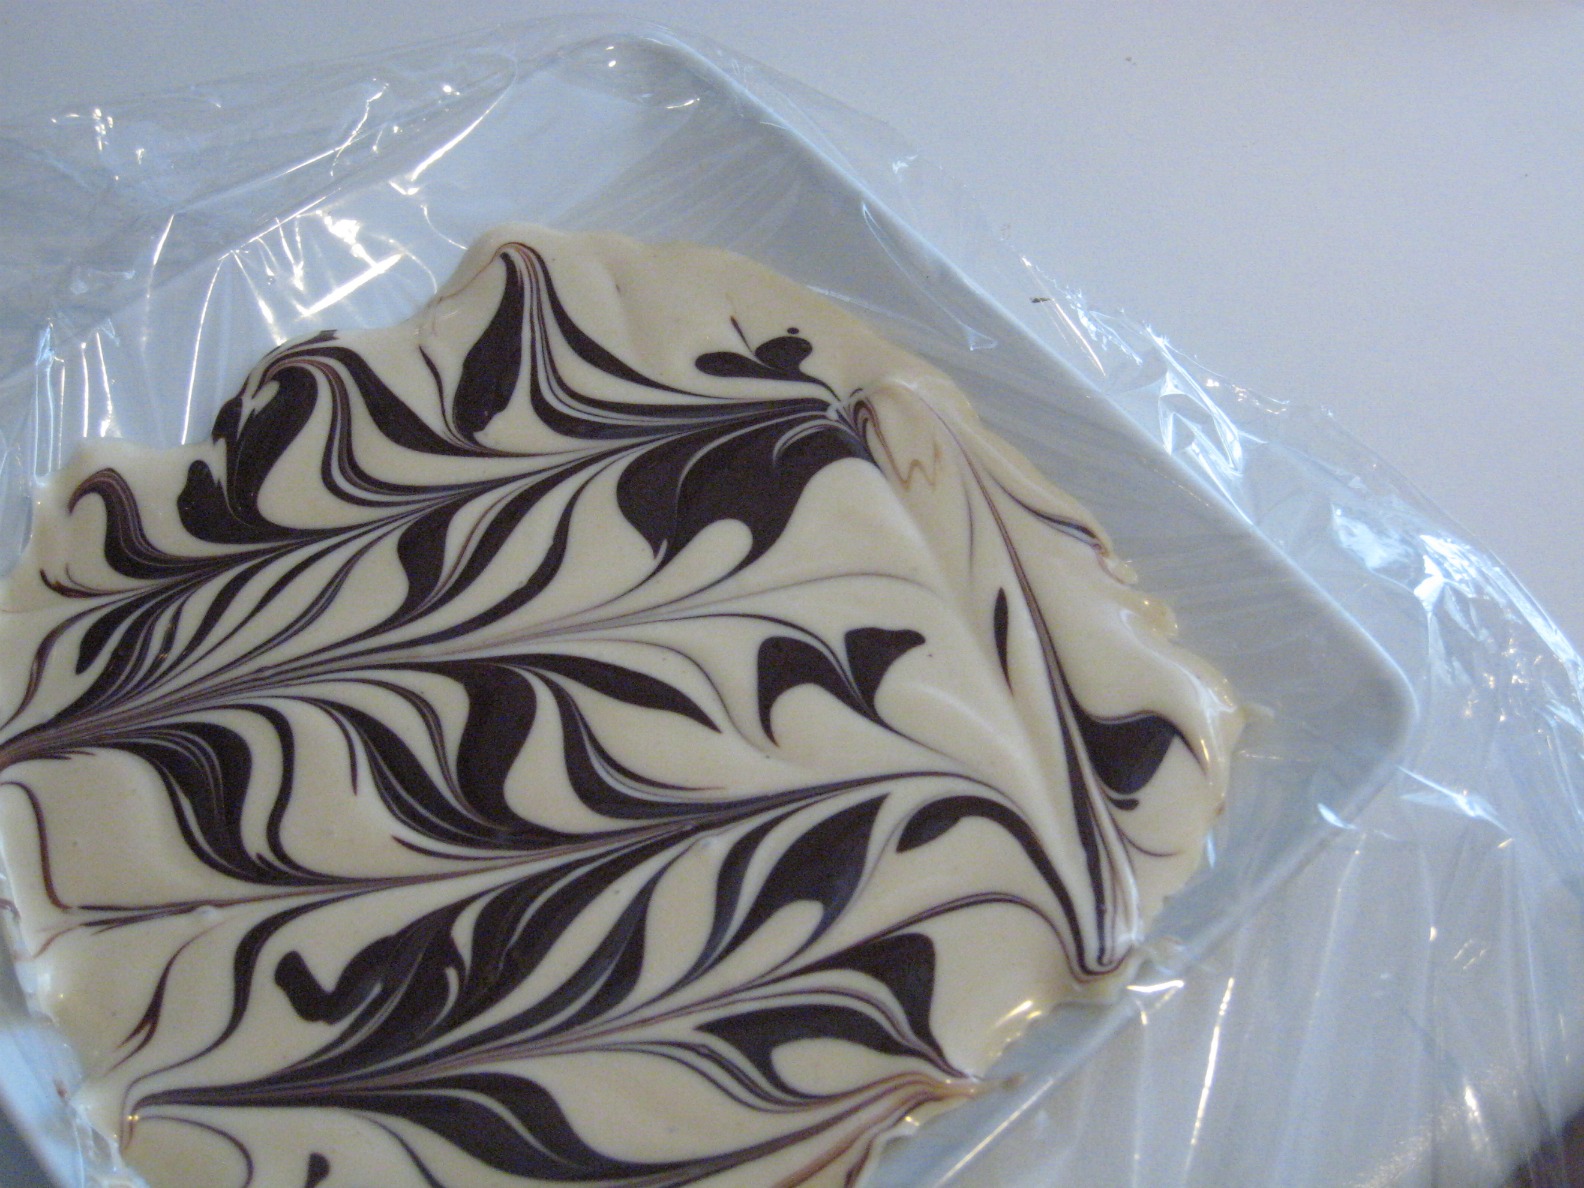
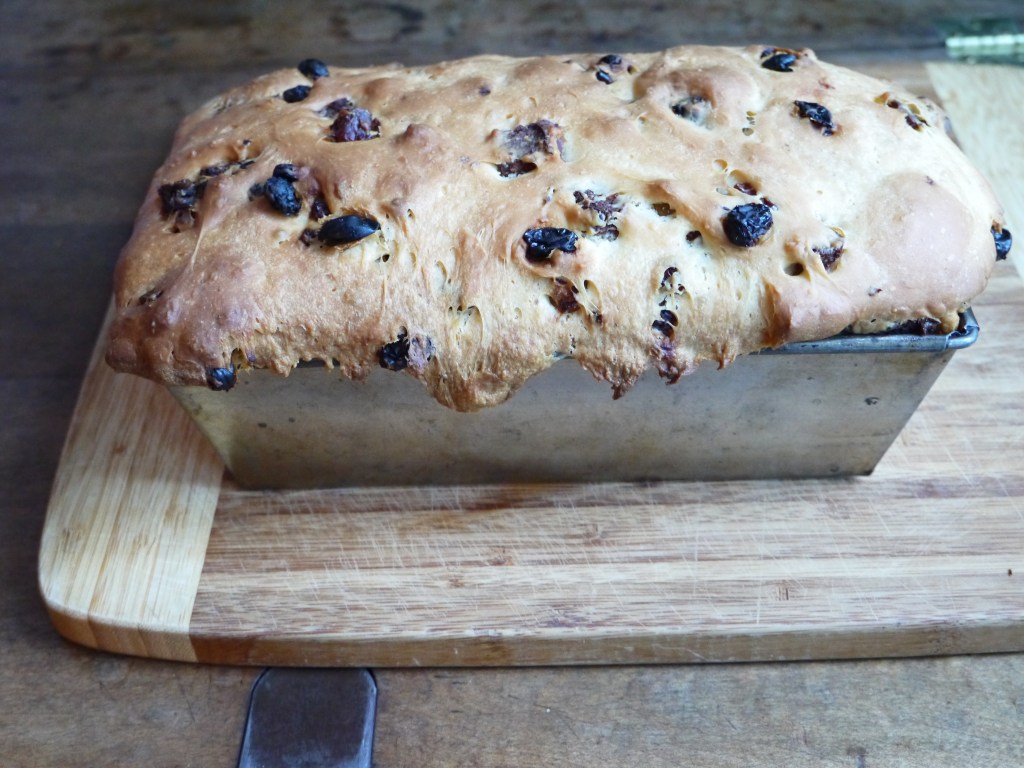
This post is all about some of my favourite holiday baking treats over the 10+ years of TrustInKim, so bakers have it all in one place. There are more recipes to come this year too!
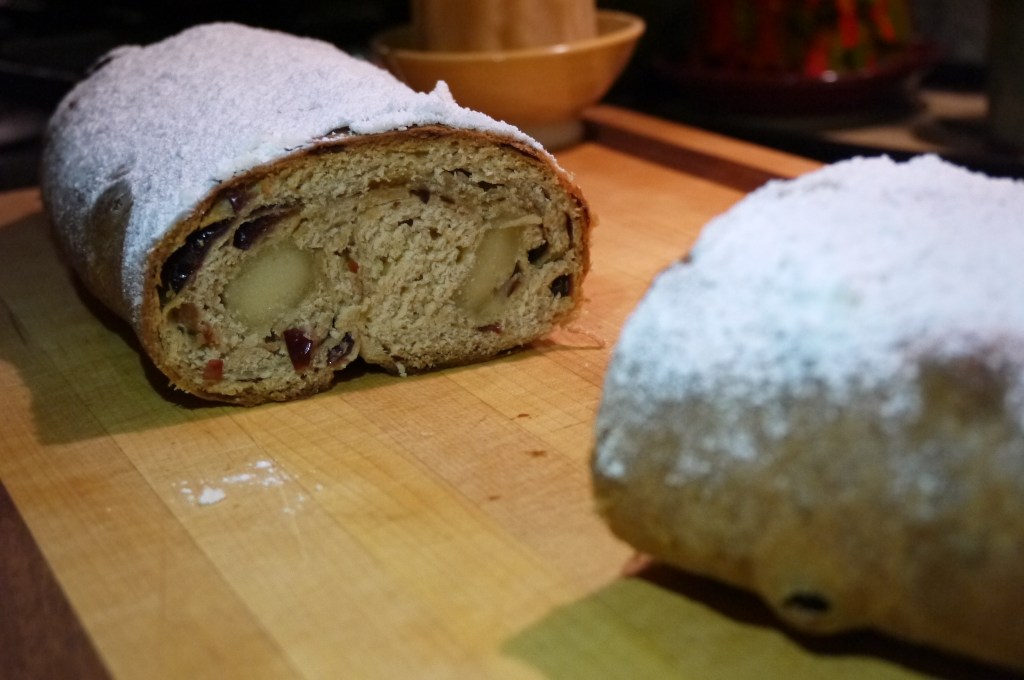
Here is an updated version of a recipe from a few years ago. There were issues with the previous version because the use of alcohol in the dough inhibited the yeast growth. This version made the best stollen I’ve ever made!
This stollen is filled with brandy-soaked sour cherries and raisins, toasted almonds, and plenty of marzipan. It is coated with butter and powdered sugar, for flavour, but also to help from drying out.
If you don’t love marzipan feel free to leave it out. I love it, but I understand that not everyone does.
This recipe makes two large loaves (or four smaller ones with a shorter baking time).
What you need:
1/2 cup raisins
1/2 cup dried sour cherries
1/2 cup brandy or rum for soaking the fruit
3/4 cup slivered almonds, toasted
2 packages active dry yeast (4 & 1/2 teaspoons, or 14 grams) + 1 teaspoon sugar
1/2 cup sugar
1/2 cup milk
1 teaspoon salt
1/2 teaspoon vanilla
a few drops of pure almond extract
2 eggs, at room temperature
4 to 5 cups flour, divided
1/2 cup butter, room temperature
200 grams (7 ounces) marzipan (or a little more if you love marzipan)
melted butter (1/4 to 1/3 cup)
1/4 cup powdered sugar
What you do (Updated Version Dec 2021:
Combine the raisins and cherries in a bowl and cover with the brandy or rum. Let it sit for 12 – 48 hours, stirring from time to time (Shortcut: just soak for an hour). Drain the brandy or rum. Pat the fruit dry with paper towels and toss the fruit in 2 tablespoons of flour.
Toast the almonds until very lightly browned.
Heat the milk, salt and 1/2 cup sugar in a small pot over medium heat, until just warm (110-115 degrees). Let it cool.
In a large bowl add 1 teaspoon of sugar into 1/4 cup warm water (110-115 degrees celcius). Any hotter will kill the yeast, and colder and it won’t activate. Sprinkle the yeast on top and stir it in. Let it sit until the yeast starts to bubble, about 5 minutes.
Add the milk mixture (make sure it’s just warm, not hot, or it will kill the yeast), vanilla and almond extracts and eggs to the yeast mixture. Combine by beating with a fork. Add 1/4 cup water.
Add two cups of flour to the bowl, and use a wooden spoon to combine. Cut the 1/2 cup butter into small pieces and work into the dough using a fork.
When the butter has been evenly distributed, add one cup of flour and mix it in. Add about half a cup more flour, adding more until the dough forms into a workable ball (not too much flour to make it too stiff).
Turn the dough out onto a floured countertop and knead for 10 minutes. The dough should become smooth and elastic.
Add the fruit and almonds tot eh dough. I start with the almonds. To do this I flattened the dough out a bit, sprinkle on about 1/4 cup of almonds, and kneaded them in. Continue this process until all the nuts are combined, then do the same with the fruit. If any pieces of fruit are sticking out of the top of the dough, pick them off and knead them in a bit more.
Melt a little bit of butter and use it coat a large bowl. Place the ball-shaped dough into the buttered bowl, then turn the dough butter-side up so it is coated in butter. Loosely cover the bowl with a tea towel and let the dough rise until it has doubled in volume, about 1-3 hours depending on how warm your room is.
Line a baking pan with parchment paper. Melt about 2 tablespoons of butter.
Punch down the dough and divide it into two parts (or 3 or 4 for smaller loaves). Form one half into a flat oval using your hands.
Divide the marzipan into equal parts to go in each loaf. Roll it into a rope just short of the length of the dough. Place one of the marzipan ropes on top of the dough, then pull the sides of the dough over the marzipan, pressing down in the middle. Roll the ends of the dough over a little. Gather the loaf and place it rolled-side down on the parchment paper. Repeat this process with the other half of the dough.
Brush the loaves with butter, and cover with a tea towel. Let the loaves rise until about doubled in size.
Heat the oven to 375F. Bake for 30-40 minutes; if you tap on the loaf it should sound hollow, and it will be dark golden brown.
Remove the loaves from the oven and brush with more melted butter! Dust them with sifted powdered sugar and let them cool completely before packing.
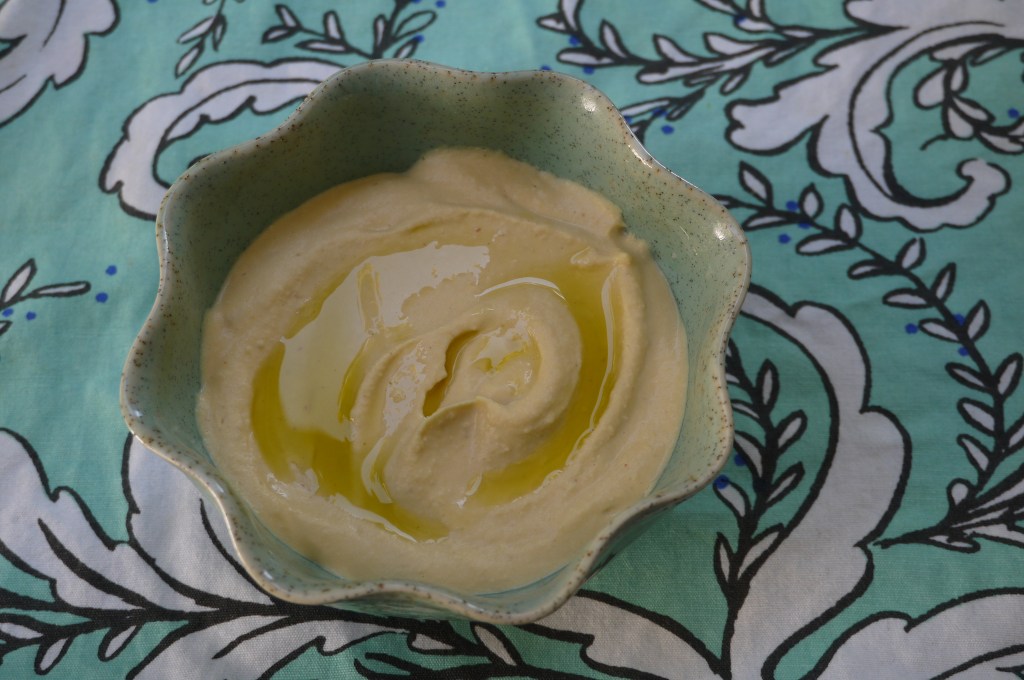
You can make your own hummus! It’s so easy, delicious, and saves you money! Whether you use canned chickpeas or cook them from dried, it’s easy to make a great hummus. When I make hummus at home, I appreciate knowing exactly what goes into it, and adding more or less of whichever flavours I choose – and for me it’s all about the lemon right now!
This recipe is a variation of the hummus recipe I make often, but in this one I’ve added lemon zest along with freshly squeezed lemon juice. Plus a bit of cumin and hot sauce to perfect it.
You can use canned chickpeas, or prepare your own from dried chickpeas. I highly recommend removing the skins from the chickpeas to make a really creamy hummus. If you use split dried chickpeas, they are already skinless, so you will not need to remove the skins, but the flavour is a little different than the regular chickpea. Of course, you can always keep the skins on, but your hummus will not be as smooth. If you’ve got the time it’s worth a try, and removing the skins can be somewhat meditative.
One of my favourite meals that includes hummus is hummus kawarma, a Lebanese dish with lamb. Of course hummus also great with fresh pita, or as a veggie dip. I also love to toast day-old pita brushed with a little olive oil and sprinkled with salt to make crackers, and then dip them in hummus.
What you need:
1 & ¼ cups dried chickpeas (or one 540mL can)
1/3 cup tahini
4 or more tablespoons freshly squeezed lemon juice
zest of 1 lemon
cumin, to taste (start with 1/4 teaspoon)
hot sauce (optional) to taste
1-2 cloves garlic, crushed
Salt to taste
5 or more tablespoons ice-cold water
What you do:
Cook the chickpeas ahead of time, so they are cold when you use them to make the hummus. If you are using canned chickpeas I highly recommend removing the skins. This is a bit of work, but here’s what I do: I drain them, then put them in a large bowl with water. Then I rub some of them between my hands, and a lot of the skins come off that way. Then I go through them and pull off most of the remaining skins.
Place your drained chickpeas in a food processor or blender. Process them until you have a thick paste. Add the tahini, lemon juice, lemon zest, cumin, a little hot sauce, garlic, and 1/2 teaspoon of salt; blend this. With the machine still running, drizzle in some of the ice water and let it mix for several minutes. You will get a very creamy paste. Taste to see if you want to add any more lemon juice or any of the seasonings. Add more water if you think it needs it to be smoother; I like to add a bit more water than I think I will need, as hummus tends to thicken up a bit when refrigerated.
Cover and refrigerate if you are not using it right away, but remove from the fridge at least half an hour before you want to eat it.A little drizzle of good quality olive oil is a nice way to top it off when serving.
I have to say, I was against the idea of a potato taco in the beginning – kind of like I was against the idea of a potato pizza – but in both instances I was proven wrong. The creamy potato and black bean filling in these tacos, paired with this fire-roasted salsa, makes them a pretty awesome treat!
It’s pretty simple really, just cook some potatoes (I used a purple one because I had fresh ones from the garden), open a can of black beans (or make your own from dried beans). Smash them together with some spices, add a little cheese, throw it into a frying pan in a tortilla, and you’re done.
Here’s a breakdown of what you need to feed two people, and the process:
Boil the potato until soft, then drain and sprinkle in a little cumin, chili powder, salt, and pepper. Add the milk or substitute and give it a few squishes with a potato masher.
Add the beans to the potatoes and give it all a few more squishes, until it is pretty much combined.Taste and add more seasonings if it needs it.
Grate the cheese.
Now you can heat a large frying pan and add a drizzle of oil or a bit of butter, just enough to coat the pan so the tortilla doesn’t stick.
Place a tortilla in the pan, lifting half of it up so you can fit another tortilla in the other half, both of them open.
Spoon some potato/bean mixture into each tortilla half and spread it out so it reaches the sides.
Add some cheese, then fold the top down.
Cook on the first side until it has lightly browned, then turn it over and do the same thing on the other side.
Serve with your favourite salsa, and a side of yogurt or sour cream.
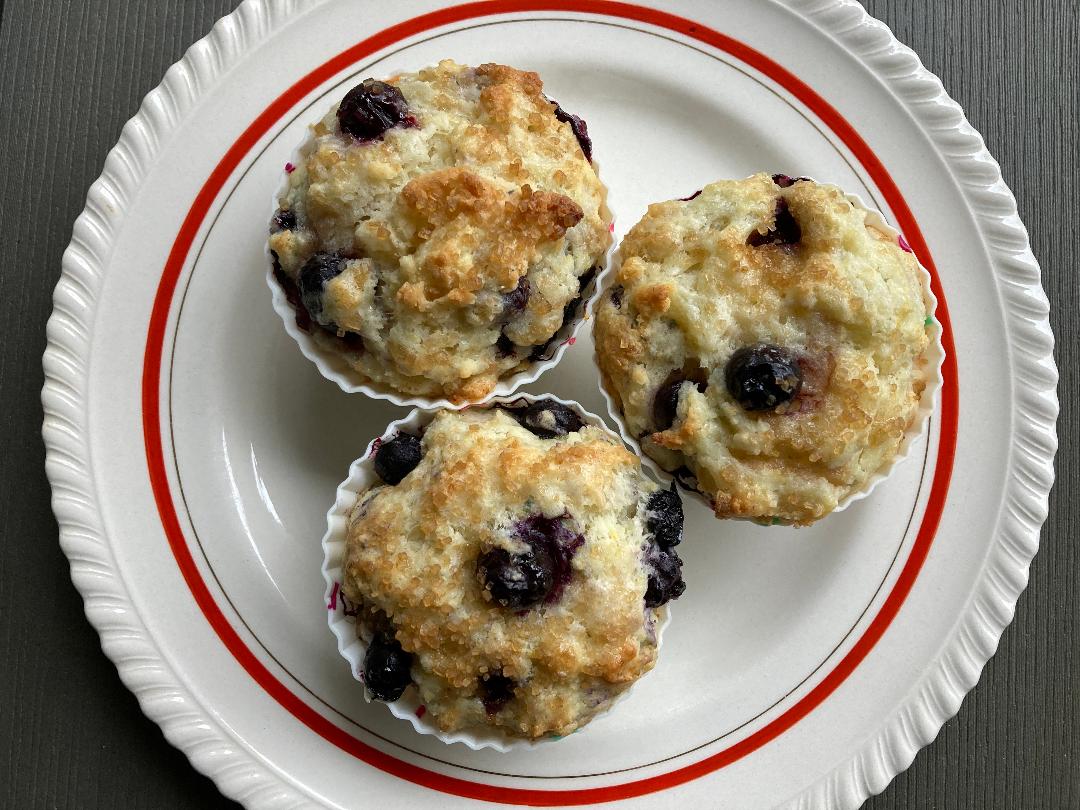
Imagine you walk into a kitchen and you catch a waft of lemon, butter and blueberries emanating from the oven – heaven, right? That’s what these are.
It’s pretty rare that I post almost the same recipe within a few months, but these are so good that I had to make them again, with a very slight change – even more lemon!
They are really light and fluffy, packed with blueberries, a nice hit of lemon, and a crunchy cap.
The last time I made these, I made a few minor changes to this recipe. I used the zest of a whole lemon instead of half, and I added the baking powder and baking soda a bit later in the process to avoid over-mixing it. For the Turbinado sugar topping I used a bit less than the suggested 3 tablespoons, and it still had a nice crunchy top. This time around I used some lemon juice in the batter to amp up that flavour, and to balance the sweetness of the muffin. I also rubbed the lemon zest into the sugar to release more of the oils, bringing out the flavour.
I also made a mistake with these! I used half a cup of butter instead of 5 tablespoons – oops. But the flavour was awesome!
If you are using frozen blueberries you should leave them in the freezer until you are ready to add them.
The trick to successful muffins is not over-mixing the batter, which will cause you to have a dense muffin. Another trick – bake them as soon as the batter is in the muffin tins so they don’t lose any of their leavening.
Makes 9-11 muffins. They are the very best the day they come out of the oven, but warmed up with a bit of butter in the next few days they were quite good too.
What you need:
5 tablespoons unsalted butter
1/2 cup sugar
zest from a whole lemon (finely grated, only the yellow outer peel)
2 tablespoons lemon juice
3/4 cup plain yogurt minus 2 tablespoons
1 large egg
1 & 1/2 cups all-purpose flour
1 & 1/2 teaspoons baking powder
1/4 teaspoon baking soda
1/4 teaspoon salt
1 & 1/4 to 1 & 1/2 cups blueberries, fresh or frozen
2 tablespoons Turbinado (sugar in the raw) sugar
What you do:
Prepare your muffin tins by lining 9 of them with paper liners, and then spray the liners with baking spray. Preheat the oven to 375°F.
Place the sugar and lemon zest in a large bowl, and work the zest into the sugar with your fingers to release the oils.
Melt the butter, then whisk it into the sugar and zest. Whisk in the yogurt and egg until smooth.
Add one cup of the flour to the sugar mixture and stir it in until there are still some clumps. Now combine the remaining half cup of flour with the baking powder, baking soda and salt. Very lightly fold this mixture into the batter, until it it is mostly mixed, with a few lumps.
Fold in the berries until they are just combined. You should now have a very thick batter, especially if you just added frozen berries.
Divide the batter between the 9 muffin cups. Sprinkle each muffin with a bit of Turbinado sugar.
Bake for 25 to 30 minutes. Test them by inserting a toothpick in the middle; if there is any batter sticking to the toothpick let them bake a few minutes longer. If you hit a blueberry, you might want to poke the toothpick into another spot to see if they are done.
Let the muffins cool in the pan for about 10 minutes, then move them to a cooling rack.